

Windows 11 is the latest version of Windows. Windows 11 has a fresh and stylish user interface with rounded corners and brings a bunch of new features. If you are running Windows 11 and want to edit videos on it, there are a lot of video editors available for Windows 11.
Now, let’s take a look at the list of best Windows 11 video editors in 2026.
6 Best Windows 11 Video Editors
- Microsoft Clipchamp
- Photos Legacy
- MiniTool MovieMaker
- Shotcut
- Pinnacle Studio
- Adobe Premiere
Here is a simple comparison table of these video editing tools on Windows 11.
| Software | Price | Learning Curve | Suitable For | Key Features | Main Limitations |
| Microsoft Clipchamp | Free + Paid | Very Easy | Beginners to Intermediate | Built-in, essential tools and effects | 4K export requires a Pro account |
| Photos Legacy | Free | Very Easy | Beginners | Built-in system app, 3D effects, no installation required | Basic functionality, MP4 export only |
| MiniTool MovieMaker | Free + Paid | Very Easy | Beginners to Intermediate | Feature-rich, GIF support, no watermark | 2-minute export limit (first 3 exports unlimited) |
| Shotcut | Free | Moderate | Intermediate to Advanced | Open-source, supports multiple formats, 4K editing | Complex interface, steep learning curve |
| Pinnacle Studio | 15-day free trial + Paid | Steep | Intermediate to Advanced | Multi-cam editing, 360° video support | Not free, relatively expensive |
| Adobe Premiere Pro | Subscription-based | Very Steep | Advanced / Professional | Industry standard, full-featured, robust ecosystem | Requires subscription, high hardware demands |
1. Microsoft Clipchamp
Microsoft Clipchamp is the official, built-in video editor for Windows 11, designed for both beginners and more advanced creators to create videos with ease. It offers a sleek, user-friendly interface with multi-track timeline editing, allowing you to trim, split, crop, and merge clips, add transitions, filters, text, and background music, and correct the clip’s color.
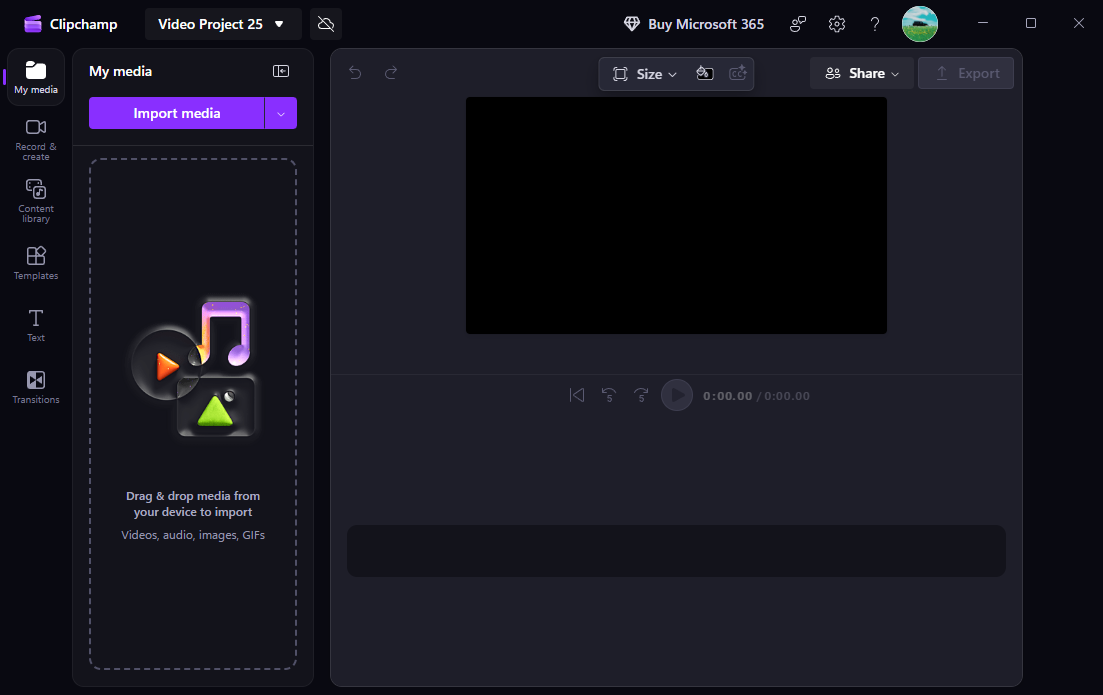
The software also offers AI-powered tools, such as auto-composition, noise suppression, and voiceovers. Additionally, it can record your screen, camera, or do both simultaneously, helping you easily create how-to guides and record gameplay, online meetings, and training sessions. By the way, it is still accessible as a web-based app.
The free version lets you export videos up to 1080p without watermarks. If you want to unlock 4k export or access its stock assets, a Premium subscription is required.
| What We Like | 1. User-friendly interface – clean, intuitive design fitting for beginners. 2. Pre-made video templates for easy creation and fast customization. 3. Direct export options – easy sharing to YouTube, TikTok, and other platforms. 4. The online version is available. |
| What We Don’t Like | 1. 4K export requires a paid upgrade. 2. Only supports MP4 for output and lacks export settings. |
Clipchamp, the default video editing software for Windows 10 and Windows 11, is surprisingly capable for both personal and professional use. It includes all the basic tools you need to produce video projects, some fun effects, and helpful templates for social media posts.https://www.pcmag.com/reviews/clipchamp
2. Photos Legacy
Speaking of video editing, many of you may first think of Adobe Premiere. Actually, if you just want to make some simple edits to your video, the built-in video editing tool in Windows 11 is more than enough to handle the editing tasks. In addition to Microsoft Clipchamp, Windows 11 has another built-in video editor in Photos Legacy.
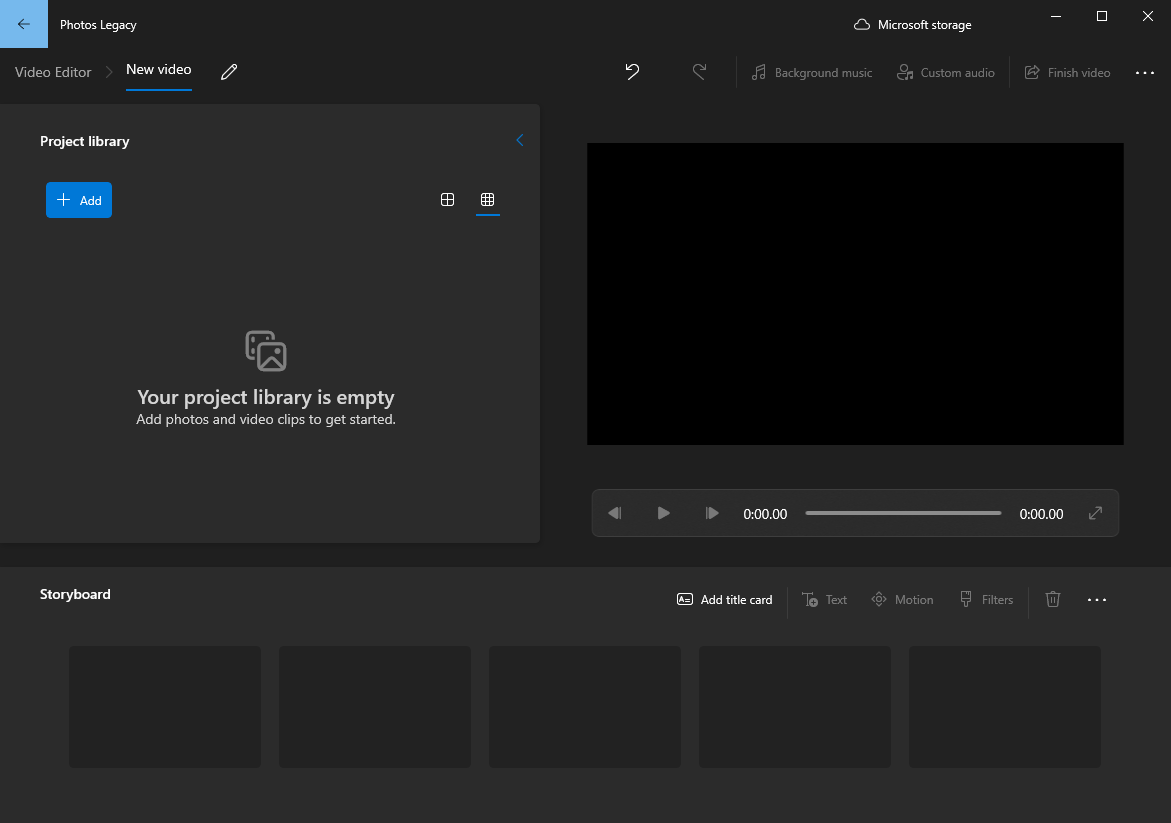
The interface of this Windows 11 video editor is simple and clean, with all the needed basic editing functions and a range of 3D effects, text templates, filters, and transitions. The editing functions include splitting, trimming, rotating, speeding up, and slowing down.
There are numerous 3D effects available in the Windows 11 Photos app, such as aurora, breaking news, bubbles, comet trail, explosion, fireworks, fireflies, etc. Besides, the built-in 3D library provides you with all kinds of 3D objects such as animals & insects, cars & vehicles, buildings & structures, celebrations, sci-fi & fantasy, etc.
| What We Like | 1. Totally free 2. Easy-to-operate user interface 3. 3D effects and 3D objects 4. No need to install third-party software on Windows 11 |
| What We Don’t Like | 1. Lacks advanced functions 2. Only exports in MP4 format |
Try these online video editors to edit videos online on your Windows 11 PC for free.
3. MiniTool MovieMaker
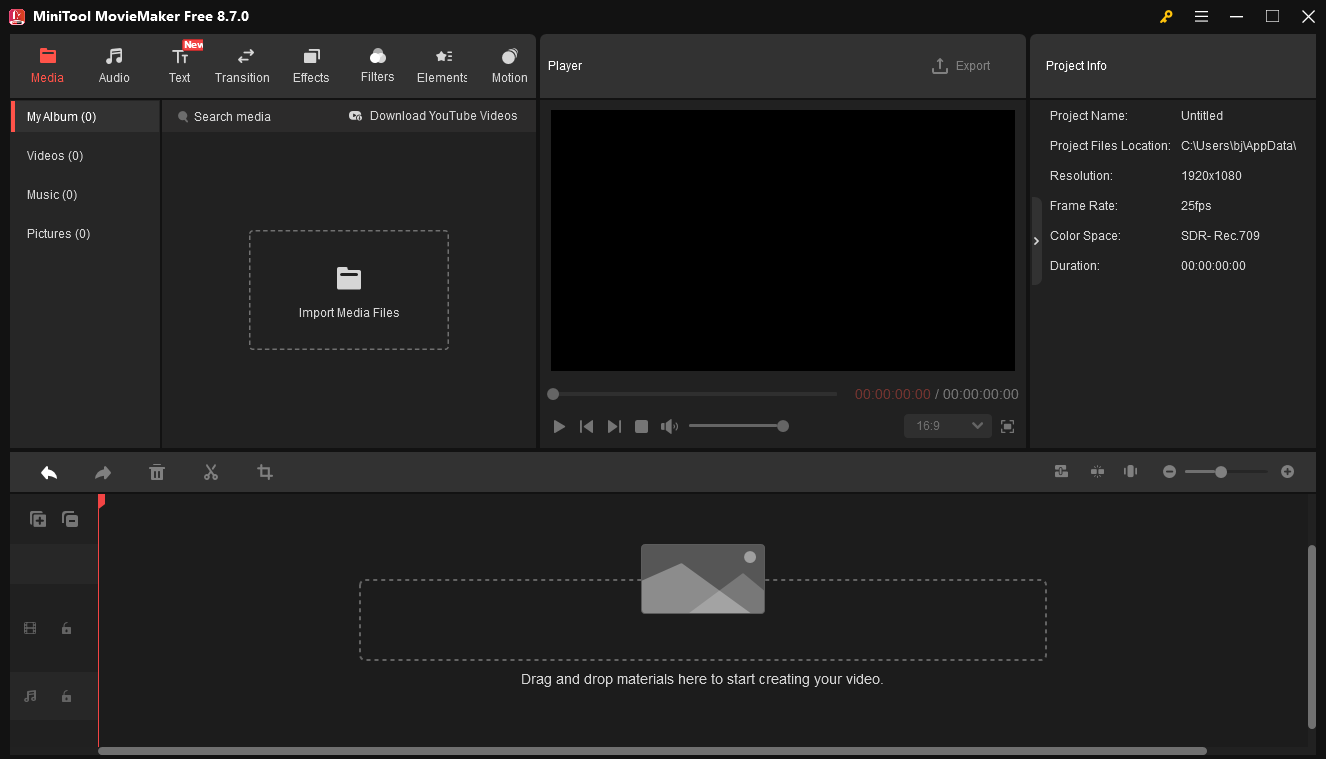
MiniTool MovieMaker is another Windows 11 movie maker and video editor. The software offers a simple, multi-track timeline that allows you to trim, crop, cut, combine, and rotate videos, apply filters, transitions, and add stickers to enhance your footage with ease.
MiniTool MovieMakerClick to Download100%Clean & Safe
Additionally, this video editor for Windows 11 features a library of text templates. Whether you want to insert title cards or end credits, add plain or animated captions, or create text bubbles, the software has you covered. It also supports common video aspect ratios, including 16:9, 9:16, 1:1, and 4:3.
Best of all, the program can export videos in 1080p or 4k for free and without watermarks, ensuring clean and professional-looking results.
| What We Like | 1. It’s free to use without watermarks. 2. The UI is clean, modern, and intuitive. 3. Drag-and-drop functionality for quick editing. 4. Export 4K/1080P videos for free. 5. A wide range of effects, filters, transitions, and stickers. |
| What We Don’t Like | 1. It’s only available for Windows. 2. You can only export videos within 2 minutes after exporting the first three videos without a length limit. |
MovieMaker by MiniTool is an inexpensive, easy-to-use video editing program. It includes a fair number of effects and gives you easy ways to join your clips, add transitions, and overlay objects and text.https://www.pcmag.com/reviews/minitool-moviemaker
4. Shotcut
Shotcut is a free and open-source video editor for Windows 11. It supports hundreds of video, audio, and image formats, so you can import your media files into Shotcut without needing to convert them into popular formats.
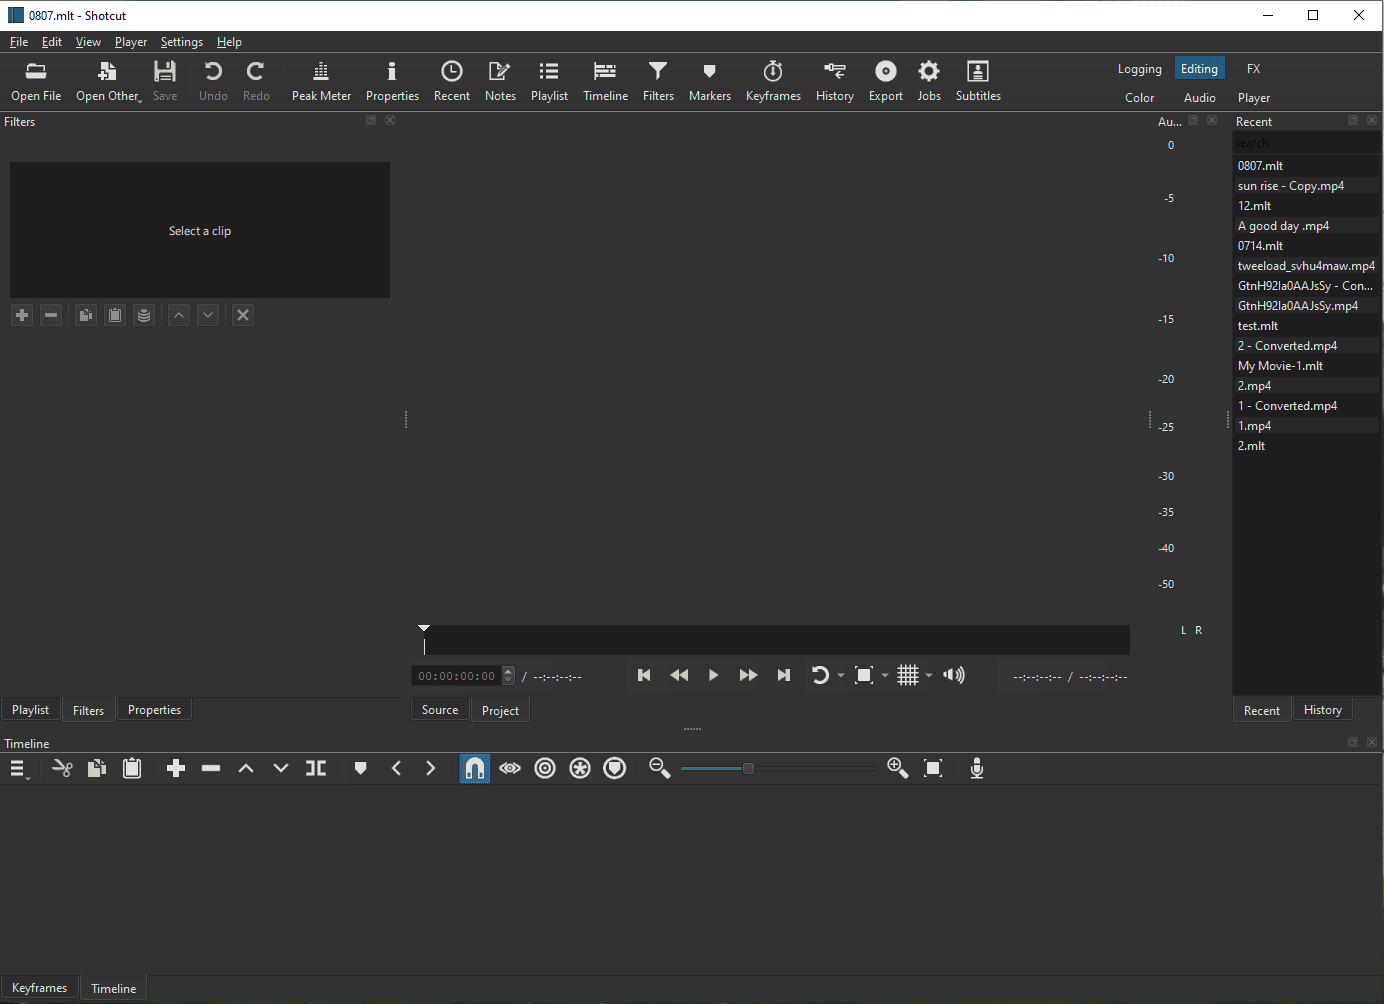
The multi-format timeline feature lets you mix videos that are in different resolutions and framerates. What’s more, Shotcut supports audio capture, webcam capture, network stream playback, keyframes, timeline markers, and offers a number of audio filters, audio scopes, video filters, 360° video filters, wide transitions, and video scopes.
It’s one of the best free Windows 11 video editors with rich functionality. The user interface of Shotcut has been translated into over 30 languages, including English, Dutch, German, French, Japanese, etc.
| What We Like | 1. Wide media format support, such as MP4, AVI, MOV, and MKV. 2. Completely free: no hidden payments. 3. Hardware acceleration for faster exports. 4. Cross-platform support. |
| What We Don’t Like | 1. Less intuitive and steeper learning curve. 2. Few video transitions. |
Many of the new features are very welcome additions, with support for more codecs, and running natively on Apple’s newest chips being a definite plus.https://www.techradar.com/reviews/shotcut-2203
5. Pinnacle Studio
Another Windows 11 video editing software is Pinnacle Studio. It’s a professional-level video editor that includes video masking, multi-camera editing, color grading, screen recording, keyframe controls, smart object tracking, motion tracking, 360° video editing, blend modes, alpha channel, and so on.
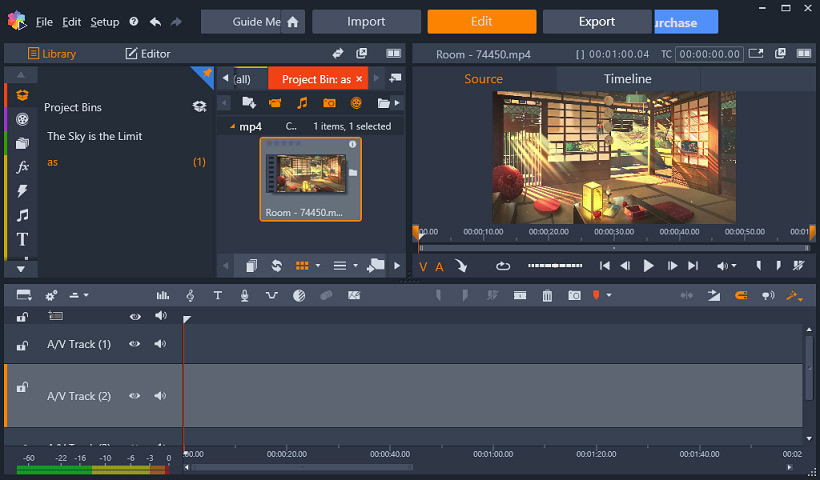
This powerful video editor offers tons of editing features that enable you to adjust parameters for your video, such as speed, size, effect, etc.
There are more than hundreds of transitions, filters, special effects, presets, and 3D titles that you can use to create a professional-looking video.
| What We Like | 1. Burn a disc with DVD menus. 2. Supports screen recording. 3. Supports multi-camera editing. |
| What We Don’t Like | 1. Not compatible with macOS or Linux. 2. Limited advanced features. |
Pinnacle is aimed at near-professional enthusiasts, featuring excellent editing features and effects such as stop-motion video, multicam editing, and motion tracking.https://www.pcmag.com/reviews/pinnacle-studio-ultimate
6. Adobe Premiere
Adobe Premiere is a timeline-based video editor for Windows 11, which is well-known throughout the video industry. It’s powerful with many advanced editing features. Whether you are a novice or an experienced user, it can meet your requirements to help you create high-quality works.
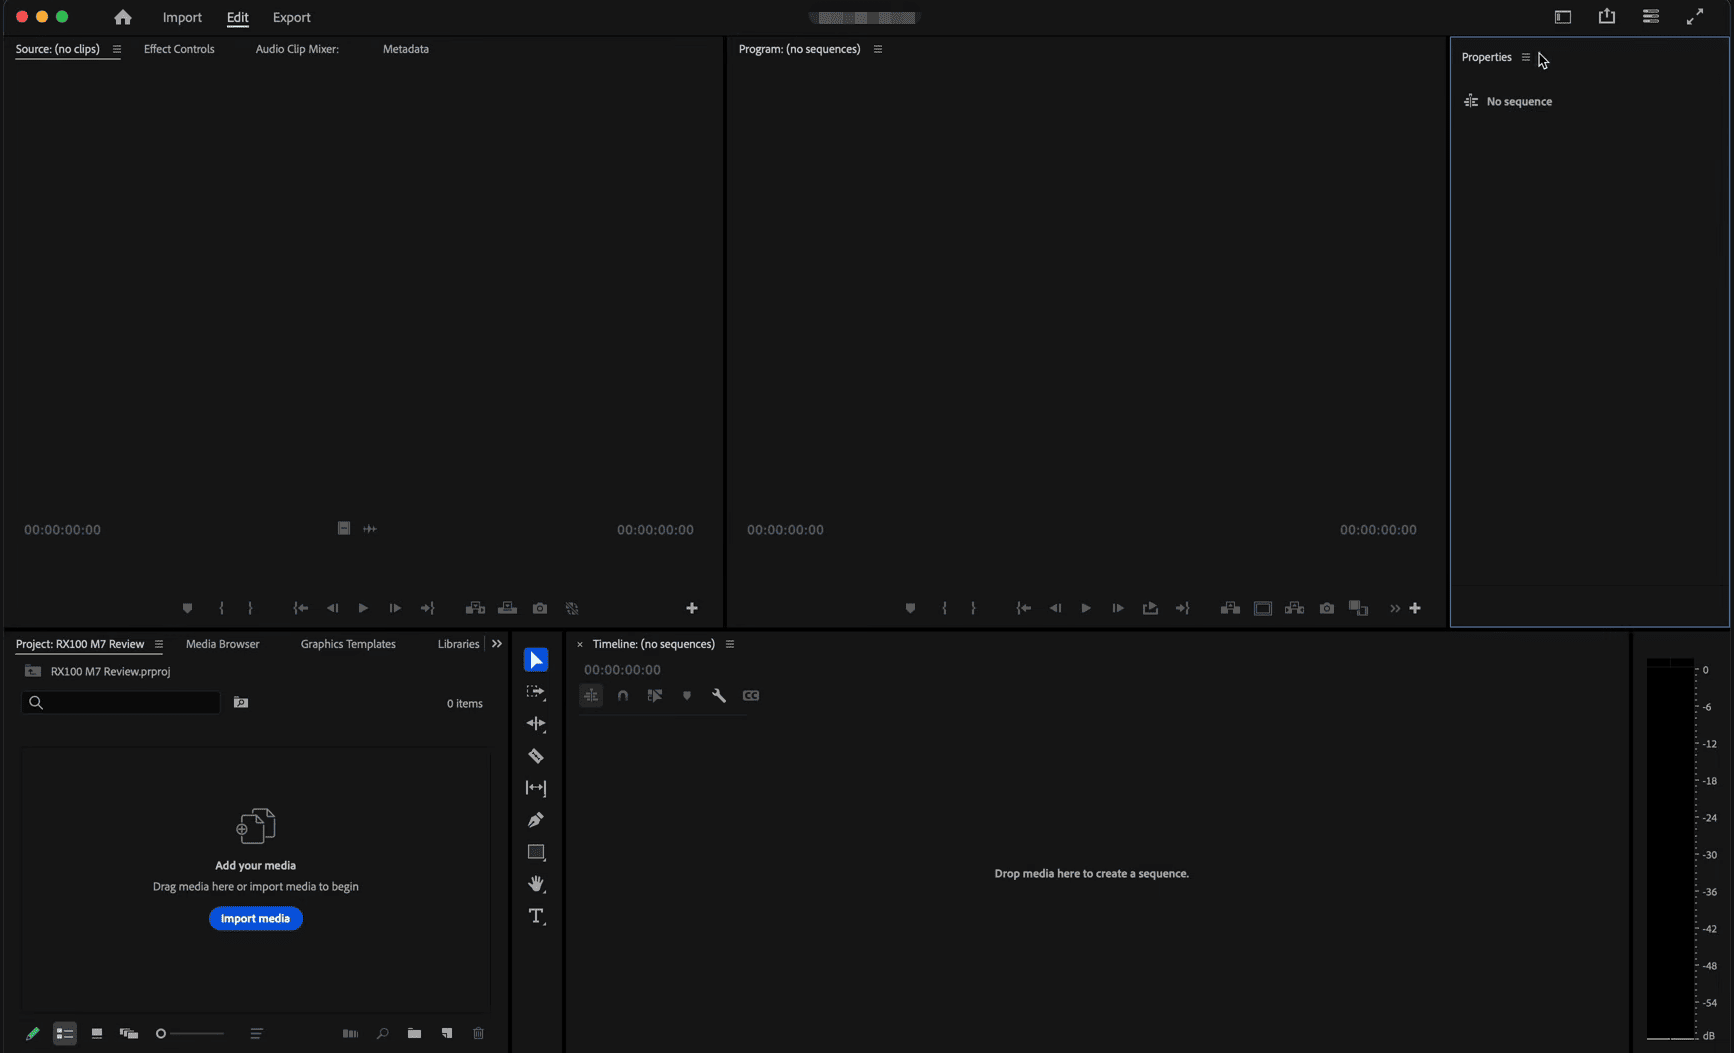
Adobe Premiere Pro is perfect for everyone who wants to edit their videos on Windows 11. For beginners, the initial learning curve is steep, but they can find lots of video tutorials on YouTube or other websites.
| What We Like | 1. Support VR editing and 8K editing. 2. Seamless integration with other Adobe products. 3. Powerful and comprehensive editing features. 4. AI-powered tools. |
| What We Don’t Like | 1. Steep learning curve. 2. High system requirements |
The massive application benefits from straightforward import and export experiences, while AI-powered auto-captioning, text-based video editing, and many other features keep it on the cutting edge.https://www.pcmag.com/reviews/adobe-premiere-pro
How to Edit Videos on Windows 11
Fast Track Steps:
- Download, install, and open your desired video editor.
- Import your video clips, images, and music.
- Add these clips to the timeline or storyboard.
- Split and trim videos, add text, and apply transitions.
- Export the final result to your PC.
Method 1: Use MiniTool MovieMaker
1. Launch the Windows 11 video editor
First, download and install the software on your PC. Then, launch the program and close the pop-up window to access the main UI.
MiniTool MovieMakerClick to Download100%Clean & Safe
2. Import videos
Click Import Media Files to open the File Explorer, choose the videos from your PC, and import them into the editing software. Click anywhere in the Media Library. Press the Ctrl + A keys to select all the imported videos and drag and drop them into the timeline. Next, drag the video clip to the position you want to place.
3. Split and trim clips
Split: Move the playhead to where you want to make a cut and click the scissor icon to split the video into 2 parts in Windows 11. Repeat this step to divide the video into segments.
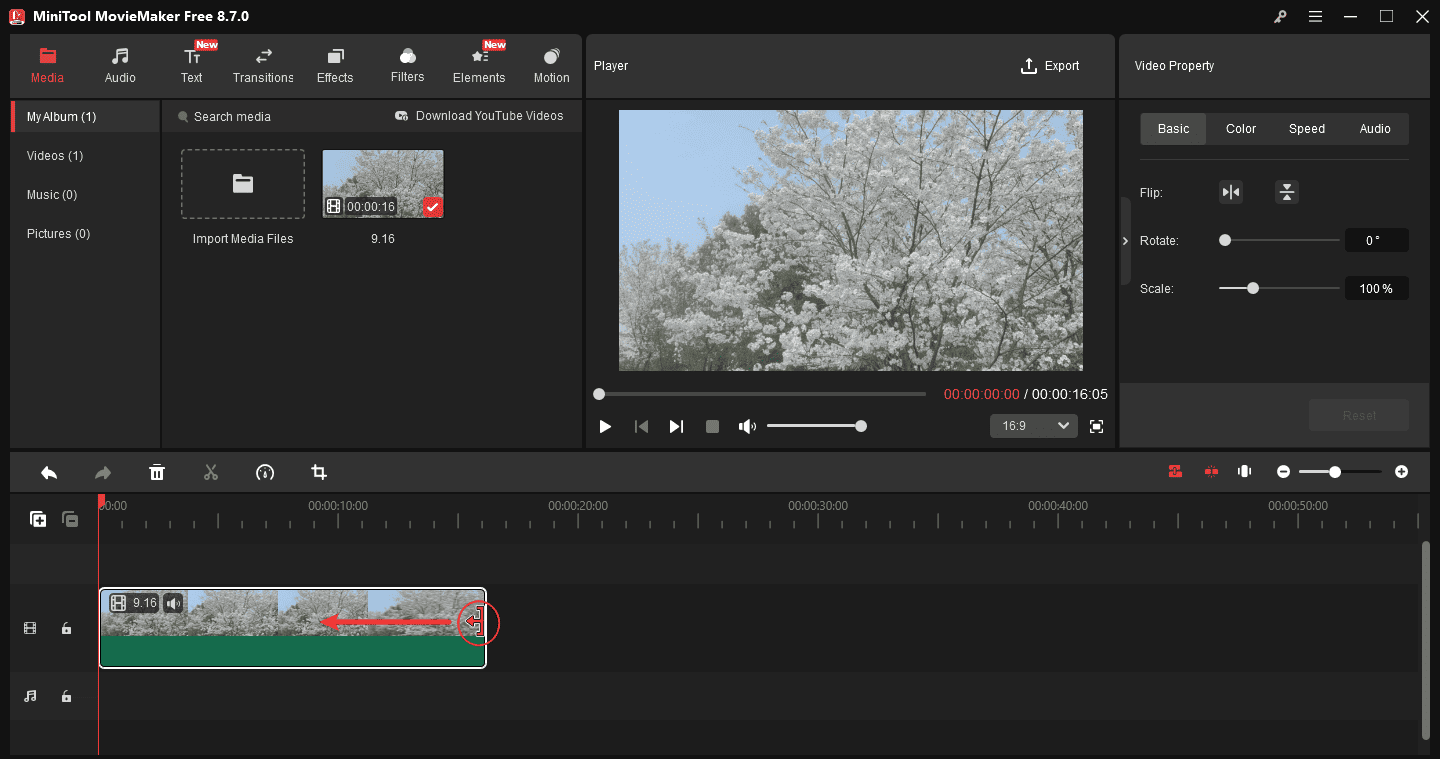
Trim: Hover over either edge of the video on the timeline until the Trim icon appears, and drag the icon inward to adjust the start or end of your desired part.
4. Change video speed
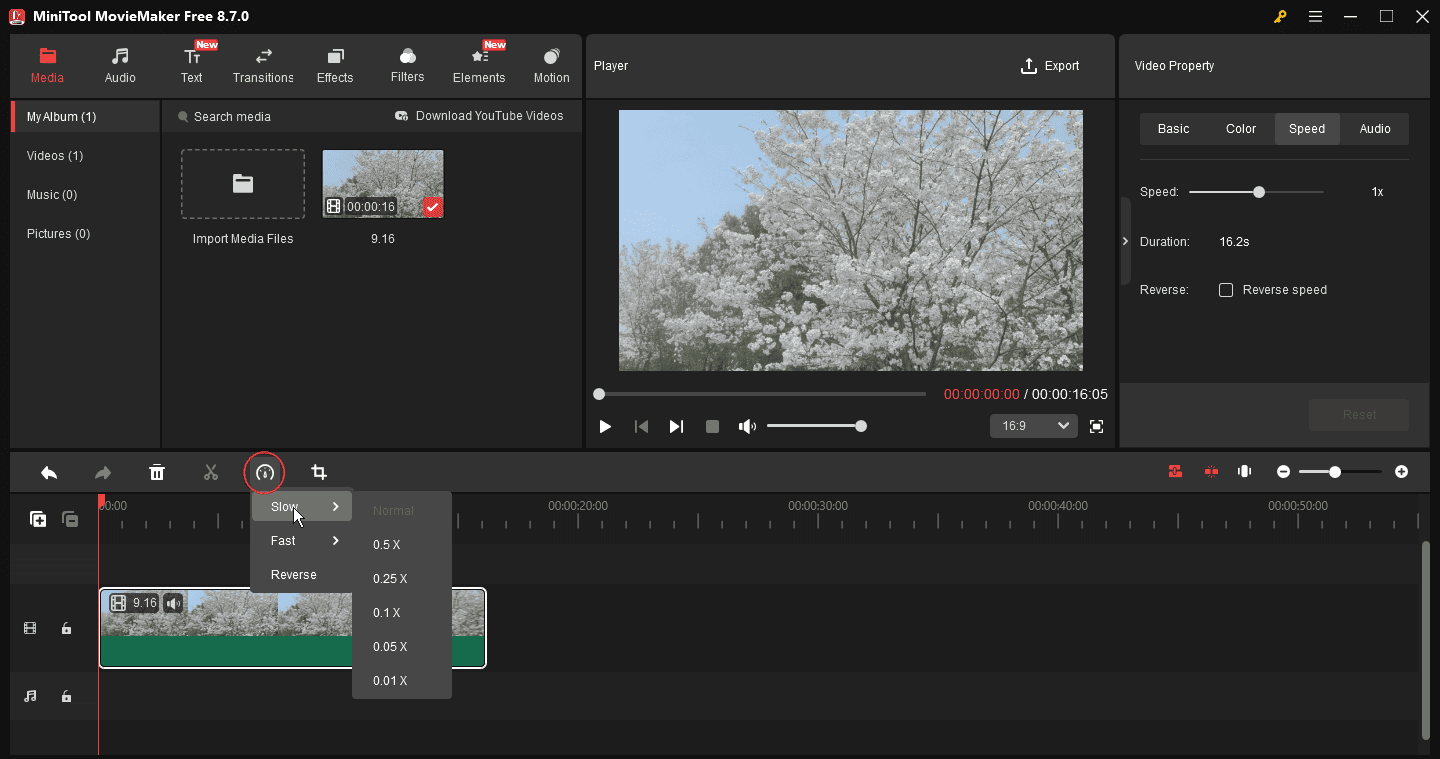
When you select a video on the timeline, the Speed controller icon will appear. Click the Speed icon, select Fast or Slow, and choose a speed to speed up or slow down the video. You can also reverse your video.
5. Add Ken Burns effect to clips
Tap on Motion and preview these Ken Burns effects. Then drag the desired effect over your video clip.
6. Add transitions to clips
Go to the Transition tab and right-click on the desired transition to apply the transition to all clips or the selected clip.
7. Add animated text
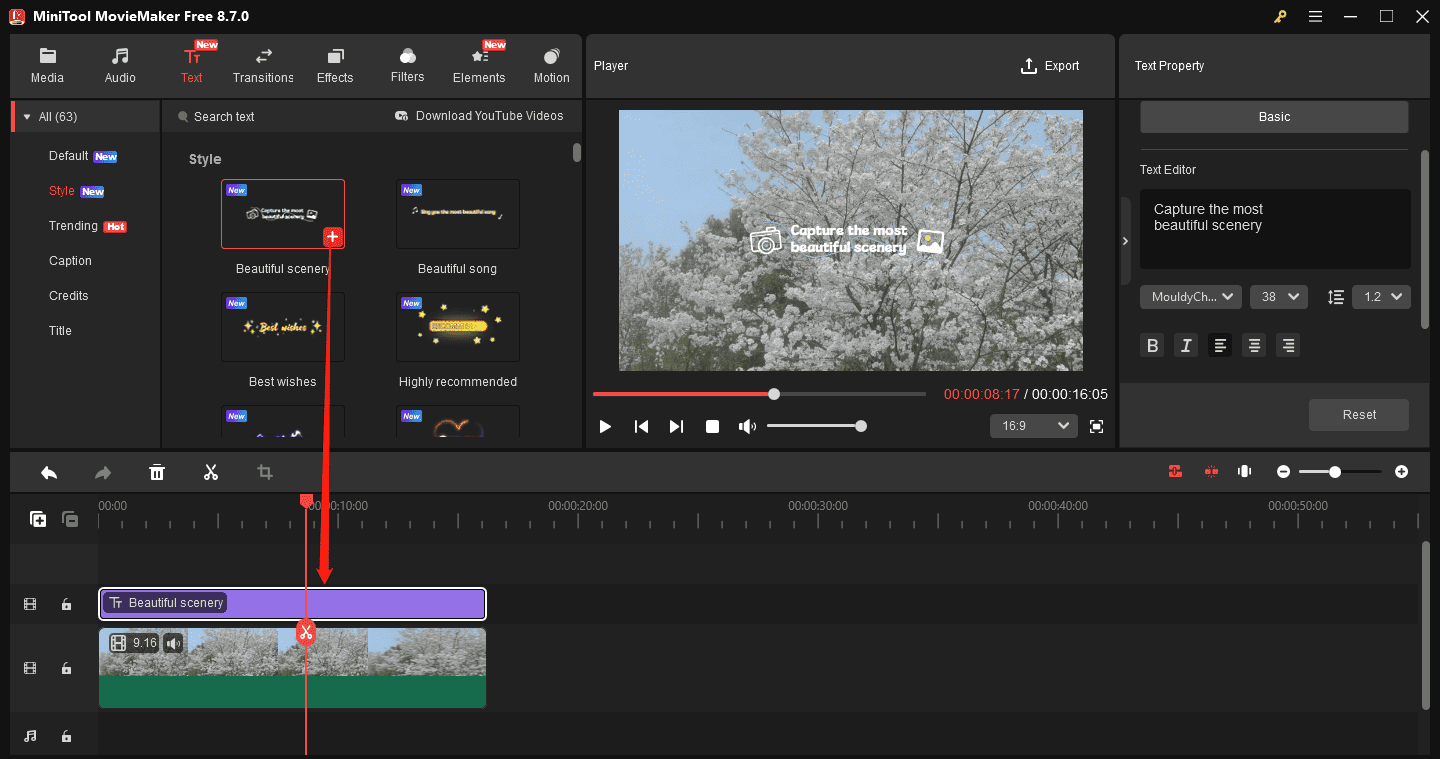
To add text to your clip, click on Text. Select the text template you want to use and click the + to add text to the timeline. In the timeline, place the text in the desired location.
Next, go to the Text editor, enter the text, and change the text’s color, font type, size, opacity, etc. To change the position of the text on the video, you can directly drag the text and text template anywhere on the video.
Import the audio track from your computer or go to the Audio tab to choose a song or a sound effect and add it to the timeline. Then you can add fade in and fade out effects to smooth the audio.
9. Export the video
Once done, click Export to adjust settings such as editing file name, changing output format, and resolution. After that, hit the Export button to save the video on your Windows 11 computer.
Method 2: Use Photos Legacy
1. Open the native video editor in Windows 11.
Click the search icon in the taskbar, type “Photos Legacy” in the search bar, and open Photos Legacy. On the home page, go to the Video Editor tab at the top, and click New video project to access the main editing interface.
2. Import media files
Give the new project a name and click OK. Click the + Add button and select From this PC from the pop-up window. Then, choose the videos you want to edit on your PC and click Open to import them. Make sure that all the videos are selected, and drag the videos from the project library into the storyboard, or just tap on Place in storyboard.
3. Rearrange the clips
You can change the order of the videos by moving the video to the position you want to put on the storyboard.
4. Add a title to video
If you want to create an opening title for your video, click on Add title card. Tap on Text to edit the text. In the right panel, enter the text in the text box, select an animated style for the title card, and choose the layout you like. Click Done to save the changes.
To change the background color of the title card, click Background and select the color you like.
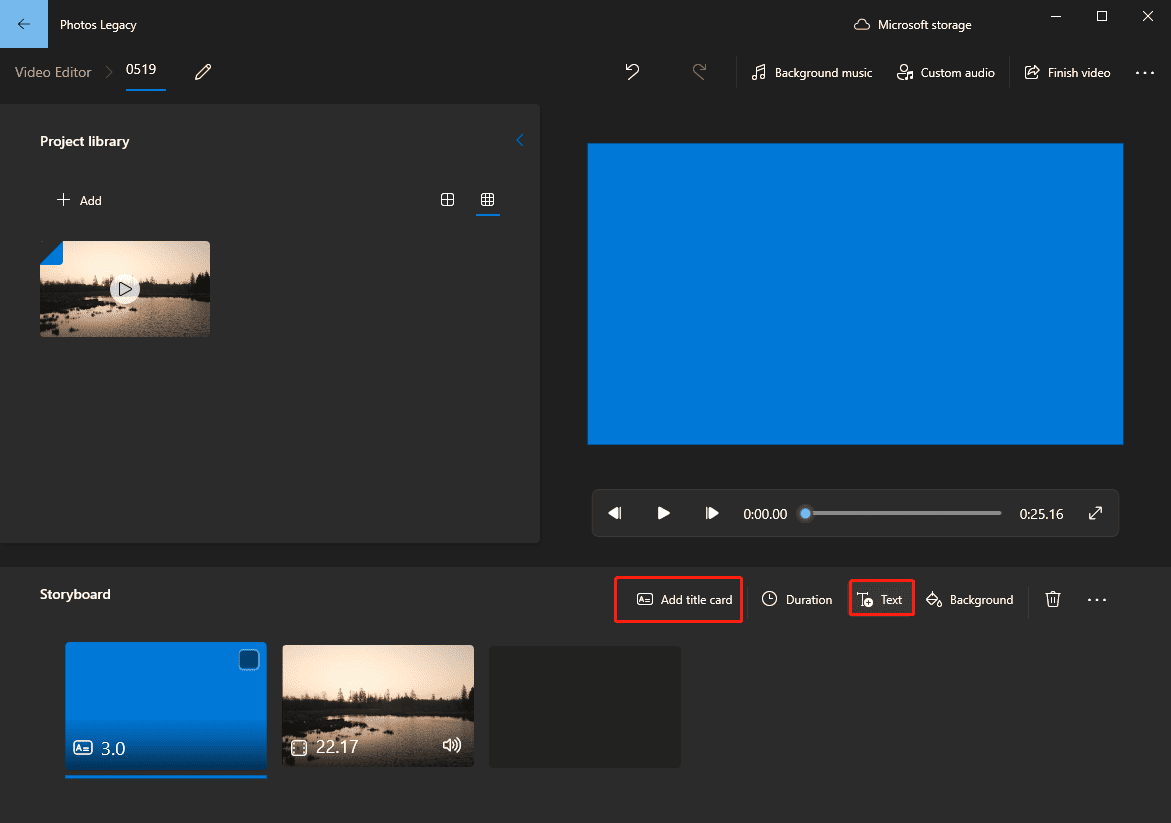
The default duration of a title card is 3 seconds. To change its duration, right-click on the title card and select Duration. In the pop-up window, you can change how long your title card appears. After that, click the Change button.
5. Trim and split clips
Trim: Select the clip you want to trim and click on Trim. Drag the left and the right pointers below the preview window to cut out the beginning and the end part of the clip. Preview the trimmed clip. If you are satisfied with the result, click Done.
Split: Choose the clip you want to split into two parts and click Split. Move the pointer to the desired position and click Done. Under the Split, you will see the duration of the two clips.
6. Add text to video
You can add captions to your video. Select the video clip, click Text in the storyboard and type the text. Choose a text style and layout for your text. Then use the slider to adjust the duration of the text.
7. Apply filters to video
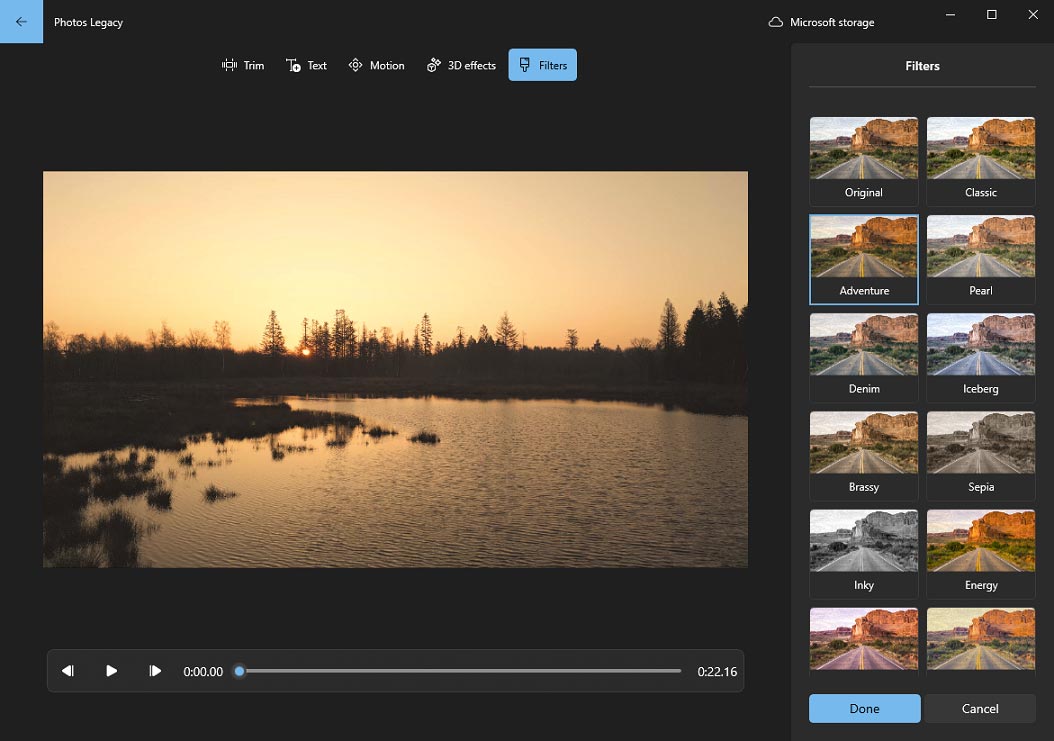
Choose the Filters option to access the filters library. Select the filter you want to use and click Done.
Tap on Background music and you can choose a track from the built-in music library. Or click on Custom audio and upload the audio file from your computer.
9. Export the video to Windows 11
When you’re finished, click on Finish video. Choose the resolution you want to save the video in and click Export.
Conclusion
These Windows 11 video editors can be used to make both basic and advanced edits to your video. Choose the one that suits you best and give it a try! If you have any questions when using MiniTool MovieMaker, send an email to [email protected] for help.
People Also Ask
About The Author

Position: Columnist
Cora is a tech writer specializing in digital media workflows, with over six years of hands-on experience in video post-production, media transcoding, and screen capture. Her writing is always clear and practical. Cora also produces in-depth software reviews for users across skill levels to help them find the right tool and enjoy video editing.
User Comments :