Text is one of the important parts of a video. It is a good way to add text to video to help your audience get the message even when the sound is off. This article from MiniTool MovieMaker will show you detailed steps to add text including title, caption, and credits to a video.
How to Add Text to Video with MiniTool MovieMaker
MiniTool MovieMaker is an excellent video editor without watermarks and it supports adding text to video. You can use it to add the title, caption, and credit to the video. What’s more, it provides you with both basic and advanced editing tools and enables you to create videos easily using its movie templates.
You can download and install MiniTool MovieMaker on your computer in advance. The following contents will tell you how to add text to video in MiniTool MovieMaker.
MiniTool MovieMakerClick to Download100%Clean & Safe
How to Add Title to Video
The title is usually the beginning of a video or movie and it tells you what the video is about or sets the stage for what follows. MiniTool MovieMaker provides you with different styles of titles that can meet your need. Now, you can refer to the guidance on how to add a title to a video using MiniTool MovieMaker.
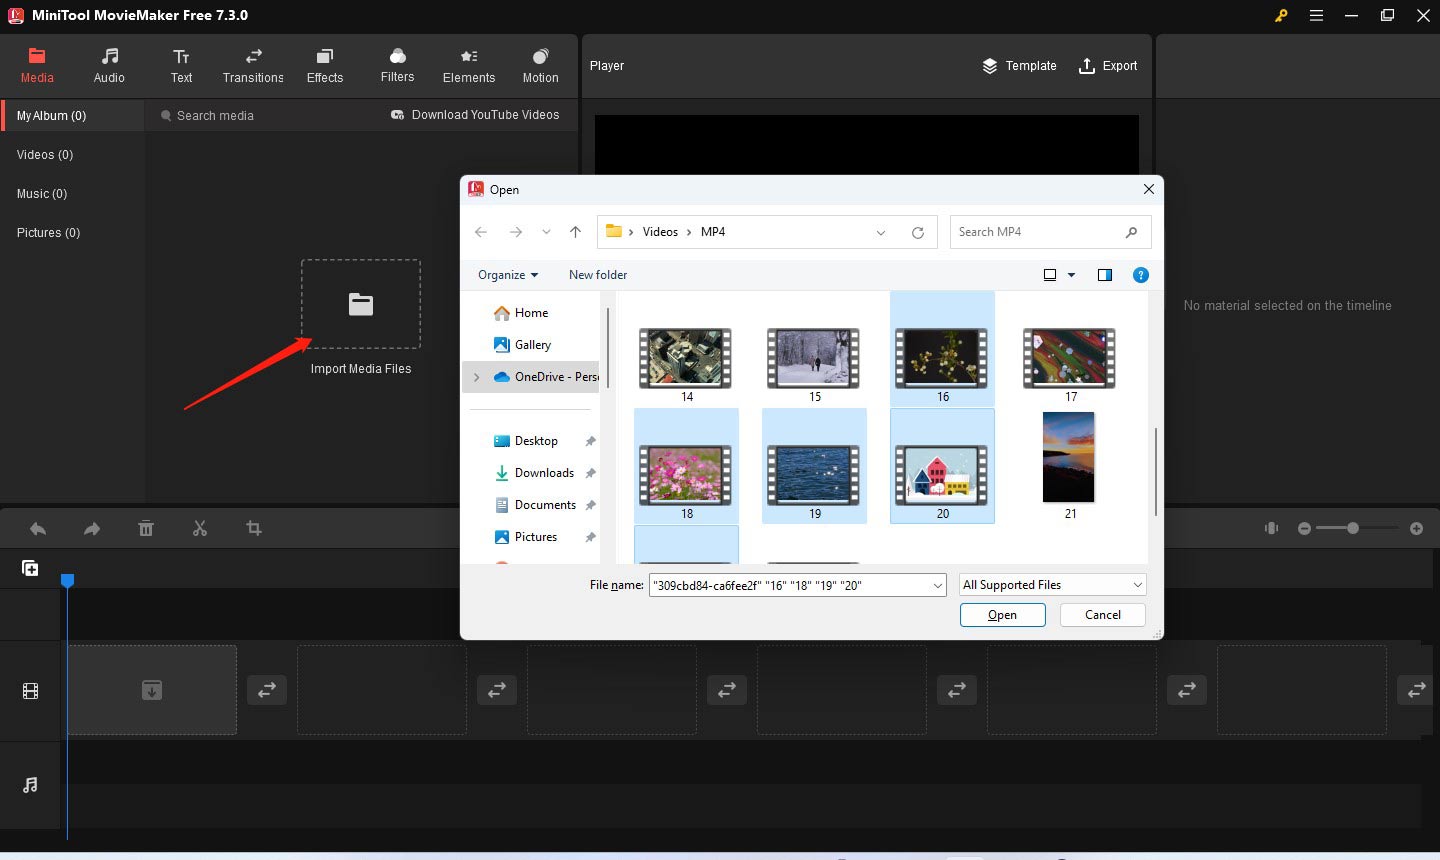
Step 1. Import Files.
Launch MiniTool MovieMaker and close the popup to enter the editing interface. Click Import Media Files to upload the videos and pictures from your computer.
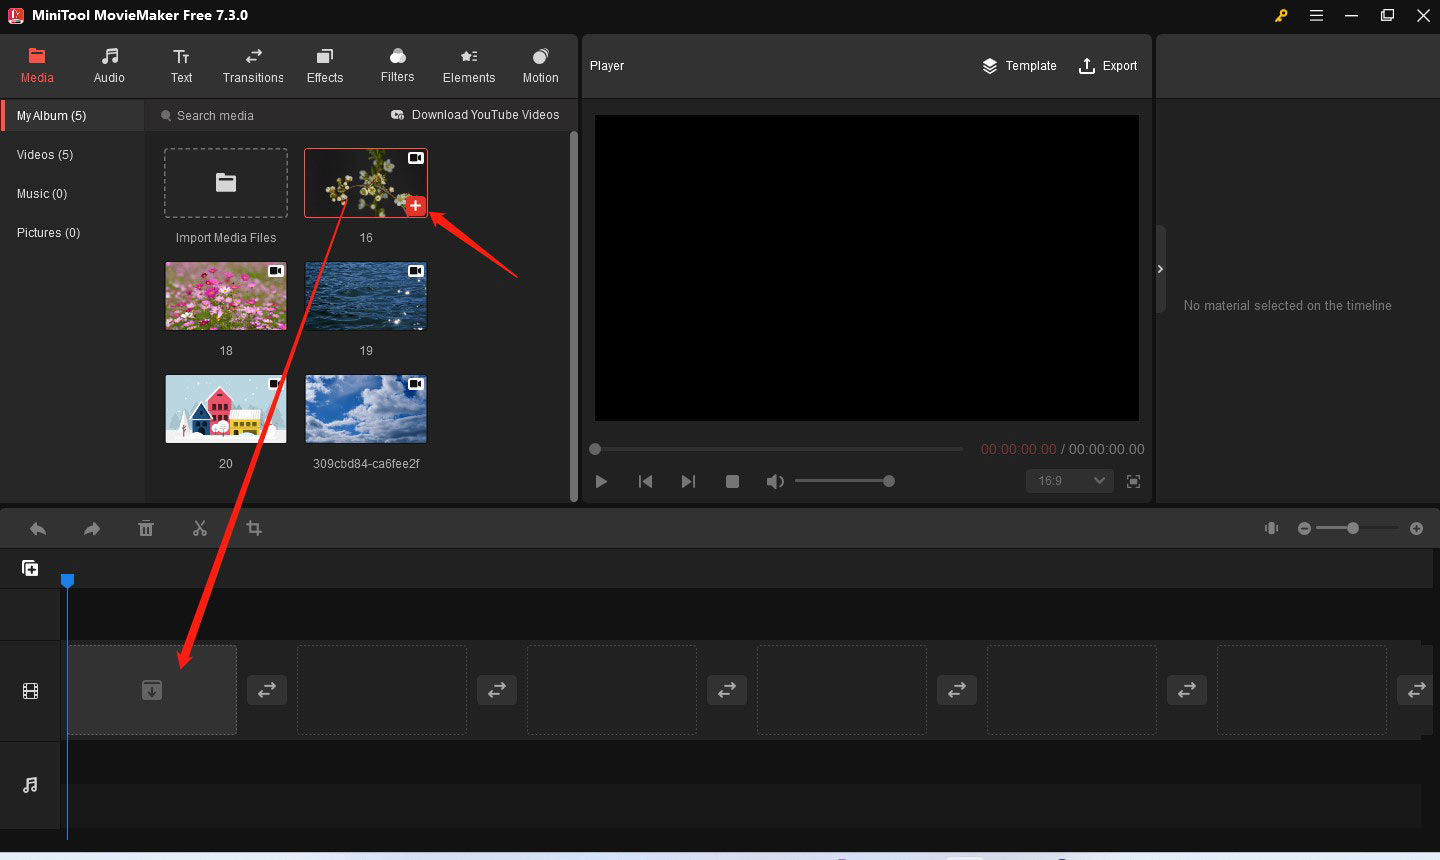
Then you can click the plus icon to add the video clip or picture to the timeline or directly drag and drop it to the timeline.
Step 2. Edit Your Video.
MiniTool MovieMaker is an excellent video editor with various editing tools. You can use it to add transitions, effects, motions, and animated stickers to make your video look better. Or, you can crop the video, split the video, trim the video, reverse the video, speed up or slow down the video, fade the audio, and more.
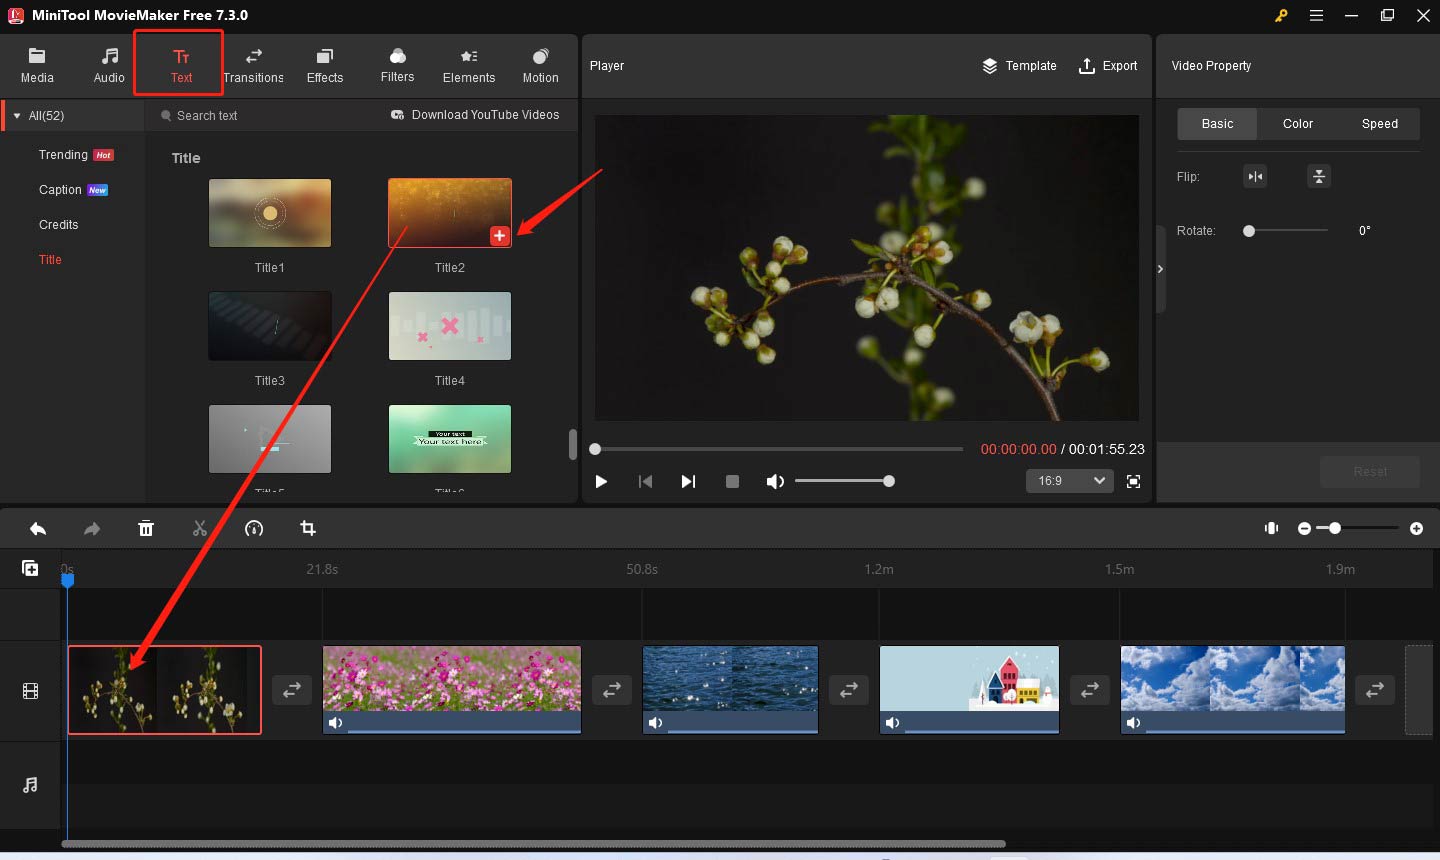
Step 3. Add Title to Video.
Go to the Text tab and click the Title option in the left panel. Then directly drag the title you like from the text library and drop it to the position of the first clip. Or click on the first clip on the timeline to highlight it and click the plus icon on the target title to add it in the front of the highlighted clip.
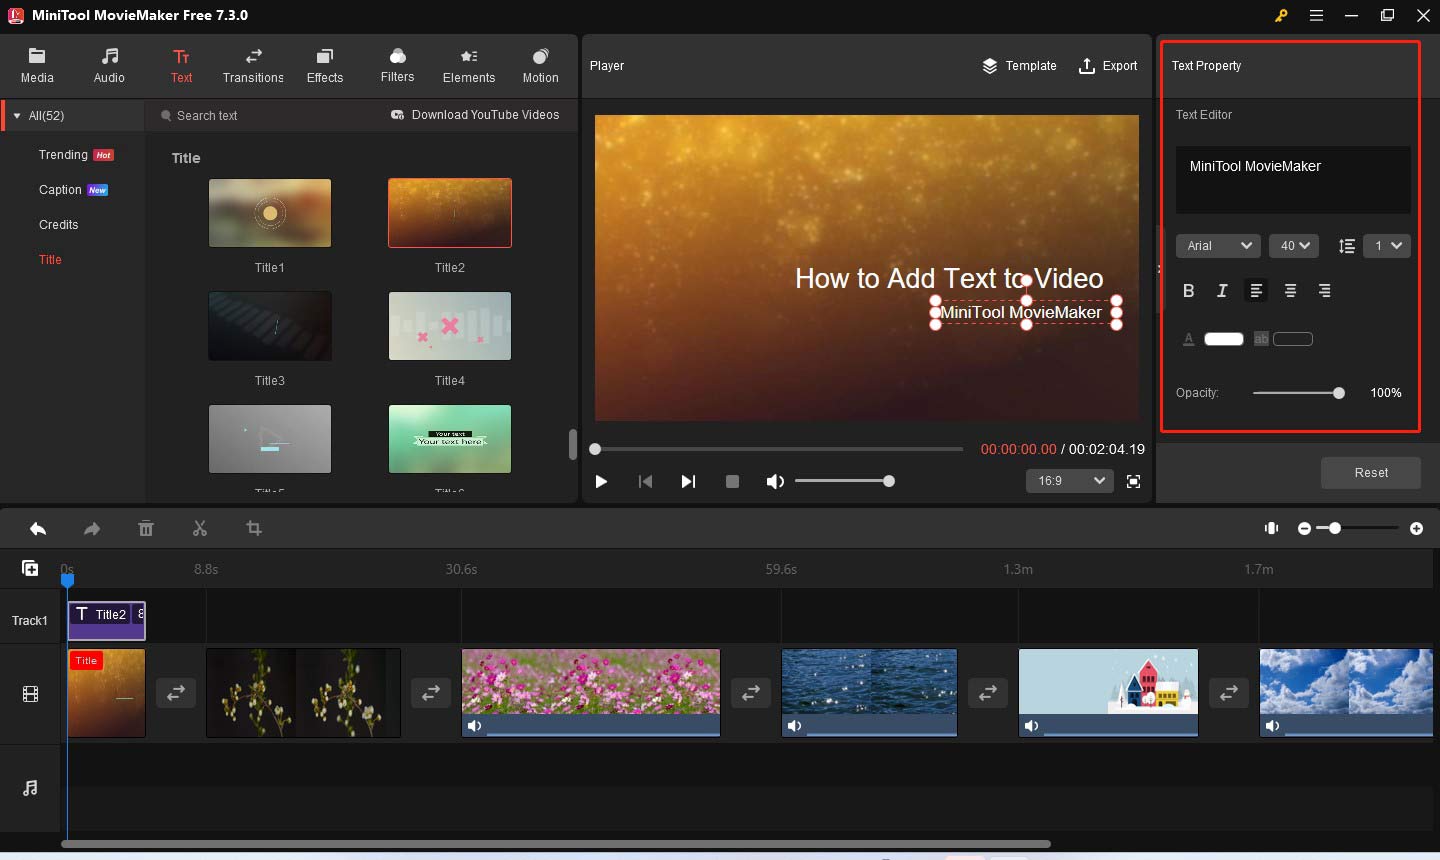
Step 4. Edit the Text.
After adding the title, you can go to the Text Property window to type the text for the title in the text box. You can also change the text font and size, change the text color and text highlight color, bold the text, and more. You can preview these changes in the Player section.
How to Add Caption to Video
The caption provides a textual record of dialogue, sound effects, and music in the video, which can tell normal people especially the deaf and hard-of-hearing audiences what they are seeing in a video clip. There are some captions in MiniTool MovieMaker. Below is guidance on how to add caption to a video.
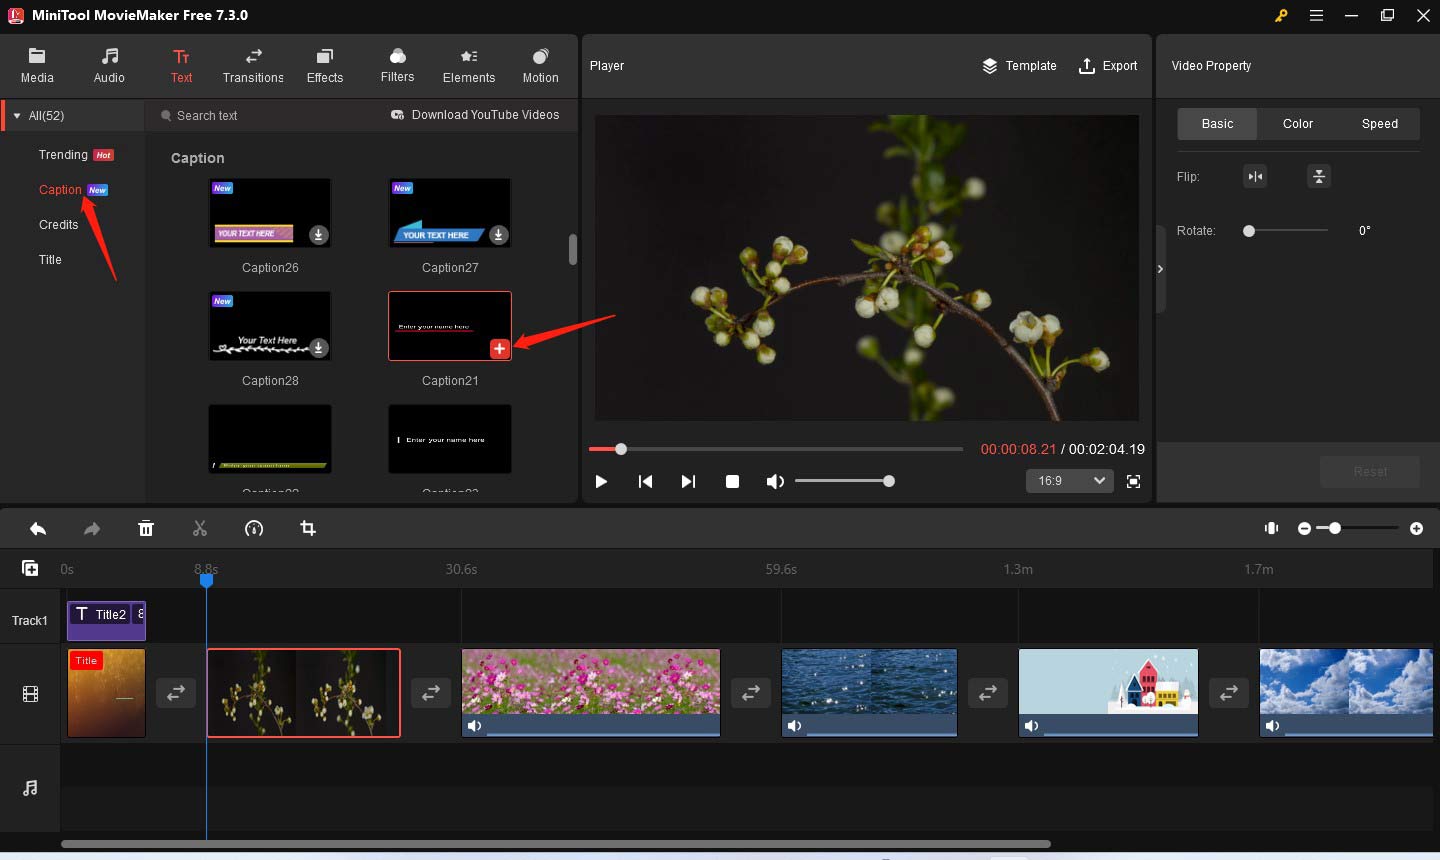
Step 1. After uploading files and adding them to the timeline, click on the clip you would like to add a caption.
Step 2. Go to the Caption option under the Text tab and choose one caption you like. Click on the target clip to which you want to add a caption on the timeline and click the plus icon on the target caption or directly drag and drop it to the timeline. It will create a new track automatically to hold the added caption.
Step 3. You can also edit the caption in the Text Property window.

How to Add Credits to Video
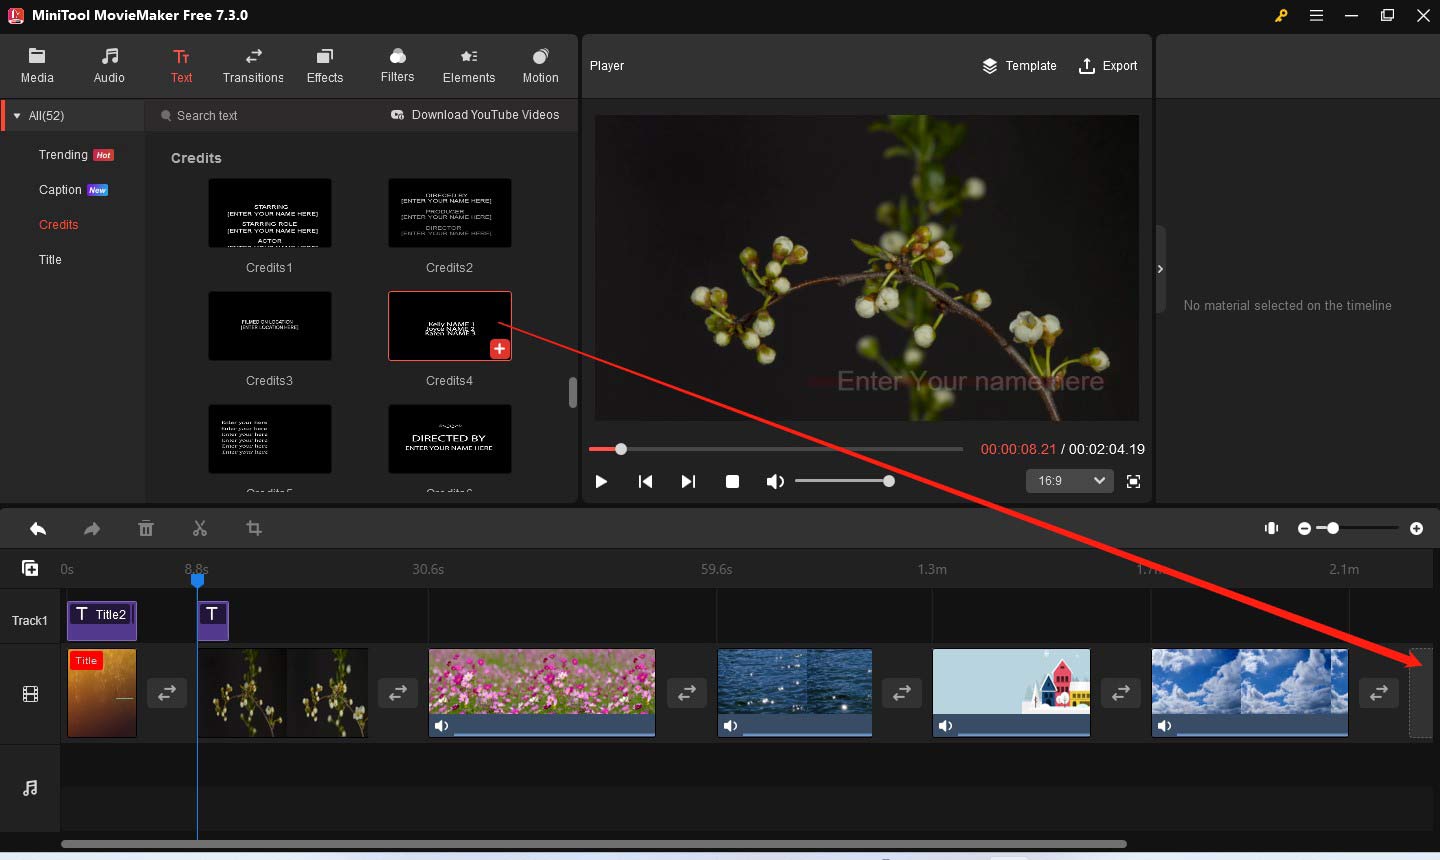
In contrast to the title, credit often appears at the end of the video and displays the information about director, actor, soundtrack, and other information. MiniTool MovieMaker offers some credits to choose from. How to add credits to a video with MiniTool MovieMaker?
The steps are similar to the way of adding the title. You can go to the Credits option under the Text tab, choose one credit you like, and directly drag and drop it to the end of the timeline. Or if you haven’t clicked on any clips in the timeline, you can click the plus icon on the target credit and the credit will be automatically added to the end of the timeline.
Just like editing the title and caption, you can also edit credits in Text Property.
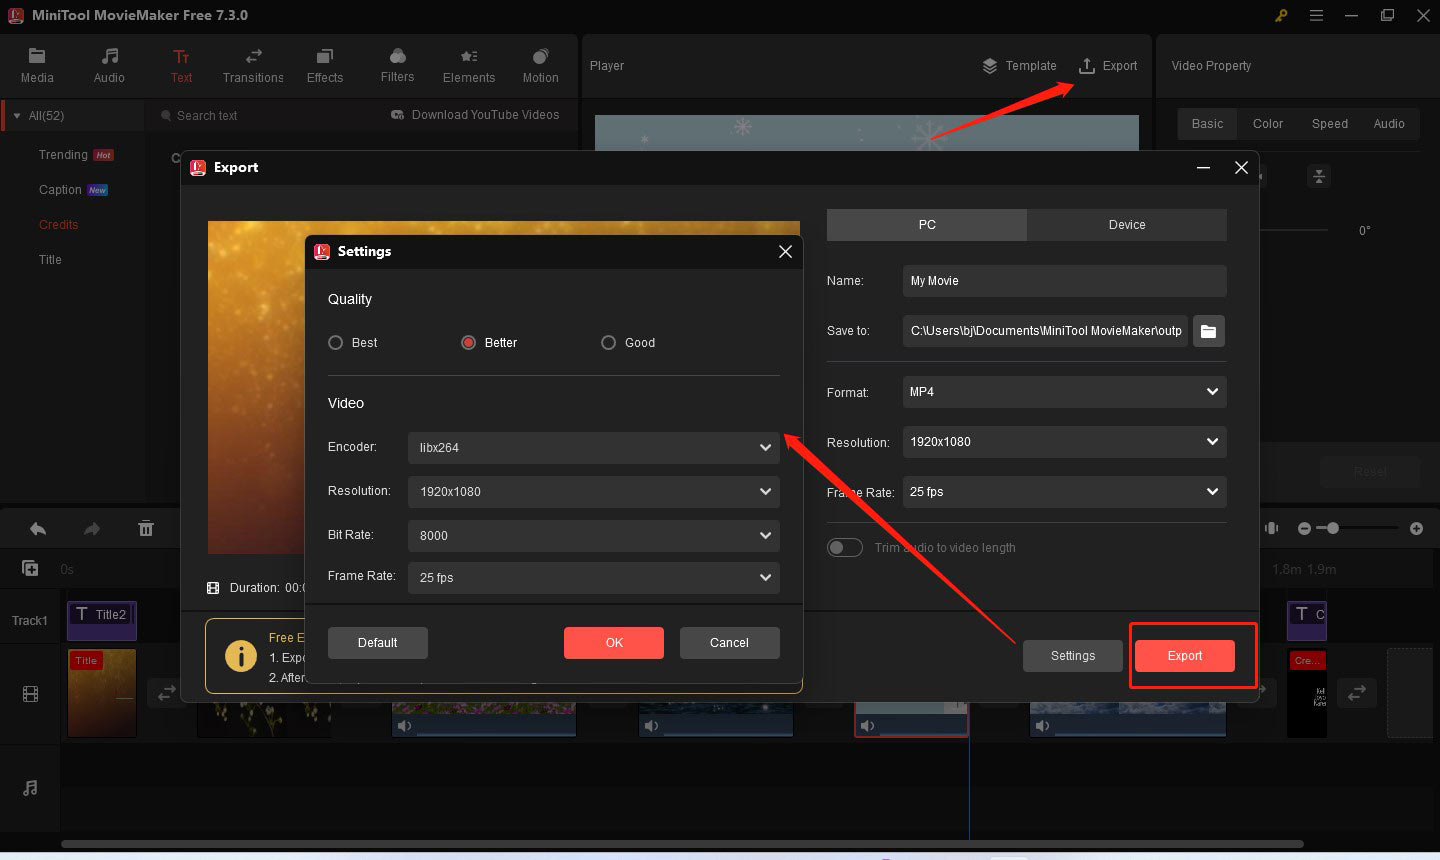
After adding text to your video, click Export in the Player section and adjust the output settings like format, quality, encoder, and resolution in Settings window. Finally, click on the Export button to save it.

How to Add Text to Video with Microsoft Photos Legacy
Microsoft Photos Legacy is the default app for Microsoft’s Legacy Video Editor, Collections as well as Album. Its Video Editor offers useful basic editing features and enables to add text to video. You can refer to the below steps to add text to video using Microsoft Photos Legacy.
Step 1. Open Photos Legacy and choose the Video Editor option.
Step 2. Click on New video project, name the video project, and click OK.
Step 3. Click the + Add button and choose to upload videos from your PC, the collection, or the web.
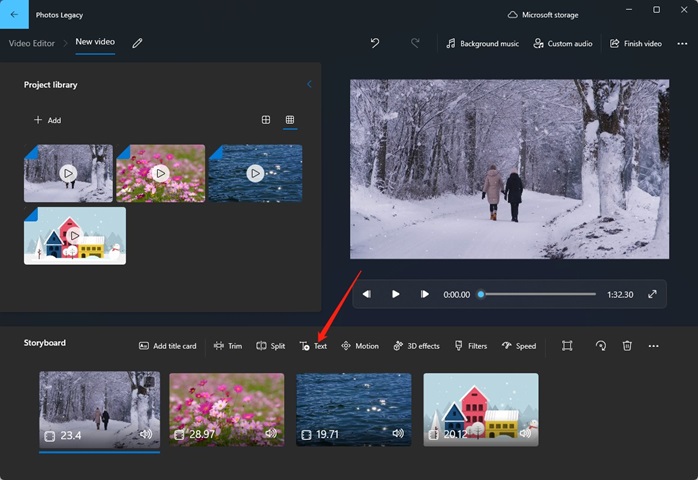
Step 4. Click on Place in storyboard to add those videos onto the timeline.
Step 5. Choose the video clip that you intend to add text and click the Text icon.
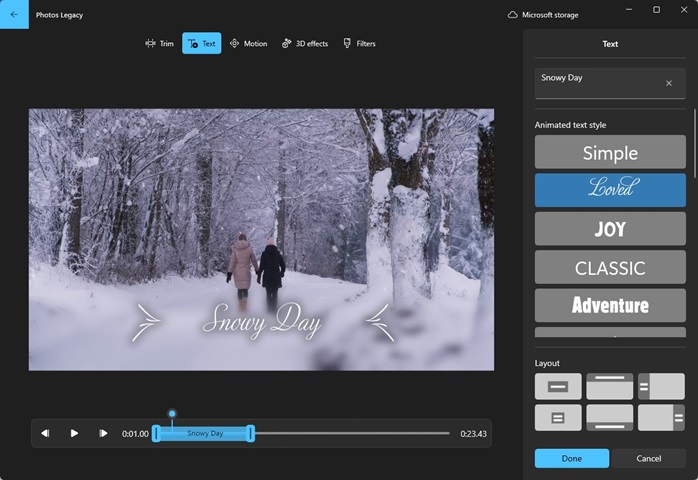
Step 6. Enter the text you want to convey. You can adjust the text during in the timeline and choose the text style and set the text layout in the right panel. Then click Done to save the changes. Repeat the operation to add text to other video clips.
Step 7. After making other edits, you can click Finish video, choose the video quality, and click the Export button to save the video.
Other Good Video Text Editors
MiniTool MovieMaker and the built-in video editor of Microsoft can help you add text to a video effectively. To give you more options, we have compiled a list of great video text editors.
- Premiere Pro
- Clipchamp
- iMovie
- Final Cut Pro
- Lightworks
- PowerDirector
- CapCut
- …
![How to Add Captions to YouTube Shorts [Detailed Guide]](https://images.minitool.com/moviemaker.minitool.com/images/uploads/2024/03/how-to-add-captions-to-youtube-shorts-thumbnail.jpg)
Conclusion
From the above, we know that MiniTool MovieMaker allows you to add the title, caption, and credit three kinds of text. These three kinds of text have different positive effects on the video. You can follow the above guidance to add text to video if you are interested in MiniTool MovieMaker.
If you have any questions or comments about MiniTool MovieMaker, please don’t hesitate to email us at [email protected].
About The Author

Position: Columnist
Olivia is always full of enthusiasm for life and loves to record. She often records beautiful and memorable moments of life with her camera and then uses some editing tools to put the photos, videos and audio together. She also has a passion for writing and offers suggestions to readers on images, audio, videos and news. To provide more professional articles and solve problems for readers, she is continuing to learn multimedia as well.
User Comments :