In this post provided by Windows video editing software, we will illustrate 6 tips to create captivating videos with a clear guide on how to make the quality of a video better. From video properties like the right video length to editing strategies, we’ll dive deep into the simple tips to improve the quality of your video.
With the popularity of smartphones and the continuous improvement of Internet technology and network bandwidth, people have begun to rely more on mobile phones for information and entertainment. This is why the short video era has emerged and flourished.
Short videos have quickly become an important way for people to obtain information and entertainment because of their simplicity and ease of dissemination. Different from traditional TV programs, short videos provide a freer and more diverse form of entertainment, with the characteristics of a simple production process, low production threshold, and strong participation.
Today, video has become a new cultural phenomenon that has had a profound impact on people’s lifestyles and values. With short video services like TikTok, Instagram, and video editing software applications, everyone can create and share videos easily and quickly.
The quality of your video is the first impression of your video and largely determines whether viewers click on your video and watch it. How to make your videos look more professional? How to make the quality of a video better? This guide will show you the main factors that determine video quality and provide other helpful tips to make a video better quality.
What Does Determine Video Quality
Before we dive into tips to improve video quality, let’s first understand the most important factor that fundamentally determines video quality – resolution.
The resolution of a video is the total number of pixels in a given video frame, measured as the frame’s width by height in pixels. For instance, 1920 x 1080 (1080p) signifies a screen or video display with a width of 1920 pixels and a height of 1080 pixels.
Technically speaking, the quality of your video only depends on the resolution at which you shoot it, as the video resolution determines the quality and clarity of each frame in your video. In general, the higher the resolution, the more pixels, and the better the video quality. However, high-resolution videos also result in larger file sizes.
The overall quality of video not only depends on the resolution but also on other parameters, including frame rate and bitrate.
Frame rate means the frequency or rate at which consecutive images (frames) are displayed or captured within a second and it affects video smoothness. Bitrate refers to the amount of video data transmitted per unit. Generally, a higher video bitrate means higher quality.
6 Tips: How to Make the Quality of a Video Better
How to make a video better quality? Here are 6 tips for your reference.
#1. Choose the Right Video Length
Each platform has different length requirements for uploaded videos. If the video is too long, viewers may not be interested in watching it, and if it is too short, it may not convey enough information.
When improving video quality, the length of the video must be considered in conjunction with the video platform. Each social media platform includes different types of video content. For instance, Instagram has Reels, Stories, feed videos (until 2022), and live videos. You can check this post – Social Media Video Length Best Practices [Ultimate Guide] to select the right length for your video.
Also, you should use longer videos when appropriate. For instance, a long video is better when you make detailed instructions, product reviews, TV series, etc.
#2. Consider the Video File Size and Resolution
To improve video quality, choosing the right video file size and resolution is necessary. Each platform has a different maximum video file size for uploading videos. If your video exceeds the maximum file size of a certain platform, you can’t post it to share with your followers.
Resolution is one of the most important factors affecting video file size. While high resolution means high-quality video, it also leads to larger file sizes. Therefore, a higher resolution is not always the best choice. Currently, 1080p is the most recommended resolution for social media videos.
If your video file size exceeds the platform’s maximum file size limit, you should do something to reduce the file size. You can downscale the resolution like 4K to 1080p, adjust the frame rate and bitrate, or change the video format and encoder. To make a video file smaller for easy sharing, you can use MiniTool Video Converter, a free video converter and a compressor.
MiniTool Video ConverterClick to Download100%Clean & Safe
#3. Select a Clean Background
Before you start shooting, you should carefully consider and select the background of your video. A clean, simple, fun, or representative background can help your video better highlight the topic and message, while a messy or distracting background makes the video look less professional.
Apart from this, you should also choose a good camera to capture high-quality videos. It doesn’t matter if you don’t have a professional camera. Nowadays, Android phones and iPhones offer enough features to capture videos in just a few clicks.
#4. Avoid Shaky Videos
A high-quality video should not contain any shaky footage. When recording video, hold your phone or camera completely steady. However, holding a camera is not easy at all. To avoid shaky videos, you can use a tripod. Some cameras have built-in stabilization features to help you reduce shake.
However, if your video is still shaky despite your best efforts, you can fix it with video stabilization software. Many video editors let you stabilize shaky videos, and here is the list for you:
- Arcsoft Video Stabilizer
- DaVinci Resolve
- Adobe Premiere Pro
- Pinnacle Studio
- Final Cut Pro X
- VideoStudio Ultimate
- VSDC Video Editor
- …

#5. Edit Videos
Of course, you can use professional video editing applications to polish your footage and add more visual effects. These apps provide both simple and advanced features and functionality for improving video quality and visual appeal, including:
- MiniTool MovieMaker
- Clipchamp
- iMovie
- Adobe Premiere Pro
- PowerDirector
- Videoshop
- InShot
- …
These video editing programs offer various options for you to edit, beautify, and advance the quality of your video.
In addition to the video editing process, you should also pay attention to color correction and grading. Adjust the contrast, saturation, brightness, hue, tint, highlight, shadow, white balance, and more to achieve the best tone and mood for your videos.
Additionally, you can apply filters or 3D LUT effects to create a stylized effect for your videos. This can also significantly improve the overall visual quality of your video.
Besides, you can add more elements such as text overlays, stickers, or other special effects to enrich your video and make it more interesting. Use these elements sparingly to avoid distracting your audience from the main content.
Apart from these traditional video editing apps, you can also use AI video enhancers to upgrade low-quality and blurry videos. The following apps harness the power of artificial intelligence technology to help you make the quality of a video better.
- HitPaw Video Enhancer
- AVCLabs Video Enhancer AI
- Topaz Video AI
- TensorPix
- DVDFab Video Enhancer AI

#6. Ensure Good Audio Quality
The quality of audio also matters in your video. While recording, you should place the microphone as close to the subject as possible to capture clear audio. In editing, you can use some tools to reduce or remove the background noise from the audio, but you should still keep the dialogue clear.
If you want to add background music to the video, notice that the music volume should not be louder than the voiceover or other important sounds.

How to Make the Quality of a Video Better with MiniTool MovieMaker
MiniTool MovieMaker is one of the best free video editors for Windows PCs. This app provides many editing tools to help you create high-quality videos. Here is a simple guide on how to make the quality of a video better with MiniTool MovieMaker.
Step 1. Download and install MiniTool MovieMaker on your PC.
MiniTool MovieMakerClick to Download100%Clean & Safe
Step 2. Launch MiniTool MovieMaker, then close the promotion window, click Import Media Files to browse for the target folder and open your video. Then, add it to the timeline.
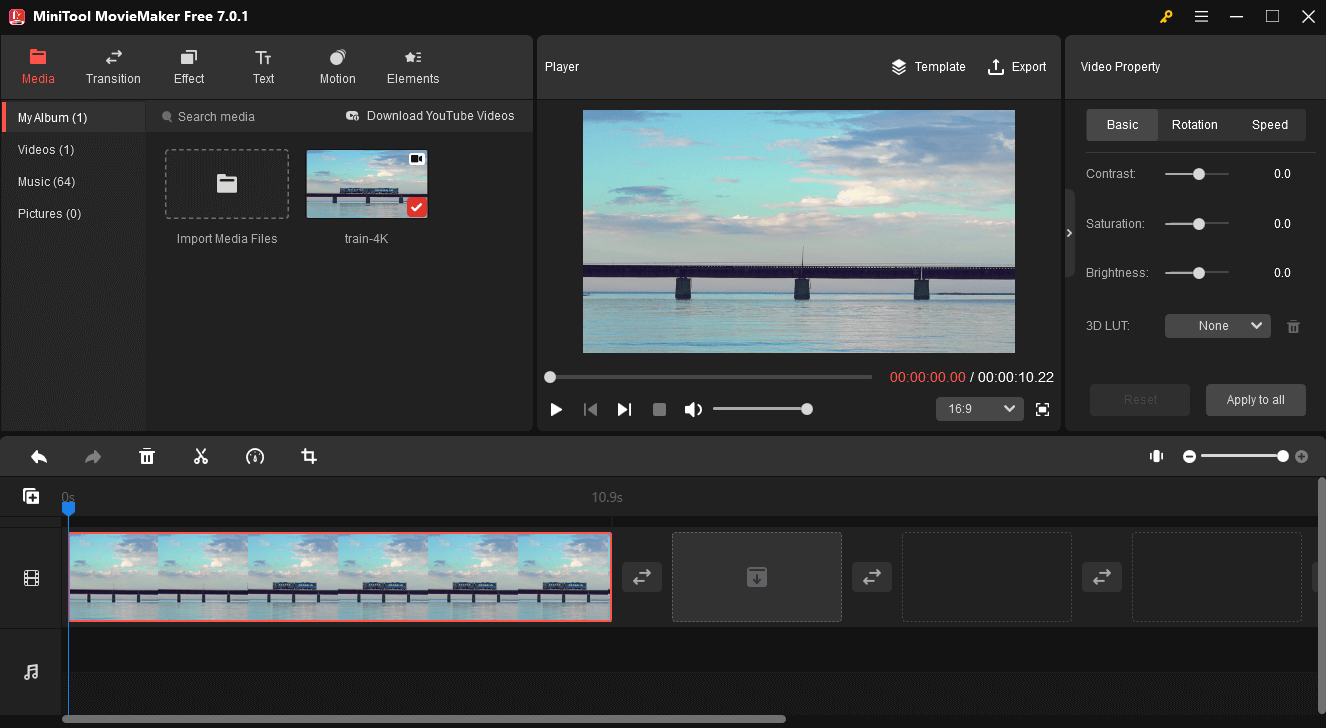
Step 3. Edit the video as you want.
Trim video: If your video is too long, you can cut out the beginning or end sections of the video. Select the clip on the timeline, hover your mouse over the beginning of the video clip until you see a double-headed arrow appear, and drag either edge of the clip toward the middle to remove unwanted parts.
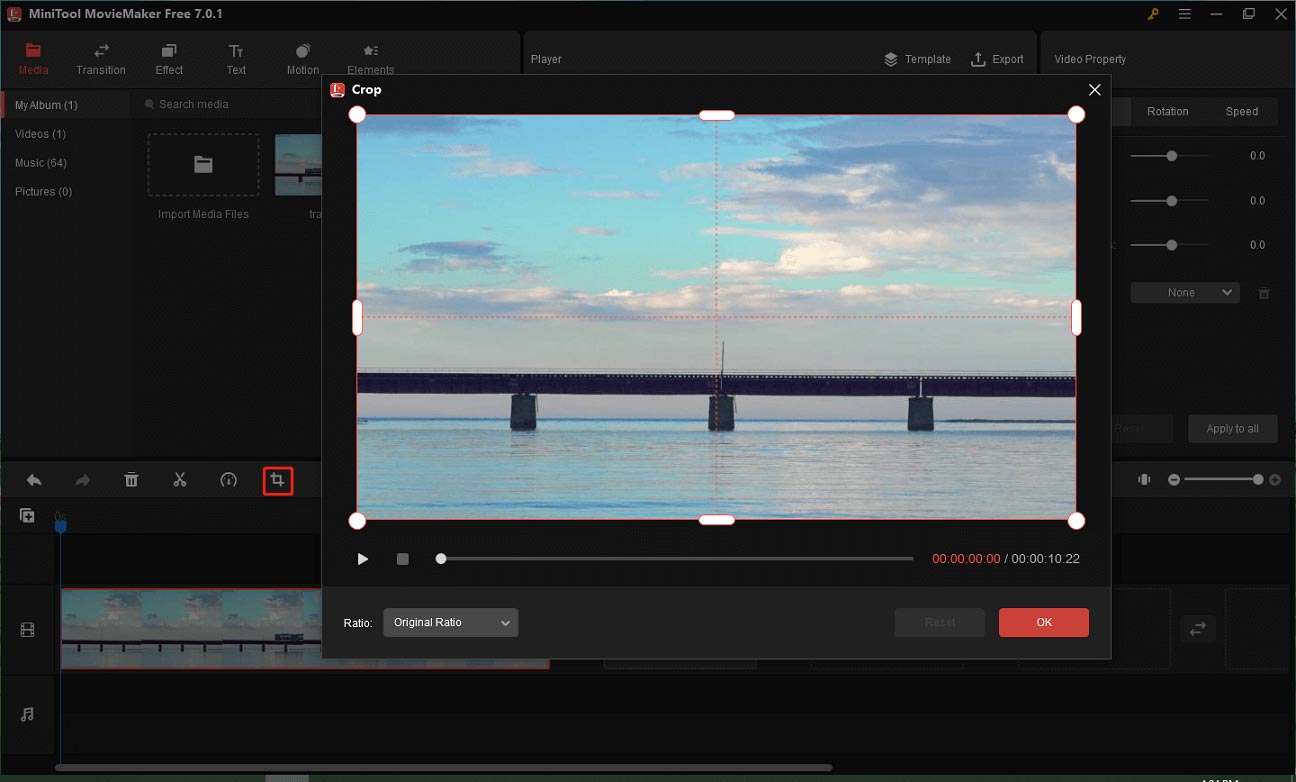
Crop video: Click the clip on the timeline, click the Crop icon, reshape the rectangle and change its position to custom-crop the video. Or, you can choose an aspect ratio and crop it. Click OK to save changes.
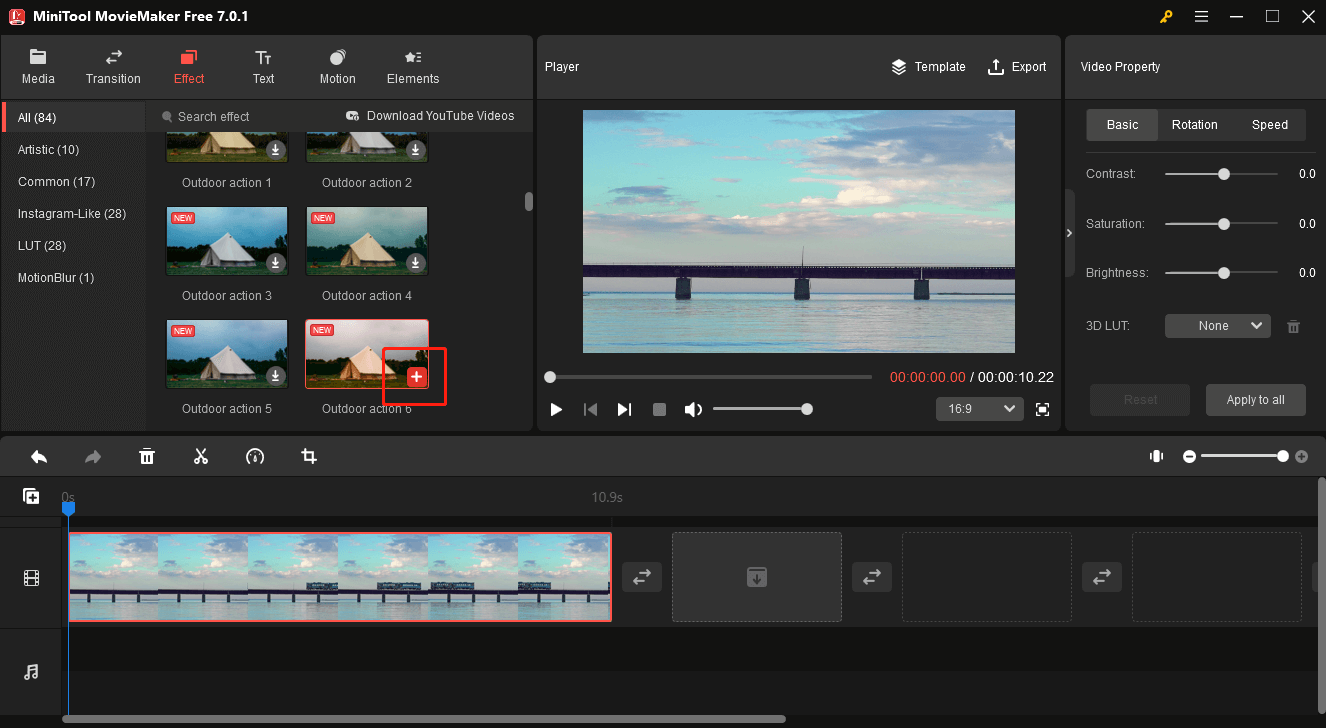
Adjust the clip’s color: Right-click on the clip, click the Basic tab in the Video Property section, and drag the controller of the Contrast, Saturation, and Brightness to make changes.
Add a filter: Select the clip on the timeline, go to the Effect tab, preview and download a filter, and click the plus icon to apply it.
Add text: MiniTool MovieMaker lets you add titles, captions, and credits to the video, and it provides many text templates. Go to Text, choose a text style, add it to the desired place on the timeline, and edit your text in the Text Editor.
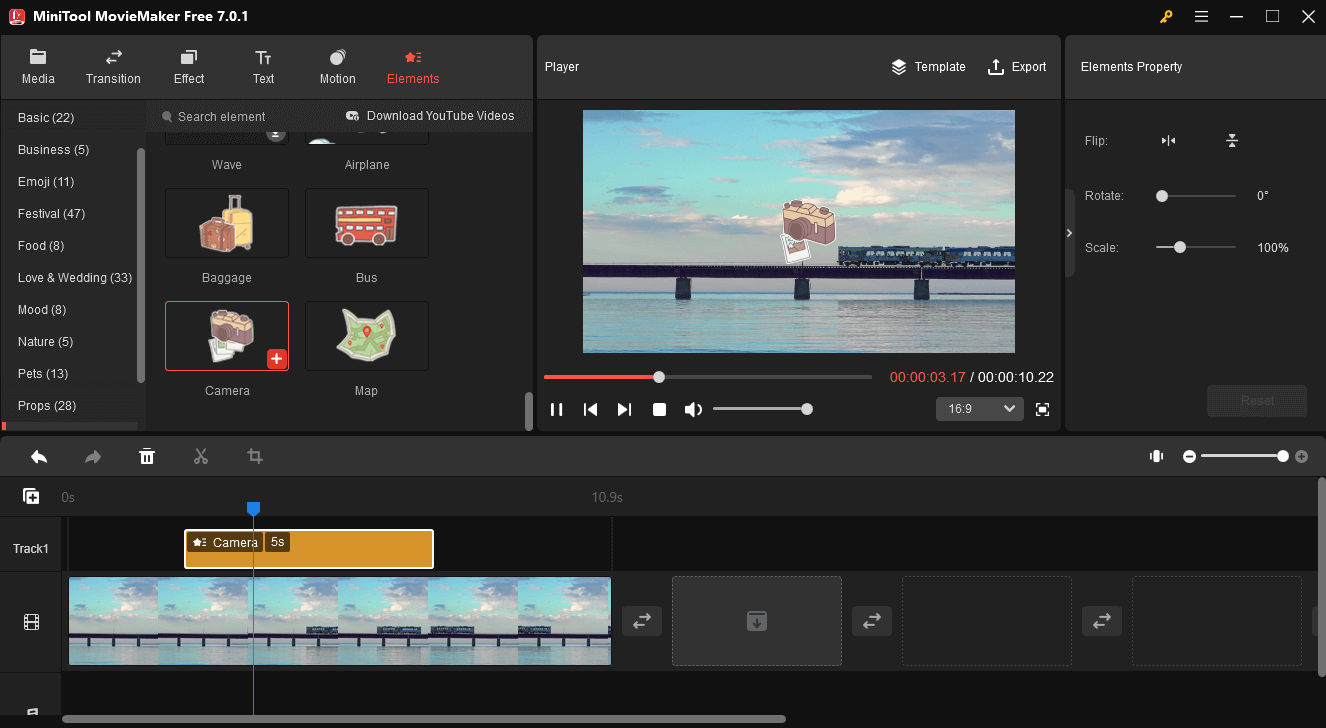
Add stickers: You can use stickers to spice up your video. Select the clip on the timeline, move the playhead to the position where you want the sticker to appear, go to Elements, choose a category, download the desired one, and click + to add it.
Step 4. Add music to the video.
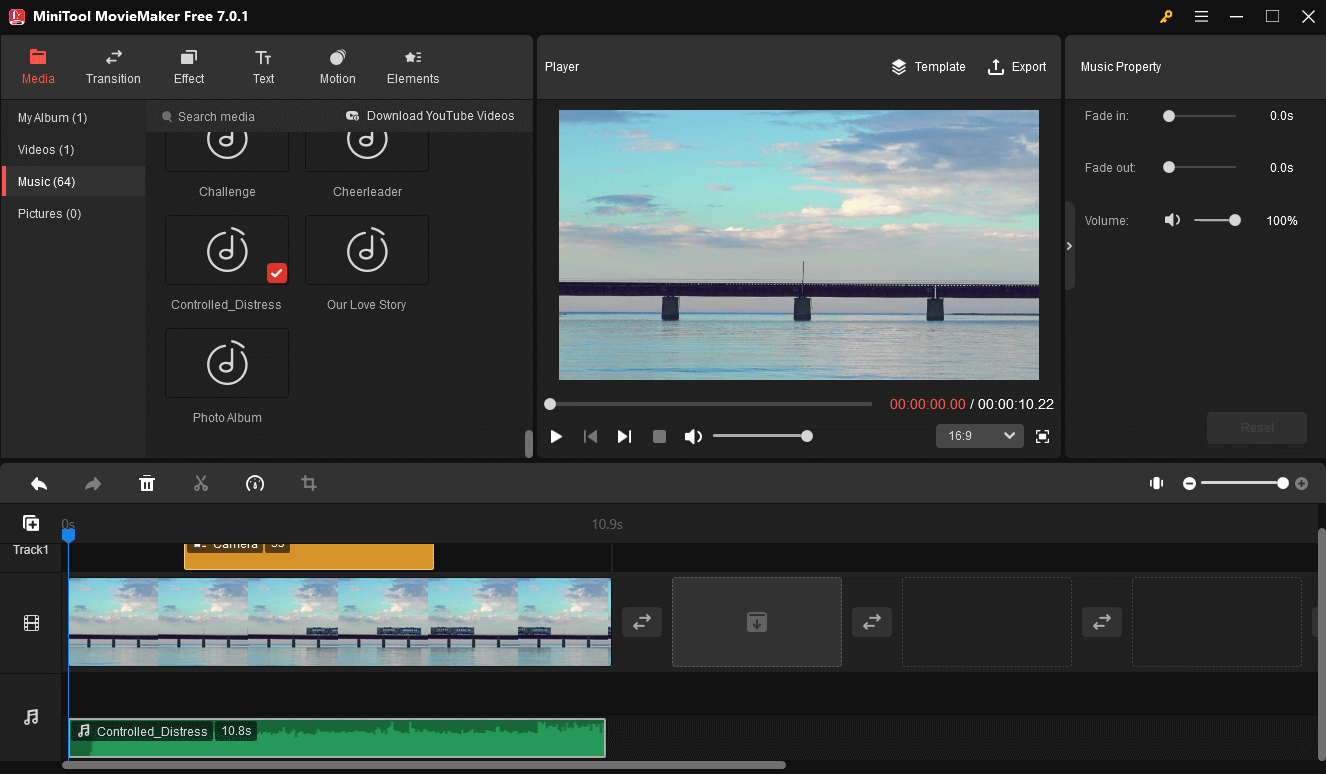
Music is an important part of video. You can also add music to your video to enhance it. Under the Media tab, click Music and you’ll find some tracks, download a song and drag it to the timeline. Also, you can click Import Media Files to upload a downloaded song for your PC and add it to the video. Then, you can adjust the volume and fade in or fade out the music.
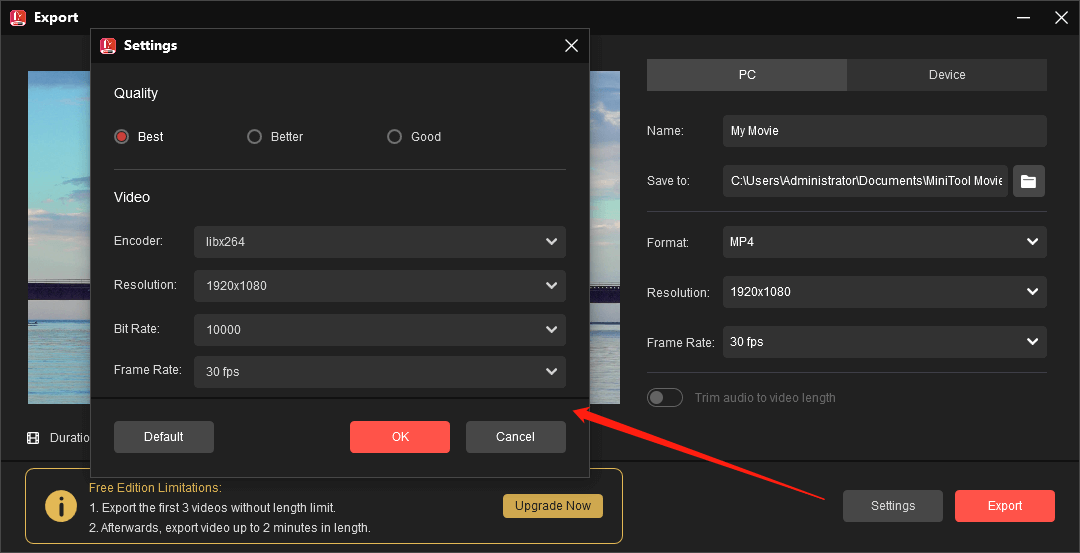
Step 5. After editing your video, click Export in the top right to open the export settings window. You can select the output format, resolution, frame rate, bitrate, quality, etc. Browse for the destination folder and click Export to export the video.
In addition to these features, MiniTool MovieMaker has more to improve your video quality. It offers a large collection of transition effects that can be used between two clips, many motion effects, and some 3D LUT effects. Also, it allows you to change the video aspect ratio, adjust video speed, split videos, rotate video, etc.
![How to Upload High Quality Video to Instagram [Ultimate Guide]](https://images.minitool.com/moviemaker.minitool.com/images/uploads/2023/02/how-to-upload-high-quality-video-to-instagram-thumbnail.jpg)
Conclusion
How to make the quality of a video better? This post provides you with some tips and guidelines to help you produce stunning videos. If you have any other tips for improving video quality, feel free to share them with us in the comment section below.
Finally, if you have any questions while using MiniTool MovieMaker, you can contact us via [email protected] for help.
About The Author

Position: Columnist
Cora is a tech writer specializing in digital media workflows, with over six years of hands-on experience in video post-production, media transcoding, and screen capture. Her writing is always clear and practical. Cora also produces in-depth software reviews for users across skill levels to help them find the right tool and enjoy video editing.
User Comments :