What Does Crop Photos Mean?
In the dictionary, the word “crop” can be a noun and a verb. When plays as a verb, there are several definitions. Here in this article, “crop” adopts the meaning of removing part of something, a photograph or other image, in order to produce a better picture or to fit a given space.
Usually, we use “cropping” when we need a noun to refer to the deletion of unnecessary peripheral areas in an illustrated or photographic picture. The task commonly contains the removal of some of the extraneous trash in the outer areas of a photo to change the aspect ratio, optimize its framing, or isolate/accentuate the subject from its background.
Depending on the application, cropping can be applied on a physical photo, artwork, or movie footage; or it can be carried out digitally relying on photo editing programs. The cropping process is common to the photo, film processing, graphic design, broadcasting, as well as printing industries.
![[2 Ways] How to Circle Crop Photo by Office Apps (Word)?](https://images.minitool.com/moviemaker.minitool.com/images/uploads/2022/11/circle-crop-photo-thumbnail.png)
Why Need to Do Photo Crop?
In the photography, graphic design, and printing businesses, cropping is one of the most basic photo manipulation processes.
In telephoto photography, usually in aviation and avian photography, when a lens of sufficient focal length to achieve the planned magnification directly isn’t available, a picture is cropped to magnify the main subject and further reduce the angle of view.
Together with color correction, balance, and sharpening, cropping is one of the few editing actions permissible in modern photojournalism. Cropping created by trimming off the top and bottom margins of a photo or video creates a view that mimics the widescreen format in cinematography and broadcasting or the panoramic format in photography. Neither of those formats is cropped as such, but instead, they are products of highly specialized optical configurations and camera designs.
While in cinematography and broadcasting, sometimes, you need to crop film footage to change its aspect ratio avoiding stretching the image or filling the blank spaces with letterbox bars.
In general, the functions or advantages of using cropping are:
- Emphasize the subject
- Remove unwanted parts
Next, we will talk about how to crop a photo on the Windows 11 operating system (OS) making use of various apps.
How to Crop Photos Windows 11 by MiniTool MovieMaker?
First of all, let’s see how to crop photos in Windows 11 with the help of a professional and easy-to-use video/photo editor called MiniTool MovieMaker. Just follow the following steps!
MiniTool MovieMakerClick to Download100%Clean & Safe
Step 1. Download, install, and open MiniTool MovieMaker on your computer.
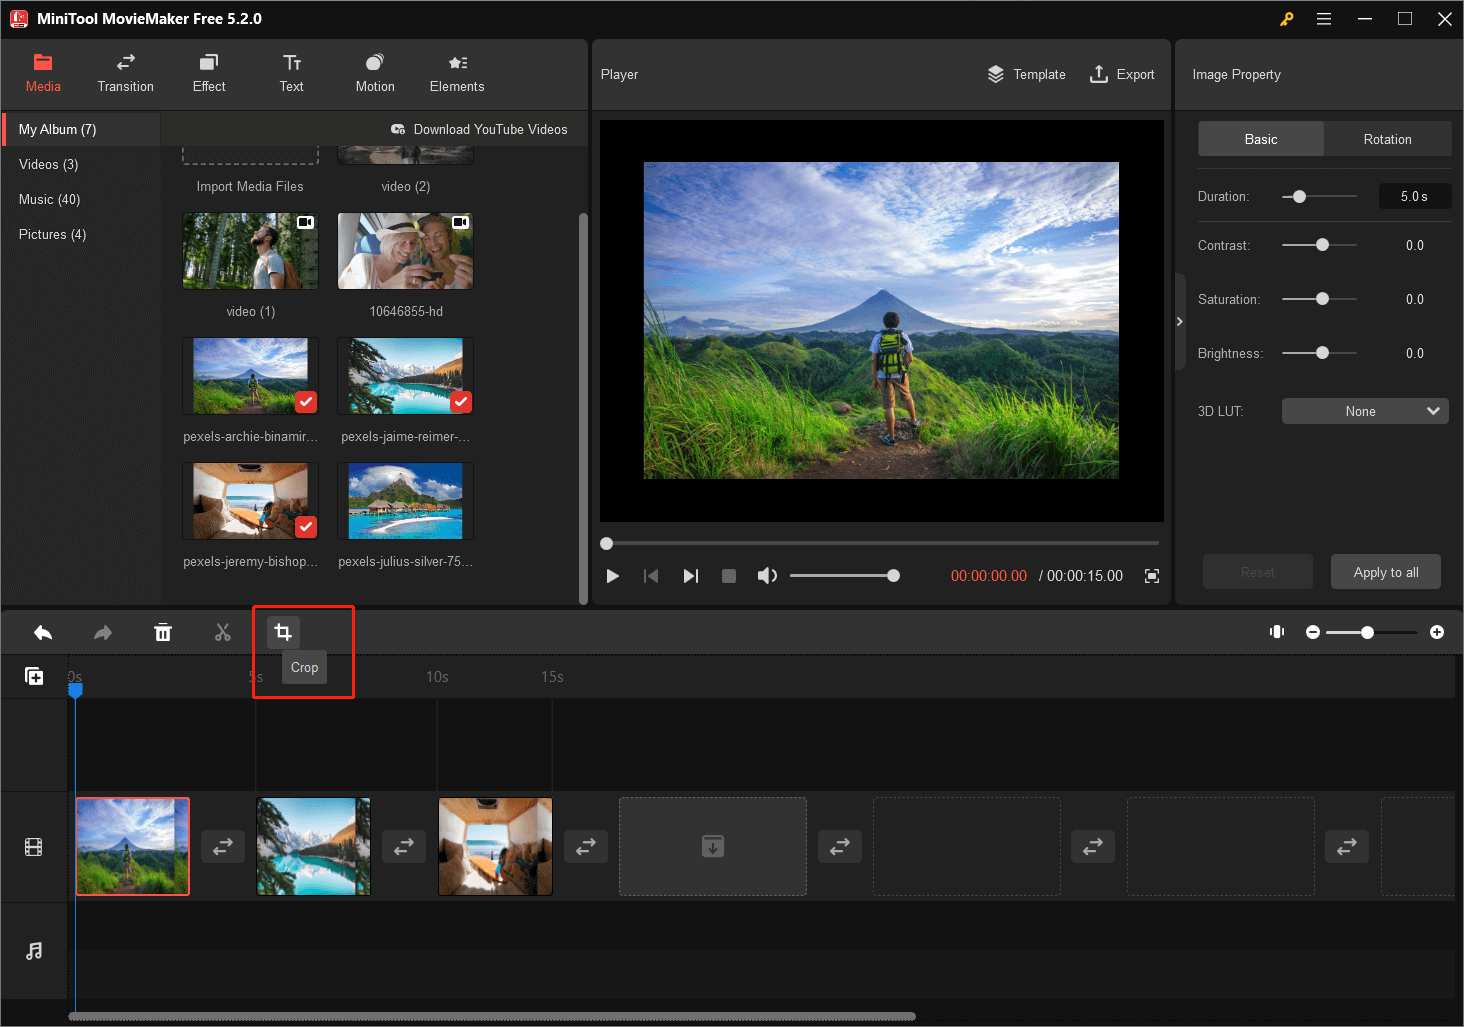
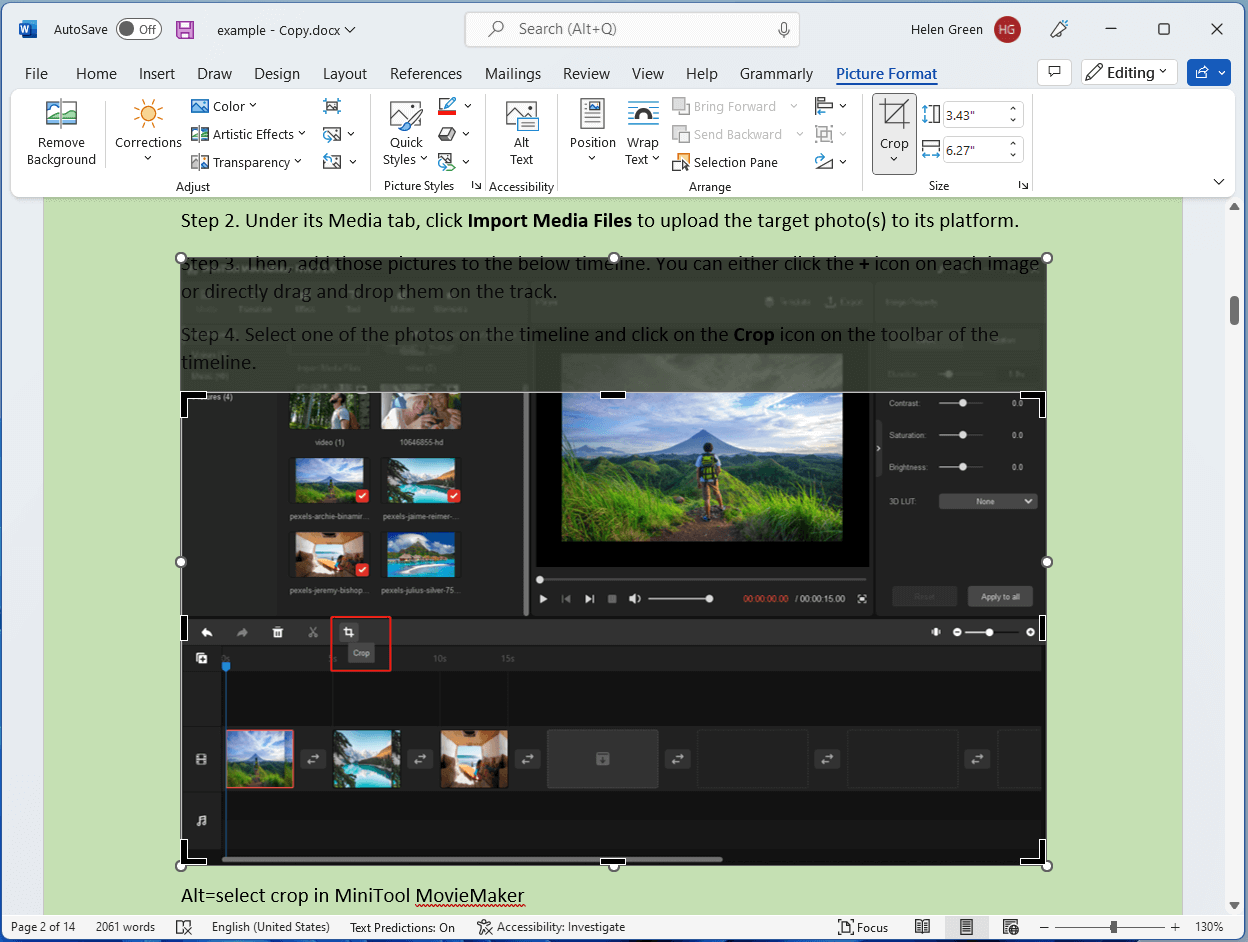
Step 2. Under its Media tab, click Import Media Files to upload the target photo(s) to its platform.
Step 3. Then, add those pictures to the below timeline. You can either click the + icon on each image or directly drag and drop them on the track.
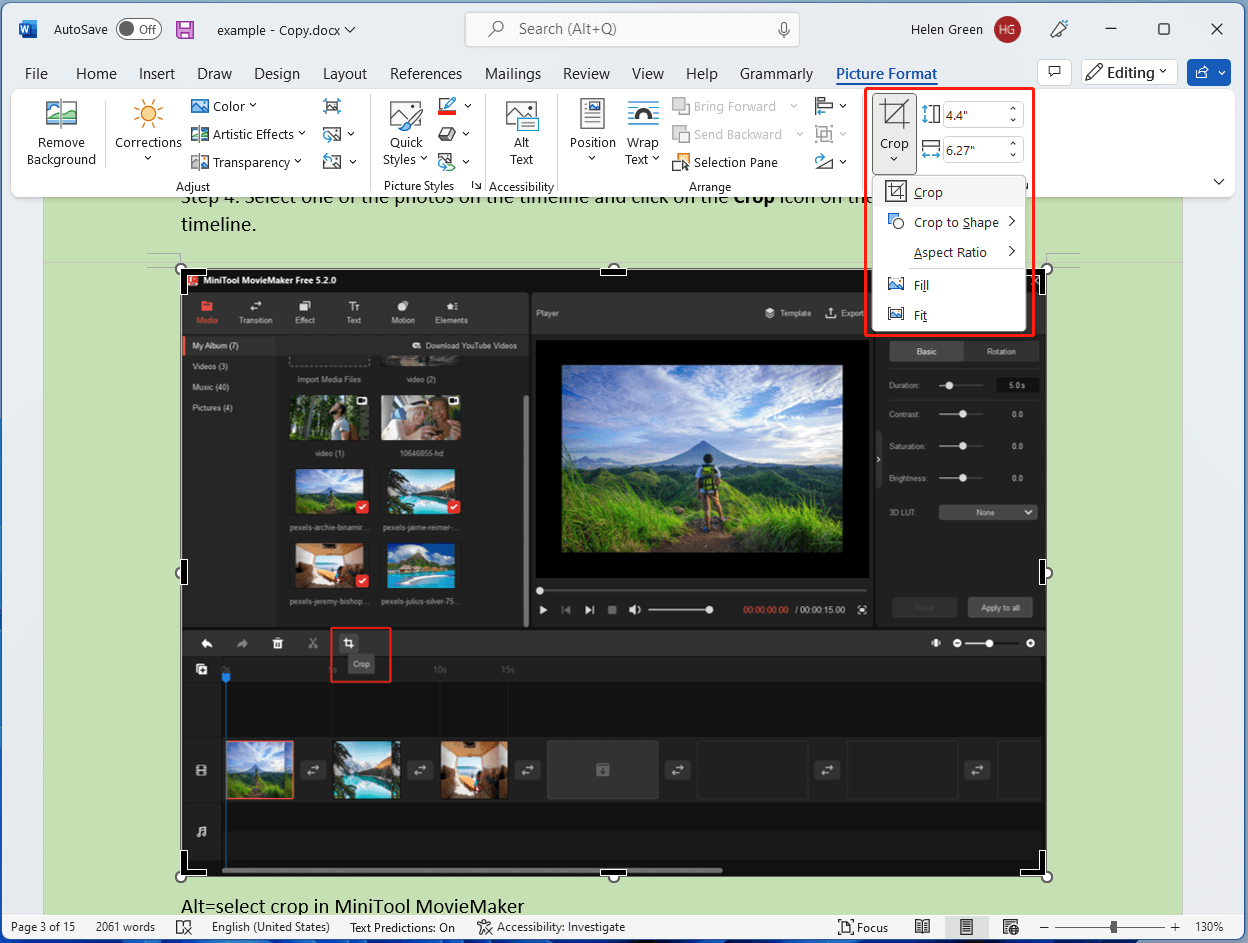
Step 4. Select one of the photos on the timeline and click on the Crop icon on the toolbar of the timeline.
Step 5. In the pop-up crop window, you can manually drag the frame in 8 directions: north, northeast, east, southeast, south, southwest, west, and northwest. Just put your mouse at one of the white points. When the mouse turns into a double-headed arrow, press and hold the left button on the mouse and pull inwards. Thus, the frame will shrink based on the current aspect ratio.
Or, you can click on the option behind Ratio in the bottom left corner and select a preset ratio among:
- Original Ratio (default)
- 16:9
- 4:3
- 1:1
- 3:4
- 9:16
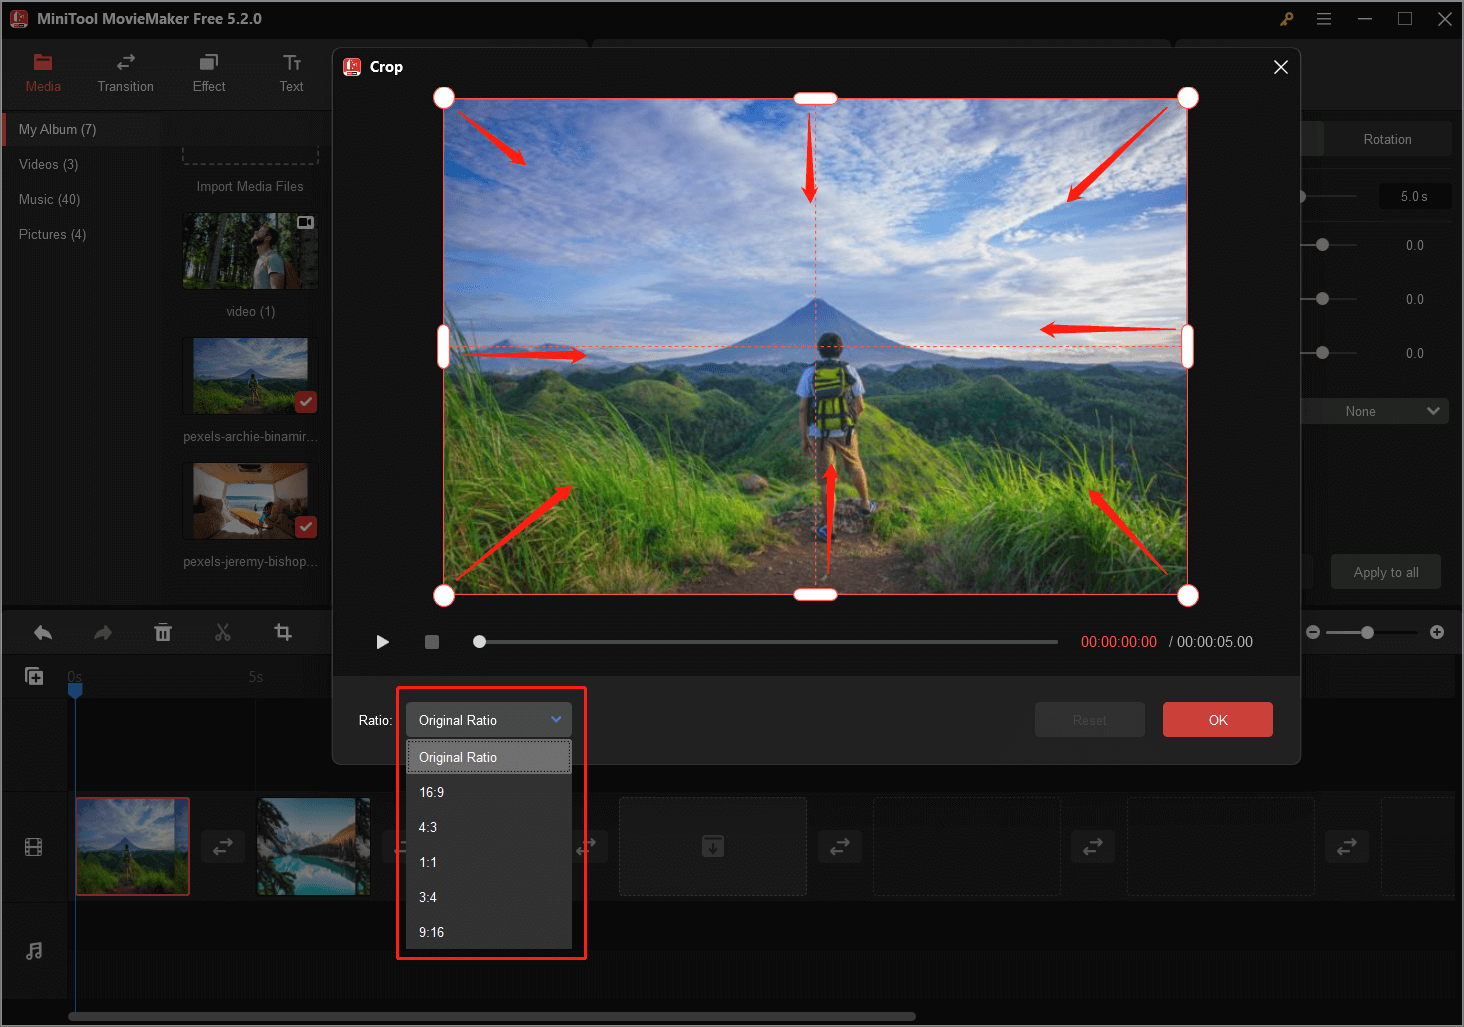
If you make a wrong cropping, you can click the Reset button to undo your change.
Step 6. Click OK to save the change.
You can preview the cropped photo in the Player section. If it is just what you want, continue to crop the next image until the last one. Unfortunately, you are not allowed to batch-crop multiple pictures at one time. Finally, click Export in the upper right to save the cropped photos into a video or GIF file.
If you want to save the cropped photos individually, you have to crop them one by one and export each cropped image after each cropping process. Also, you can only save the cropped picture in GIF format.
If you want cropped images in other formats like .png, .jpg., .bmp, etc., you can use a photo format converter to help you convert from GIF to other image formats. There are a lot of tools that can do that.
How to Crop a Photo in Windows 11 via Microsoft Photos?
Secondly, let’s see how to crop photos on the Windows 11 Photos app, which is one of the official photo viewing and editing tools in Win11.
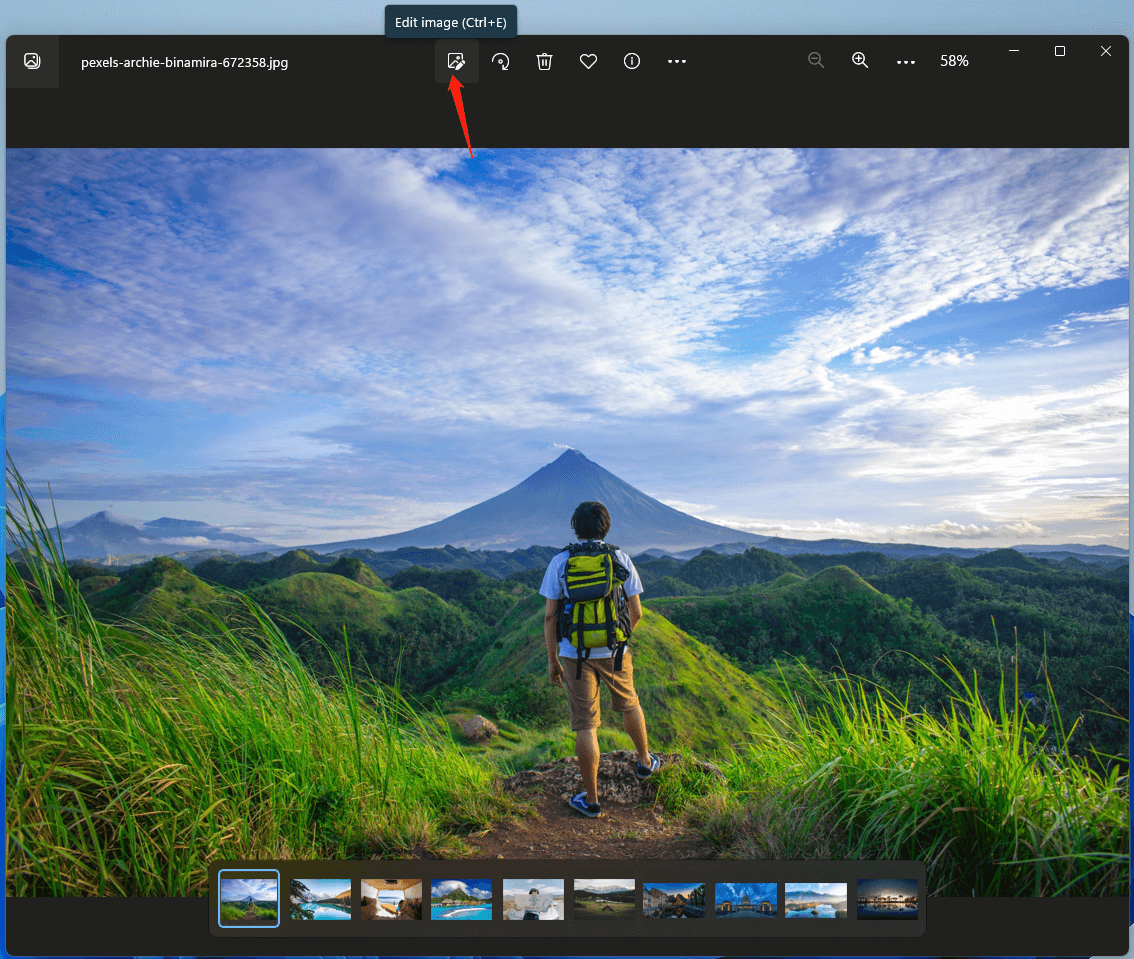
1. Right-click on the target photo and open it with the Photos app.
2. Click on the Edit image icon on the top menu.
3. On the next screen, under the crop tab, you can manually resize the image from eight directions.
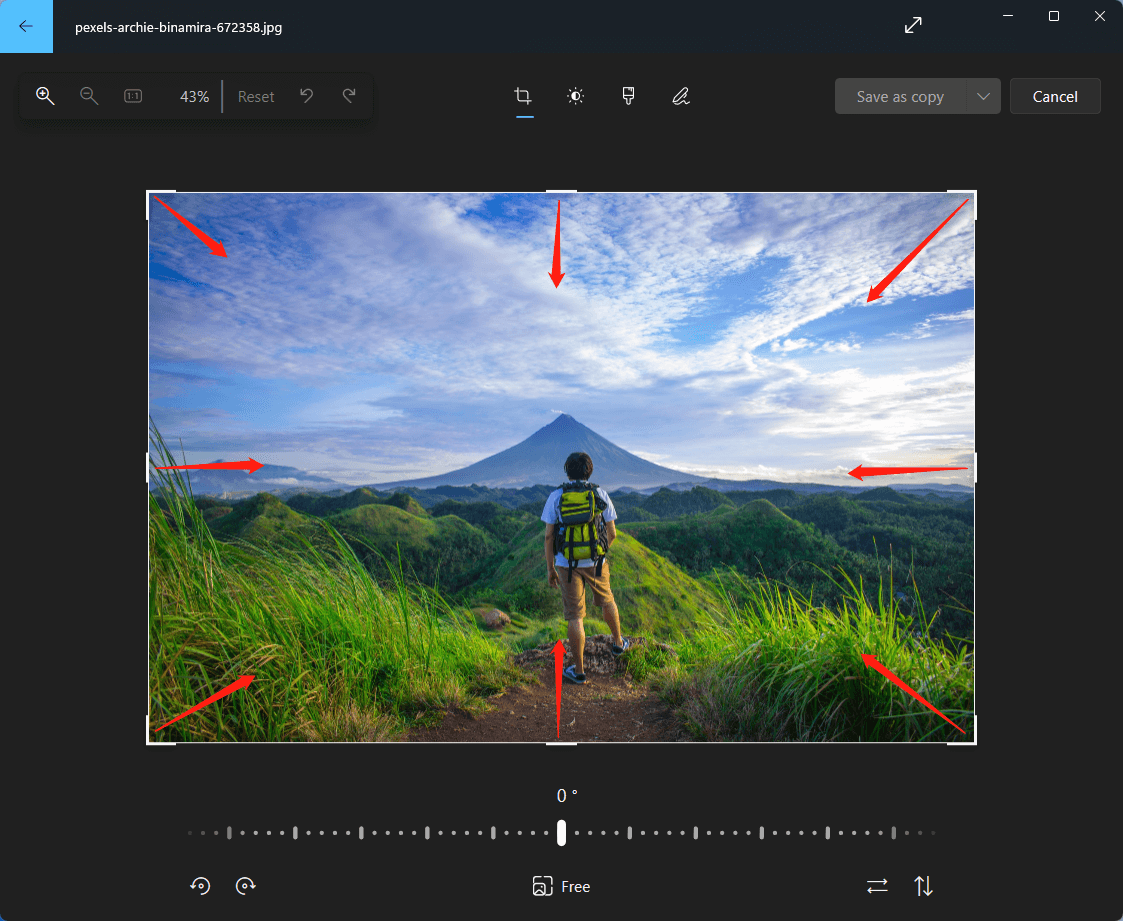
4. Or, click the Free option in the center at the bottom to select a preset aspect ratio.
5. Click the Save as copy button to save the cropped image separate from the original copy. Or, you can click on the down arrow behind Save as copy and choose Save to overwrite the original picture.
Microsoft released a new version of the Photos app for Windows 11 in October 2022, which integrates iCloud but excludes Video Editor, People, Albums, and Collection tools. If you need to use those utilities, you have to get the Microsoft Photos Legacy.
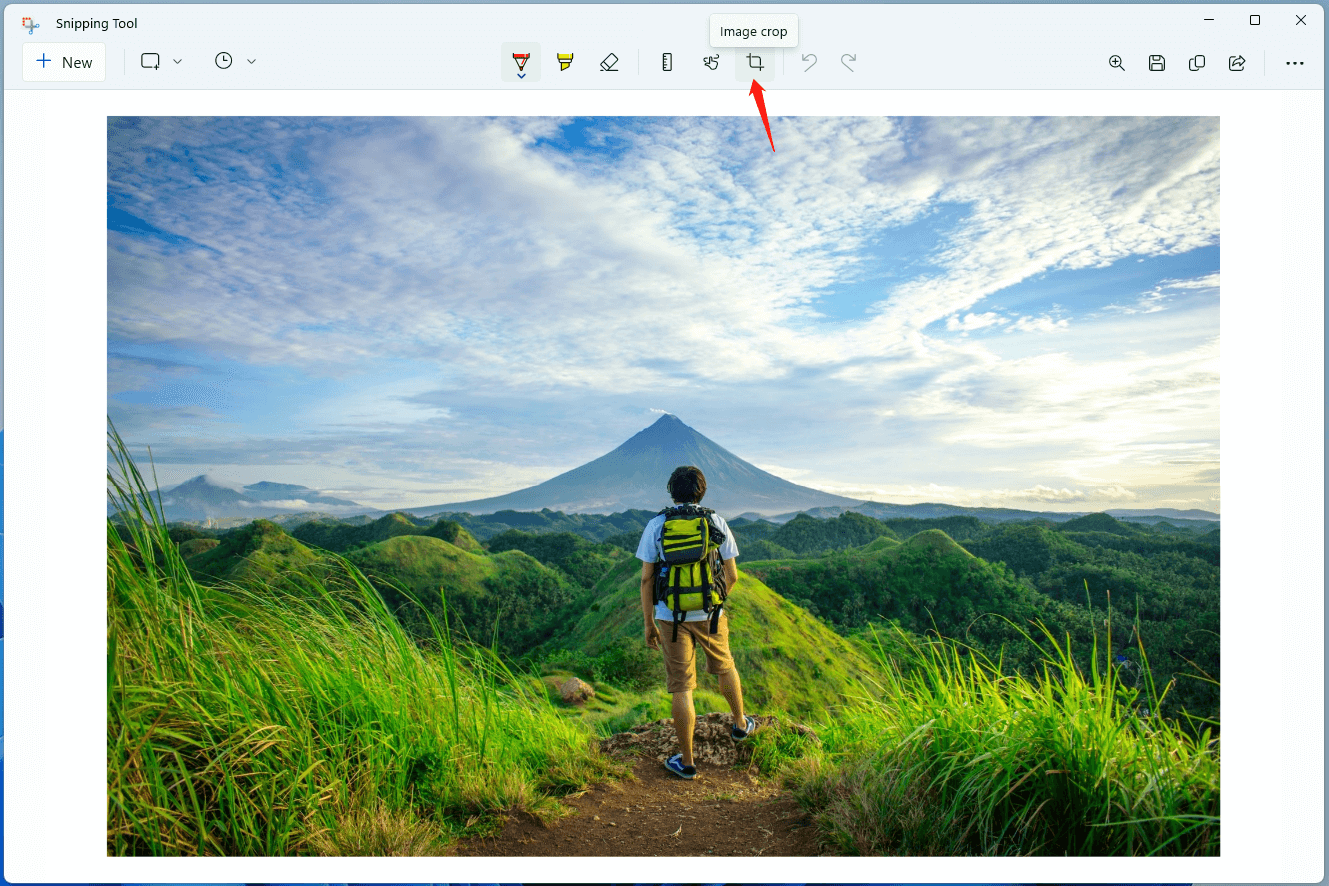
How to Crop Photo Windows 11 in Snipping Tool?
Thirdly, we will show you how to crop a picture on Windows 11 with the built-in Snipping Tool.
1. Open the target photo with Snipping Tool.
2. Click Image crop in the top menu.
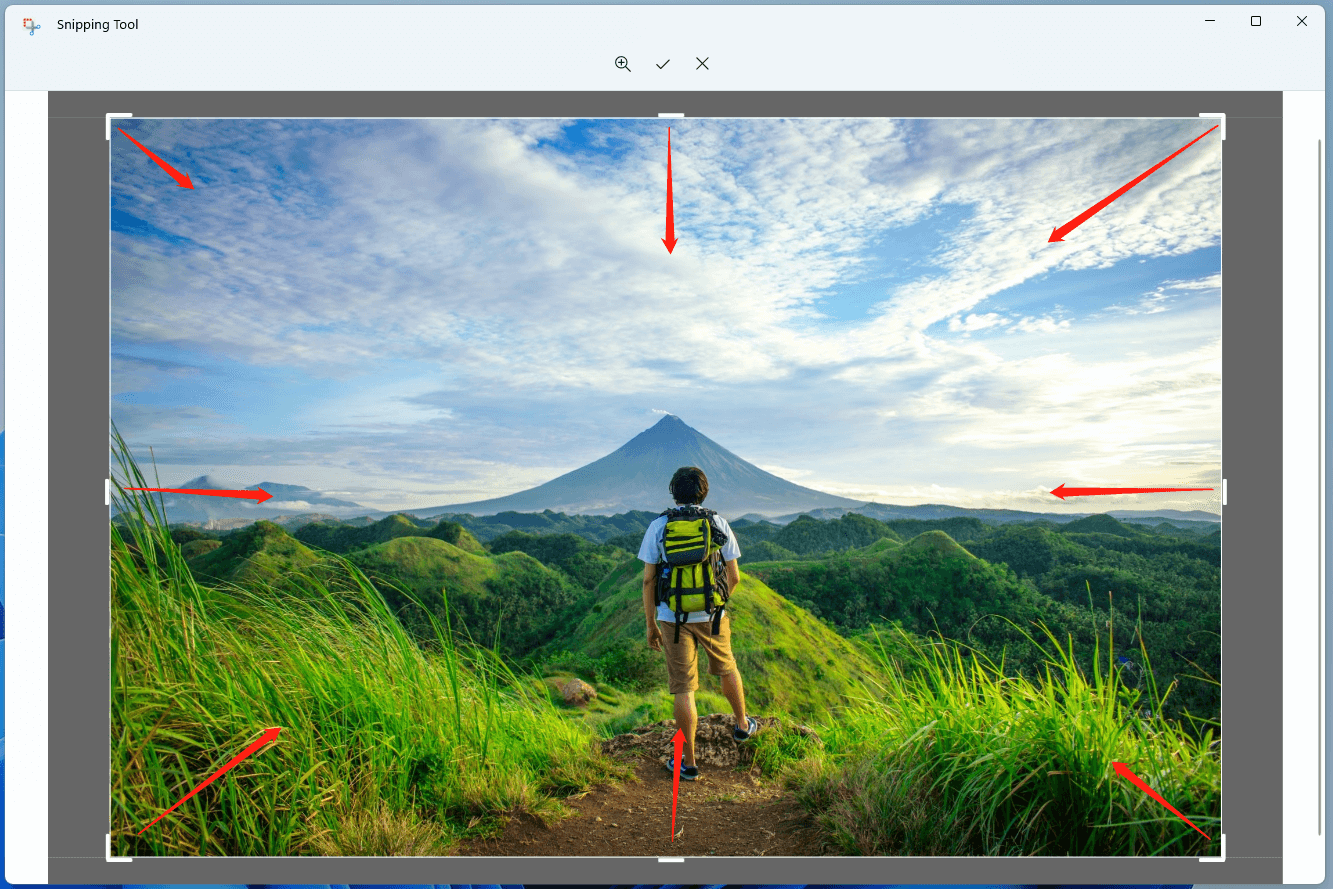
3. On the next screen, manually crop the target picture in 8 directions.
4. When you are done, click Apply on the top menu to save the crop.
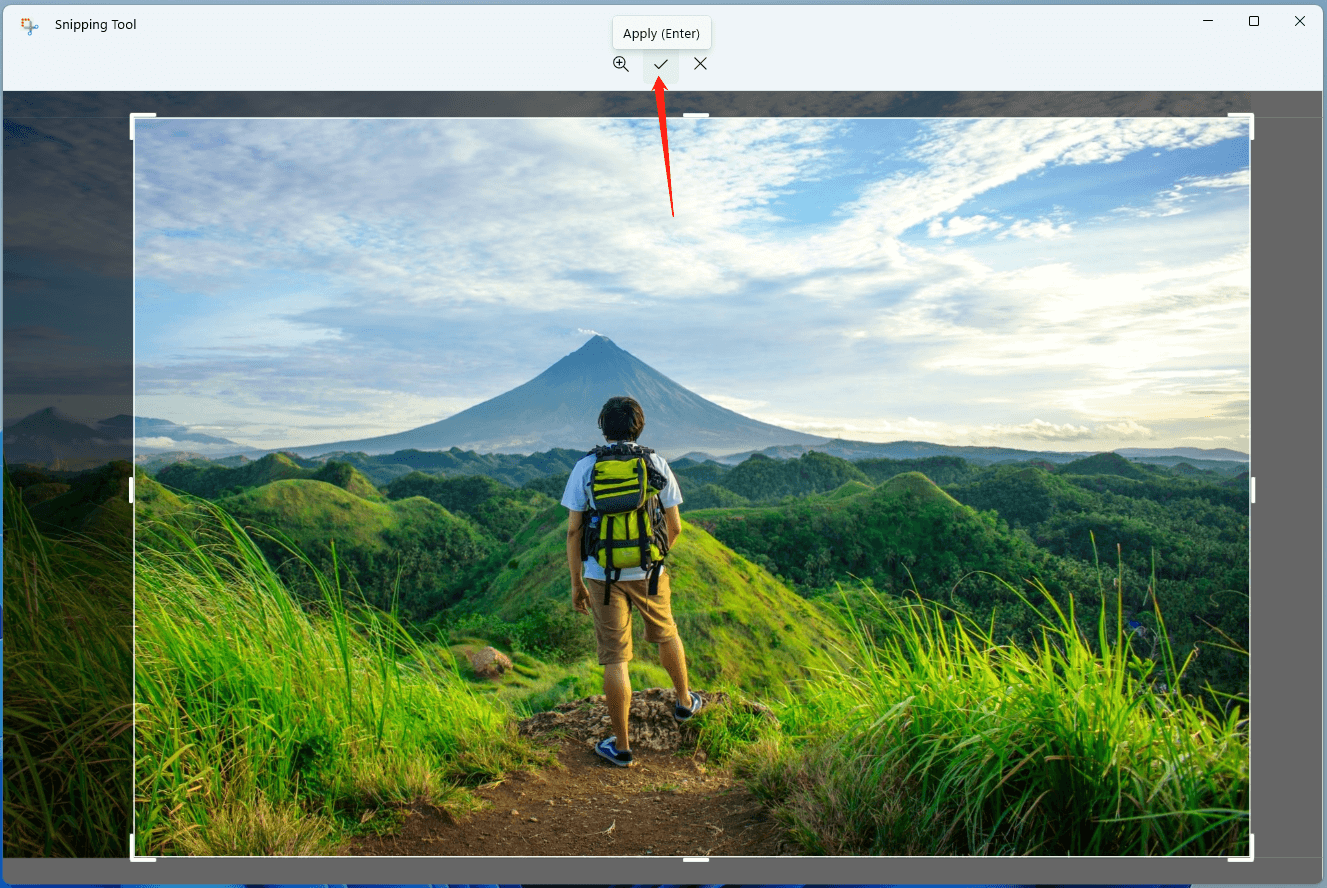
5. It will direct you back to the main interface of the tool. There, click Save as an icon on the upper right to save the cropped image.
How to Crop a Picture in Paint on Windows 11?
Next, let’s see Windows 11 photos crop within the Paint app.
1. Similarly, Open the target photo with Paint. If the original image is too large to display itself completely with the default 1:1 ratio, you can zoom out it in the bottom right. On the contrary, if the original picture is too small to edit, you can zoom in it.
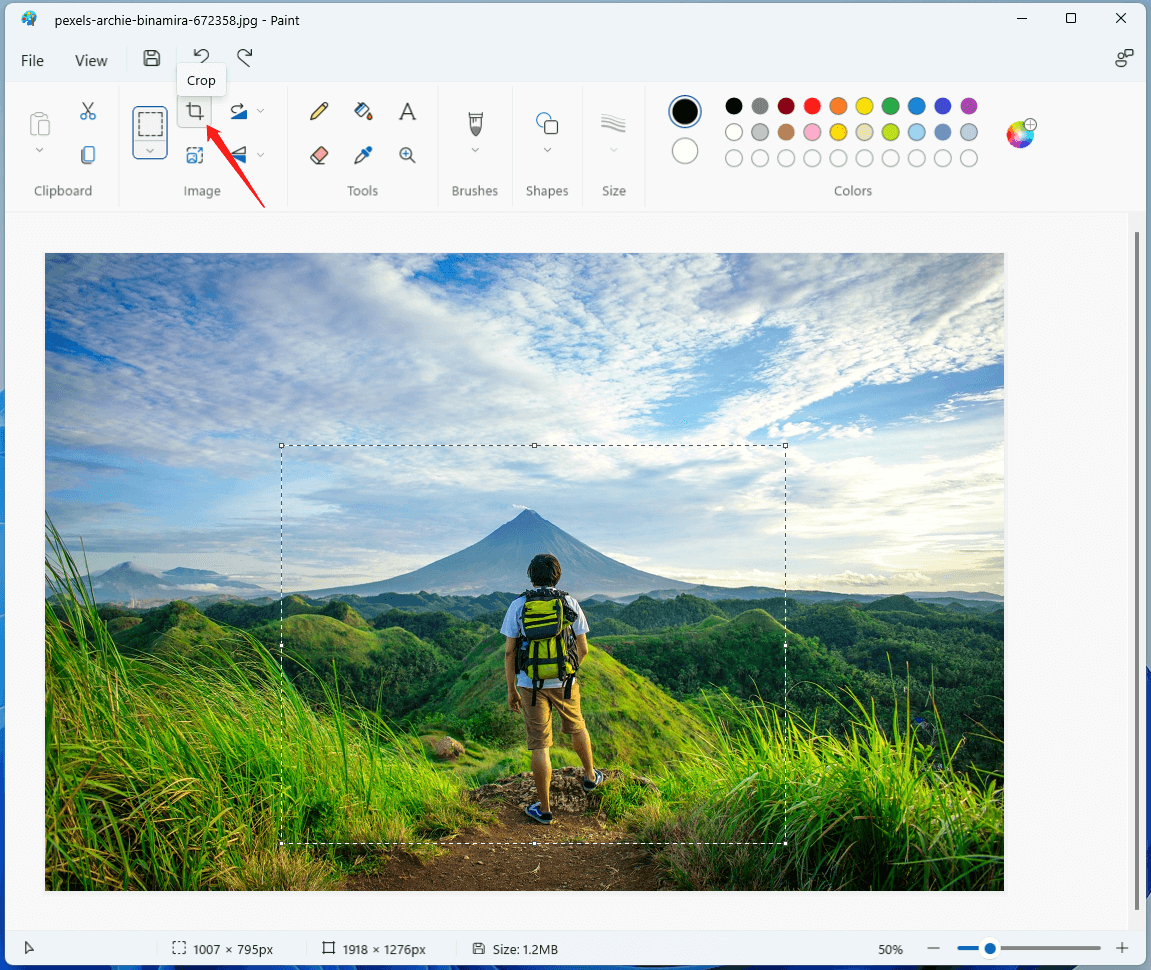
2. Click the Select icon in the toolbar and select a shape to crop the photo. Usually, we choose Rectangle.

3. Use your mouse to draw a rectangle within the image and make sure the wanted part is within the rectangle.
4. Click the Crop icon and the unwanted part will disappear.
5. Click File > Save as (Save) to save the cropped picture.
Or, without selecting a shape to frame out the wanted part, you can directly put your mouse on the little square on the east, south, or southeast and drag inwards. That will crop the left, bottom, or both areas of the photo.
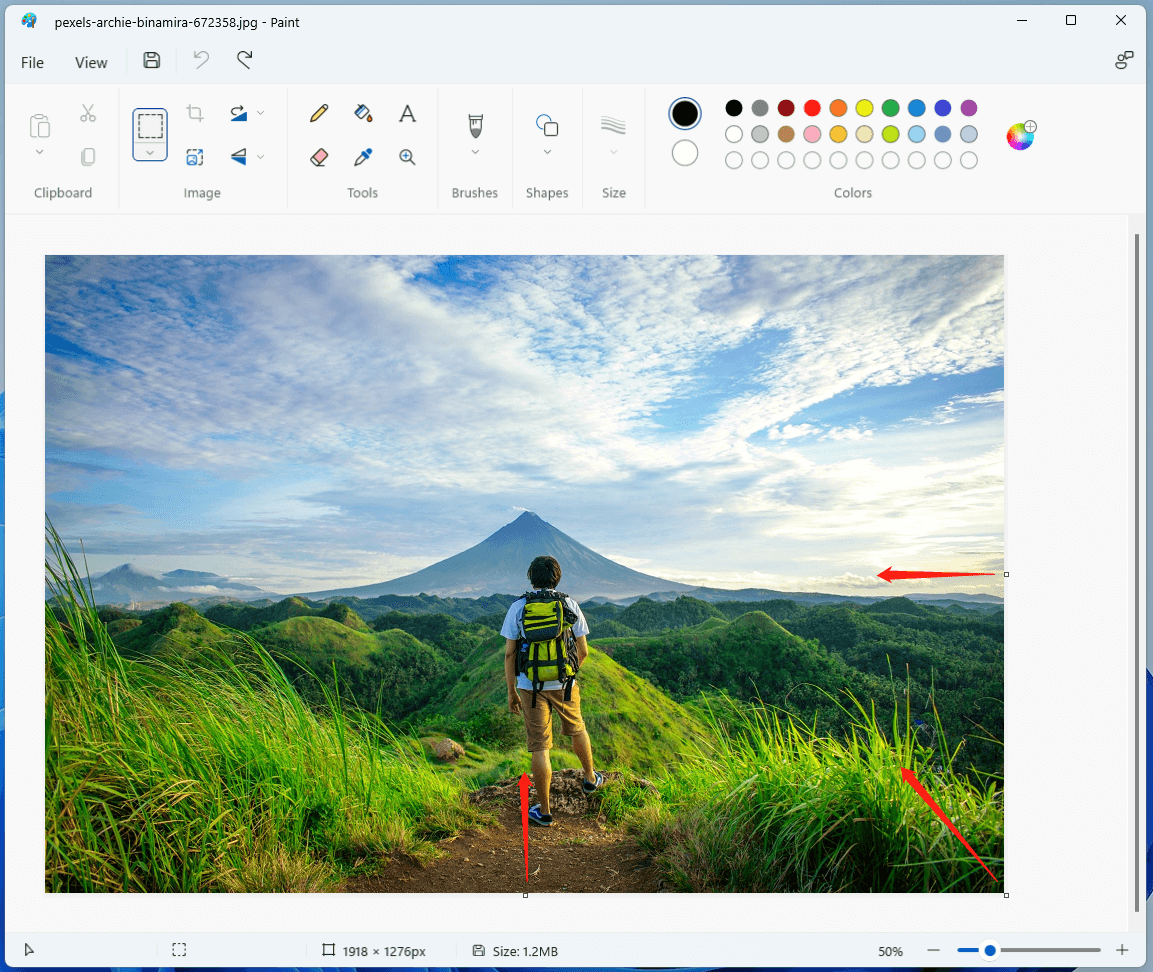
However, you can’t crop the top and left parts in the photo.
How to Crop Photo Online on Windows 11?
There are numerous free online crop photo tools. Here, we will introduce the Microsoft recommended one – Clipchamp.
1. Visit https://app.clipchamp.com/.
2. Sign in with your Microsoft account or another email.
3. Click Create a new video.
4. On the next screen, in Your media tab, click Add media to upload your photo.
5. Add the photo to the timeline and click on it to select it.
6. In the preview section, click the Crop icon.
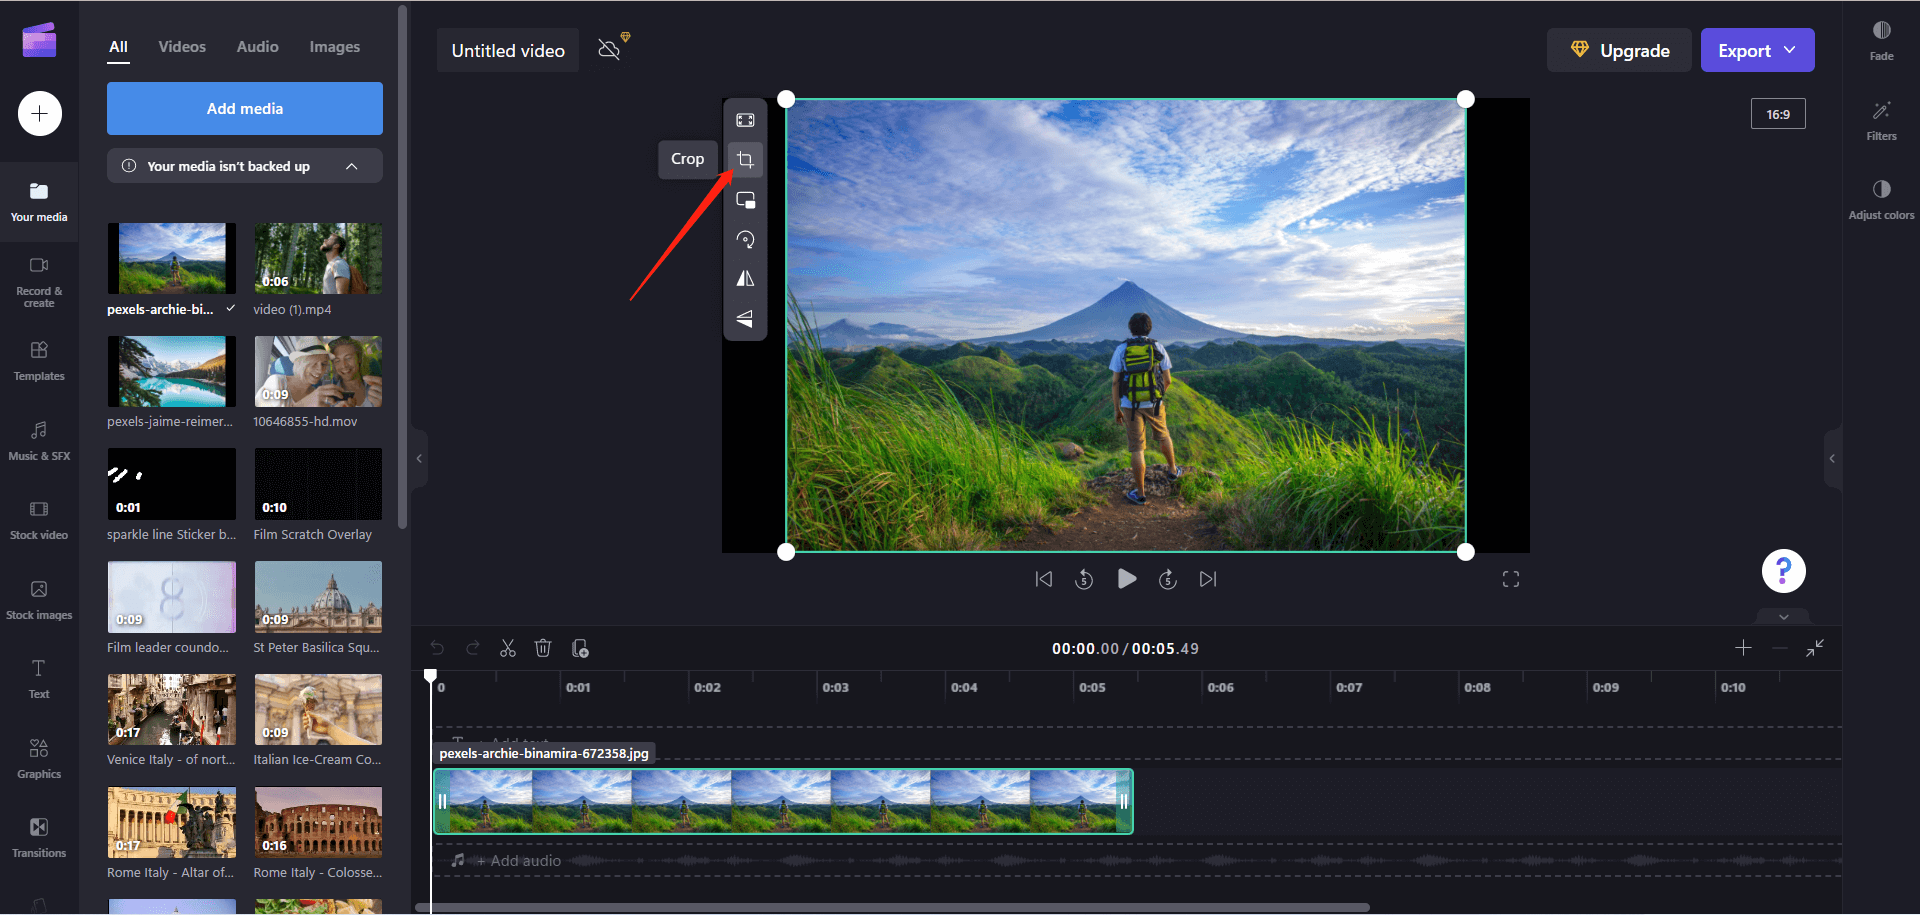
7. Then, you can manually crop the image in eight directions.
8. When it is done, click Done.
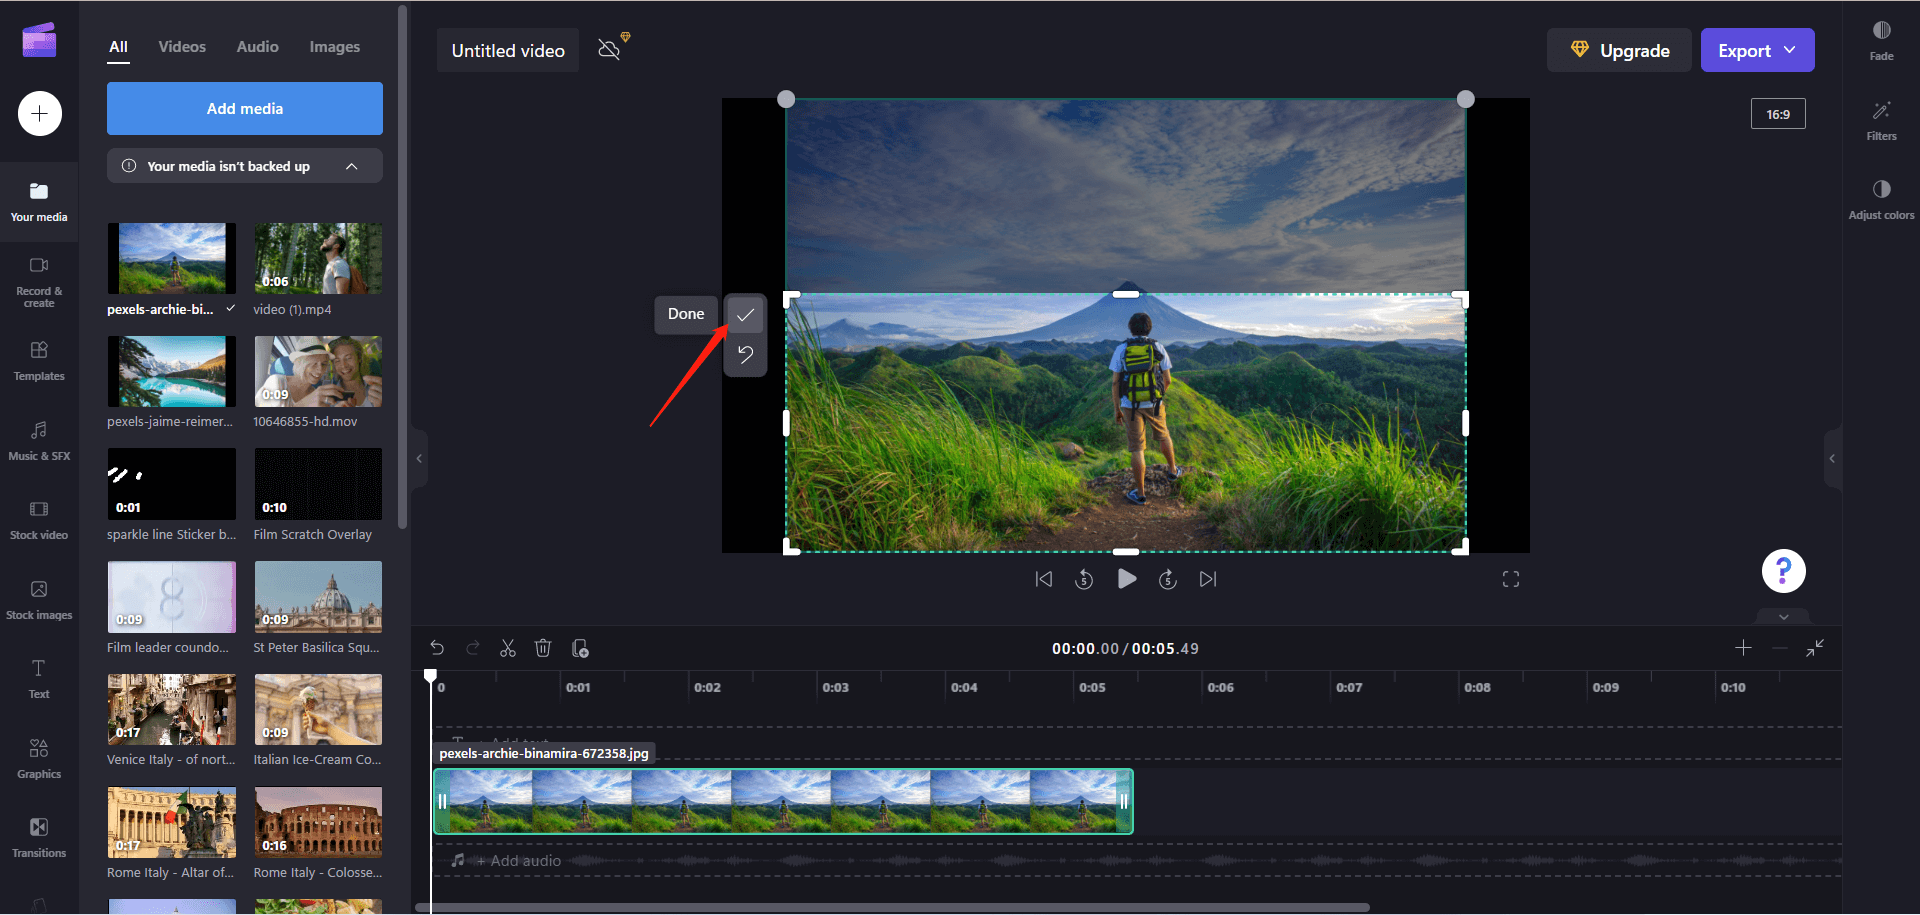
9. Click Export in the upper right to save the cropped photo in GIF format.
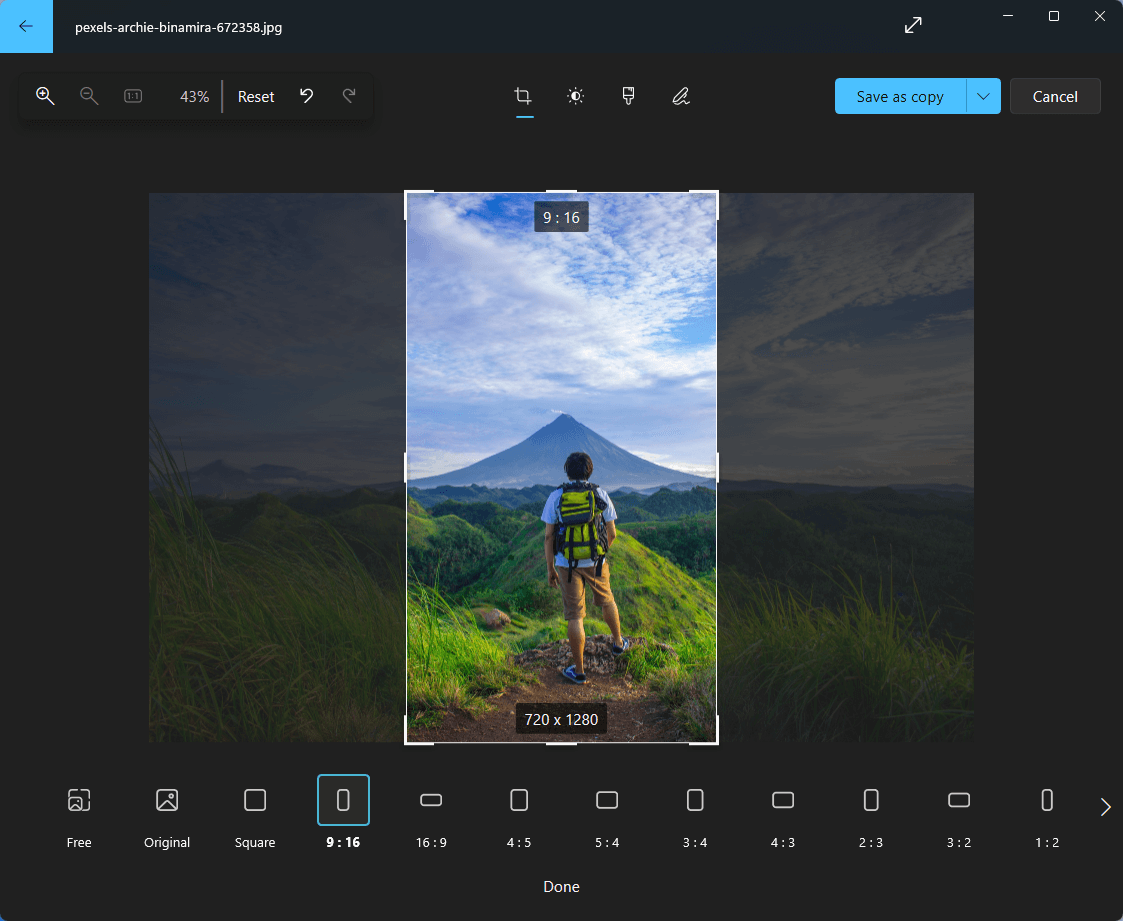
How to Crop a Photo in Microsoft Office Apps?
Finally, let’s discuss how to crop photos in Word, Excel, Outlook, etc. The following instruction is based on the Word application.
1. Put the target photo in the Word document.
2. Click on the image and click Picture Format on the top menu.
3. Select Crop or you can further choose Crop to Shape or Aspect Ratio.
4. Now, you can manually crop the picture in 8 directions.
5. Press Enter key or click on any other place to confirm the cropping.
6. Right-click on the cropped image and select Save as Picture to save it.
How to “Uncrop” a Photo?
Generally speaking, it’s not possible to “uncrop” a cropped photo unless the original one still exists or undo information exists. If a picture is cropped and saved without the original image or undo information, it can’t be recovered.
However, it is possible to artificially add a band around an image, synthetically “uncropping” it by taking advantage of texture synthesis. That is an effective way if the edge of the photo is a chaotic pattern or has low detail like water or cloud. Yet, the method doesn’t work if discernible objects are cut off at the boundary like half a house.
There is an uncrop plug-in for the GIMP photo editor.

Conclusion
This article provides altogether six solutions to crop photo Windows 11. If you encounter problems with one of the methods above, like Windows photos crop not saving or Windows photo crop not working, you can switch to the other ways.
Crop Photo Windows 11 FAQ
Firstly, Windows Live Photos Gallery is discontinued with Windows Essentials in 2017. Yet, you can still install it by installing Windows Essentials in Windows 11 as long as you can get an installation package.
Secondly, it seems the later versions of Photo Gallery have removed the crop feature. So, you can’t use it if you are using the later editions. If you are using an old version of Photo Gallery, you can quickly crop a photo following this guide.
- Open the target photo with Photo Gallery.
- Go to the Edit tab.
- Select the Crop utility on the top menu.
- Point your mouse at the dots. When the mouse turns into a double-headed arrow, drag the walls where you want to focus on the photo.
- Click Apply crop in the Crop utility drop-down options.
Windows Photo Viewer can’t crop a photo.
For hardware devices, you can crop a photo on a computer (desktop, laptop, notebook, etc.) or a mobile phone (iPhone or Android phone). For operating systems, you can crop photos in Windows 11/10/8/7/Vista/XP, macOS, iOS, iPadOS, Android, ChromeOS, and Linux.
In Windows OSes, you can crop photos in apps and services including Microsoft Photos, Paint, Snipping Tool, Word, Clipchamp, as well as third-party photos crop software like MiniTool MovieMaker.
![[2 Ways] How to Crop Someone out of a Photo by Photoshop/Fotor?](https://images.minitool.com/moviemaker.minitool.com/images/uploads/2022/11/crop-someone-out-of-a-photo-thumbnail.jpg)
Also read:
- [Look] How to Crop a Picture on TikTok & Photo Crop Challenge
- [Guides] How to Crop a Photo in Photoshop and Photoshop Element?
- [Step-by-Step] How to Crop Someone into a Photo by Photoshop?
- How to Crop Photos for Instagram & Why Does Instagram Crop Photos
- How to Transfer Photos from Camera to Computer Windows 11/10?
About The Author

Position: Columnist
Helen is a tech writer with over 10 years of experience. She specializes in creating easy-to-follow guides for video editing, media file conversion, and computer performance. Helen doesn't just write—she tests every software herself and listens to feedback from users and experts. Her goal is to make complex programs simple so that everyone can solve their tech problems with confidence.
User Comments :