GIMP, a widely-used image editor, absolutely lets you crop pictures. How to crop in GIMP? How to crop images in gimp? Don’t worry, this post will give you a step-by-step guide. And if you want to create amazing videos or slideshows with images, try MiniTool MovieMaker and it can meet your needs.
In the previous posts, you’ve learned what is GIMP and how to resize an image in gimp. Today’s post will show you how to crop in gimp. There are 2 methods to crop images in GIMP: using the Crop tool or the Selection tool.
How to Crop in GIMP Using the Crop Tool?
Here’s the guide on how to crop an image in gimp.
Step 1. Launch the GIMP. If you haven’t installed GIMP, just download GIMP first.
Step 2. In the menu bar, select the File > Open to locate the target folder, then choose the desired image and click the Open to upload this image you want to crop.
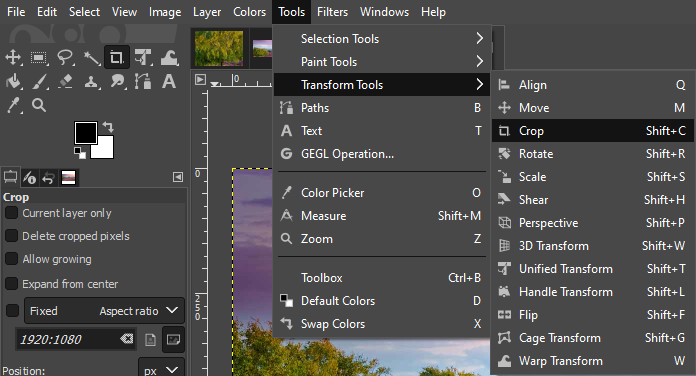
Step 3. Click the Crop tool icon or tap on the Tools > Transform Tools > Crop to activate this tool.
Step 4. Drag the mouse to draw a rectangle around the region of the image you want to keep. The dark area outside the rectangle will be removed.
Step 5. Move the mouse to adjust the cropping region as you wish.
Step 6. Double-click in the dark area or tap the Enter key on the keyboard to crop the image.
Step 7. Hit the File > Save to save this cropped image.
Also read: How to Add Text to Photo
How to Crop in GIMP Using the Rectangle Select Tool?
Step 1. Open the GIMP and click the File > Open to open the image.
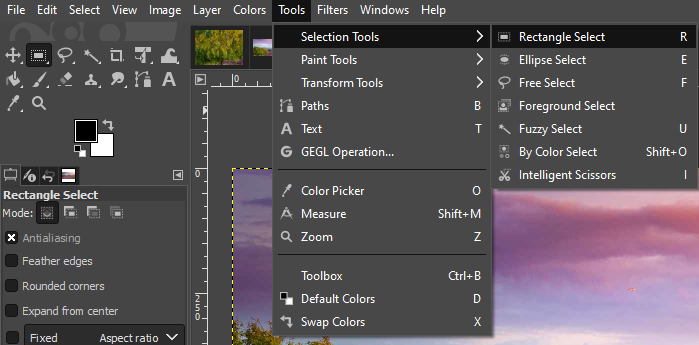
Step 2. Select the Rectangle Select Tool icon or click the Tools > Selection Tools > Rectangle Select.
Step 3. Drag the mouse and highlight a region the same way as the Crop Tool, and then adjust the selection area.
Step 4. When you’re happy with the selection to crop, click the Image and select the Crop to Selection.
Step 5. Tap the File > Save to save this edited image on your PC.

Bonus – How to Rotate an Image in GIMP?
Now, you’ve learned 2 methods on how to how to crop images in gimp. Apart from this, GIMP can let you rotate images. How to rotate an image in GIMP? Here are the steps.
Step 1. Run the GIMP and tap the File > Open to choose an image.
Step 2. Select the Tools > Transform Tools > Rotate to get the Rotate dialog.
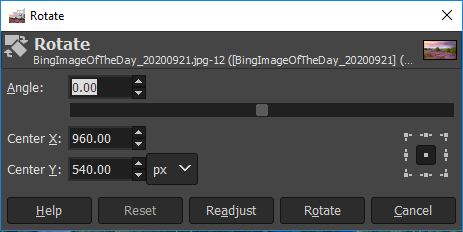
Step 3. In the Rotate dialog, enter the value you want, and then click the Rotate to rotate this image.
Step 4. Click the File > Save to save this image.

Conclusion
How to crop in GIMP? It’s very easy, isn’t it? This post shows you how to crop an image in GIMP and how to rotate an image in GIMP. Follow these instructions and try to crop or rotate your images using the GIMP image editing software!
About The Author

Position: Columnist
Cora is a tech writer specializing in digital media workflows, with over six years of hands-on experience in video post-production, media transcoding, and screen capture. Her writing is always clear and practical. Cora also produces in-depth software reviews for users across skill levels to help them find the right tool and enjoy video editing.
User Comments :