After taking many beautiful photos using your camera, you will probably need to put them on your computer for further editing. To achieve that, first of all, you need to know the way to migrate photos from camera to Windows OS, especially the latest Windows 11.
How to Transfer Photos from Camera to Computer Windows 11?
You can import photos and videos that are saved on camera SD cards, USB drives, mobile phones, or other removable devices to your PC. The following takes downloading photos from camera to computer for example to show you the process.
Way 1. Directly Move Photos from the Camera to the Computer
Firstly, you can make use of the copy & paste utility in Windows to help you transfer pictures from the camera to your computer.
Step 1. Connect the camera SD card to your PC taking advantage of a USB cable.
Step 2. Go to File Explorer to find your SD card.
Step 3. Visit the SD card and copy the photos you want to add to the PC.
Step 4. Move to the destination location on your computer where you’d like to put the copied pictures and paste those pics there.
Way 2. Import Photos from Camera to PC By Photos App
Secondly, you can rely on the Microsoft Photos application to import images from an SD card to the desktop.
1. Still, connect the SD card to your device via USB wire.
2. Open the Microsoft Photos app.
3. Click the Import option from the right part of the top menu in the Photos app and select your SD card.
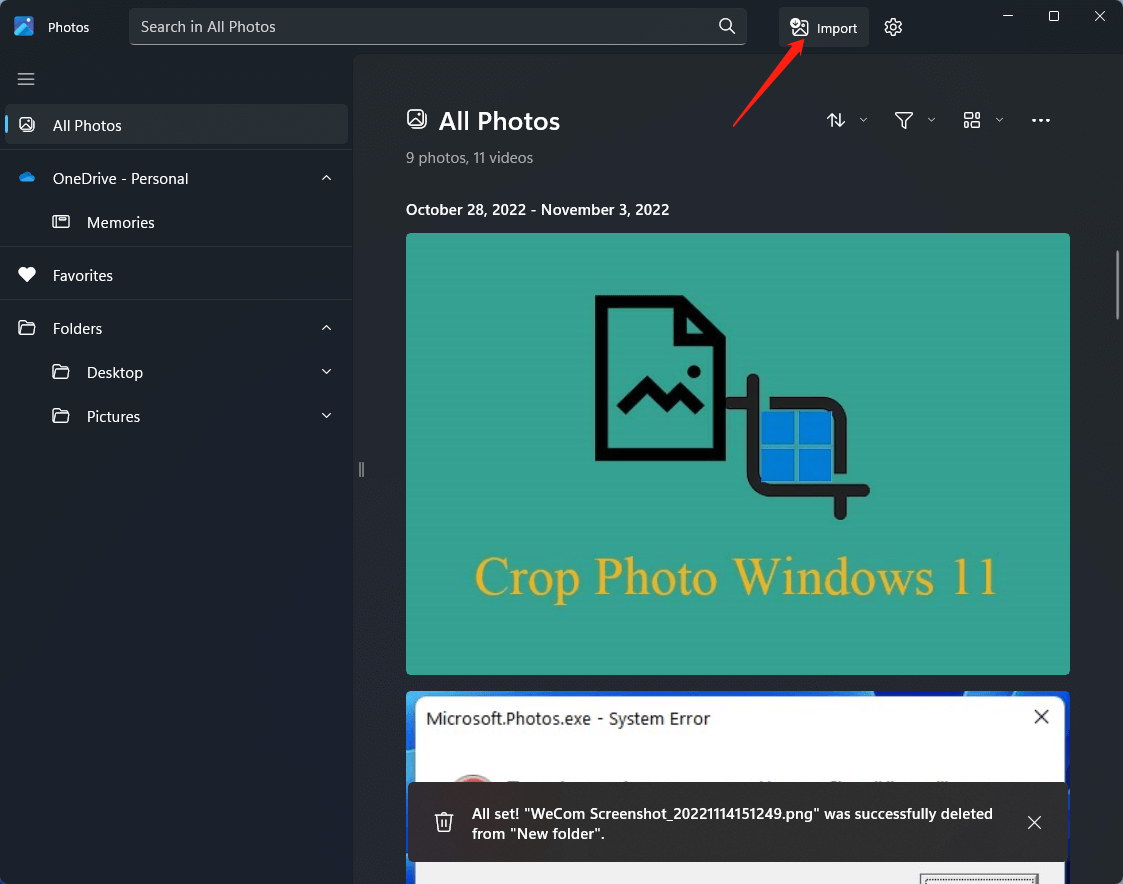
4. Check all the photos that you want to import to Windows 11 and click Add xx items.

5. Then, click Import to start the process. You can alter the destination by clicking Change. Then, browse and pick a folder on your computer, click Confirm, and finally click Import.
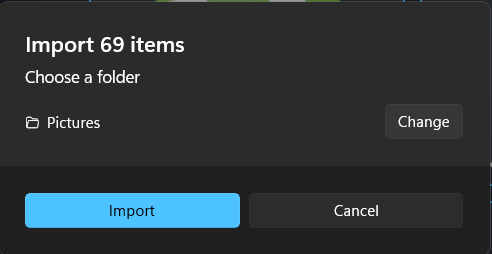
Wait until the process finishes. Then, the imported items will automatically be stored on your computer.
How to Transfer Photos from Camera to Computer Windows 10?
In addition to the above methods, there are some other solutions that are popular in Windows 10.
For example, you are able to make use of the Windows built-in tool to import photos from a camera Windows 10.
1. Directly connect your camera to the computer with a USB cable.
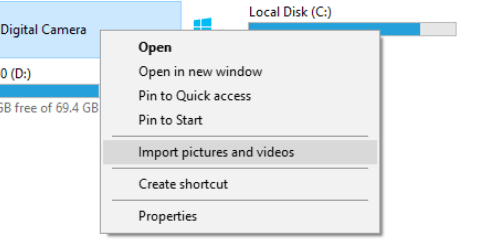
2. Navigate to This PC in Windows File Explorer. There, right-click on your camera and choose Import pictures and videos.
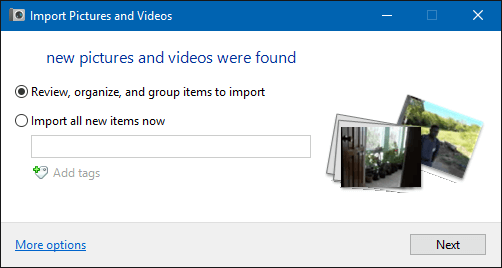
3. The Import Pictures and Videos window will pop up. Just click Next. If you would like to specify where the imported pictures and videos are stored, click More options in the bottom left to change.
4. Select the groups of photos you want to import.
5. Click Import.
Wait for the success. During the process, you can tick “Erase after importing” to wipe out the original copies from your camera to free up storage space after the media files are successfully transferred to your computer.
Also read:
- [2 Ways] How to Find/Delete/Remove Duplicate Photos Windows 11?
- [3 Ways] How to Transfer Photos from Windows 11 to USB Stick?
- Import Photos/Videos from iPhone/iPad/iPod to Windows 11
- [2 Ways] How to Tag Photos in Windows 11 with Photo Tagger?
- Crop Photo Windows 11 by MovieMaker/Photos/Paint/Snipping Tool…


User Comments :