To change the outline of a photo to make it a special shape such as a circle or a rounded rectangle, you can make use of the Crop to Shape feature on the ribbon of the Microsoft Office apps like Word, Excel, PowerPoint, and Outlook.
This article will take the Word app for example to show you how to crop a photo in a circle in Windows 11/10.
How to Crop Photo into Circle Using Crop Feature?
You are able to the shape of a photo through cropping. It will be automatically trimmed to fill the geometry of the chosen shape while keeping its proportions.
1. Put the target photo into a Word document.
2. Click on the image to select it. Then, select Picture Format in the ribbon.
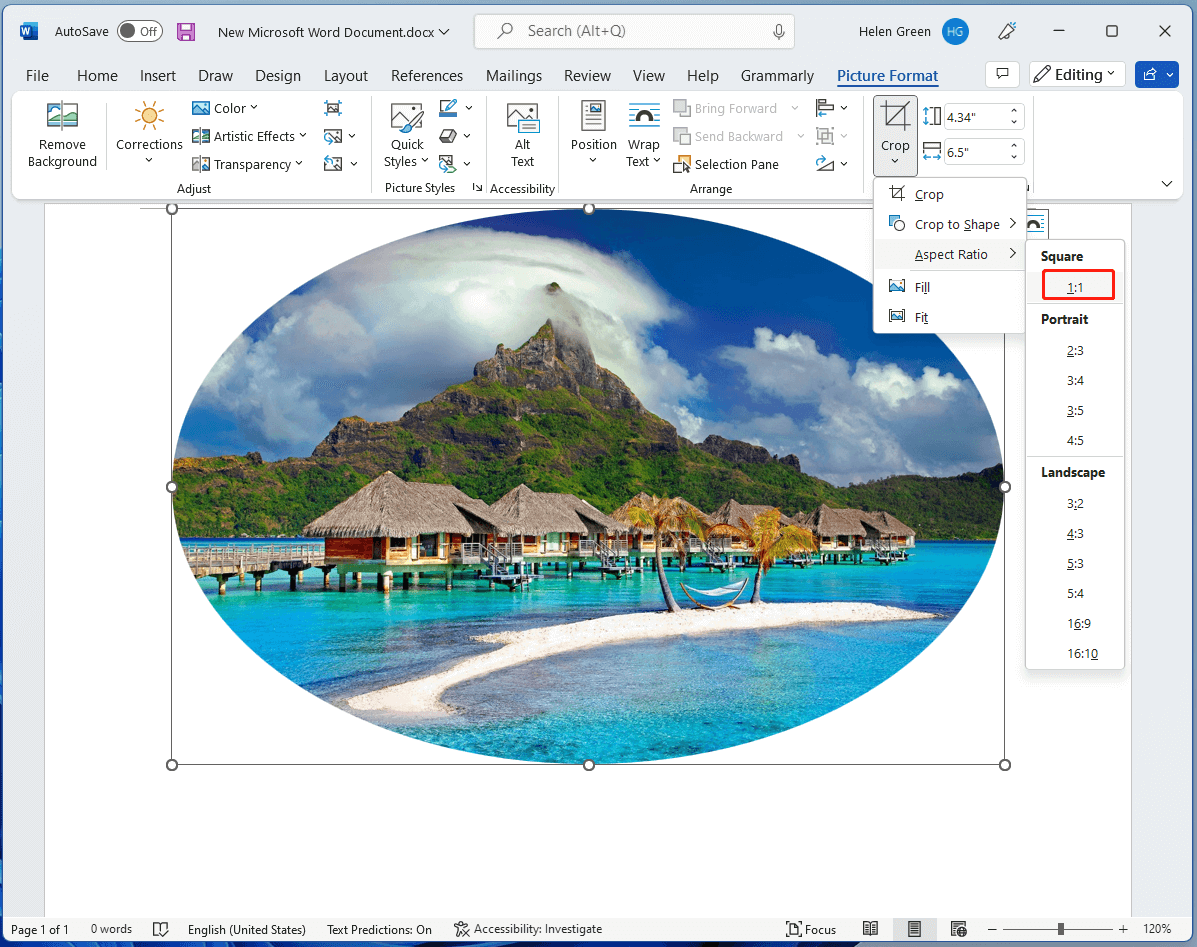
3. Next, in the Size section in the right part of the ribbon, navigate to Crop > Crop to Shape and select Oval under the Basic Shapes category.

4. Now, you get an oval-shaped photo. To make it a standard circle, just go to Crop > Aspect Ratio and choose 1:1 (Square).
5. You can manage the position of the picture within the frame by selecting it and dragging it where you want.
6. Click the Crop option again or click on the blank space in the text area to crop off the extra parts.
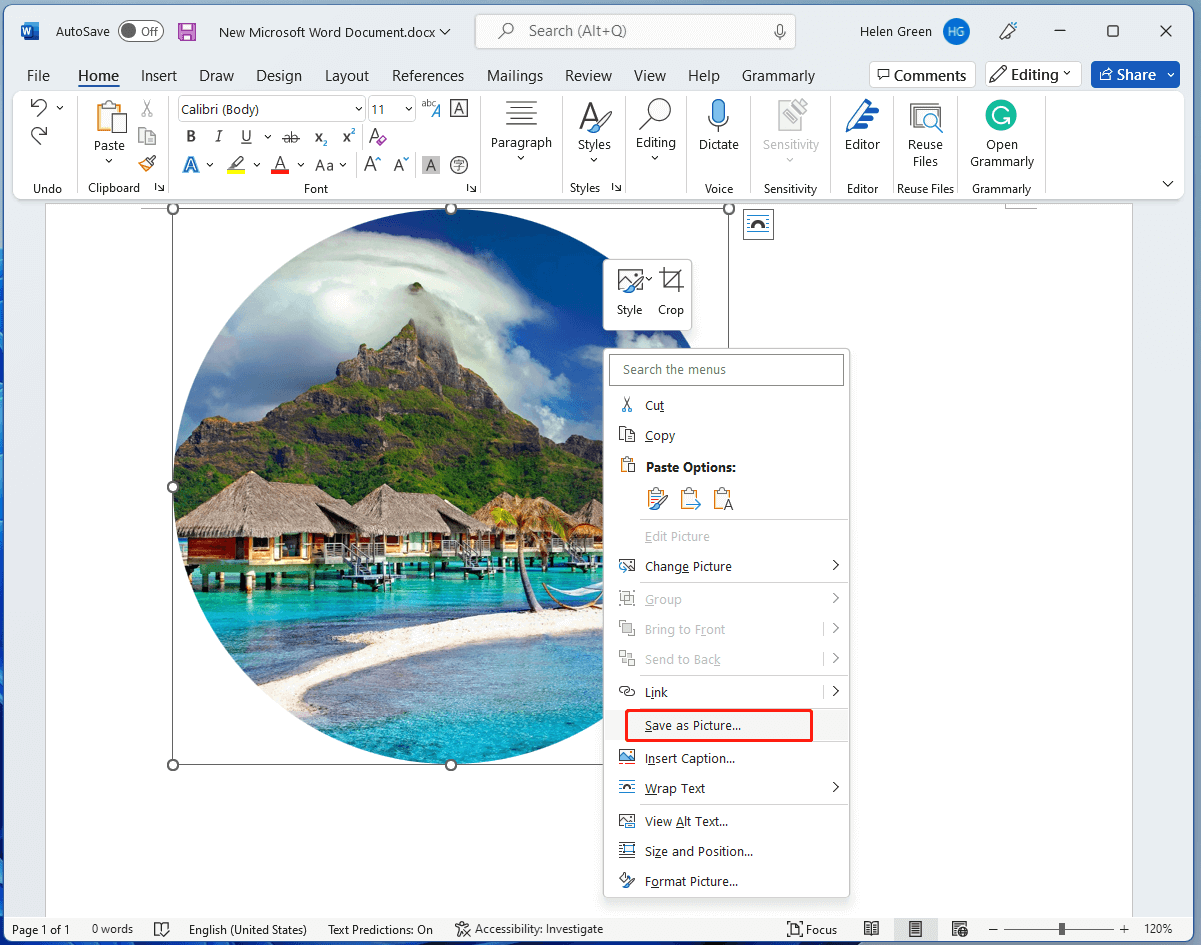
7. Right-click on the rounded photo and select Save as Picture… to save the cropped photo.
Besides, there are some other useful options under the Crop utility.
- Fill: Fills the entire shape with the photo. Some outer edges of the picture may be trimmed off. There will not have any empty space at the margins of the shape.
- Fit: Makes the whole image fit within the shape while maintaining the photo’s original aspect ratio. There may be some empty space at the margins of the shape.
Upon this time, the black crop handles appear on the edges and corners of the photo when you select the Fill or Fit option. You can crop the margins of the photo by taking advantage of the black crop handle.
- To crop one side: Drag inward on the side cropping handle.
- To crop two adjacent sides at the same time: Drag inward on the corner cropping handle.
- To crop equally on two parallel sides at once: Press and hold the Ctrl key on your keyboard while dragging inward on the side cropping handle.
How to Crop a Photo into a Circle by Adding Shape?
On the contrary, you can first create a circle shape and then put your photo into the circle to crop it.
1. Move to Insert > Shapes in the ribbon and select Oval shape.
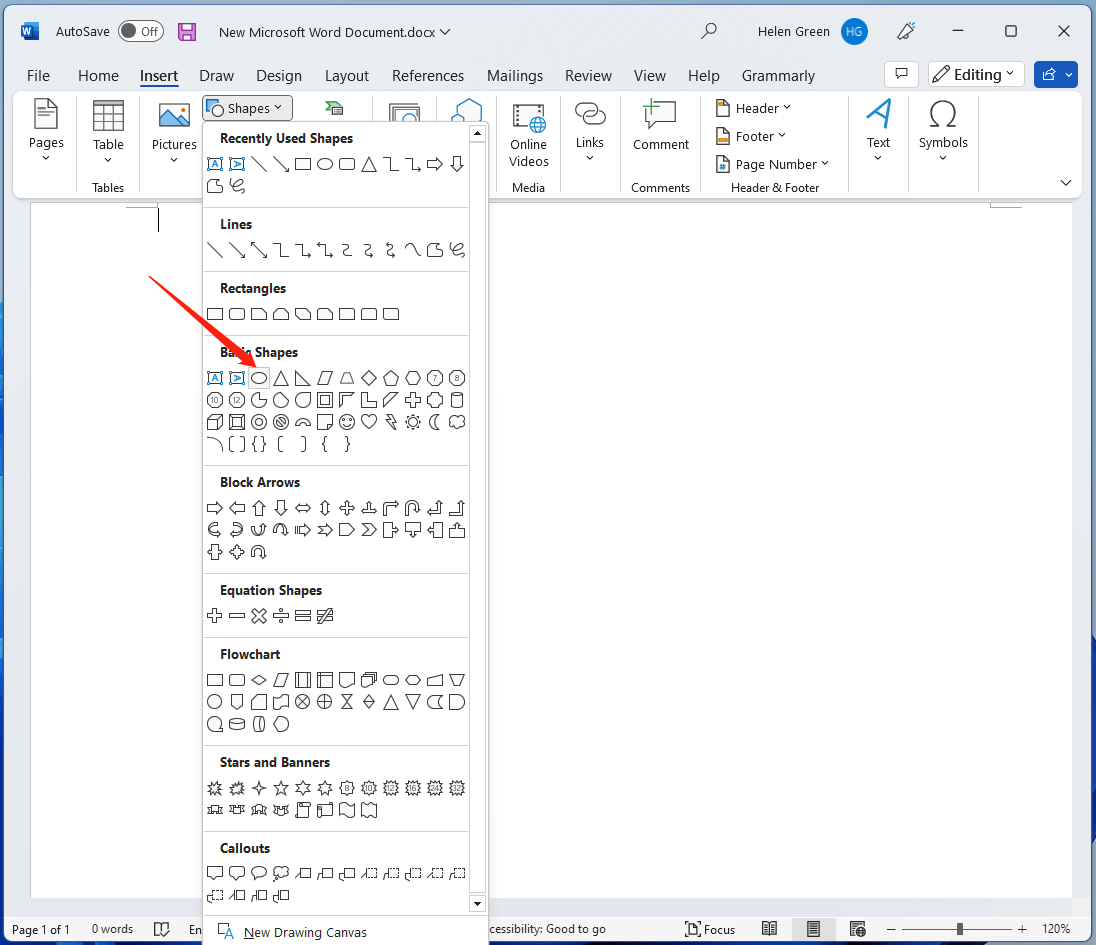
2. Manually draw an oval shape in the text area. Try your best to make it reach the size of your wanted circle.
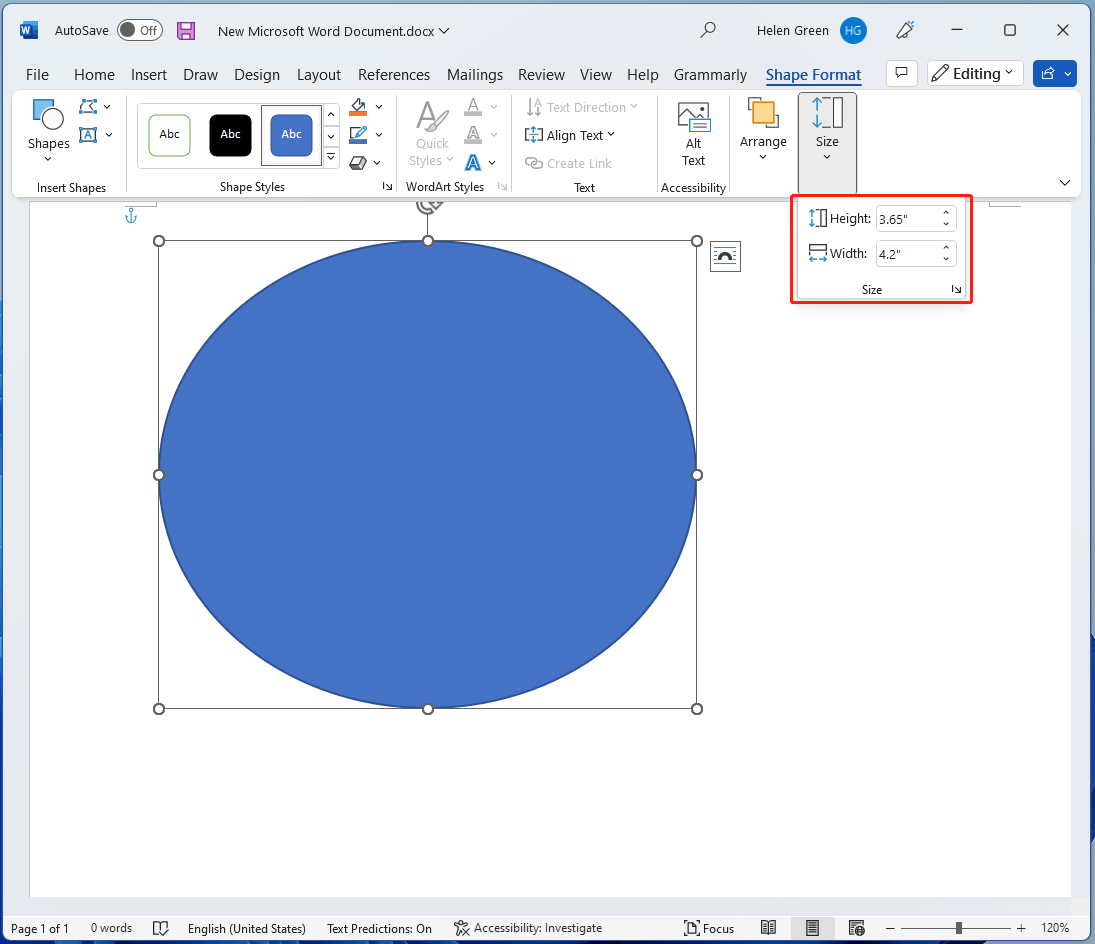
3. Then, you will be directed to the Shape Format tab. There, go to the Size section and make the Height and Width the same. Then, the oval will turn into a standard circle.
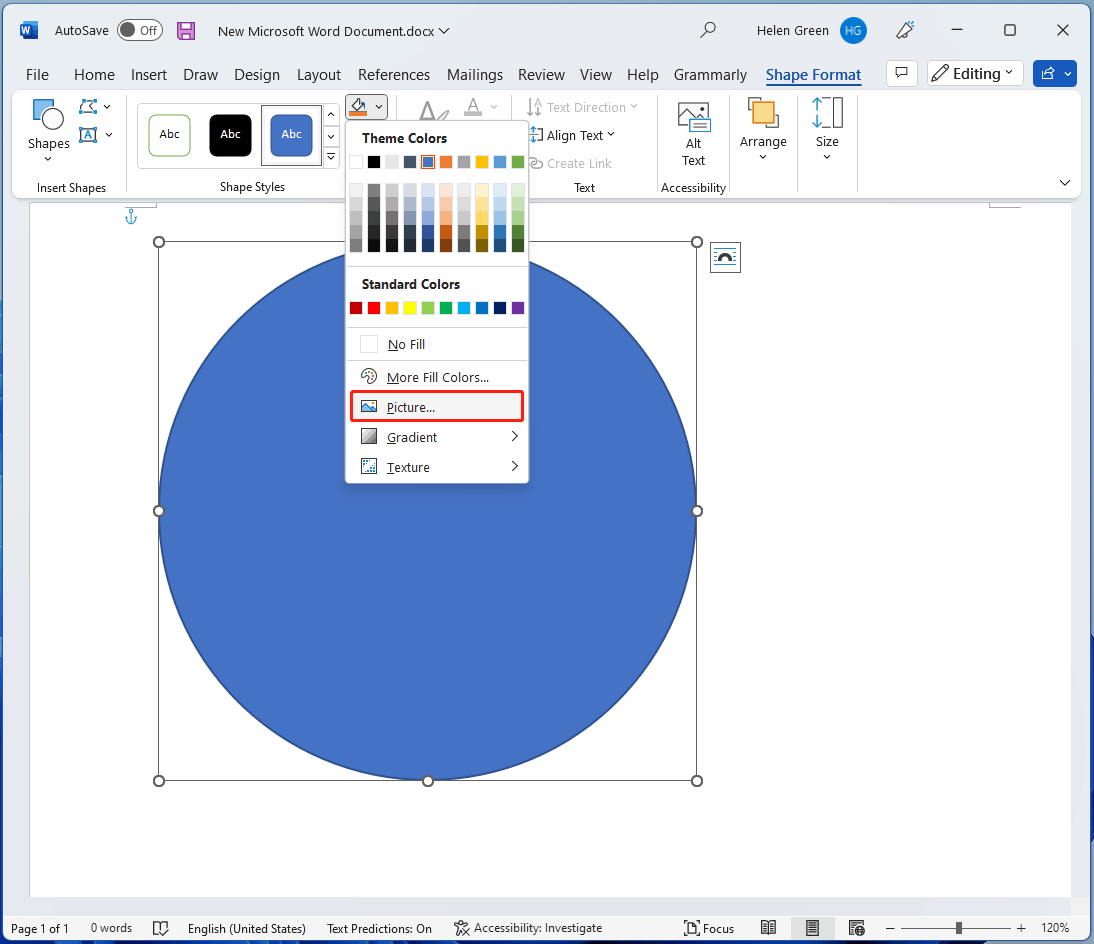
4. Next, in the Shape Style section, click Shape Fill and choose Picture… to select your target photo. Immediately, you will see your photo in the Word text and it is cropped to match the circle shape.
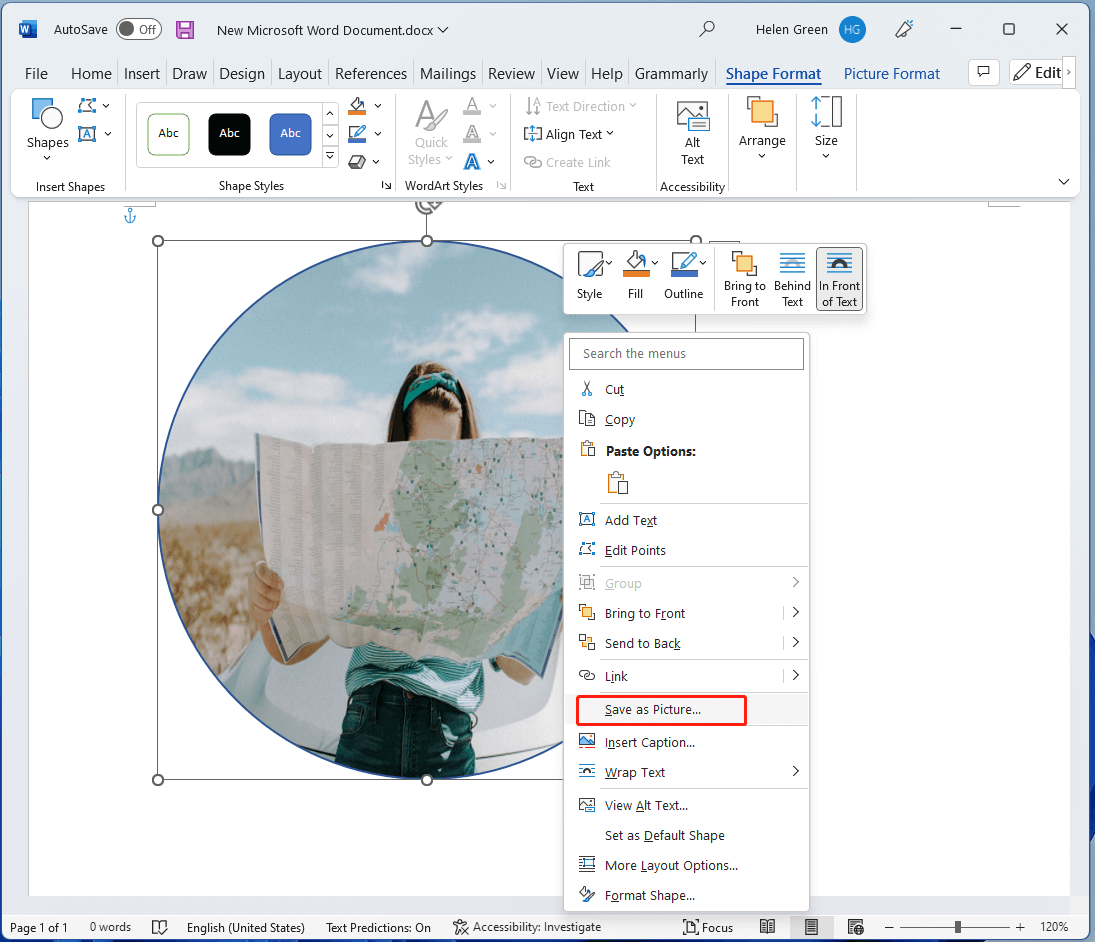
5. Right-click on the circle picture and select Save as Picture.
Conclusion
Now, you must have learned how to crop picture circle Windows 10/11! Isn’t it easy and useful? Next time, when you want to circle crop photo or crop image into other shapes, don’t forget Microsoft Office apps, which is right at hand!
Also read:
- [Look] How to Crop a Picture on TikTok & Photo Crop Challenge
- [Guides] How to Crop a Photo in Photoshop and Photoshop Element?
- [Step-by-Step] How to Crop Someone into a Photo by Photoshop?
- [2 Ways] How to Crop Someone out of a Photo by Photoshop/Fotor?
- Crop Photo Windows 11 by MovieMaker/Photos/Paint/Snipping Tool…


User Comments :