Instructional videos are an excellent way to teach complex tasks, provide training, or demonstrate software use. With screen recording, you can visually guide your audience through each step of the process. Here’s a guide from a Windows video editing software – MiniTool MovieMaker, which focuses on how to make an instructional video with screen recording.
What Is an Instructional Video?
An instructional video is a visual tool that aims to teach viewers how to do something or explain a concept, subject, or process. These videos often include videos, photos, visual effects, text, screen recording, and audio to make the content easy to understand. They may also feature graphics, animations, and on-screen annotations to emphasize key points and important information.
Instructional videos can cover a wide range of topics and can be used in various fields such as education, business, technology, and more. They can help people learn new skills, understand complex concepts, or follow step-by-step tutorials. Whether you’re a teacher, trainer, or content creator, instructional videos are a powerful way to convey knowledge effectively.
A screen-recorded instructional video is a tutorial that captures your computer screen, your webcam, your audio, and your mouse cursor, and shows them in your video. This way, you can show your viewers exactly what you are doing and how to do it.
Types of Instructional Video with Screen Recording
Instructional videos with screen recording can be categorized into several types, each serving a unique purpose and audience. Here are some of the most common types:
#Tutorial Videos
Tutorial videos provide step-by-step instructions on how to do something specific, such as using a software feature or completing a digital task. This is suitable for tasks with a certain degree of difficulty.
#Training Videos
Training videos are often used to introduce new employees to company procedures or train existing employees on new processes or policies. They ensure every employee gets the same instruction, which makes them ideal for remote teams.
#Product Demos
If you have a digital product, screen recording will be the primary form of the demo. A product demo video is created to showcase how a product works, highlighting its features and benefits through screen recordings. This type of video is often used in sales pitches, added to the Help section of a website, or shared internally for training purposes.
#Presentation Videos
Presentation videos typically use slides or other visual aids along with screen recordings and voiceovers to explain a concept or present some information.
#Screencast Videos
A screencast is a digital video recording of a computer screen, often accompanied by voiceover narration. It is used to demonstrate the process happening on the screen.
#Explainer Videos
Explainer videos focus on explaining concepts or topics in a clear and concise way. They combine visuals (including screen recording) with concise explanations, which are great for more complex processes.
How to Make an Instructional Video with Screen Recording
Now that you have a basic understanding of instructional videos, would you like to know how to create one? Here is a comprehensive guide on how to make instructional videos with screen recording, broken down into several steps. Follow the steps below to create your own instructional video right now.
Step 1: Plan Your Content
Before you start recording, determine what you want to cover in your video. Choose a topic that is in demand and can be clearly explained via screen recording. If necessary, prepare your script and slides. A script is a written document that outlines what you are going to say and do in your video. A slide is a visual aid that supports your script and helps your viewers understand your message. This ensures you cover all the important points and keep the video concise and engaging.
Step 2: Choose the Right Screen Recording Tool
Then, select a screen recording tool that suits your needs. There are many options available for different platforms and purposes. Some of the most popular ones are:
#MiniTool Video Converter
MiniTool Video Converter is an easy-to-use and powerful screen recorder that allows you to capture everything happening on your computer screen for free with no time limit. It also gives you options to add audio from the system or microphone and then save the recording as MP4, WAV, MKV, FLV, AVI, or TS. On top of that, it does not add any watermark to your recordings.
Apart from screen recording, this tool is capable of downloading videos, playlists, music, and subtitles from YouTube and converting YouTube to MP4, WAV, WebM, and MP3 in high quality. Furthermore, it allows you to convert batch audio and video files between 1000+ formats.
#ScreenFlow
ScreenFlow is a powerful and easy-to-use screen recording and video editing software designed for Mac users. It offers a range of features that make it a popular choice for creating high-quality instructional videos, screencasts, tutorials, and presentations. With it, you can record your screen, your webcam, your audio, and your iOS devices, and edit them in a professional way.
#OBS
OBS, short for Open Broadcast Software, is a free and open-source screen recording and streaming software for Windows, Mac, and Linux users. It enables you to record your screen, your webcam, your audio, and multiple sources, and stream them live or save them as a video file. It’s a powerful tool with a lot of features, but it can be a bit complex to use for beginners.
#Camtasia
Camtasia is a robust screen recording and video editing software suite for Windows and Mac. This screen recorder allows you to record anything on your computer screen, including websites, software, video calls, and PowerPoint presentations. After recording, you can merge, splice, and trim video clips, and add effects, animations, transitions, and captions to enhance your videos.
Step 3: Set Up Your Recording Environment
To ensure a smooth recording session, close any applications that you won’t be using to avoid any unnecessary distractions. Also, make sure to clean up your desktop and only keep the relevant windows open. If you’re demonstrating something online, check your Internet connection beforehand to avoid any potential issues. It’s also important to choose a quiet place to record to avoid any background noise. Lastly, if you plan on including webcam footage, make sure that you have good lighting and a clean, professional background.
Step 4: Record Your Screen
Then, let’s go to one of the most important parts – record your instructional content after you’ve chosen the right screen recording software. Here, we’ll take MiniTool Video Converter as an example to show you how to create an instructional video with screen recording. Here are the detailed steps:
1. Click the download button below to download MiniTool Video Converter and follow the on-screen instructions to install it on your computer.
MiniTool Video ConverterClick to Download100%Clean & Safe
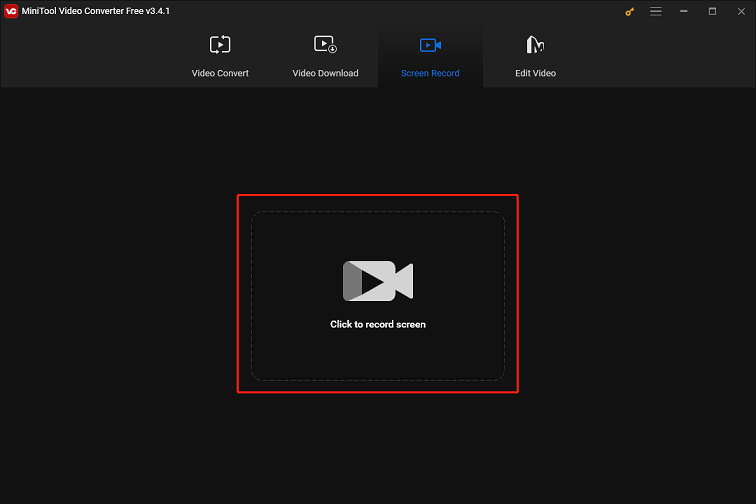
2. Launch this free screen recorder and go to the Screen Record tab at the top of the screen.
3. Click the Click to record screen area to initiate the MiniTool Screen Recorder window.
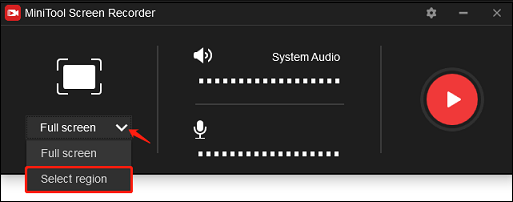
4. This screen recorder captures the full screen by default. If you plan to record part of the screen, click the arrow icon next to Full screen, choose Select region, and then use your mouse to select the recording area.
5. Decide whether you want to record system or microphone sound. Simply click on the corresponding icon to turn the sound on and off.
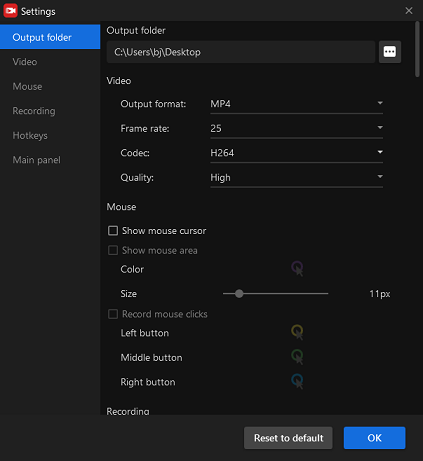
6. Click the Settings icon in the upper right corner of the window to make some settings. Here, you can choose the output folder, recording format, frame rate, codec, quality, and more. Then, click on OK to apply the settings.
7. Click the red Record button or press F6 to start recording your computer screen.
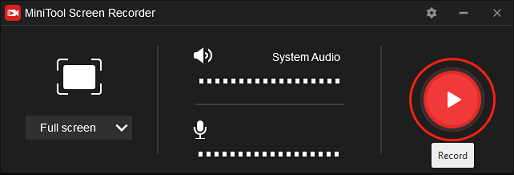
8. During the recording process, you can press F9 to pause or resume recording. Once done, press F6 to stop recording.
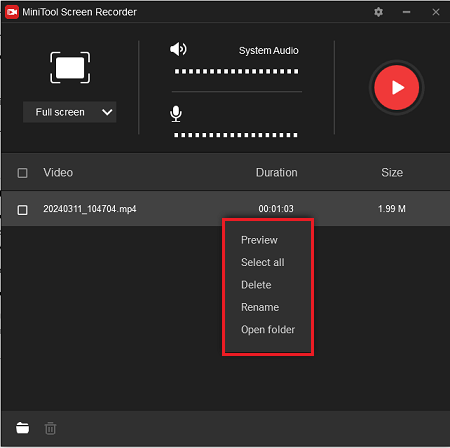
9. Then, the screen-recorded instructional video will appear on the list. Right-click on it to preview, delete, rename, or locate its folder.
Step 5: Edit Your Screen Recording
Once the screen recording process is complete, you can enter the critical stage of post-recording editing. This is where your raw screen recording turns into an engaging instructional video. The editing process can be daunting for some, but with the right instructional video software, you can create a professional instructional video that will wow your viewers and convey the message effectively.
Give MiniTool MovieMaker a try, an easy-to-use and free download video editor that can help you combine screen recording clips, trim any unnecessary parts, add text overlays, annotations, or highlights to emphasize key points, and add background music to set the mood.
Here are the steps on how to make an instructional video with screen recording using MiniTool MovieMaker:
1. Download and install MiniTool MovieMaker by clicking the following download button.
MiniTool MovieMakerClick to Download100%Clean & Safe
2. Open this software and close the promotion window to access the editing interface.
3. Click on Import Media Files to import your screen recordings. Then, click the + icon or drag the clip to the timeline.
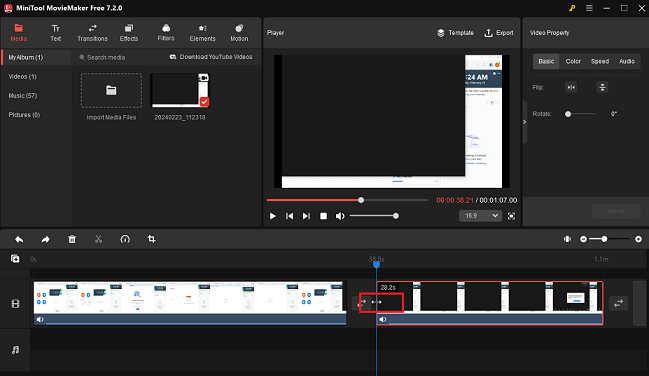
4. To trim the unnecessary parts, select the screen recording on the timeline, mouse over the start or end point of the clip and you’ll see a double-headed arrow appear. Drag the arrow rightwards or leftwards to remove unwanted parts at the beginning or end of the clip.
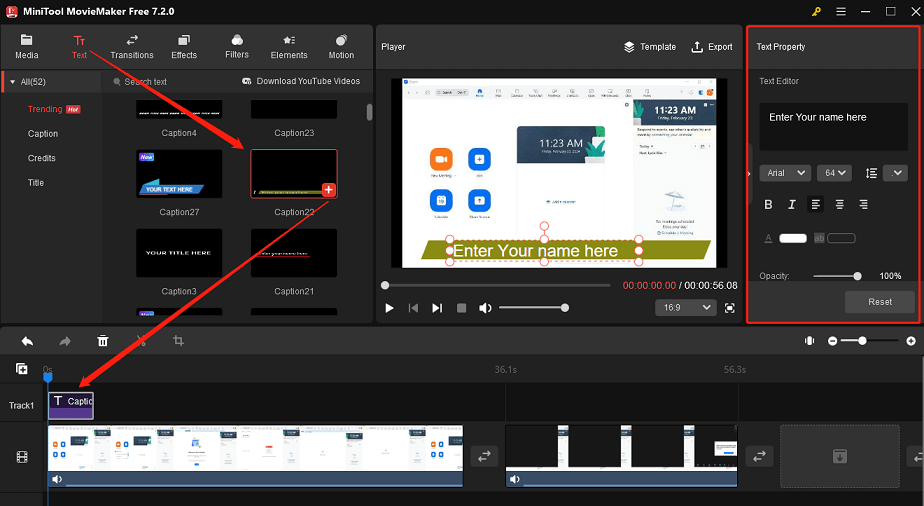
5. To add text overlays or annotations to make your screen recording easier to understand, click the Text tab, find your desired text style, and click the + icon to add it. Then, you can enter and edit the text under Text Property.
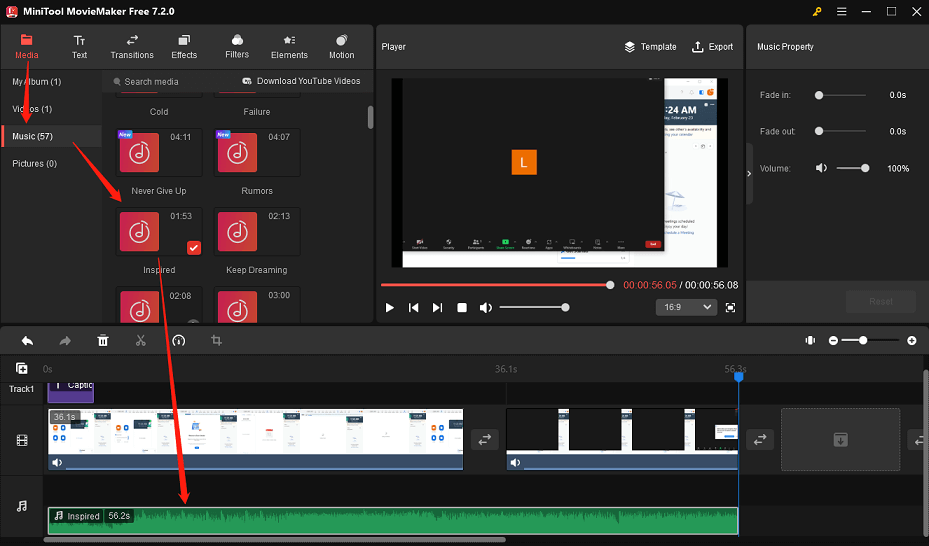
6. To add background music to the screen recording, navigate to the Music subtab under Media, choose a built-in song, and add it to the timeline. Alternatively, you can import your own music and add it.
7. You can also make more edits to the instructional video, such as splitting, cropping, reversing, flipping, rotating screen recordings, changing the aspect ratio, adjusting playback speed, adding transitions, filters, effects, motion effects, animated stickers, etc.
8. Once the edits are completed, click on the Export button to save the instructional video with screen recording in your preferred format.
Step 6: Publish or Share the Instructional Video
Once the video is edited, you’ve reached the final step in creating your instructional video – publish or share it with your audience. If your audience is vast and diverse, you can upload it to video-sharing platforms like YouTube and Vimeo. On the other hand, if your video is for a more targeted audience, such as a group of employees or customers, you can choose to share it via email.
Wrap Up
Creating an instructional video with screen recording is a straightforward process that can greatly enhance your teaching and communication. By following these steps, you can produce a clear, informative, and engaging video that your audience will appreciate. We hope you found this guide on how to make an instructional video with screen recording helpful.
If you have any questions or suggestions while using MiniTool MovieMaker and MiniTool Video Converter, please feel free to leave a comment in the section below or contact us via [email protected].
User Comments :