Watermarks are an important part of protecting creators' copyright in videos. Sometimes, you may want to use certain videos for personal purposes, but watermarks can affect the visual quality of the video. This article will show you two reliable methods to remove watermark from video: cropping the video or overlaying the watermark with the best video editing software or using AI-powered watermark removal tools.
A watermark is a designed logo or text that is usually used in videos, images, or physical content to identify ownership and stop unlawful usage. Adding visible watermarks to your products helps promote brands and prevent infringement. Plus, watermarks can also be used to trace the origin or ownership of content, which is highly useful for copyright protection and tracking leaks.
Sometimes, you may download a video with a watermark from the internet. You have no intention of using this video for commercial purposes, but the watermarks really bother you. Or in another case, you may watermark a video, but after a few days, you want to change the video watermark and find that the original video is gone. Well, the only way to solve your problems is to remove watermark from video.
Why Remove Watermark from Video
I’ve summarized some benefits of removing watermarks from videos. Here’s a breakdown.
- Improve video quality: Watermarks can distract the audience’s attention or make them feel annoyed. Removing watermarks from video makes videos more polished and professional.
- Content reuse: Watermark-free videos can be used in new projects with no hassle.
- Product promotion: Remove old watermarks and replace them with new ones to help infuse creativity into your brand.
How to remove watermark from video? There are two methods you can use. Read on for more.
Remove Watermark from Video by Cropping or Overlaying
The first method to remove watermark from video is to crop it out of the video or cover them with stickers. To do so, I recommend the three professional video editing software programs below. With them, you can complete your editing tasks with no effort.
Option 1. MiniTool MovieMaker
MiniTool MovieMaker is a top-grade and free video editor that provides various basic and advanced editing functions. It can crop, trim, split, flip, speed up, slow down, scale, and rotate video. Plus, it supports video color correction, allowing for adjusting video contrast, saturation, and brightness.
As for advanced editing, this application supports multi-track editing, video text overlay, photo collage, high-resolution editing, audio overlap, copy and paste on timeline, and more.
Moreover, MiniTool MovieMaker supports a wide range of digital formats, including MP4, MOV, MKV, AVI, FLV, MP3, AAC, AIFF, etc. With no ads, bundles, or viruses, you can remove a watermark from a video easily.
Follow the instructions below.
1. Download and Install MiniTool MovieMaker
Click the download button below to download this program. Then install it by following the setup tutorials.
MiniTool MovieMakerClick to Download100%Clean & Safe
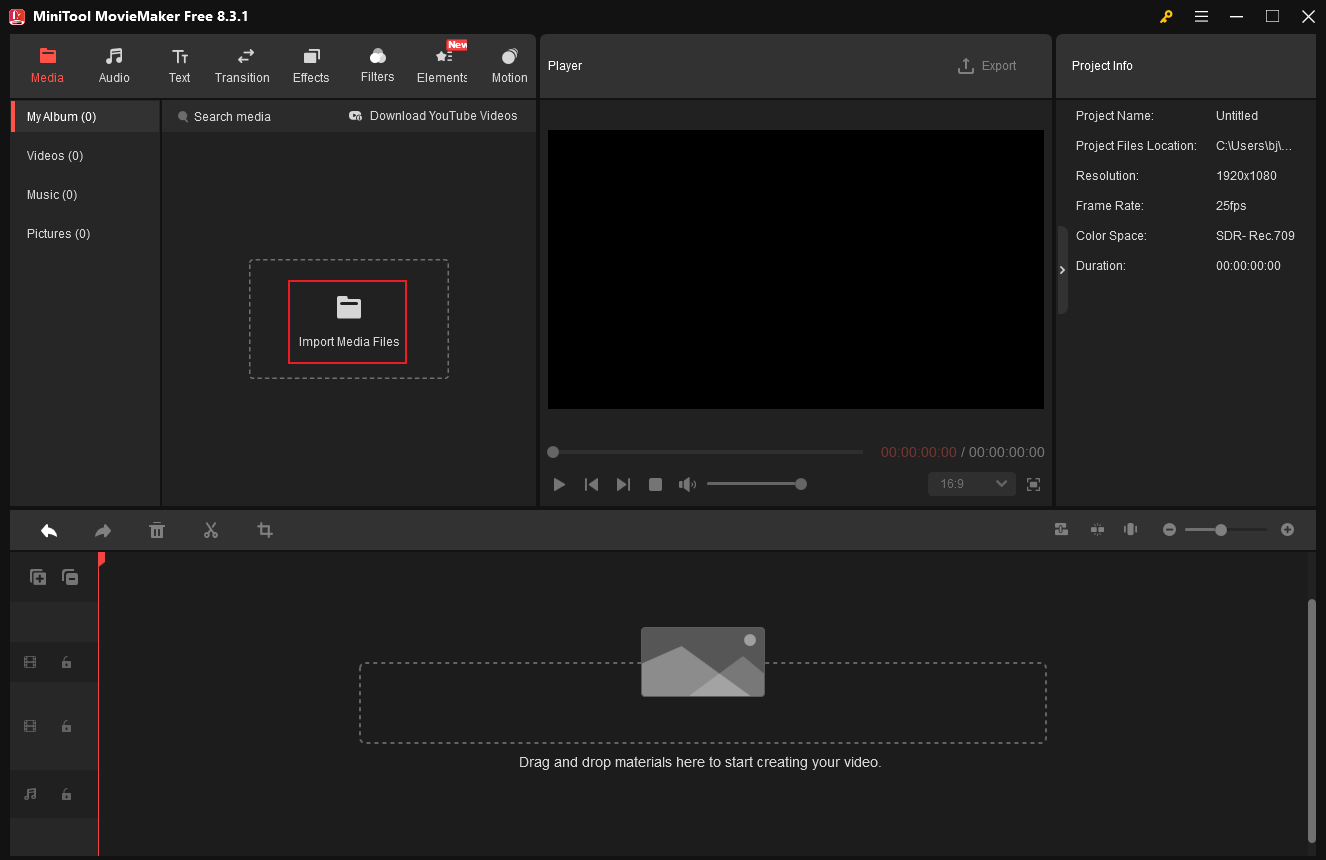
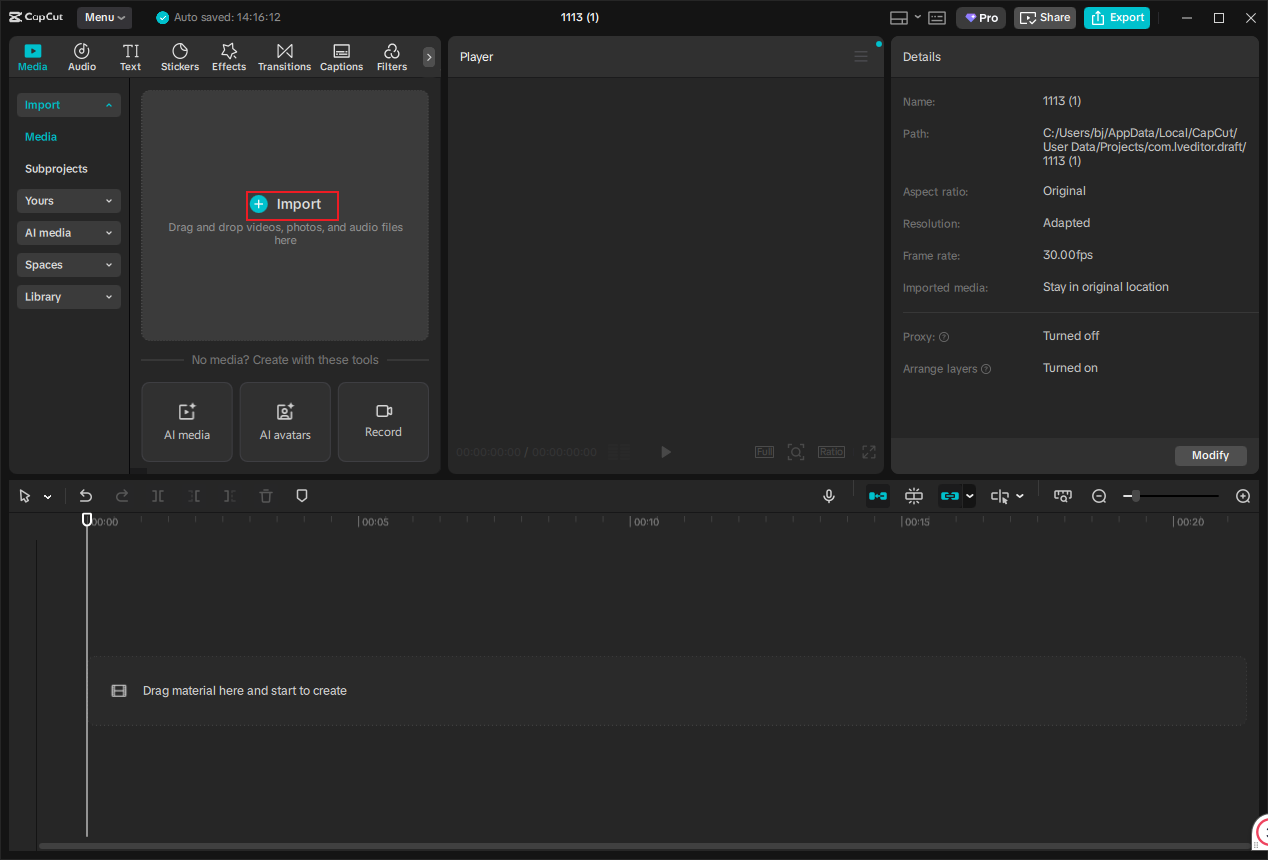
2. Import Your Video
Launch this program and click on New Project to enter the main interface. Next, click the Import Media Files option to add the video you want to remove the watermark from.
3. Remove the Watermark
Drag the added video to the timeline.
Method 1. Crop the video
Click the Crop icon in the toolbar above the timeline to access the Crop window. Next, hover the mouse cursor on one of the four edges until the double-arrow icon appears; drag it inwards to remove the watermark. Then, click OK to save the changes

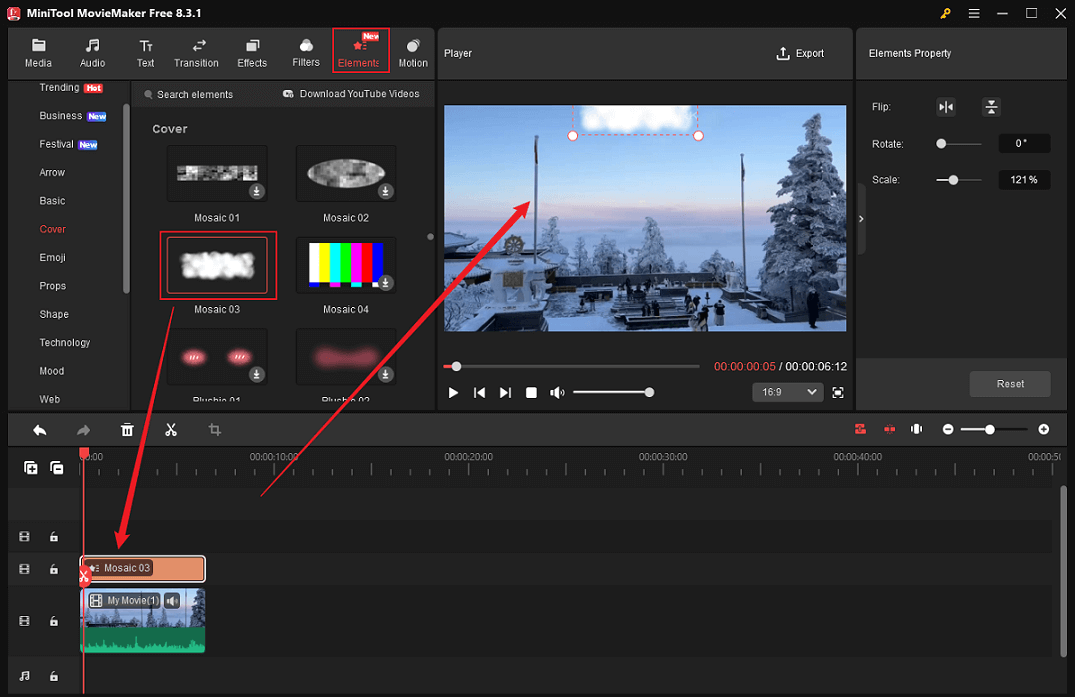
Method 2. Add a sticker
Click the Elements tab in the top menu, browse the sticker list, choose the desired one, and download it. Next, drag the downloaded sticker onto the timeline, then adjust its duration by dragging the edges of the sticker layer. Then, click the sticker in the Player window, move it to cover the watermark, and then drag the edges to scale it.
4. Export the Video
Click the Export icon at the top right of the Player window. In the Export window, you can rename the output video, specify a destination, and adjust the video format, resolution, and frame rate. After that, click Export to save the video.

When the exporting process completes, click Find Target to locate the video.
Moreover, MiniTool MovieMaker can serve as a video compressor, file converter, audio extractor, media player, and video/audio/image merger. Click the download button below to explore more of MiniTool MovieMaker!
MiniTool MovieMakerClick to Download100%Clean & Safe
Option 2. Microsoft Clipchamp
Microsoft Clipchamp is a free video editor without watermark pre-installed on Windows 11. It offers various video editing features, including but not limited to cropping, splitting, trimming, speed controlling, and more. In addition, Clipchamp has a resource library that includes multiple stickers, overlays, effects, music, transitions, etc.
Clipchamp has a well-organized user interface. Whether you’re a beginner or an experienced user, you can handle Clipchamp with no effort. How to remove a watermark from a video using Clipchamp? Just follow the tutorials below.
1. Access Microsoft Clipchamp
Launch this program on your computer if it’s installed. If not, go to the Microsoft Store to download and install Clipchamp, then launch it.
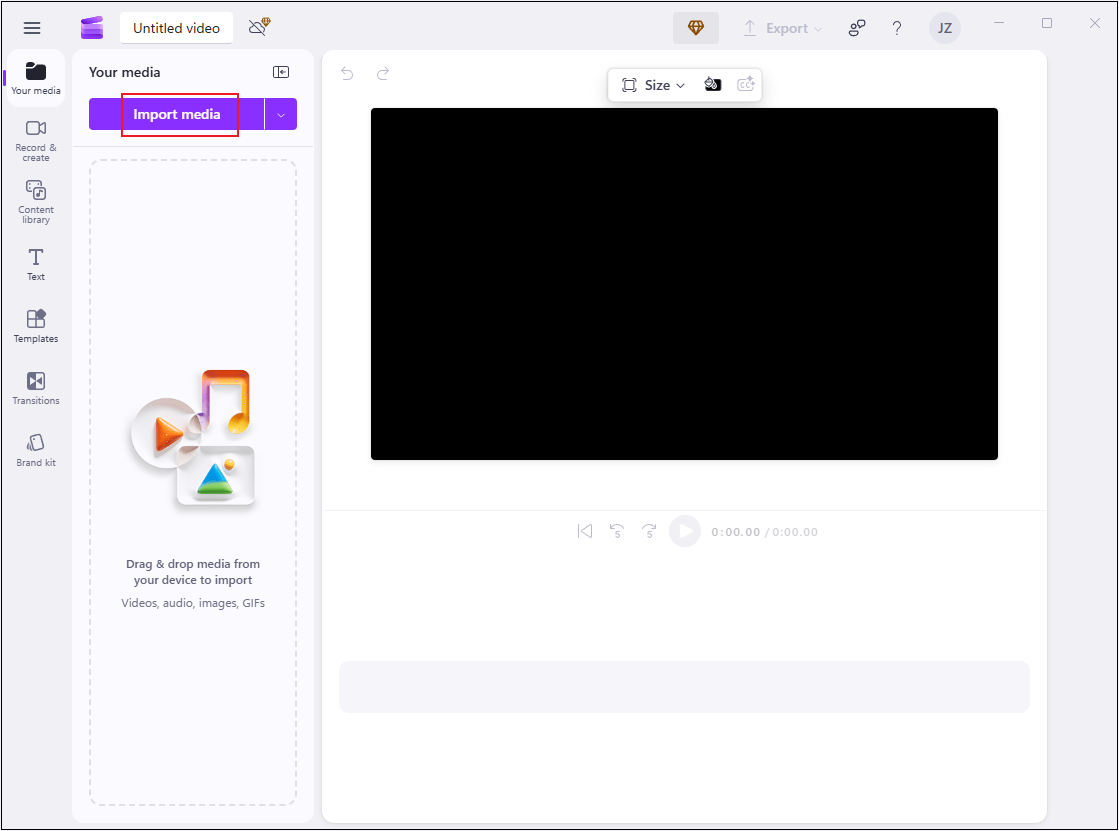
2. Import Your Video
Click Create a new video to enter the editing page. Then, click the Import media option to add the video you want to remove watermarks from.
3. Remove Watermark from the Video
Drag the added video to the timeline. There are two methods to remove the watermark from the video.
Remove the Watermark from the Video by Cropping
Click the Crop icon above the video preview window.
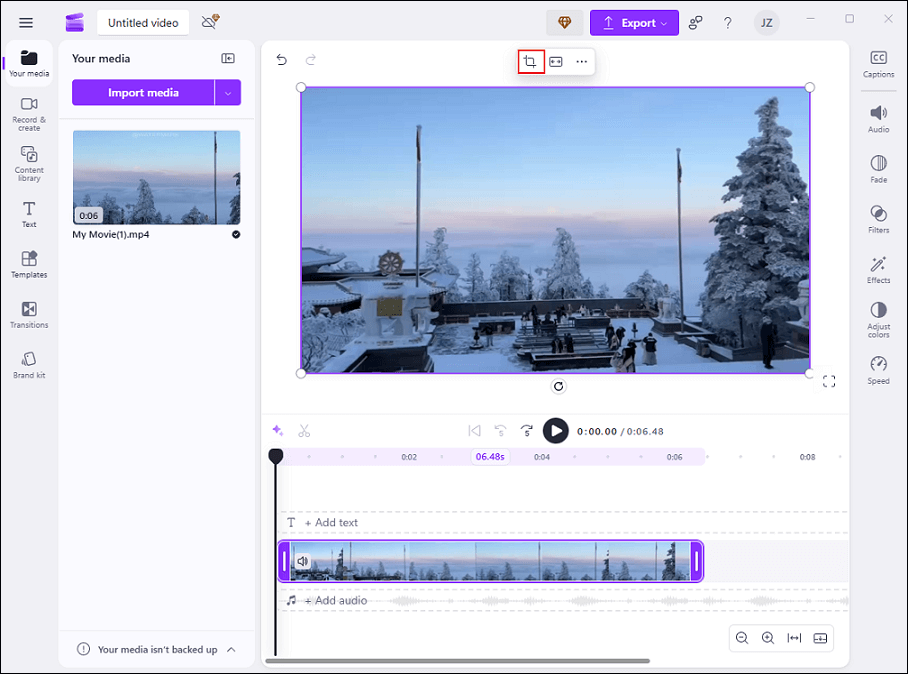
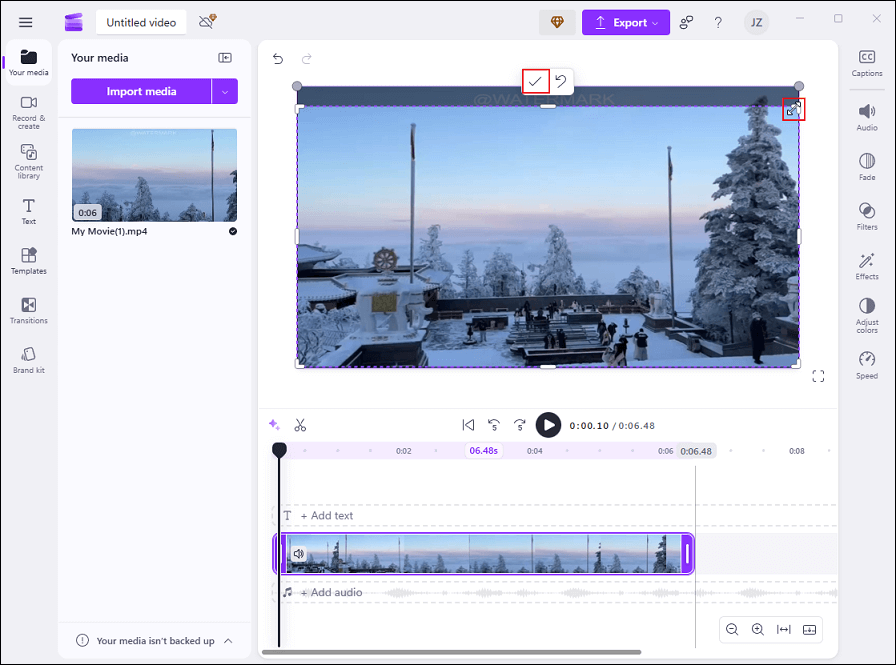
Drag one of the cropping handles to remove the watermark. Then, click the Done icon to save the changes.
Remove the Watermark from the Video by Overlaying a Sticker
Click the Content library tab in the left menu and select the Stickers option.
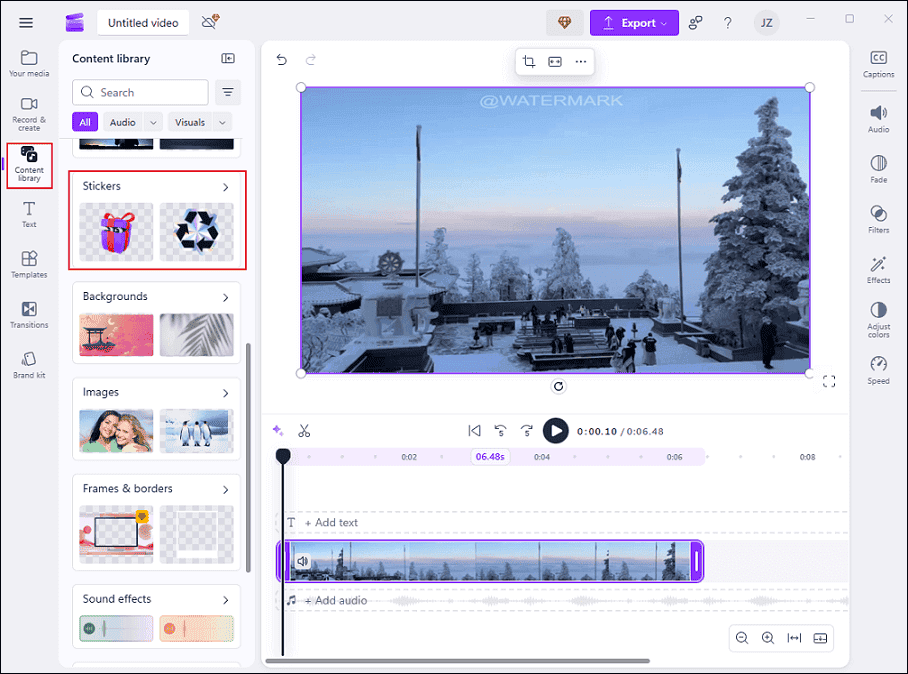
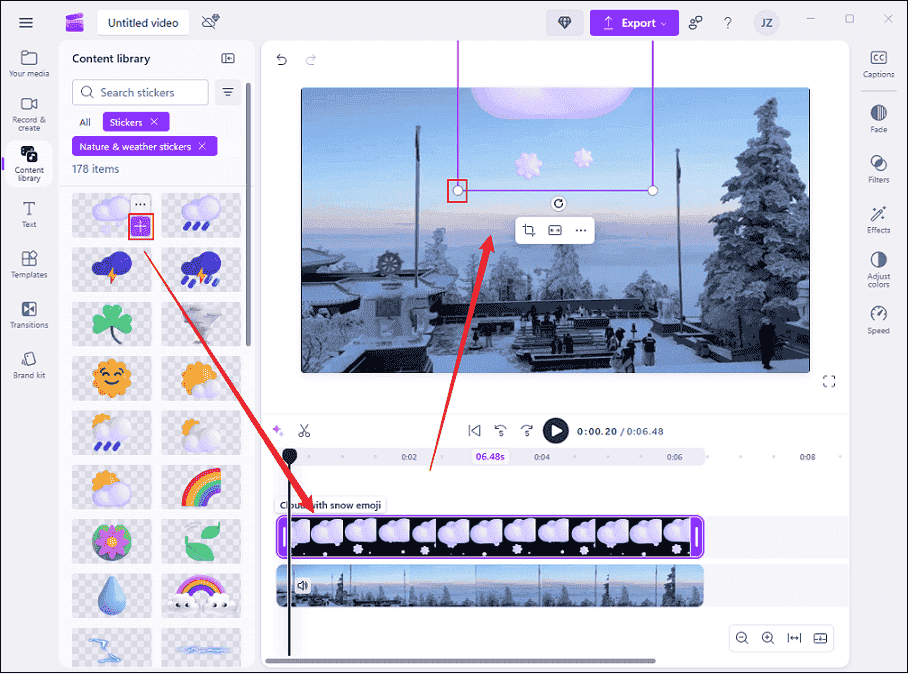
Enter the preferred sticker category, find the desired sticker, and add it to the video. Adjust the sticker duration by dragging its layer edges on the timeline. Then, click the sticker in the preview window, drag its edges to scale it, and move it to cover the watermark.
4. Export the Video
Click the Export button at the top right and choose a resolution to export the video.
Option 3. CapCut
CapCut is a popular free download video editor developed by ByteDance that comes with powerful editing functions. It allows you to edit videos by cropping, splitting, trimming, rotating, reversing, speeding up, and more. In addition, CapCut offers a resource library with a variety of trendy stickers, effects, transitions, filters, and more.
Moreover, CapCut supports adding keyframes and masks, adjusting video color, creating avatars with AI-powered tools, etc. It is compatible with Windows and macOS computers, iOS, and Android mobile devices. Plus, CapCut provides online tools for video/image/voice editing, making it quite convenient to access.
Now, let’s see how to remove a watermark from a video using CapCut.
1. Download and Install CapCut
Visit CapCut’s official website to download and install this program on your PC.
2. Import Your Video
Launch this program, click on Create project to enter the editing page, and then click the Import option to add your video.
3. Remove Watermark from Video Free
Drag the added video to the timeline.
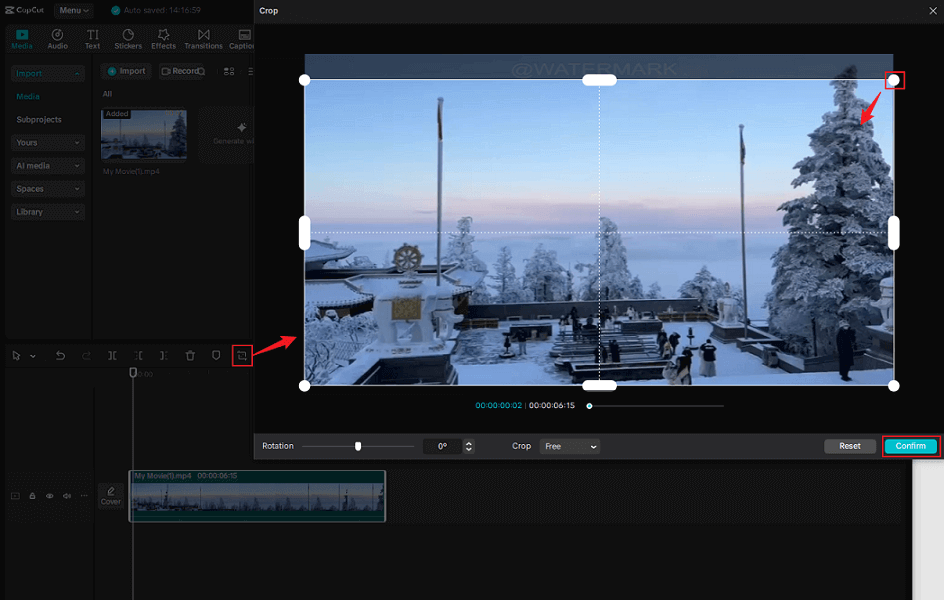
Crop the Video
Click the Crop icon in the toolbar above the timeline to enter the Crop window. Then, drag and move the video edges inwards to remove the watermark. When you’re satisfied with the video, click the Confirm button to save the changes.
Cover the Watermark with a Sticker
Click the Stickers tab in the top menu, download the desired sticker, and add it to the video. Adjust the sticker duration, scale it, and move it to cover the watermark.
4. Export the Video
Click the Export button at the top right, configure the video settings, and click Export to save the video.
That’s all! With the three advanced video editors above, removing a watermark from a video is a breeze. Now, let’s move to the second method: using AI watermark removers.

Remove Watermark from Video with AI Watermark Remover
Here are three AI-powered tools that can help you remove watermark from video.
Option 1. 4Easysoft Total Video Converter
4Easysoft Total Video Converter is a desktop AI-powered video watermark remover that enables you to remove a watermark from a video efficiently and effortlessly. In addition to that, this feature-rich software can function as a video enhancer, video compressor, GIF maker, and more. How do you remove a watermark from a video? Follow the step-by-step guides below.
1. Download and Install 4Easysoft Total Video Converter
Go to 4Easysoft Total Video Converter’s official website to download and install it on your computer.
2. Access the Video Watermark Remover
Launch this program, select the Toolbox option in the top toolbar, and choose Video Watermark Remover.
3. Add Your Video
Click the + button to import your video.
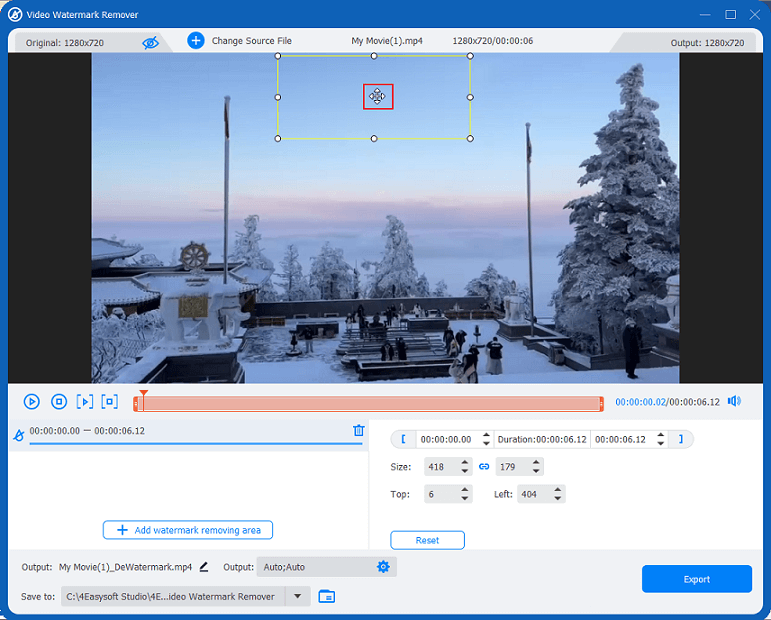
4. Remove the Watermark from the Video
Choose the Add watermark removing area option.

Then, you will see a frame in the video and hover the mouse cursor on the frame until the four-headed icon appears; drag it to cover the watermark.
5. Export the Video
Click the Export button to save the video.
Option 2. EzRemove AI
Don’t want to download any more software on your computer? Try an online tool! EzRemove AI is a reliable tool that empowers you to remove watermark from video online free. It is super easy to access, which can be used on mobile devices and computers. Plus, EzRemove AI supports various video formats, like MP4, MOV, AVI, etc.
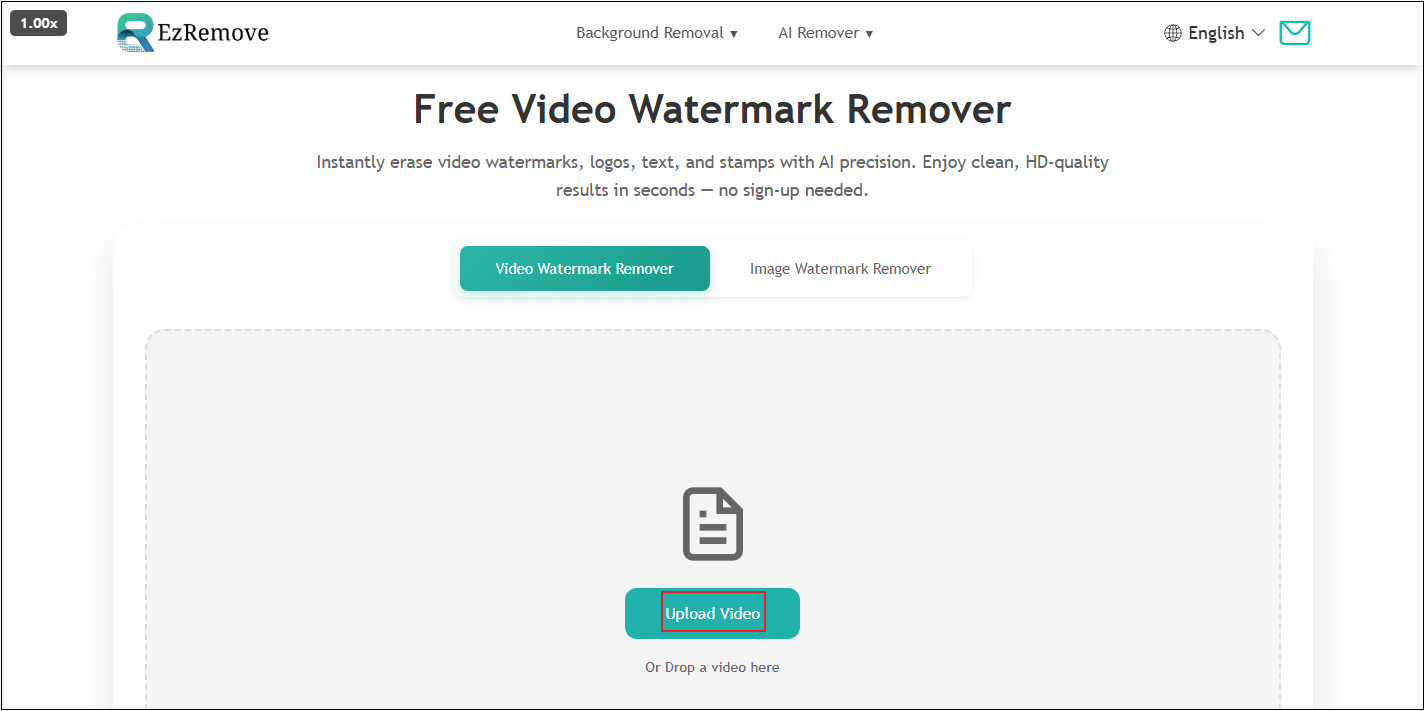
1. Access EzRemove AI
Visit https://ezremove.ai/video-watermark-remover/ to access this free video watermark remover.
2. Upload Your Video
Click the Upload Video option to add your video.
3. Remove Watermark from Video
Use the Brush tool to cover the watermark and click the Remove Watermark option.
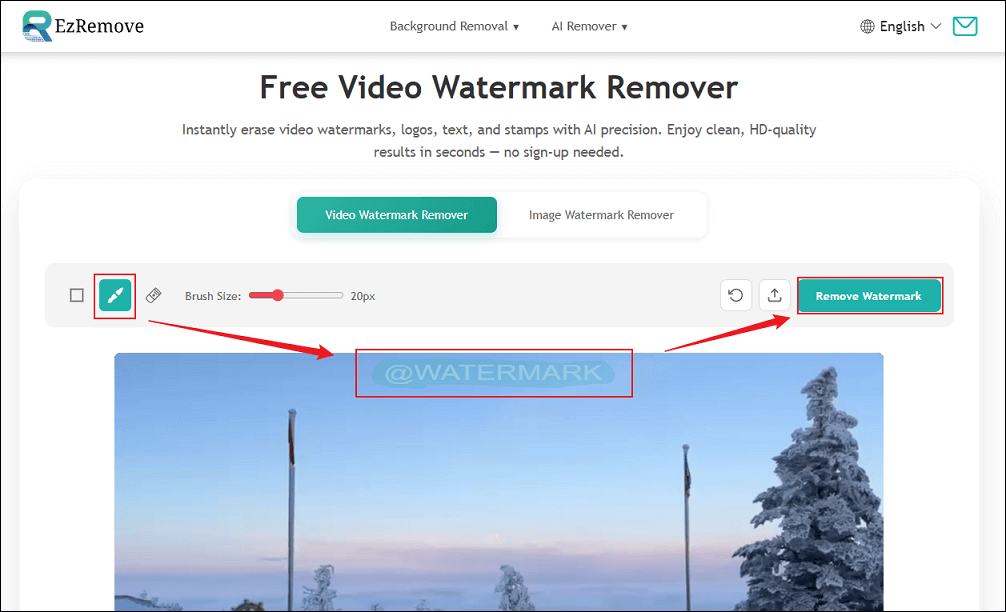
4. Download the Video
When the watermark removal process completes, click the Download button to save the video.
Option 3. Magic Eraser
Magic Eraser is also an online AI-powered tool that can remove the watermark from your video in a flash. Additionally, it also serves as an image object remover, image watermark remover, background eraser, etc. Simply follow the instructions below to remove a watermark from a video for free.
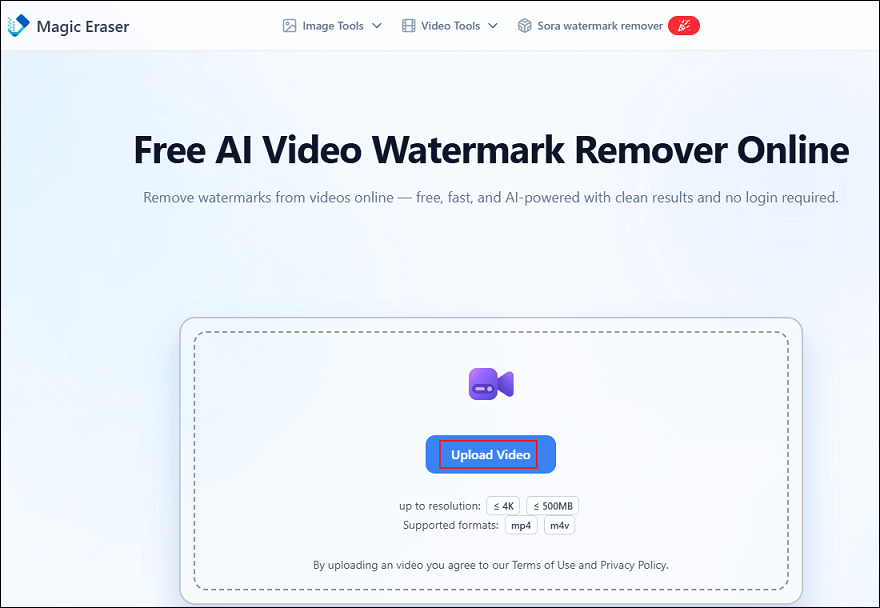
1. Go to Magic Eraser
Go to Magic Eraser’s video watermark remover (https://magiceraser.org/remove-watermark-from-video/).
2. Upload the Video
Click the Upload Video option to import your video.
3. Remove the Watermark from the Video
Cover the watermark with the Brush tool. Then, click Remove Now.
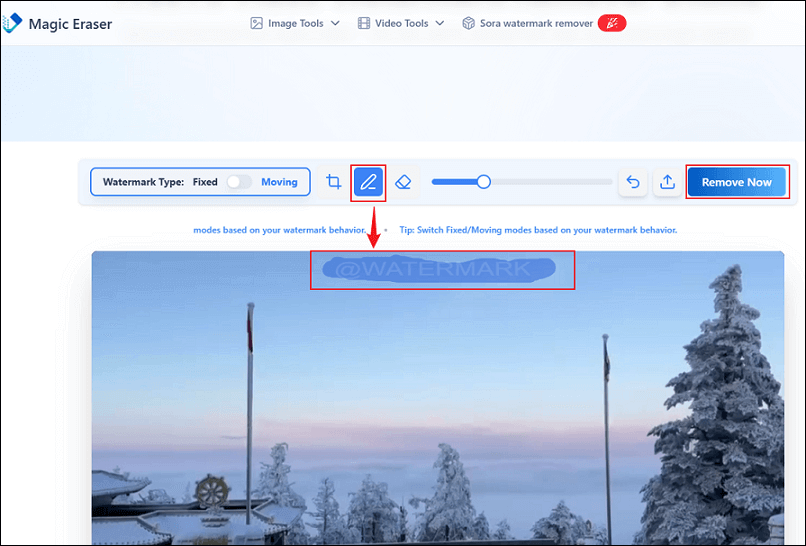
4. Download the Video
Click the Download icon to save the video to your local folder.
All done!
Bonus: How to Add a Watermark to Your Video
Want to add a watermark to your video? MiniTool MovieMaker can help you! Whether you want to add custom designs to your videos or simply include a text logo, MiniTool MovieMaker has you covered. Follow the guides below.
1. Import Your Video to MiniTool MovieMaker
In MiniTool MovieMaker’s main editing page, click the Import Media Files option to add your video.
MiniTool MovieMakerClick to Download100%Clean & Safe
2. Add a Watermark to Your Video
Drag the added video to the timeline.
Add a watermark from the local folder
If you’ve already designed a watermark for your video, just click the Import Media Files to import it, and drag it to the timeline. Note that the logo must be an image format.
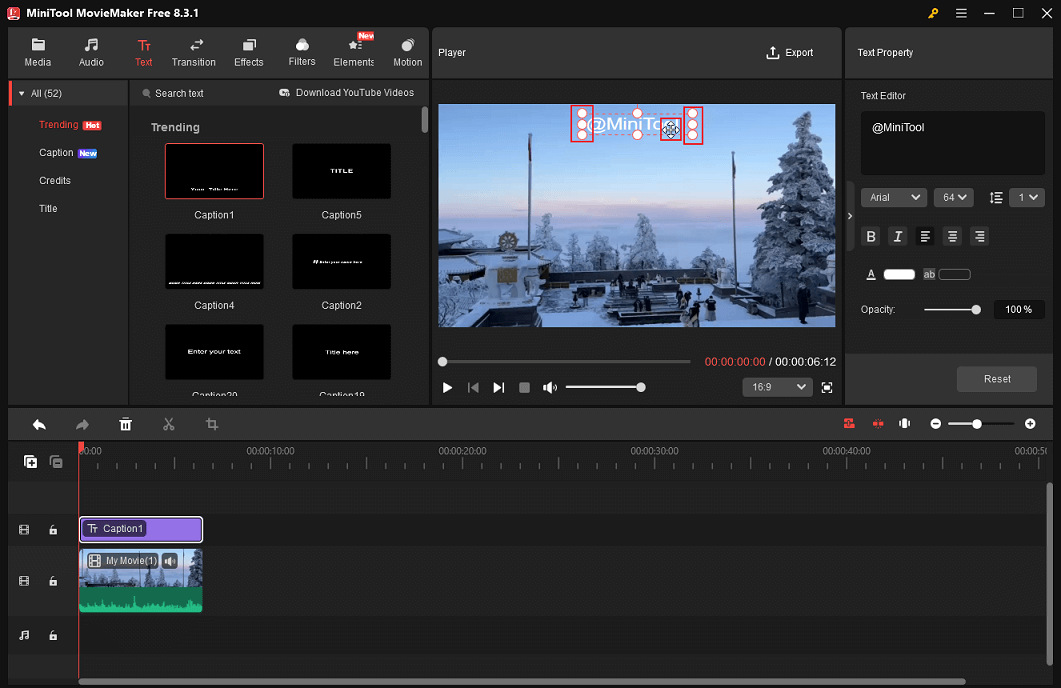
Add a Text logo
Go to the Text section, choose a text style, and add it to the timeline. Adjust the text duration by dragging its layer edges. In the Text Property window, type the desired text into the Text Editor box. Then, adjust the text size, color, font, etc., based on your needs.
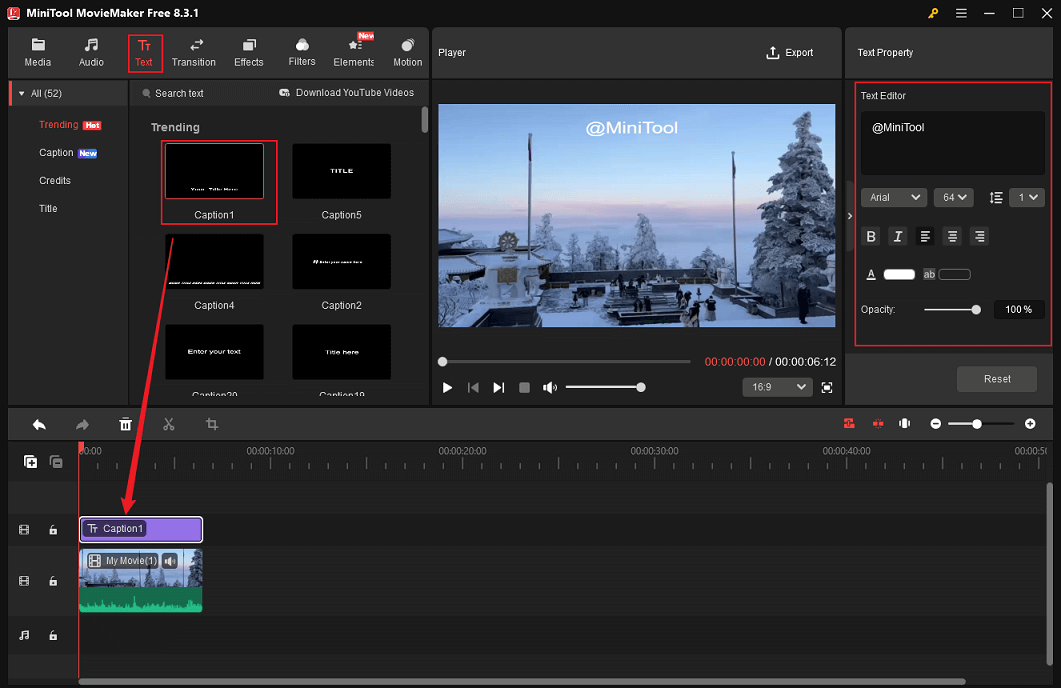
To adjust the watermark position in the video, click the created watermark in the Player window, and move the watermark by dragging the four-headed icon. Also, you can scale the watermark by dragging its edges.
3. Export the Video
Click the Export icon at the top right of the Player window to save the video.
In Summary
To remove watermark from video, this post provides two main methods: using a video editor to add a sticker overlay or crop out the watermark area, or an AI-powered tool to erase it. If you have additional video editing needs beyond watermark removal, I recommend downloading a comprehensive video editor like MiniTool MovieMaker. For quick solutions only, online watermark removal tools are more suitable. Hope this article can help you a lot!
You can contact us via [email protected] if you have any questions about using MiniTool MovieMaker. Also, you can send me messages directly on Twitter, and I’ll help you as soon as possible.
User Comments :