If you’re wondering how to cut the middle part of a video, you’re in the right place. Explore this post for the best video editing software to find effective techniques to make your video more polished.
Whether you’re editing a vlog, a tutorial, or a home video, there are many times you need to cut the middle part of a video to eliminate mistakes, unnecessary pauses, or irrelevant content. In this comprehensive guide, we’ll explore various methods to achieve this using different software, including beginner-friendly desktop applications and easy-to-use online tools.
Why Cut the Middle Part of a Video
Cutting the middle part of a video is a simple yet crucial editing technique that enhances your content’s overall quality and effectiveness. Here are the key reasons you might need to remove a middle section of a video.
First, you can cut the middle part of a video to remove mistakes and unwanted content, such as awkward pauses and verbal errors in recorded videos, and delete these errors to keep your videos professional and engaging.
Long and unedited videos may lose the audience’s interest. So, eliminating unnecessary middle parts can make your content more attractive and grab the audience’s attention.
Then, sometimes you need to remove the unnecessary middle part of a video to make it shorter and concise, thus meeting the upload requirements of social media platforms like TikTok, Instagram, YouTube Shorts, and more.
Additionally, removing irrelevant middle clips helps enhance storytelling and gives the video a clear structure. By doing this, you can also extract the best moments from a long video, easily creating highlights and making it more shareable.
Apart from that, if your video contains repetitive parts in the middle, remove them to fix the redundancy and avoid viewer fatigue.
Cutting the middle part of a video is a great way to refine your video and make it more polished. So, how to cut the middle part of a video? This post covers 4 simple methods.
![How to Add Fire Effect to Video on Windows [Solved]](https://images.minitool.com/moviemaker.minitool.com/images/uploads/2024/07/add-fire-effect-to-video-thumbnail.jpg)
How to Cut the Middle Part of a Video on Windows
In this part, you’ll learn 2 ways to remove the middle part of a video on a Windows computer.
Option 1: MiniTool MovieMaker
MiniTool MovieMaker is an easy-to-use and feature-rich video editing application designed for beginners and intermediate users. Its intuitive interface and essential editing tools allow users to create professional-looking videos without requiring advanced technical skills. Whether you want to edit vlogs, social media content, or daily recordings, MiniTool MovieMaker provides a simple yet effective solution.
MiniTool MovieMaker features a clean and straightforward interface, making it easy to navigate and more accessible for users of all levels. As for its editing capability, the software provides multiple tools and effects without complicated steps.
It allows you to split and trim video precisely, crop videos with popular aspect ratio presets, adjust the playback speed to create slow-motion or fast-motion effects, add titles, captions, and end credits, apply motion effects, and more. What’s more, MiniTool MovieMaker supports exporting videos up to 4K/1080P for free and without watermarks.
Here’s how to cut the middle part of a video using MiniTool MovieMaker.
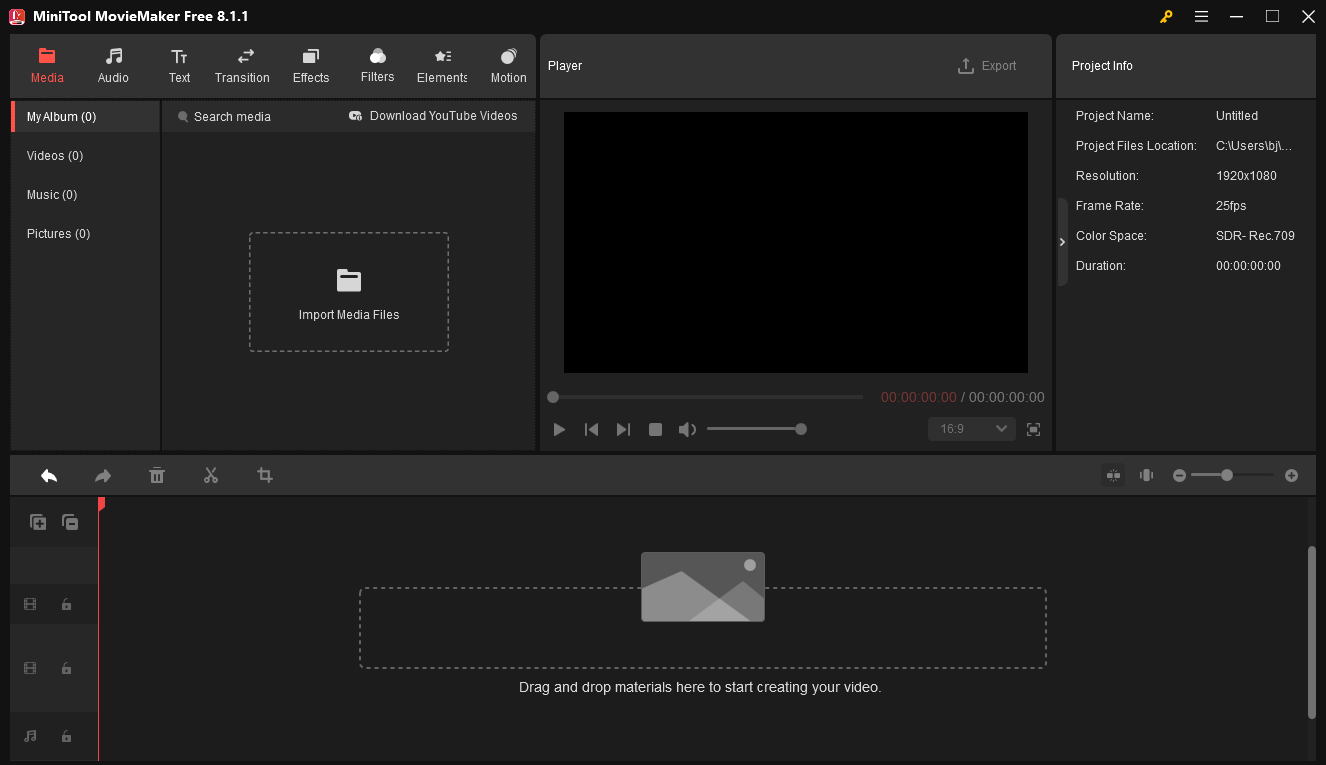
Step 1: Launch MiniTool MovieMaker.
Click the button below to download free video editor and install it on your computer. Once done, run the software and close the promotion window to enter the main interface.
MiniTool MovieMakerClick to Download100%Clean & Safe
Step 2: Import your video.
Click anywhere in the dotted box that says Import Media Files to open the File Explorer to locate the target video file. Select the video and click Open to import it into MiniTool MovieMaker. Then, click the + icon on the clip or drag and drop it to the timeline.
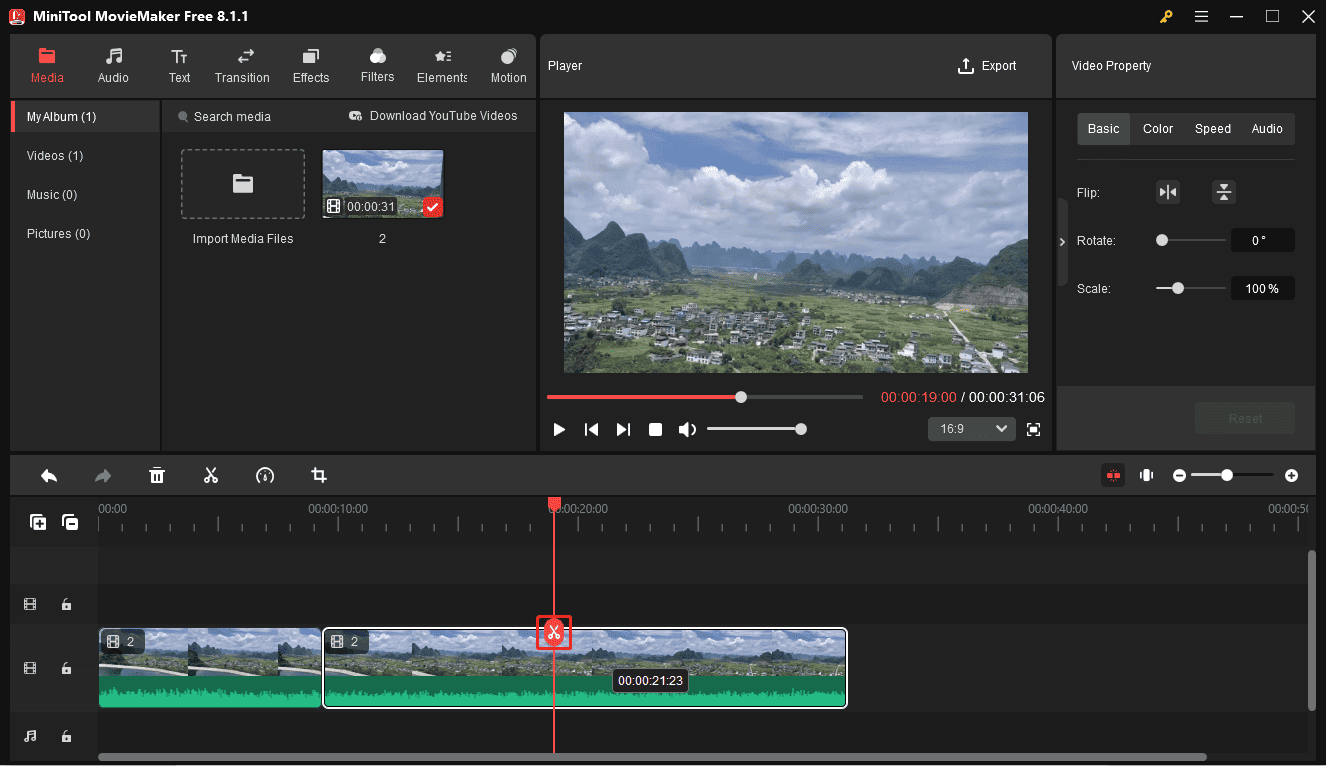
Step 3: Cut the middle part of the video.
To remove the middle part of the video, first, you need to separate the target clip from the original video. Select the entire video on the timeline, and it will be highlighted in white; drag the playhead to the start point of the clip you want to delete and click the Split icon; continue moving the playhead to the endpoint of the clip you want to remove, and click the Split icon.
After that, the middle clip is separated from the entire video. To remove it, right-click on the clip and select Delete, or press Delete on the keyboard.
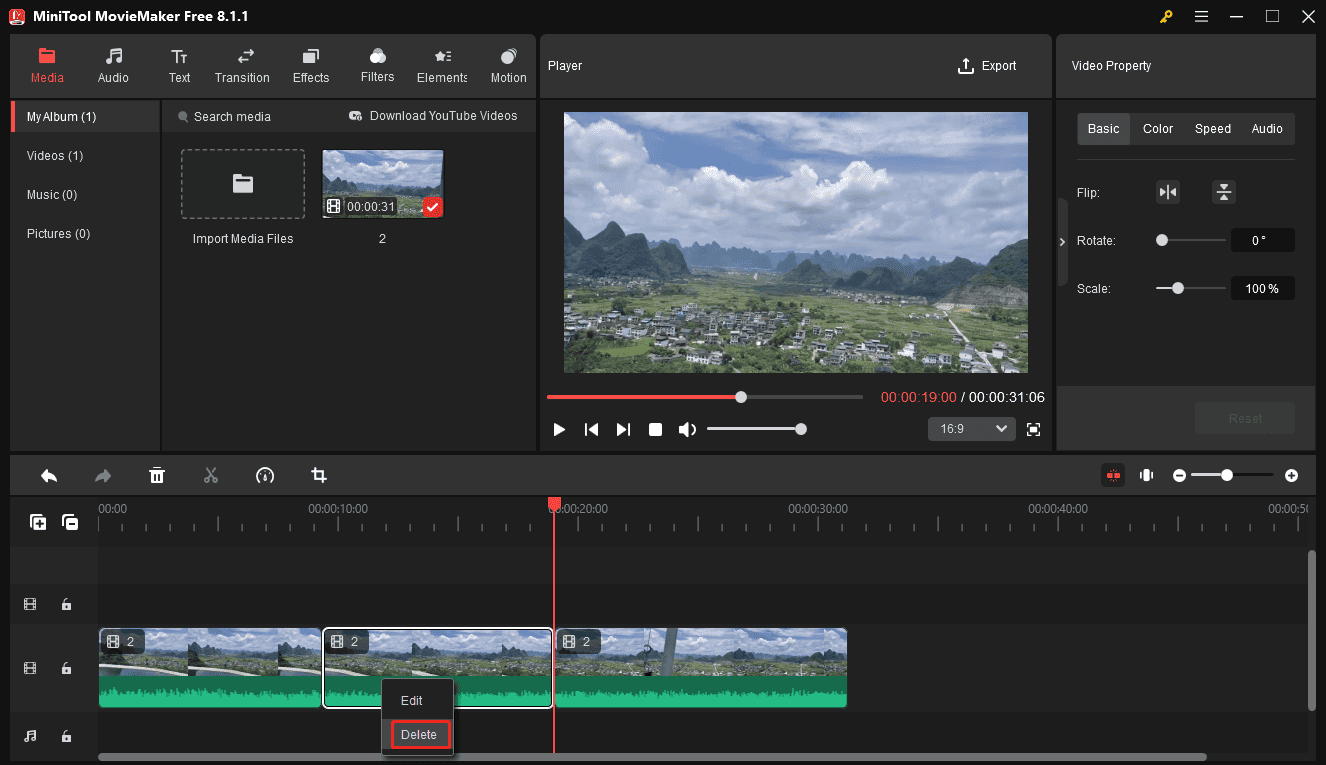
Alternatively, you can divide the video into two segments at the beginning or end of the middle section to be deleted, and trim the target segment to cut the middle section.
Step 4: Continue editing your video (optional).
Crop the video: select a clip on the timeline and click the Crop button on the timeline toolbar. On the Crop window, choose a ratio and adjust the size and position of the red rectangle to select the portions you want to save, and the outer areas will be removed. Click OK to save changes.
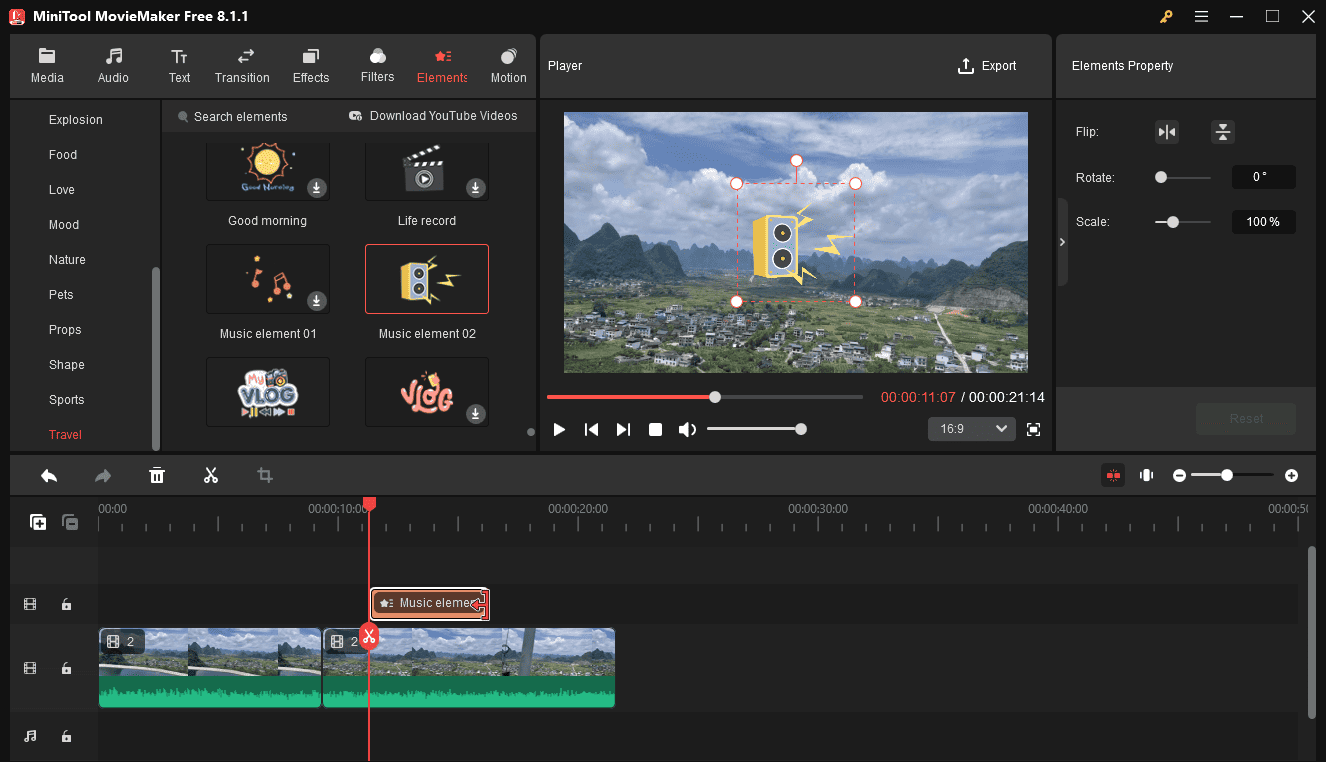
Add elements: MiniTool MovieMaker provides a huge library of animated stickers to decorate your footage. Go to Elements, browse the library to find the desired one, and click the small download icon to download it. Then, click the + icon to add it to the timeline. Then, you can rotate, flip, scale it, and adjust its position and duration.
Add music: go to Audio on the top menu bar, download a music clip or a sound effect, and drag it to the timeline. If the music is longer than the video duration, trim it to delete additional sections. You can also adjust the volume and apply fade-in/out effects in Music Property.
Step 5: Export the video.
Preview the video, and if you’re happy with the result, it’s time to export it. Click Export in the upper right corner; select the location to save the exported video, format, resolution, frame rate, and other settings; finally, click the Export button to start exporting the video.
Additional Features of MiniTool MovieMaker
- Change the video aspect ratio to make it perfect for social media platforms.
- Apply trending transitions between two videos/images.
- Adjust the clip’s color with various filters and basic color correction tools.
- Spice up footage with overlays, frames, borders, distortions, glitches, and other effects.
- Edit the audio in the video.
- Support up to 9 video tracks and 2 audio tracks.
- Rotate and flip videos easily.
- Create video from images, short video clips, and background music.
- Extract audio from video and save it in MP3.
Option 2: Microsoft Clipchamp
Microsoft Clipchamp is the official video editor for Windows 11/10, offering a comprehensive suite of editing tools to make professional-quality videos, regardless of the user’s editing experience.
This excellent video editor provides a drag-and-drop interface that includes a full range of editing options such as cropping, speed adjustment, trimming, and transitions. In addition to a collection of royalty-free stock videos, music, and sound effects, this application also enables you to add text overlays, filters, and effects to videos, edit the video’s color, speed up or slow down videos, create picture-in-picture effects, etc.
Moreover, Microsoft Clipchamp offers advanced features, such as automatic captions, text-to-speech, noise suppression, and background removal, making it perfect for quickly creating social media posts, tutorials, and business presentations.
What’s more, Microsoft Clipchamp is a video editor without watermark that supports direct sharing to YouTube, TikTok, and other platforms.
How to cut a part in the middle of a video using Microsoft Clipchamp? Follow the steps below.
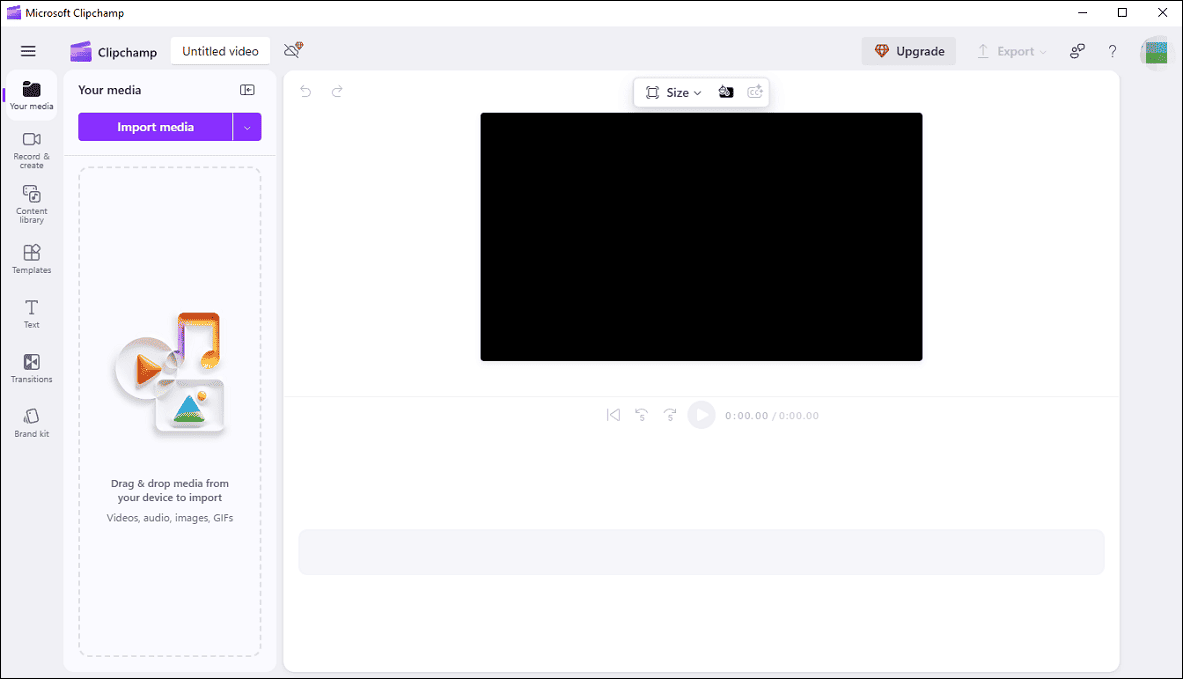
Step 1. Launch the video editor on your PC. If you’re a Windows 11 user, search “clipchamp” in the search box and open the matching result. However, if there’s no result, it shows that Clipchamp is not installed on your PC. If Build 22572 is not installed, Microsoft Clipchamp will not come pre-installed on Windows 11. In this case, go to the Microsoft Store to get the app.
Step 2. Log in with your Microsoft account and click the Create a new video button at the top to start a new project.
Step 3. After entering the main user UI, click the Import media button to open the video you want to edit, and drag it to the timeline.
Step 4. Click the video on the timeline to select it. Move the playhead to the start point of the clip you want to delete, and click the scissors icon. Then, select the second clip, drag and move the edge to the right to the endpoint of the segment you want to eliminate, and release the mouse.
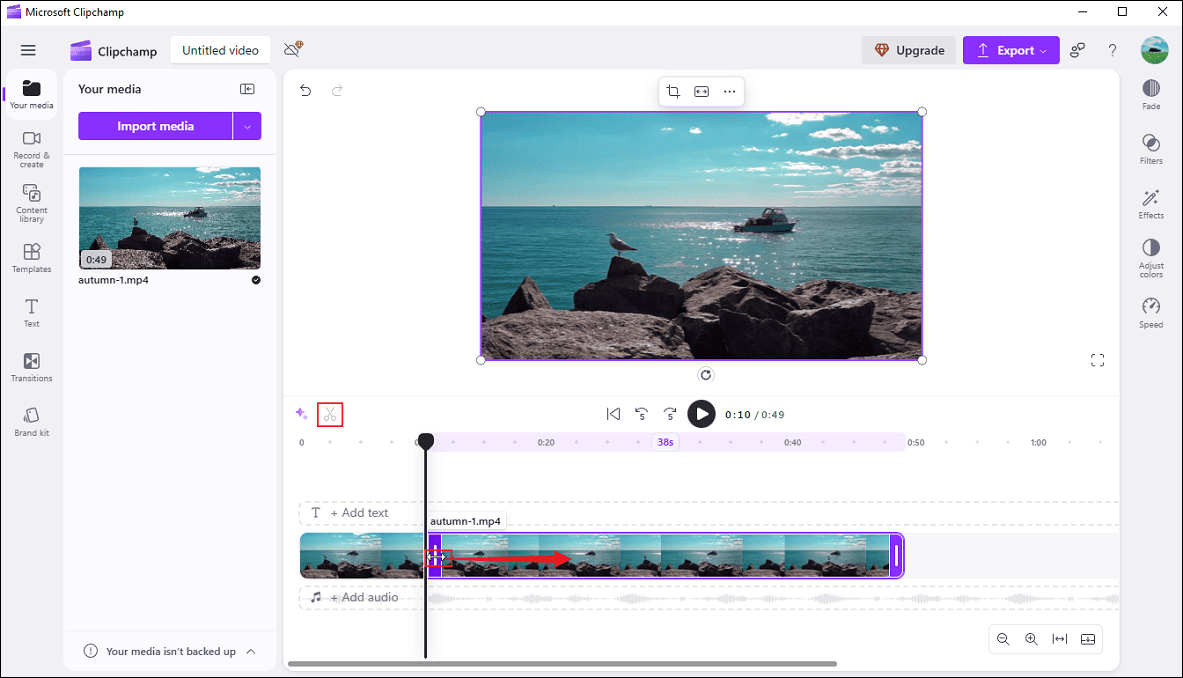
Likewise, you can use the split tool to extract the middle part of a video and delete it.
Step 5. You can continue editing the video clips with filters, effects, and more. To export the video, click the Export button, and select a resolution to start exporting the video. After that, you’ll get an MP4 file.

How to Cut the Middle Part of a Video Online
In addition to desktop applications, many web-based video tools allow you to cut the middle part of a video easily.
#1. Canva
If you often need to create logos or photo collages, you should be familiar with Canva. It’s not only a photo editor, logo maker, and collage maker, but also a video editor that’s equipped with essential editing tools, such as trimming, cropping, splitting, filters, speed control, and more. If you want to cut the middle part of a video online, Canva won’t let you down.
Here’s how to remove the middle part of a video with Canva.
Step 1. Go to the Canva website on your browser and sign in with your account.
Step 2. Select Video at the top menu bar and click the desired video size, such as landscape, mobile video, Instagram Reel, TikTok video, and more.
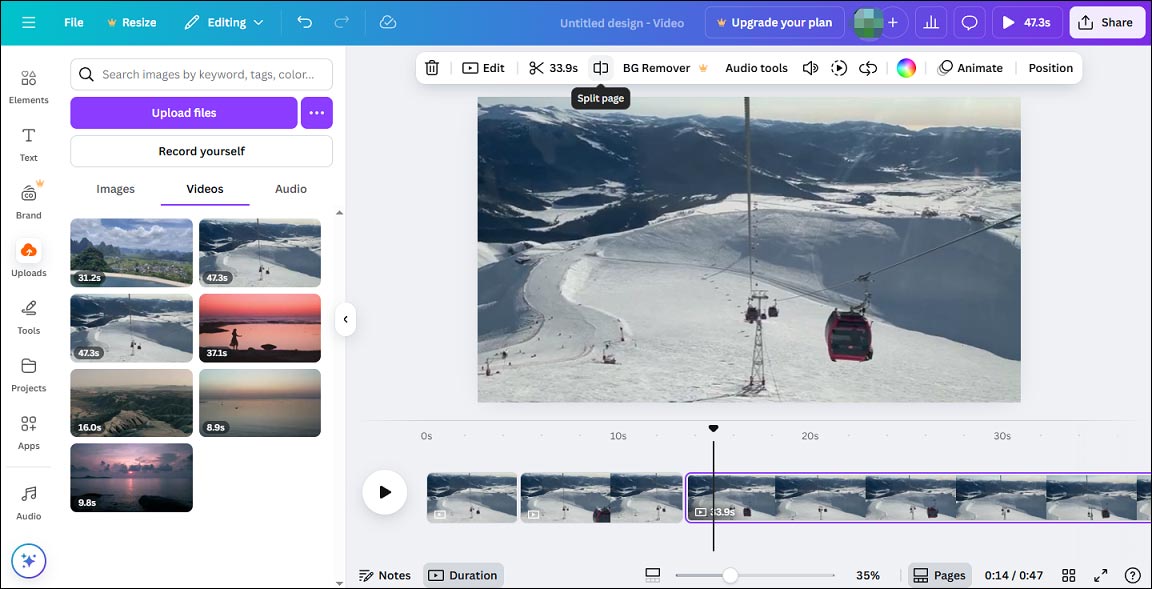
Step 3. After accessing the editing page, upload your video by clicking Uploads > Upload files, then add it to the timeline.
Step 4. Click and drag the black playhead to the beginning of the middle part, and click the Split page icon at the top; move the playhead to the endpoint of the middle part, and click the Split page icon to separate it from the video.
Next, right-click the segment and choose Delete page to remove it.
Step 5. Click the Share button in the upper right corner, select Download, and click Download to export the video.
#2. CapCut Online Video Editor
CapCut is a popular video editor for your computer and smartphones. In addition to the desktop and mobile apps, it offers a web app that can be easily accessed on a browser. While it’s not as powerful as the PC and mobile apps, it still has plenty of features to create stunning videos. For instance, this tool supports reversing, cropping, flipping, and splitting videos, adding freeze frame effects, applying animation effects, and more.
Here’s how to cut a part of a video in the middle using CapCut online video editor.
Step 1. Navigate to the CapCut website and open the online video editor.
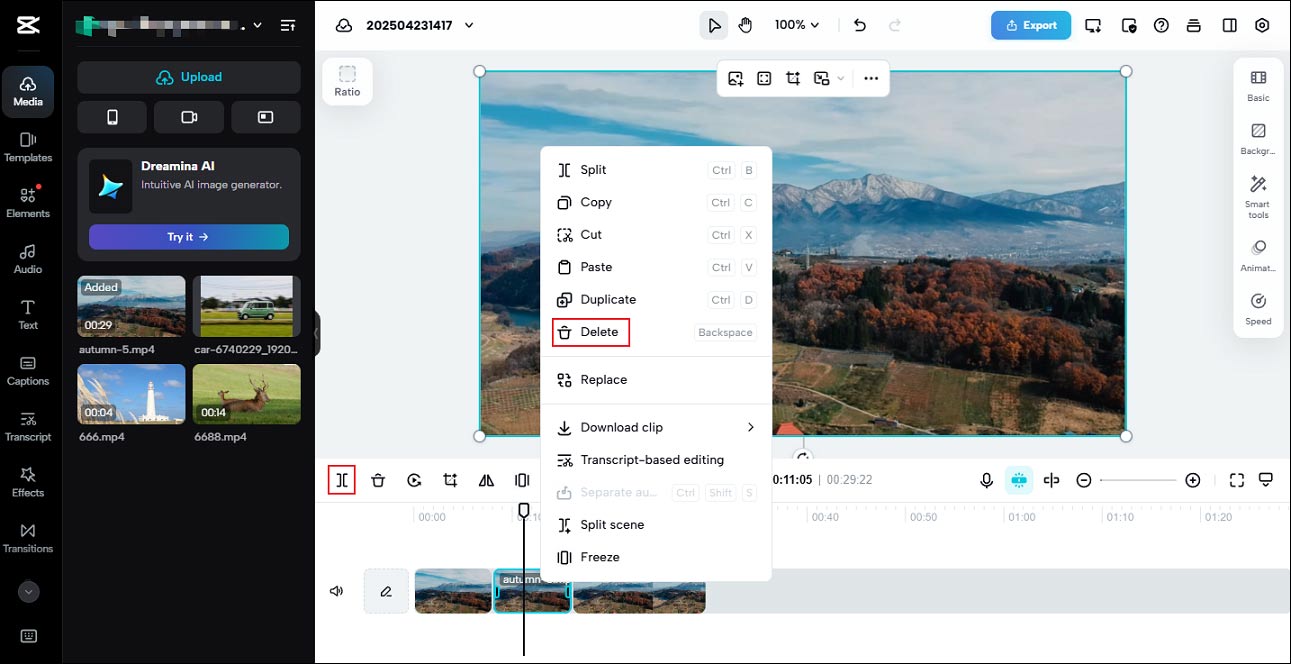
Step 2. Click Media > Upload to import your video and drag it to the timeline.
Step 3. Select the video on the timeline, drag the playhead to the desired position, click the Split icon, continue moving the playhead to the endpoint of the clip you want to remove, and click the Split icon again. Then, right-click the middle clip and choose Delete.
Step 4. After that, click the Export option, then you can directly share the video on TikTok, YouTube, Facebook, and Instagram, or download it as an MP4 or MOV file.
![[10+ Methods] How to Stop CapCut from Lagging on PC & Mobile](https://images.minitool.com/moviemaker.minitool.com/images/uploads/2024/05/capcut-lagging-thumbnail.jpg)
Conclusion
Cutting the middle part of a video is easy with the right tools. No matter which tool you choose, the process is similar. Split the target clip from the original video, delete it, and merge the remaining clips. Select a tool and remove unwanted sections to create a cleaner and more engaging video.
Finally, if you have problems while using MiniTool MovieMaker to create videos, please contact us via [email protected] for assistance.
About The Author

Position: Columnist
Cora is a tech writer specializing in digital media workflows, with over six years of hands-on experience in video post-production, media transcoding, and screen capture. Her writing is always clear and practical. Cora also produces in-depth software reviews for users across skill levels to help them find the right tool and enjoy video editing.
User Comments :