In this post of MiniTool MovieMaker, we will give you a step-by-step guide on how to add overlay on CapCut on PC. Also, you can add overlays using the CapCut app for Android and iOS, and the steps are exactly the same.
CapCut is a popular video editing application for creating TikTok videos, YouTube videos, and more. This app is packed with various features like cropping, text, transitions, filters, green screen, speed adjustments, and more. In this post, we’ll focus on CapCut overlays and teach you how to add overlay on CapCut on PC.
About CapCut Overlays
Overlay is an editing technique of video editing applications and this feature allows a video or an image to overlap with other elements in the same frame or screen. With the CapCut app, you can add video, text, image, and sticker overlays. This guide will show you how to overlay videos on CapCut with a video, an image, text, and stickers.
However, the CapCut overlay feature is totally different from the green screen feature. A typical example of overlay is the picture-in-picture video, while green screen is used to change the background of the video.
How to Add Overlay on CapCut on PC
Follow the steps below to learn how to overlay on CapCut on your desktop.
Step 1. Create a New Project
1. First, you should go to the Microsoft Store or CapCut website to download the app on your PC or install it on your Mac from the App Store.
2. Once installed, open the CapCut desktop app and sign up with your account.
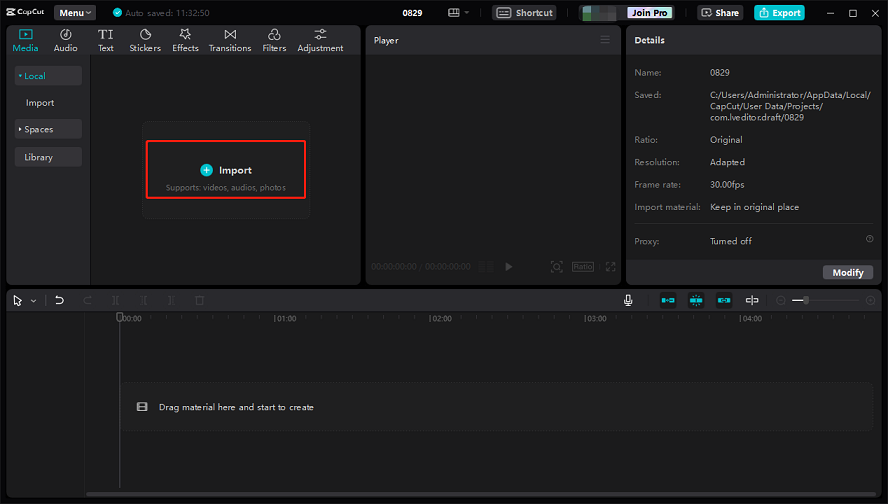
3. Click the + Create project button at the top to enter the edit page and click Importto upload your videos and images.
Step 2. Add Video Overlay
1 First, hover over the thumbnail of the video you want as the background, and click + to add it to the timeline.
2. Drag and drop another video into the timeline, and both videos are on the same track. Then, click and select the desired video as an overlay and drag upwards. This will create a new video track.
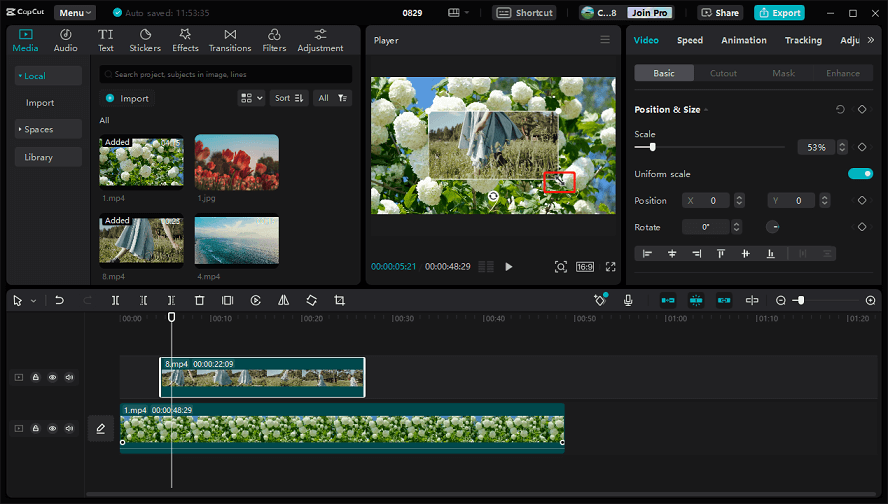
3. Go to the video player section and move the points on each corner to adjust the size of the overlay. Also, you can use the Scale tool on the right. And you can dray the overlay on the player window to change its position on the frame.
Step 3. Add Image Overlay
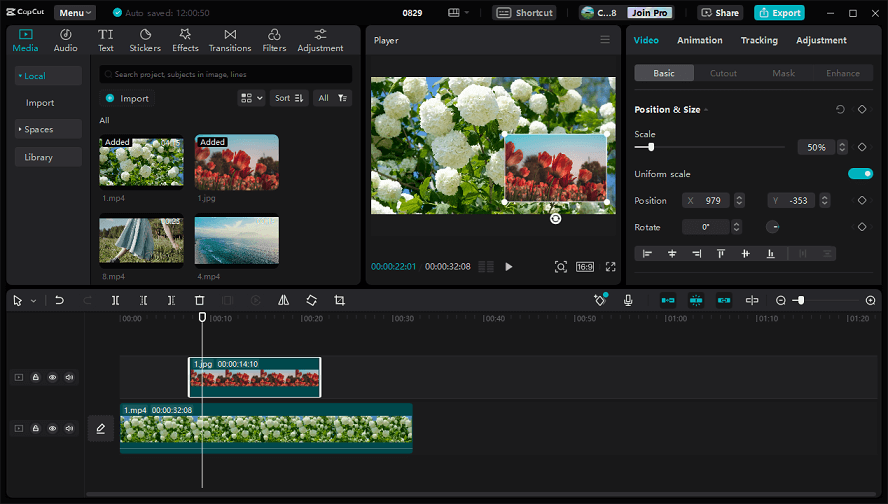
Adding an image overlay works the same way you add a video overlay. In addition, you can drag the edge of the clip to adjust its duration.
Step 4. Add Text Overlay
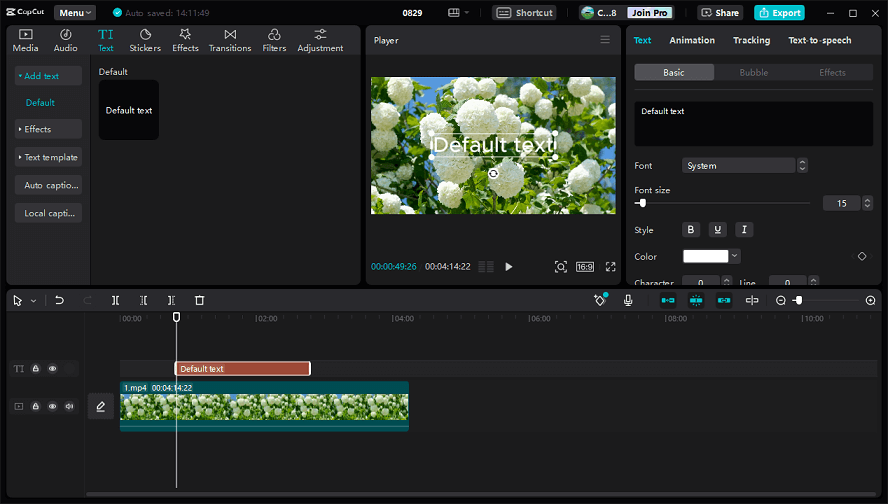
1. To add a text overlay on CapCut, select the video on the timeline and move the playhead to the desired place where you want the text to appear.
2. Go to Text at the top, you can click the plus icon below Default text to add a text track on the timeline and edit your text on the right side. Also, you can use a text template. Drag the right edge of the text to make it longer.
Step 5. Add a Sticker
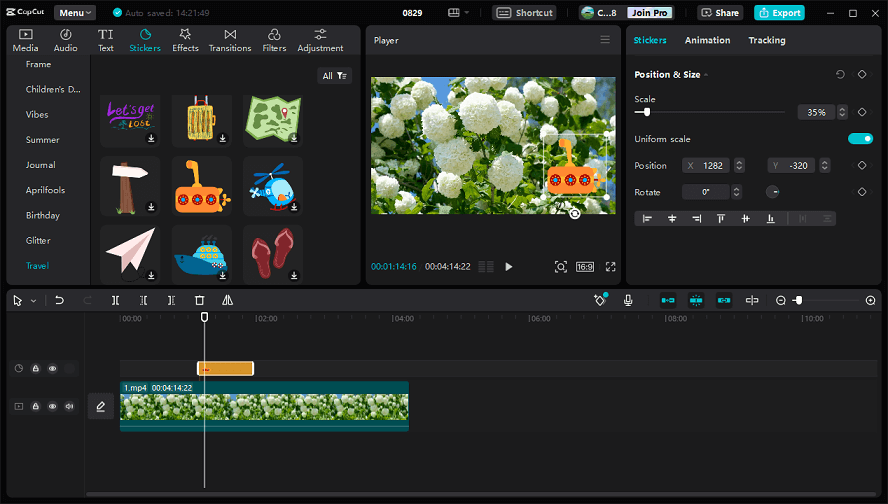
1. CapCut provides a variety of stickers to spice up videos. To add a sticker overlay, first, you should move the playhead to the target place where you want the sticker to appear.
2. Go to Stickers at the top, select a category, download a sticker, and click + to add it to the video. Then, you can adjust its duration, position, and size.
Step 6. Export the Video
Click the Export button in the top right corner, then you can select the video resolution, bitrate, codec, format, and frame rate, choose a folder to save the video, and click Export.
A CapCut Alternative You Shouldn’t Miss
MiniTool MovieMaker is one of the best alternatives for creating videos on Windows 11/10. This app is simple to use and includes many editing tools. It enables you to crop, trim, split, rotate videos, change video aspect ratio, apply transitions, and others. More importantly, it can export videos up to 1080P or 4K for free and without watermarks.
In addition, MiniTool MovieMaker is a multitrack video editor that supports up to 9 video tracks and 2 audio tracks to overlay multiple resources, such as videos, images, animated elements, captions, frames, filters, etc. Here’s how it works:
Step 1. Download and install this excellent video editor by clicking the button below.
MiniTool MovieMakerClick to Download100%Clean & Safe
Step 2. Open the application and close the promotion window to access the main interface. Click the Import Media Files button to upload your videos and photos.
Step 3. Click the + icon on a video or picture to add it to the timeline. Then, drag and drop the target video/image on top of the main video layer to create an overlay.
You can also add text overlay and element overlay to your video. Go to Text > Caption or Elements, download a text template or element, and add it to the timeline. Next, edit the duration by dragging any edge of the desired layer on the timeline.

Step 4. Finally, click the Export button to save your video.
Conclusion
You can follow the above steps to use the CapCut desktop app to add overlays. It’s very simple. If you like this post, you don’t want to miss:


![TikTok Photo Mode: How to Get Photo Mode on TikTok [Full Guide]](https://images.minitool.com/moviemaker.minitool.com/images/uploads/2022/11/how-to-get-photo-mode-on-tiktok-thumbnail.jpg)
User Comments :