In this post, we’re going to show you how to edit a cinematic video in CapCut. With these tips, you can easily make your video look cinematic.
If you’re an iPhone user, you might directly use the cinematic mode of the Camera app to record a cinematic video. Also, you can use a video editor to turn your footage into a cinematic video. CapCut is one of the most popular video editors in recent years, and many people want to know how to edit a cinematic video in CapCut.
In this guide, we’ll give you 5 useful tips to help you easily make a cinematic video with CapCut on your Android, iPhone, and desktop.
MiniTool MovieMakerClick to Download100%Clean & Safe
Tip 1: Speed Ramp
Like many other video editors, CapCut allows you to adjust the playback speed of a video. In addition to normal speed settings, which means the video always keeps the same speed, CapCut supports speed ramp, also called velocity edit or curve speed. Speed ramp means that a video has different playback speeds at certain seconds.
How to speed ramp in CapCut?
First, open the CapCut app on your desktop, click the + Create project button, click Import to upload a video, and add it to the timeline. Next, select the clip on the timeline, click Speed at the top left, and select Curve.
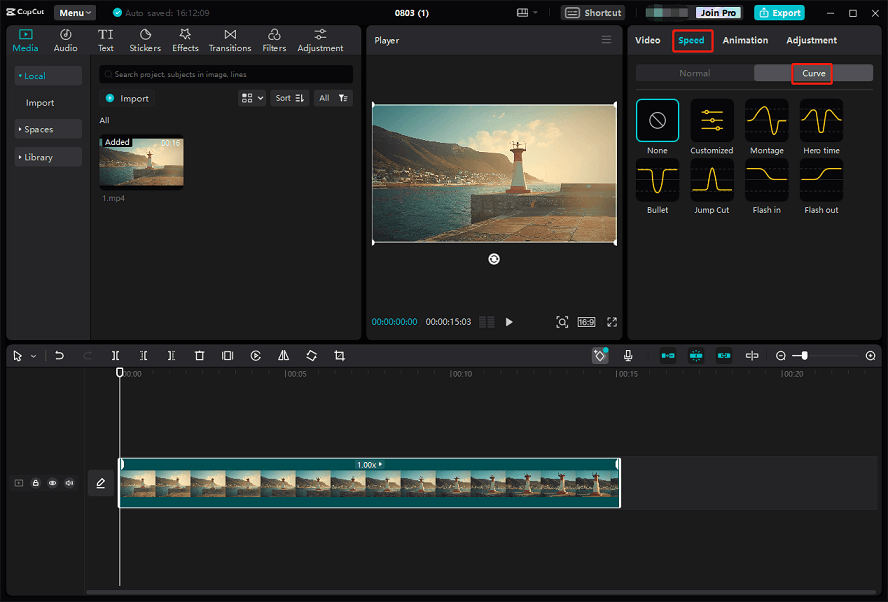
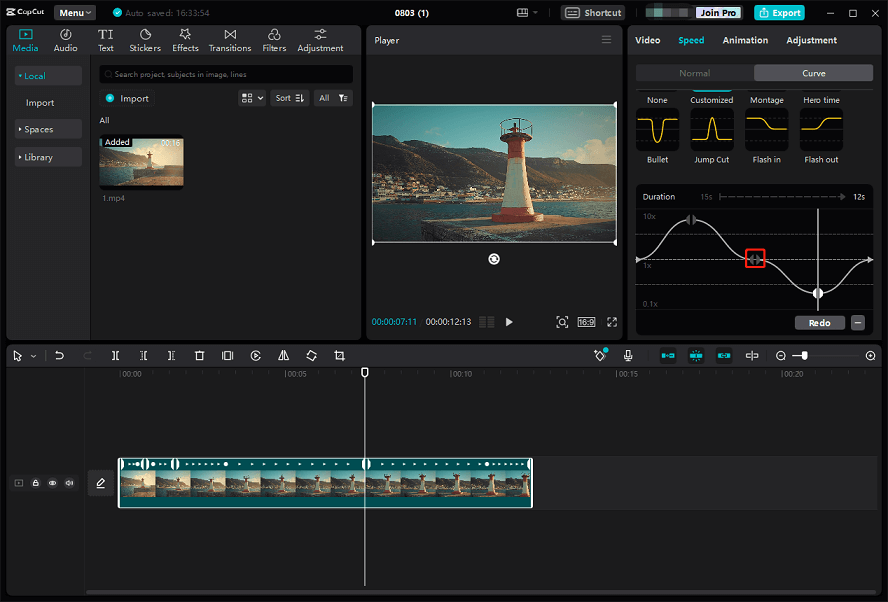
Immediately, you’ll see several speed ramp templates. You can try these templates and then preview your video. Also, you can choose Customized to manually control the speed.
You can see several points on the 1X line, and drag these points up or down to increase or decrease the playback speed.
Tip 2: Use Cinematic Music
Music is an essential part of a cinematic video. To edit a cinematic video in CapCut, you should add music to that clip. CapCut has an audio library that includes some trending music tracks and sound effects. Also, it supports extracting audio from a video.
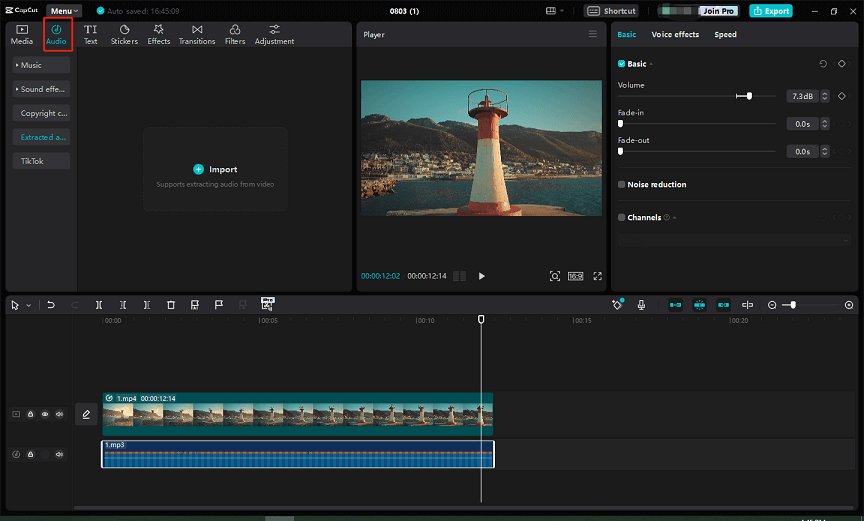
Alternatively, you can upload downloaded music tracks, songs, or sound effects to the video. There are many sites to download stock music for videos. After downloading, click Media and Import to upload your music, and add it to the timeline.
Tip 3: AI Auto Beats
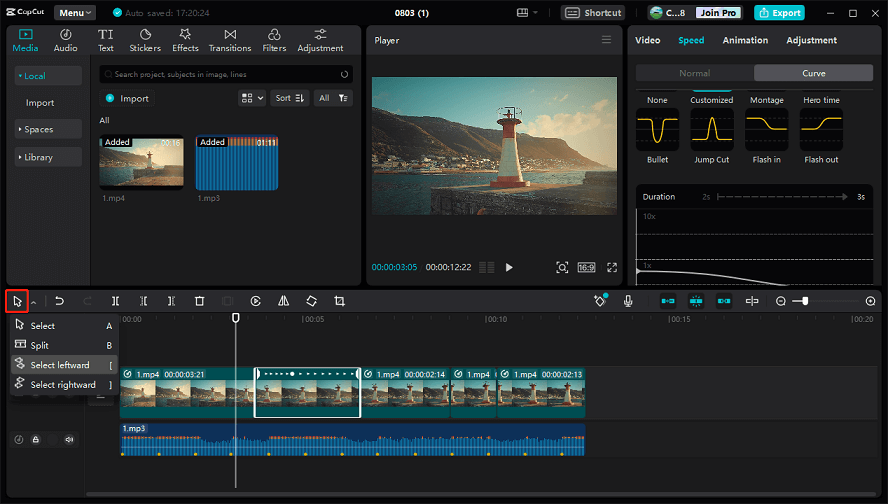
CapCut’s Auto beat feature uses AI to show you where the beats of your music track and so you can easily match the music to the video. All you need to do is to select the audio track, click the Auto beat button, and select Beats 2. Then, you’ll see some yellow dots at the bottom of the audio track and every dot is a beat.
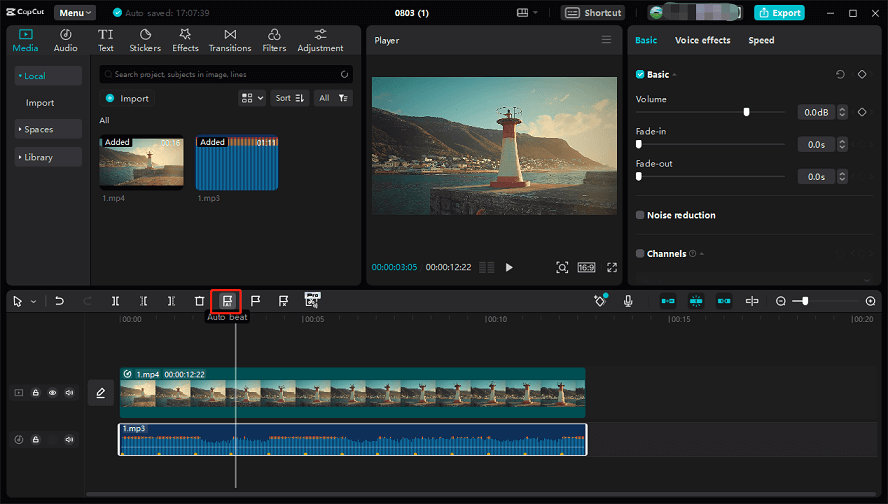
To cut and trim all clips to the beat, select your video, click the arrow button, select Split, and split the video into as many parts as you like. Then, click a clip, and drag the white edges to trim the video.
Tip 4: Color Grading
Color grading is also an important part if you want to create a cinematic masterpiece in CapCut because the color can express the tone, emotion, and atmosphere of your video.
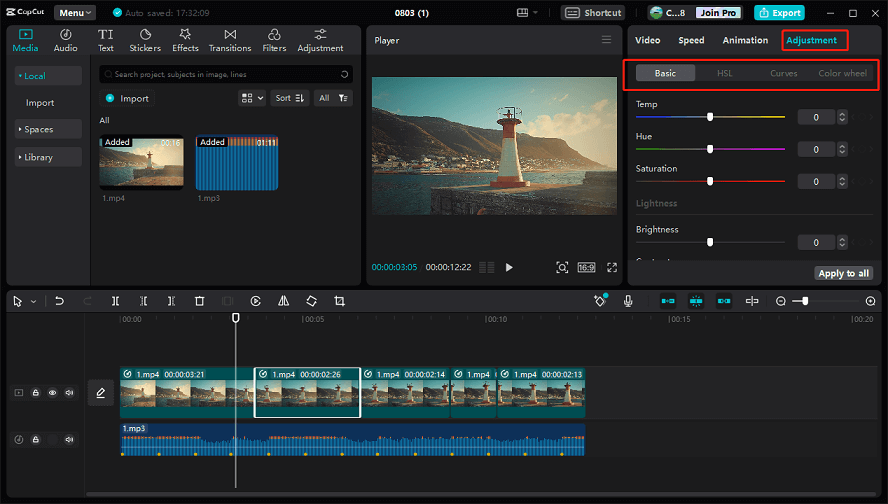
How to color grading in CapCut? Click Adjustment, under the Basic tab, you can adjust the clip’s temperature, hue, saturation, brightness, contrast, and more. You can do more advanced settings in HSL, Curves, and Color wheel.
Apart from that, you can directly add a filter to your video. CapCut offers a wide variety of filters. Just go to the Filters tab, download a filter, and click + to apply it.
Tip 5: Add Cinematic Bars
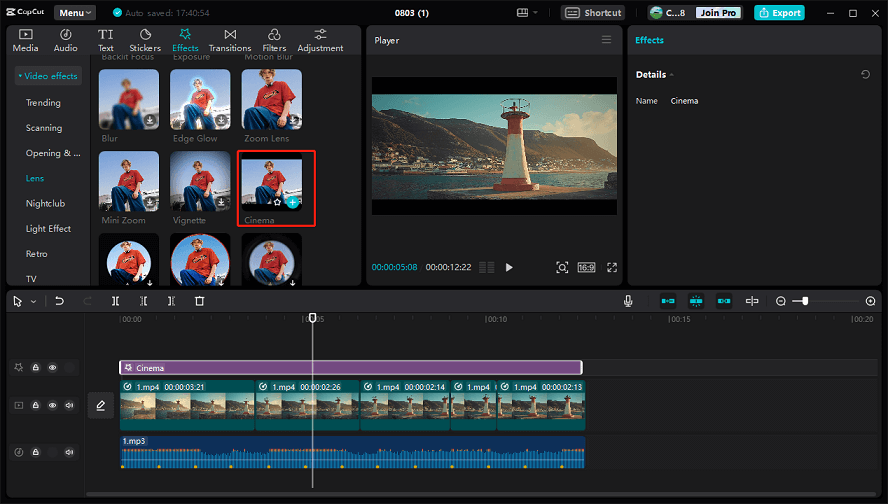
The last tip is to add cinematic bars to your video. This is very simple. Click the Effects tab, expand Video effects, select Lens, scroll down, find and download the Cinema effect, and add it to your video.
There’s a second way to add cinematic bars on the CapCut app for Android and iOS. Just click on your video, find and click Mask, and click the Filmstrip option.
Conclusion
Hopefully, these 5 tips can make you edit a cinematic video in CapCut. Plus, there are even more features you can experiment with to make your videos look more cinematic and express yourself better.


User Comments :