As the name suggests, video post-production is the final phase of video creation. This is a stage you need to put everything together to finish your masterpiece video. This post will give you a complete guide on the video post-production process. Read this post to get some inspiration or insight.
The best way to summarize the video post-production phase is exactly that – the putting together phase. All the content has been envisioned and captured, and now it’s time to put it together. The content below will present you with the ultimate guide on video post-production.
Besides, here we will recommend you an amazing free video post-production software – MiniTool MovieMaker, which is easy to use no matter what your skill level.
MiniTool MovieMakerClick to Download100%Clean & Safe
What Is Video Post-Production?
To begin with, let’s cover the base. The production of a film or video is a three-step process:
Pre-production: it is about what occurs before the actual time before a film/video is shot, including the preparation, the scripting the planning, or the scheduling. Production: it is between video pre and post-production that you film your video assets. Your video footage is gathered by filming scenes live. The filming, on-location sound recording, reshoots are involved.
Post-production: it generally includes everything that occurs after the shooting has been completed. This is the third final phase where the video footage takes shape as an actual product. Organizing, cutting, coloring, and editing the footage captured in production are involved in this stage.
You can refer to this post – Top 10 Must-Have Apps for Filmmakers [Ultimate Guide] to make the filmmaking work easier right on your mobile phone.
Why Does Video Post-Production Count?
As we can see the definition of video post-production in the above part, so many important things are completed in this phase. In other words, without the video post-production workflow, there is no finished video product. You simply have raw footage that may or may not tell the story you want to tell.
In fact, raw video footage is often not shot in the order it is meant to be presented in, but rather, the order that was most efficient for the actors, location, and other factors in a video. Presenting unedited footage likely wouldn’t make sense, let alone tell a compelling story.
Every element of post-production works to enhance the overall story of the film. Background music, for instance, sets the mood and tone of the piece. With skillful editing, a video can definitely reach its full potential. The following part will present a clearer picture of the vital elements in the video post-production process.
What Are the Key Elements of Video Post-Production?
Video post-production is one of the most important steps of making a video. In this stage of your video-creation process, you take the elements and craft them into your final vision for the video. What are elements that make up the post-production stage? What exactly goes into post-production work for a video? You can refer to these key elements as your video post-production checklist. Let’s go on.
In this article, we are mainly focusing on the post-production elements of a live-action video, not an animated video. You can check this post How to Make Animated Videos [Step-By-Step Guide] for animated videos.
Video Editing
After filming is over, the editing process begins. It is the act of assembling clips and putting the raw footage in a coherent order to tell the desired story. Firstly, you need to go through the footage to find the best takes. Once you’ve picked the best takes, you then cut the video clips in accordance with the script and storyboard that pulls focus to your core messages.
Tips: You can research editing software like MiniTool MovieMaker, iMovie, Adobe Premiere, Final Cut Pro, and more to see which is right for you. Using editing software, you’ll select your footage, cut it up, or splice it together.
After placing the footage into a sequence, you can finesse the timing of the edits and assemble all the final pieces. Refer to your script as you assemble your scenes, so you know you’re getting everything you planned.
Color Correction
Color correction is the process of altering the color of the light in each shot with digital filters so each shot matches one another. These corrections include fixing exposure problems, where too much light is in one shot and too little in another; or white balance issues, where the color of the light just doesn’t match.
It can make a huge difference to your video. When shooting a video, chances are you will be filming with multiple cameras and in multiple locations. The lighting, color depth, camera settings may cause a variation in post. That’s why the color correction is so important because it helps to maintain continuity in your story and makes the video look more harmonious.
Special Effects
Visual Effects are also an important part of video editing post-production workflow. There are many special effects like green screen, compositing – the layering of multiple effects or muzzle flashes. You can also stabilize shaky clips, clean up unwanted noise or artifacts in the video, and add motion graphics or animation for a unique or specific look to your film.
Sound Processing
The sound process in audio and video post-production refers to a stage where you edit together different audio tracks for your video or synchronize them to your video. Remember that your sound exists to enhance your visuals. This can be done through video editing or sound editing software.
The different sound elements your video might have include: dialogue, where featured people speak in front of the camera; sound effects, such as a doorbell or dog barking added after the filming is done; music, as the background of what’s happening on-screen; and voiceover, where someone off-camera talks over the images of your video.
For some audio elements, like voiceovers or sound effects, you may need to record separately. That’s because you need a soundproof place to get clean audio. Sometimes, you might even need to re-record audio like dialogue that you captured in your production phrase, due to some unwanted sounds in the background.
The soundtrack needs to blend in well with the visual portion of the project – it needs to match the tone of the video, match the pace of the edits, and help get your core message across to your target audience.
Title and End Cards
You can add titles and credits at the beginning and end of your video, and any other text you may need. End cards are a title graphic placed at the end of your video. You may be familiar with the concept of end credits, as filmmakers use them at the end of each movie to give credit to everyone who worked on a film.
End cards in digital video post-production are similar. They can be not necessary but maybe a nice way to remind the viewer of your brand.
If you make the video for your brand, you will typically use the end card to highlight your brand’s name, logo, and any additional links, like a homepage, or email sign-up form. The end card should also encourage viewers to take an action using a CTA (call to action), like “Visit Us,” or “Get Started!”.
Video Distribution
Video distribution is the last element in the video post-production process. The platforms you distribute can range from streaming services such as YouTube and Amazon to social media like Facebook or Instagram.
Social media platforms each have their own video requirements, such as aspect ratio and maximum length. Streaming services like YouTube and Vimeo provide guidelines for how best to export. You can change the resolution, size, format of your video when you export it. Check this post The Best Video Aspect Ratio for YouTube, Instagram and Facebook for more information.
For each of these distribution methods (just like social media), there are different technical specifications your video must meet. Post-production distribution services could include taking care of these requirements and inspections for you.
Best Video Post-Production Software
MiniTool MovieMaker
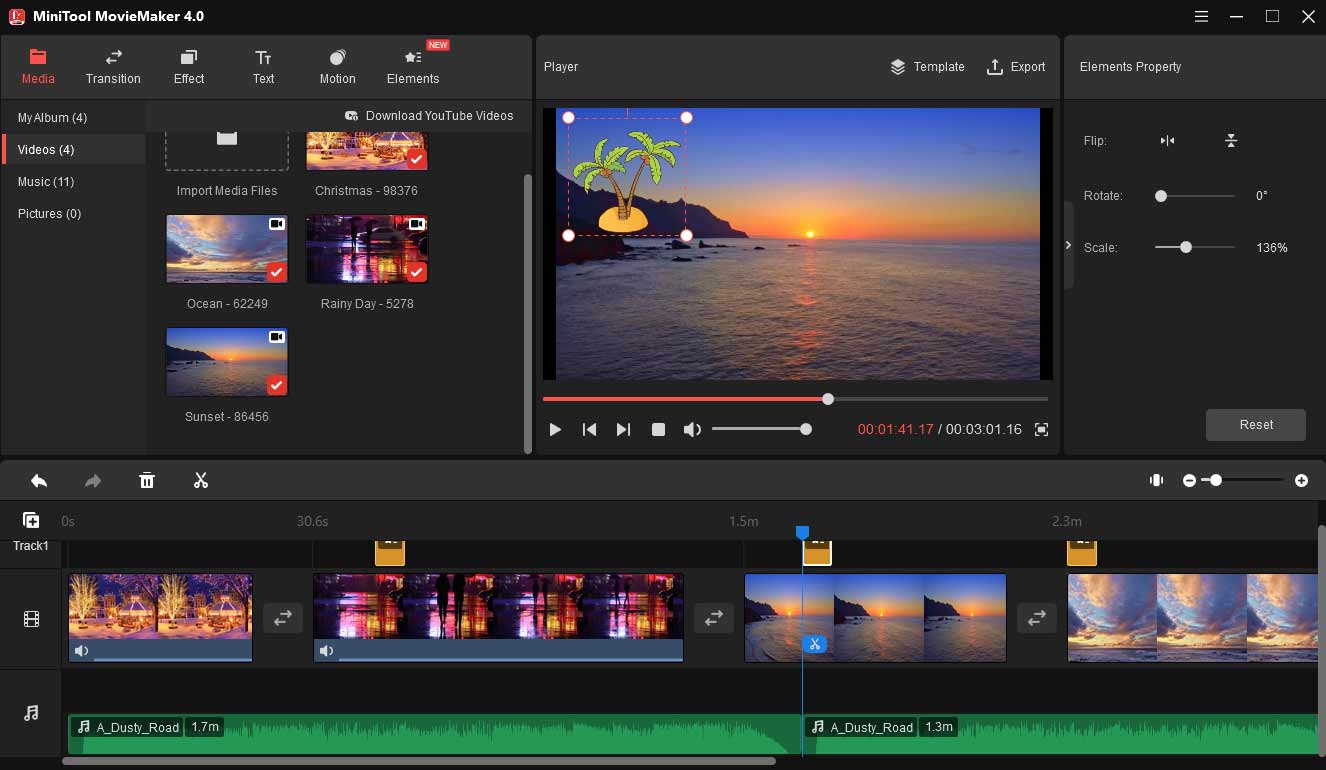
MiniTool MovieMaker is one of the best video post-production software for Windows. Amazingly, it is a 100% free yet safe video-making and editing program with no ads, watermark, or bundle. With a clean and simple interface, you can learn about all the editing features and familiarize yourself with this software easily and quickly.
As we mentioned the key elements in the video post-production process, it definitely does well in polishing your video footage. To help you deal with the video clips, it comes with some basic editing features as well as advanced editing options. You can cut, trim, rotate, flip, combine, reverse, speed up/slow down your videos.
To make your video more attractive, you can apply beautiful filters, transitions, motion effects, and animated elements to the video. It also provides you with creative flexibility including 3D LUT effects, color correction, and the ability to fade in and fade out the audio in your videos.
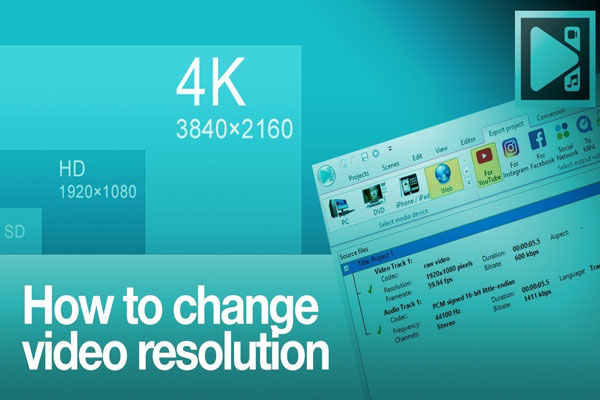
Amazingly, this free video post-production software also allows you to change the video resolution and video format. After you complete all the editing, you can change the format of your video file to make it compatible with other platforms and media players.
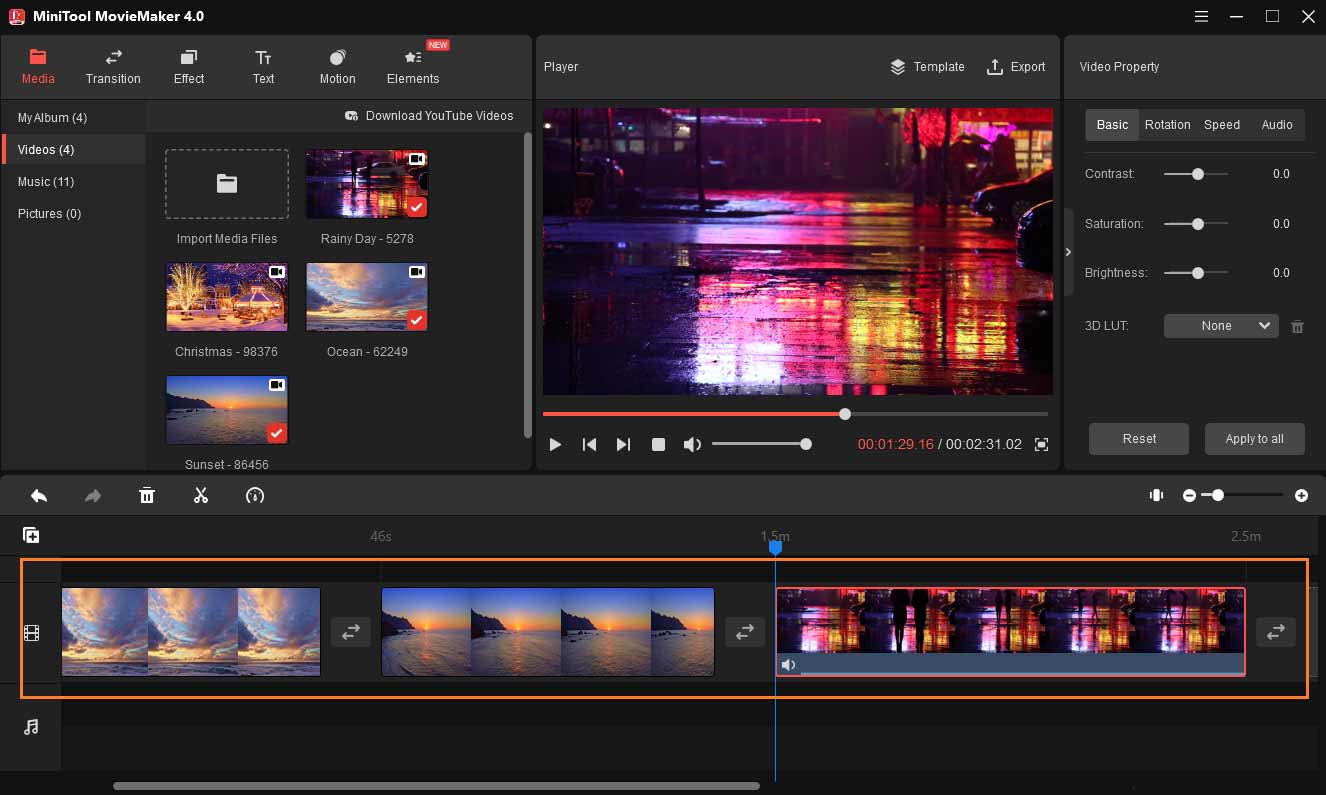
How to Use MiniTool MovieMaker in Video Post-Production
1. Launch the free MiniTool editing software.
MiniTool MovieMakerClick to Download100%Clean & Safe
You can download MiniTool MovieMaker by clicking the button above and installing it on your computer. Launch the program and shut down the popup window to enter the main interface.
2. Import the video clips.
After you get the main user interface, click Import Media Files to import the video files. And then drag and drop them onto the timeline.

3. Edit videos.
- Arrange videos: Drag and drop the media files to change the position on the timeline.
- Cut video: Select the target video clip on the timeline, drag the playhead to the place you want and click the scissor icon to split, or click the scissor icon and choose Quick Split. Right-click the clip you want to remove and select Delete.
- Add effect: Target the clip on the timeline where you want to apply an effect. Click Effect, choose the desired effect. Click the + icon to add the effect to the video. Or drag and drop the desired effect to the target clip.
- Apply transition: Select the clip where you want to add a transition next to it. Go to Transition. Drag and drop the desired transition to the location between two clips. Or right-click the transition, select Apply to All to add the same transition to all clips on the timeline.
- Add title/credits: Head to Text, find a suitable title/credits, then drag the title/credits from the text effect library to the timeline, or click the + button to put title/credits in the right place.
- Add animated elements: Go to Elements. Click the download button to download the source of the online element. Or right-click on an element and then select Download All to get all the elements. Locate the place where you want to add elements on the timeline, select the desired element. Click the + button or drag the desired element to the track above the target clip.
- Insert music: Go to Music under Media, and then use the built-in music tracks. Click the + icon to add the music to the video, or drag and drop the music to the video on the timeline. Or tap on Import Media Files to import music files. Click Open to import the music. Then, drag the imported music into the timeline.
4. Export the video.
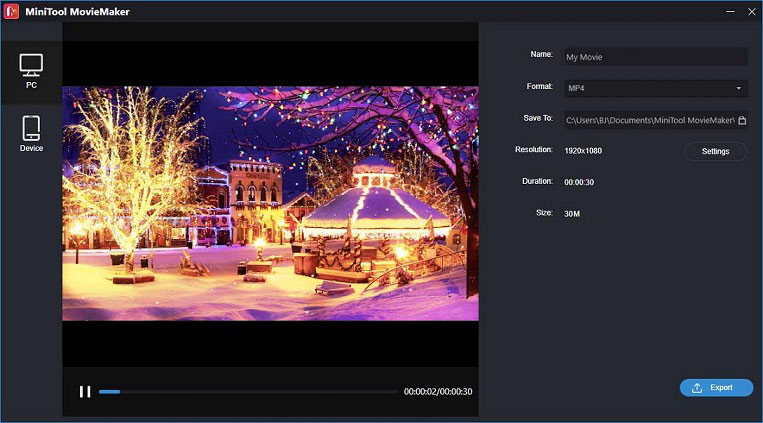
After editing, tap on Export to open the export window. Here you can rename the video file, change the video format, specify the destination folder, and adjust the video resolution. Once you’re done, tap on Export to save the final video.
Conclusion
To sum up, video post-production is a critical turning point in any video or film. This editing process has the potential to bring any video to its full potential. I hope this post can be helpful in your video post-production workflow.
If you have any questions or encounter any problems while you are using MiniTool MovieMaker, you can connect us via support@minitool.com.
User Comments :