Have you ever wanted to remove a certain part of the audio from a video? Maybe there’s an unwanted noise or copyrighted music. This guide offers 4 simple methods to help you accomplish this task.
Why Remove Part of Audio from Video
Removing part of the audio from a video serves various purposes. Here are key reasons:
- Avoid Copyright Issues: If the music is copyrighted and you don’t have the right to use it, deleting it is a necessary step to avoid legal problems.
- Achieve Better Sound Quality: Removing background noise (like wind, traffic) or bad recordings makes the audio clearer. Meanwhile, the audio may contain something that is not relevant to the main theme of the video. Thus, you can remove it to highlight important parts.
- Create Emotional Effect: Removing part of the audio from a video to create silent moments can have a powerful emotional effect. For example, silence in a scary scene makes viewers more tense.
- Reduce File Size: Audio takes up space. Removing unnecessary audio makes the video file smaller.
In short, removing part of the audio from a video can make the video better to watch and share.
How to Remove Part of Audio from Video
In this part, I will show you 4 easy methods to help you remove part of audio from video.
Method 1. MiniTool MovieMaker [Desktop]
MiniTool MovieMaker – a free video editor without watermark, is the most recommended tool for this job. Its intuitive interface allows anyone to create a wonderful video effortlessly and quickly.
MiniTool MovieMaker offers many editing tools, including trimming, splitting, cropping, speed control (fast-forward, slow-motion, reverse playback), and 3D LUTs for advanced color adjustments. It also allows you to add transitions, subtitles, filters, effects, and motions to enhance visual appeal.
More importantly, MiniTool MovieMaker allows you to edit the audio track of your video. You can change the audio’s volume. You can also remove the whole audio track or a certain part of the audio from a video.
In addition, MiniTool MovieMaker offers multiple export formats, including MP4, AVI, MOV, MP3, etc., to ensure flexibility. Moreover, this video editor allows multi-track editing. You can edit video, photos, and audio files independently. It also includes a Group Clips feature that lets you edit the materials on the main track with the images, videos, text, filters, elements, effects, and motions on the sub-tracks together.
Let’s see how to remove part of audio from video using MiniTool MovieMaker.
Step 1. Download and install MiniTool MovieMaker
Click the button below to get the installation package of MiniTool MovieMaker. Then, follow the on-screen instructions to install this softwareon your Windows PC.
MiniTool MovieMakerClick to Download100%Clean & Safe
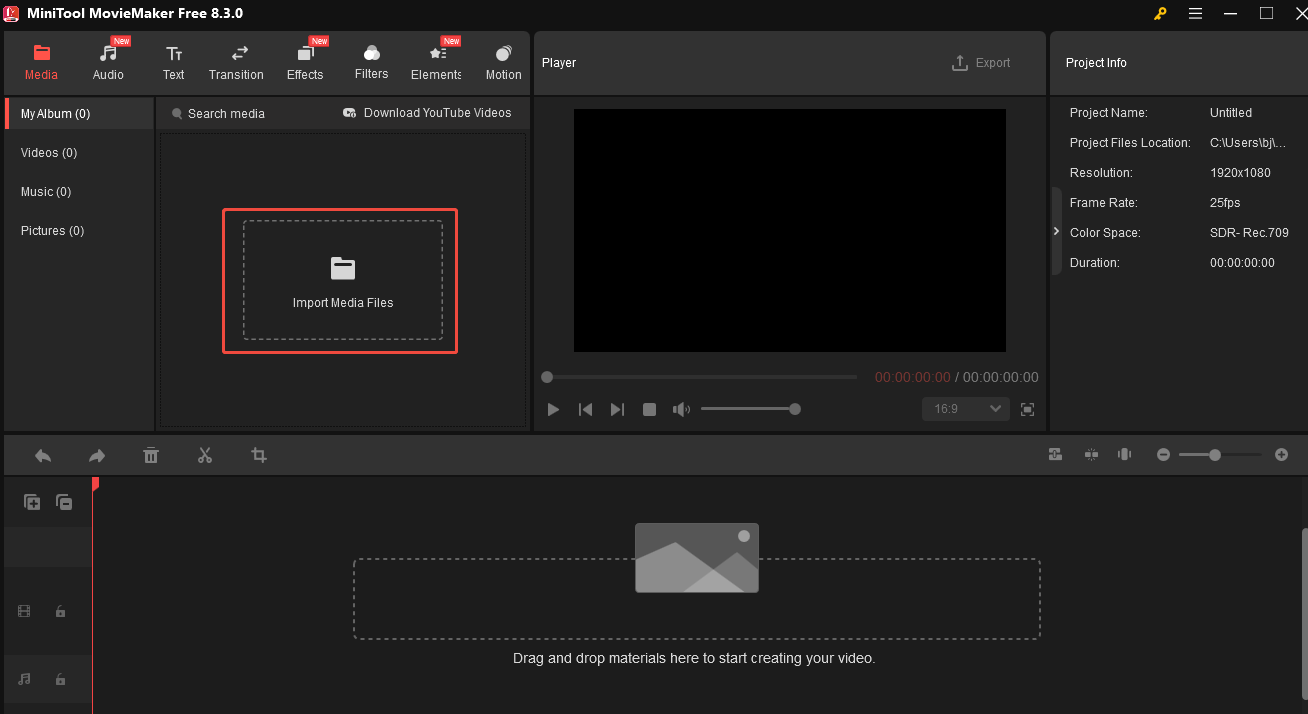
Step 2. Import your video
Launch the software and close the project window to enter its main interface. Next, click the Import Media Files area to upload the video you want to remove part of the audio from. Then, drag it to the timeline.
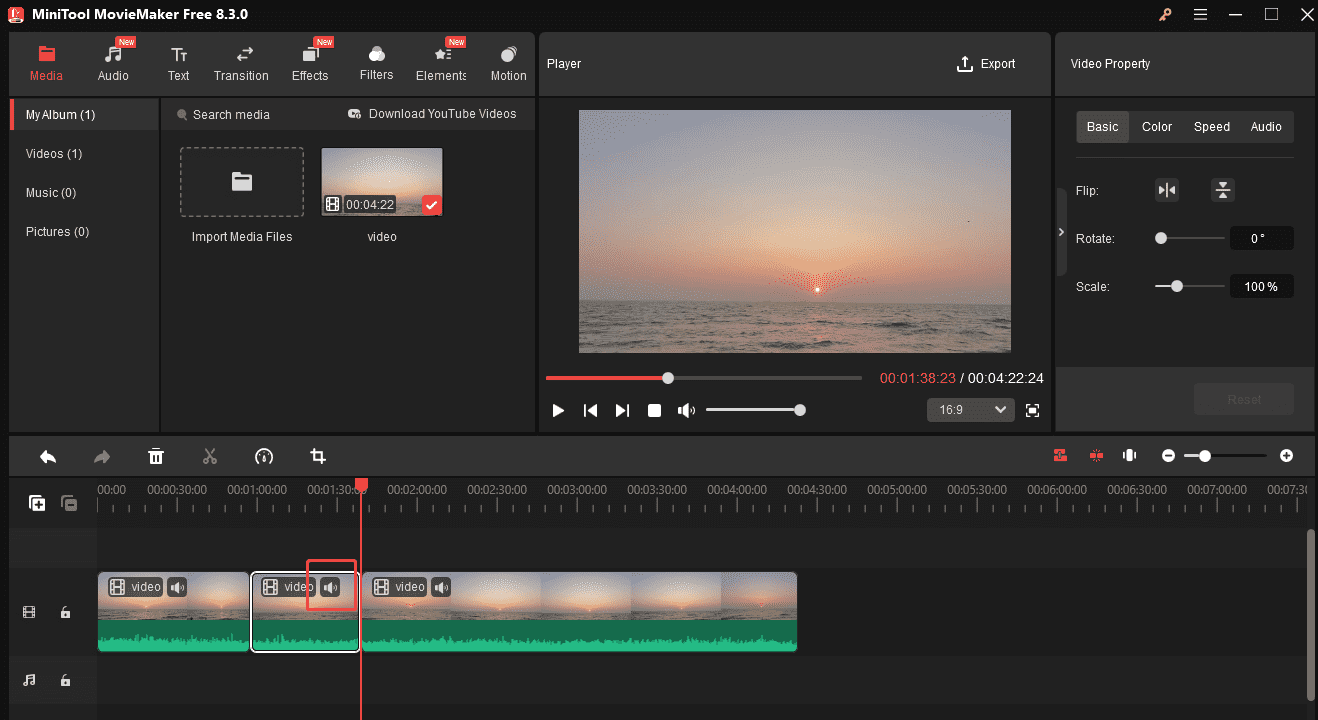
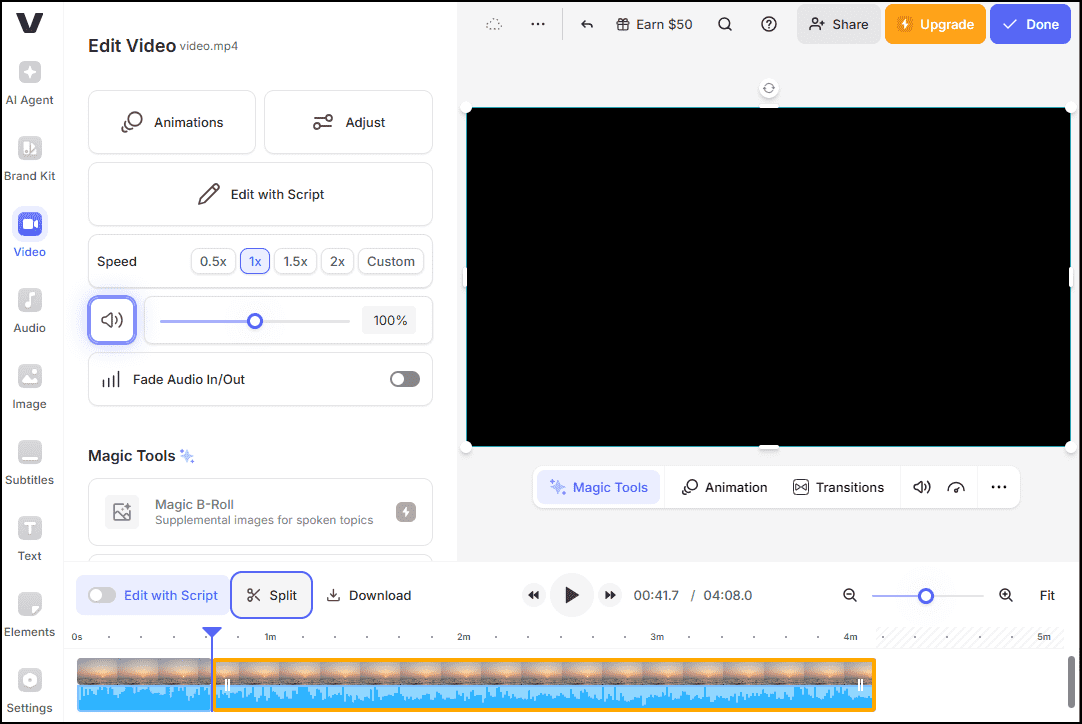
Step 3. Split your video
Before removing a certain part of the audio from your video, you need to split out that part first.
Start playing your video, pause at the beginning of the part that you want to remove audio from, and click the Scissors icon on the playhead to perform a split.
Next, play your video again, pause at the end point of the target section, and click the Scissors icon on the playhead.
Now, you have isolated the audio segment you want to remove.

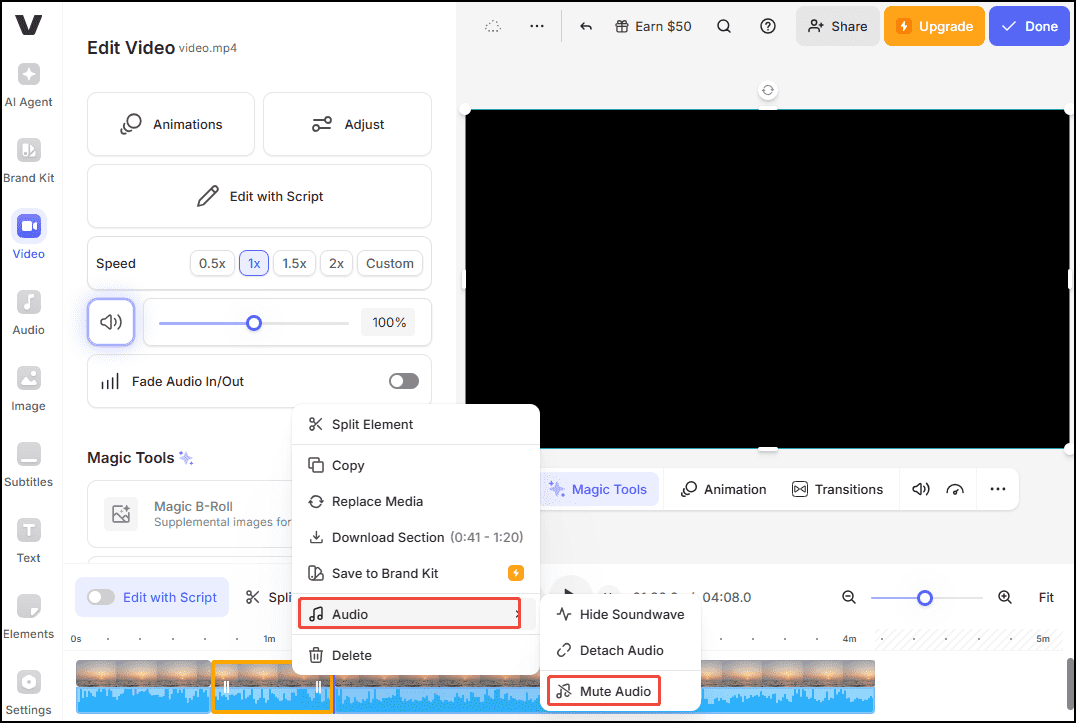
Step 4. Remove the audio
Click the target clip and hit the Mute icon (speaker) on it to remove the audio. Alternatively, you can right-click the target clip and choose Mute Audio from the drop-down list to remove the background sound.
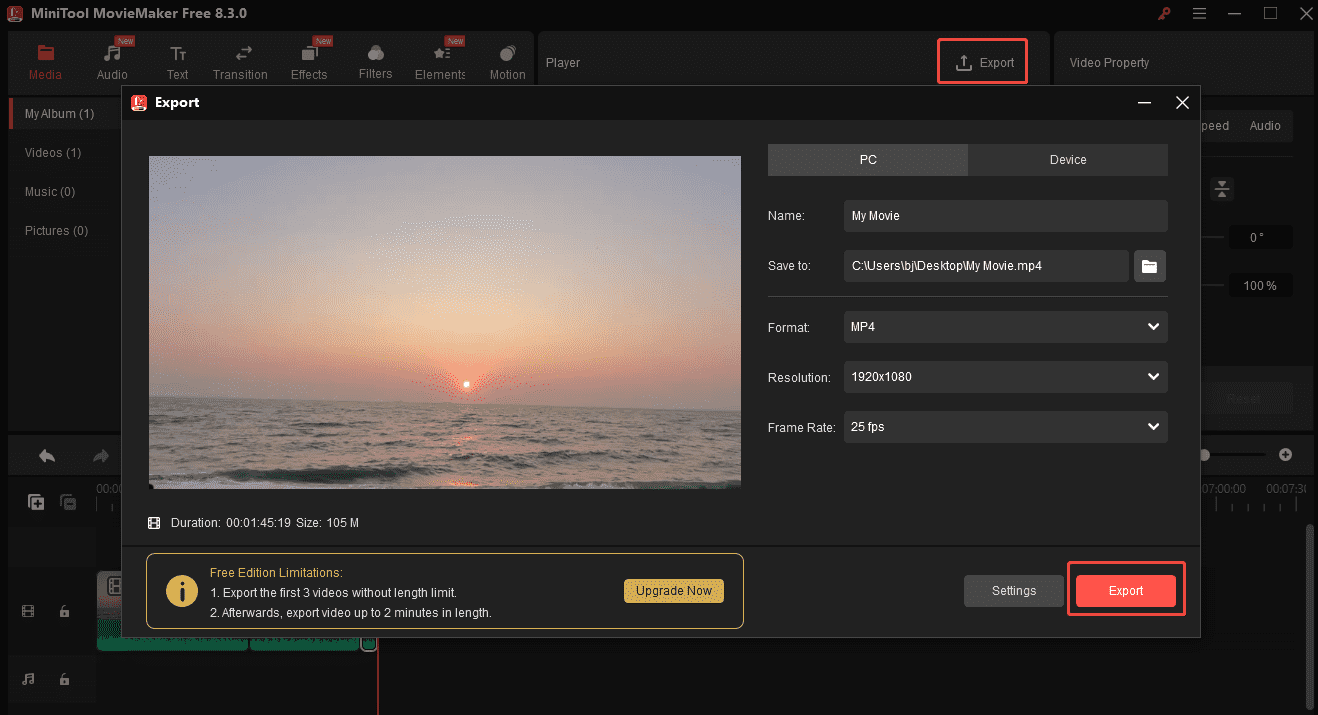
Step 5. Export the edited video
Click the Export option in the upper right to open the Export window. Here, you can customize the video’s name, destination folder, format, resolution, etc. When all set, click the Export button to save the video.
See, removing part of the audio from a video is easy with MiniTool MovieMaker.
Method 2. CapCut
CapCut is a powerful video editing application designed to empower you to create professional short videos with ease. It offers a range of editing tools, allowing you to trim, split, change speed, and customize the aspect ratio. You can also add music, captions, and other visual elements to your video to give it a unique feel.
In addition, the user-friendly interface of CapCut ensures that newbies to use it smoothly.
More importantly, CapCut allows you to edit the audio of your video. You can change the audio’s volume, mute the video, or remove part of the audio from the video.
How to remove part of the audio from a video using CapCut? Here are detailed instructions.
Step 1. Download and install CapCut on your device.
Go to the CapCut website to download this software. Then follow the on-screen instructions to install it on your device.
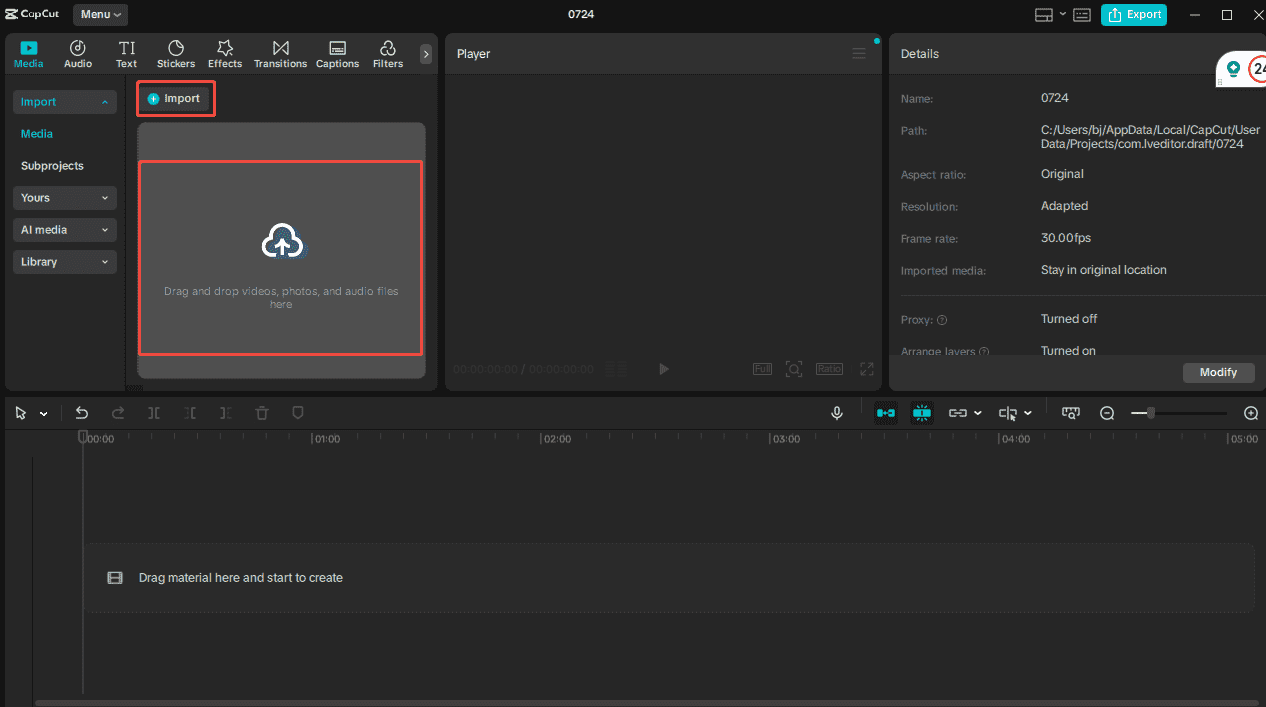
Step 2. Add the video
Click the Import button under the Media tab to add the target video to CapCut. You can also directly drag and drop your video into the software. Next, drag the video to the timeline.
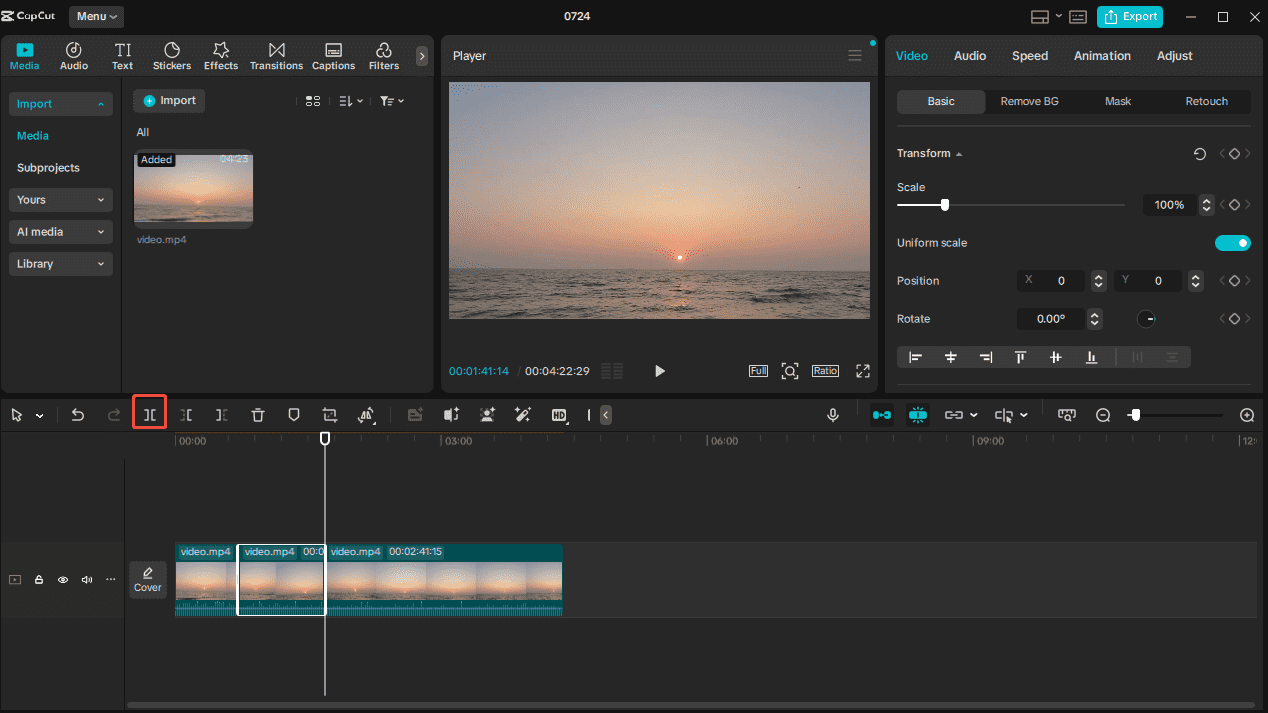
Step 3. Split the video
Start playing your video and pause at the start of the video segment from which you want to remove the audio. Then, click the Split icon on the timeline toolbar to split the video.
Start playing the video again and pause at the end of the clip that you want to remove the audio from. Next, click the Split icon.
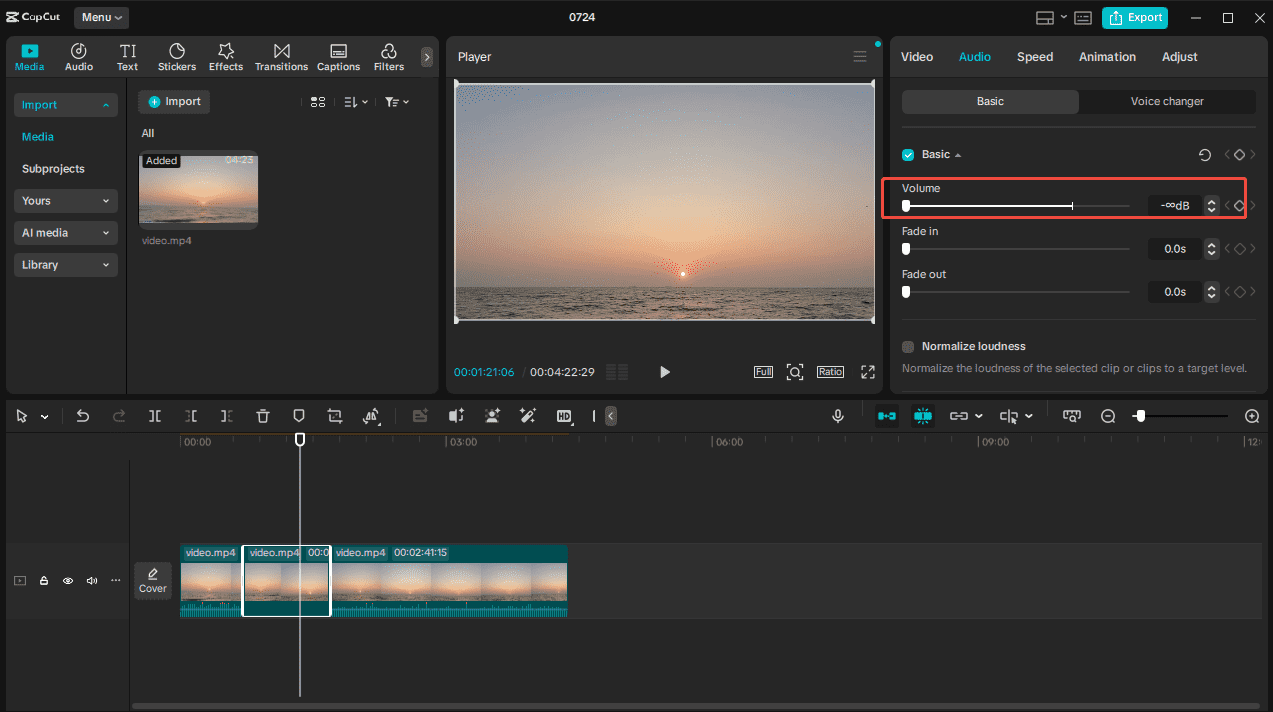
Step 4. Remove the audio
Click the video clip from which you want to remove the audio. Go to the Volume option under the Audio tab and drag the volume slider from 0 to the left end. Then, the video sound will be gone.
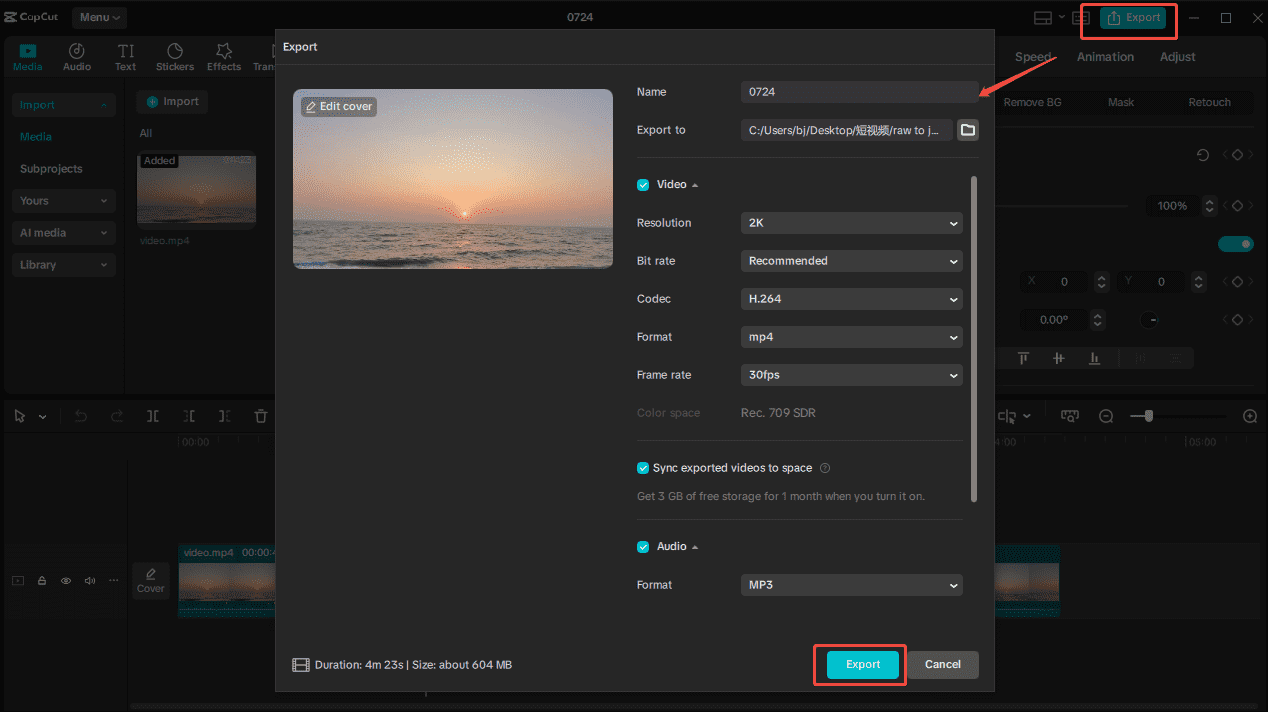
Step 5. Export the video
Click the Export icon at the top-right corner. In the following Export window, you can customize the video’s resolution, output format, frame rate, etc. Finally, click the blue Export icon to save the video on your device.
In short, CapCut is the go-to choice to remove a certain part of the audio from your video.
Method 3. VEED.IO
Can I remove part of audio from video online? Sure! You can try VEED.IO. It is a free online video editor that lets you remove audio tracks without downloading. That’s useful when the storage space of your device is limited.
VEED.IO is easy to use, requiring no experience in video editing. It allows you to mute a certain part of the video or the entire video with just a few simple clicks. You can also add your own audio files after removing the original audio from your video.
In addition to removing audio, VEED.IO can trim video, rotate it, add subtitles, adjust its speed, remove its background, and more.
Here is a step-by-step guide on how to remove part of the audio from a video using VEED.IO.
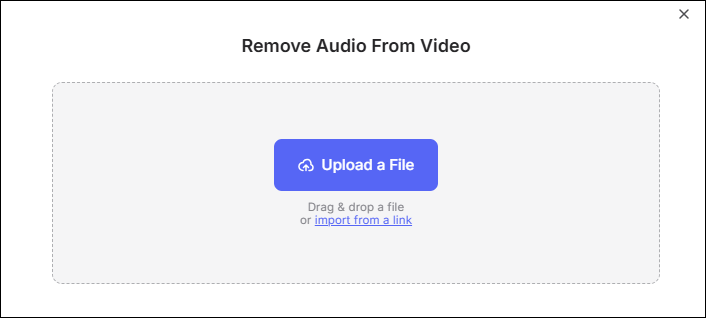
Step 1. Open the VEED.IO removing audio tool
Visit the VEED.IO website using your browser. Choose the Product option from the top menu bar, scroll down your screen to find the Remove Audio from Video tool, and click it.

Step 2. Add the video
Click Choose Video. In the following window, click Upload a File to add the target video to this video editor. You can also directly drag and drop the video into it.
Step 3. Split the video
Drag the playhead on the timeline and place it at the start point of the video where you want to remove the audio, then click the Scissors icon.
Next, drag the playhead to the end point of the video where you want to remove the audio, then click the Scissors icon.
Now, you have got the video clip that you want to remove the audio from.
Step 4. Remove the audio
Right-click the video clip that you want to remove the audio from, choose the Audio option, and select the Mute Audio option to remove the audio.
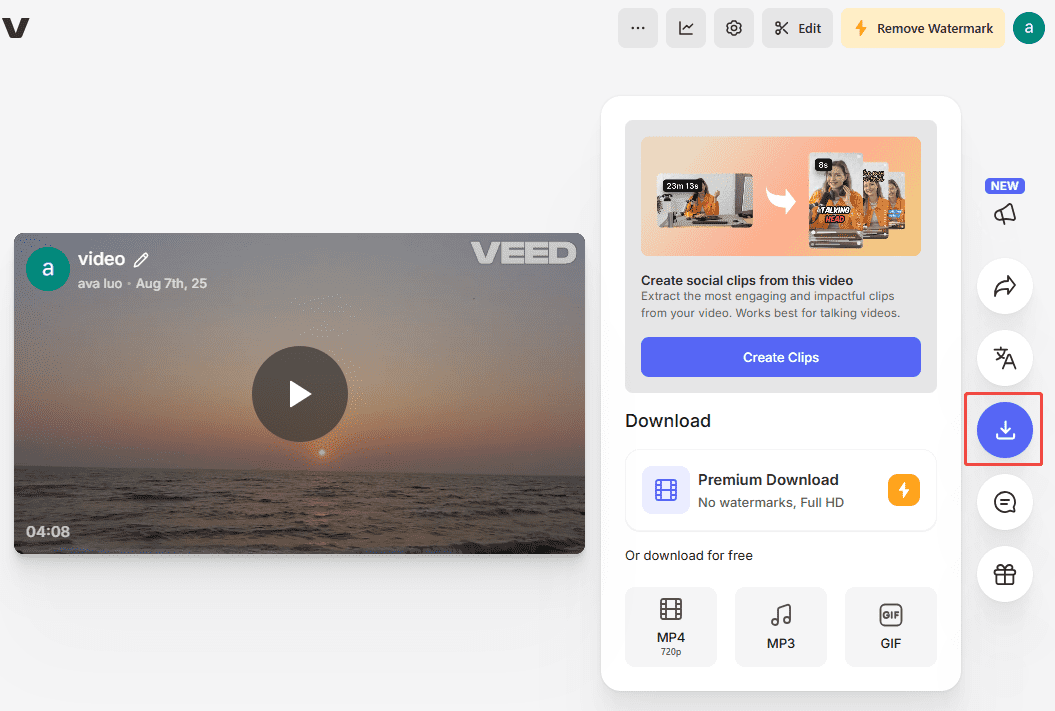
Step 5. Export the video
Click Done and choose Export Video. Finally, click the Download icon on the right sidebar to save the file on your device.
With VEED.IO, you can remove part of audio from video online in seconds.
Method 4. Kapwing
Kapwing is an all-in-one online video editor that is easy to use, powerful, and accessible. The platform is suitable for users of all levels. Whether you’re a beginner or a pro, you can navigate the software easily.
Kapwing offers many useful editing features. It can help you easily remove a specific part of the audio from your video, cut and trim your videos to the desired length, add music, voiceovers, and sound effects to enhance your videos, apply various filters and effects to make your videos more visually appealing, etc.
In addition, Kapwing allows you to export your video in multiple formats and resolutions.
Follow the steps below to remove a certain part of the audio from your video using Kapwing.
Step 1. Open Kapwing
Open your browser and go to the Kapwing website.
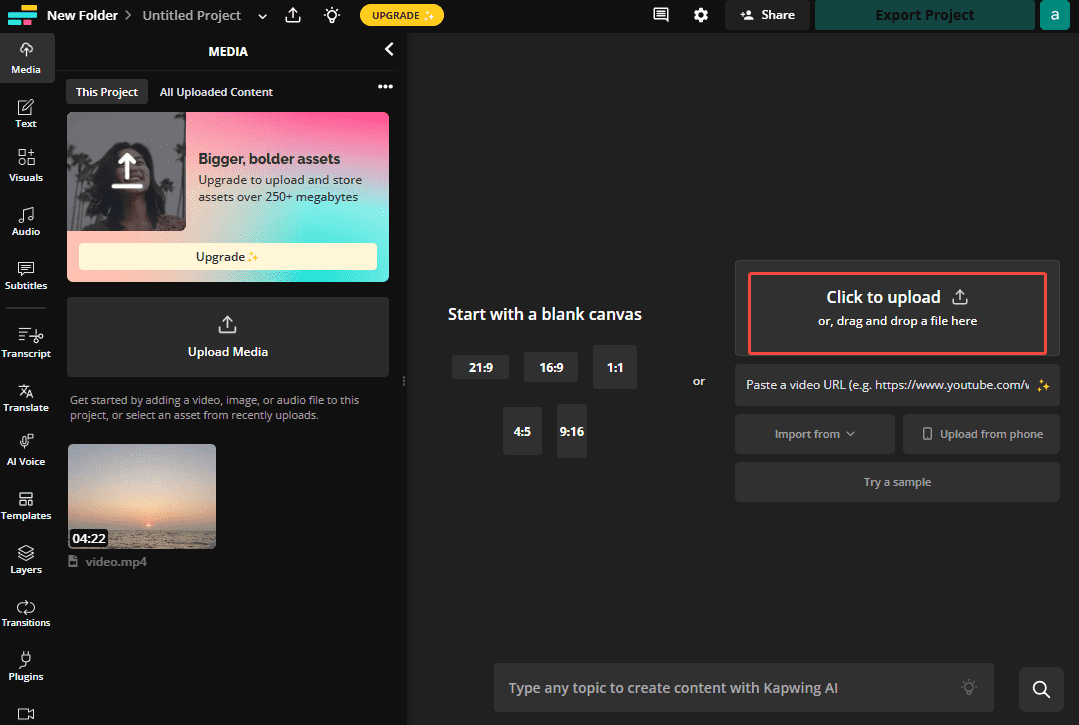
Step 2. Add the video
Click the + Create new button and select the Click to upload option to add the target video to Kapwing.
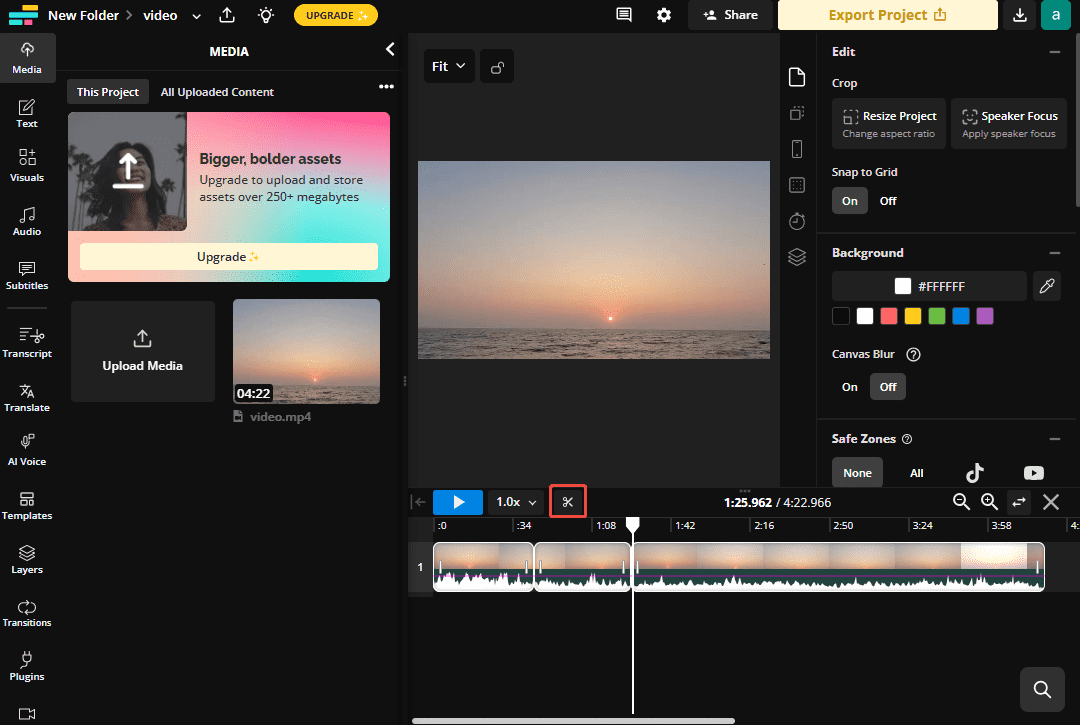
Step 3. Split the video
Move the playhead to the start of the clip where you want to remove the audio and click the Scissors icon on the timeline.
Move the playhead to the end of the clip where you want to remove the audio and click the Scissors icon on the timeline.
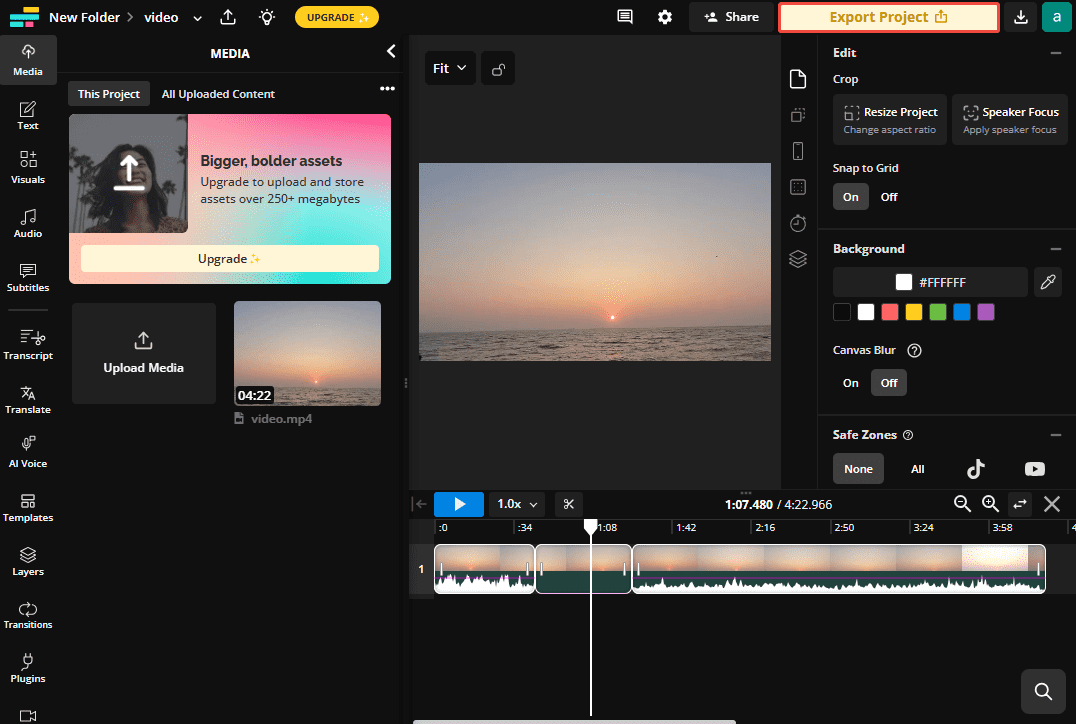
Step 4. Remove the audio
Select the target video on the timeline. Go to the Volume section on the right panel and drag the volume slider to the left end to remove the audio.

Step 5. Export the video
Click the yellow Export Project button at the top-right corner of the interface to export the video.
That’s it. I guess now you can remove part of the audio from the video using Kapwing.
Conclusion
Removing part of the audio from a video serves many purposes. It can help you remove unwanted sound to improve the overall quality of your video, create silent moments to have a powerful emotional effect, etc.
This guide offers 4 tools, each with its own advantages, to help you remove a certain part of your video offline and online. If you prefer a desktop application, you can use MiniTool MovieMaker or CapCut. If your device is short of storage space, you can use VEED.IO or Kawping to accomplish this task online. Just choose one that suits your needs best.
Finally, if you need any help while using MiniTool MovieMaker, don’t hesitate to contact us via [email protected]. You can also send messages to me on Twitter.
User Comments :