If you frequently create content for social media, you must have used the two video editors: Movavi and Camtasia. However, you might be stuck: which video editor should you use between them? This article will compare them in several aspects to make it easier for you to make a choice. Otherwise, try their alternatives for video editing and screen recording, like MiniTool MovieMaker and MiniTool Video Converter.
Whether you want to create tutorials, real estate videos, promotional videos, or social media content, you need reliable and feature-rich video editing software to help you produce professional-looking videos. Two of the most popular options include Movavi and Camtasia. They both offer a wide range of similar features and tools to enhance your videos.
However, there are also some distinct differences between them, which makes it difficult to determine which one should you use. Look through this comparison of Movavi vs Camtasia to choose the one that suits your needs.
Movavi vs Camtasia: Overview
What Is Movavi
Movavi is a powerful desktop video editor designed for both professionals and beginners, available for Mac and Windows. The software is designed to be easy to learn and use, even for those with no video editing experience. With it, users can create and edit videos in a range of formats, including HD and 4K.
Movavi is packed with a range of features that allow users to create professional-looking videos, including basic editing tools, special effects, and audio enhancement. Its intuitive drag-and-drop feature allows users to quickly arrange them on the timeline, add clips, create separate tracks, apply various effects and transitions, and more.
This video editor also has a built-in library of royalty-free music and sound effects that you can use for your videos. Apart from video editing, this program also comes with tools for screen recording, video conversion, and audio extraction.
What Is Camtasia
Is Camtasia better than Movavi? Similar to Movavi, Camtasia is also a video-making and screen-recording solution for Mac and Windows users designed to create, edit, and share videos. It’s widely used to create video tutorials, product demos, webinars, lessons, instructional videos, etc.
With Camtasia’s editing tools, users can use various video templates as well as zoom in and out of video content, add transitions, animations, visual effects, and customizable quizzes. Also, it supports multi-track timelines, trimming and flipping videos, and adjusting audio volume. When you’re done, videos can be saved in multiple formats and uploaded directly to social media platforms, like YouTube, Vimeo, Screencast, and more.
As for screen recording, Camtasia enables you to record everything on your Windows and Mac device screens and webcams to capture software functionalities, video calls, and other content.
Movavi vs Camtasia: Key Differences
With a basic understanding of Movavi and Camtasia, let’s delve into the clear comparison of Camtasia vs Movavi.
Movavi vs Camtasia: Minimum System Requirements
Minimum system requirements of Movavi:
| Windows | Mac | |
| Operating system | Windows 7/8/10/11 with the latest service packs and patches | Mac OS 10.13.6 or higher |
| Processor | Intel, AMD, or compatible processor, 1.5 GHz | 64-bit Intel processor |
| Graphics card | NVIDIA GeForce series 6 or higher AMD Radeon R600 or higher graphics card with up-to-date drivers The graphics card must support OpenGL 2.0 and above | Intel HD Graphics 2000, NVIDIA GeForce series 8 and 8M, Quadro FX 4800, Quadro FX 5600, AMD Radeon R600 Mobility Radeon HD 4330, Mobility FirePro series, Radeon R5 M230 or higher graphics card with up-to-date drivers |
| Display resolution | 1024×768, 32-bit color | 1280 × 800 screen resolution, 32-bit color |
| RAM | 2GB | 2GB |
| Free disk space | 110 MB for installation 500 MB for ongoing operations | 400 MB for installation 600 MB for ongoing operations |
Minimum system requirements of Camtasia:
| Windows | Mac | |
| Operating system | Microsoft Windows 10 (64-bit) 20H2 version or later | macOS 11.0 or later |
| Processor | Intel 8th Gen or newer CPU – or AMD Ryzen 2000 Series or newer CPU | Intel Core i5 Processor with 4 CPU Cores; or gen 1 M1 SoC |
| RAM | 8GB of RAM | 8GB of RAM |
| Hard disk space | 4GB of available disk space | 4GB of available disk space |
Movavi vs Camtasia: Price
Apart from minimum system requirements, it is also very appropriate to do the Movavi vs Camtasia comparison by knowing the price of these two video editors.
Price of Movavi:
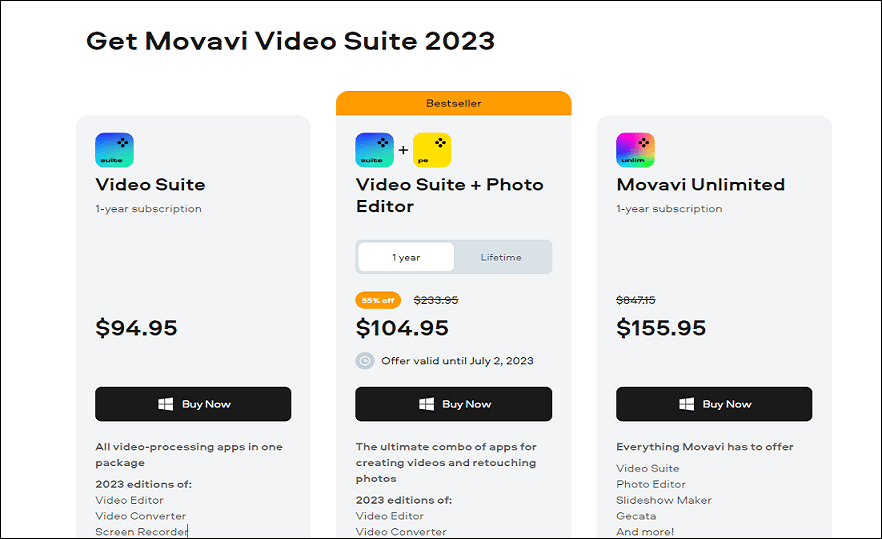
Movavi Video Suite is a software package that contains all video processing applications, and its edition includes Video Editor, Video Converter, and Screen Recorder. Now, you can get a one-year subscription for $94.95.
Price of Camtasia:
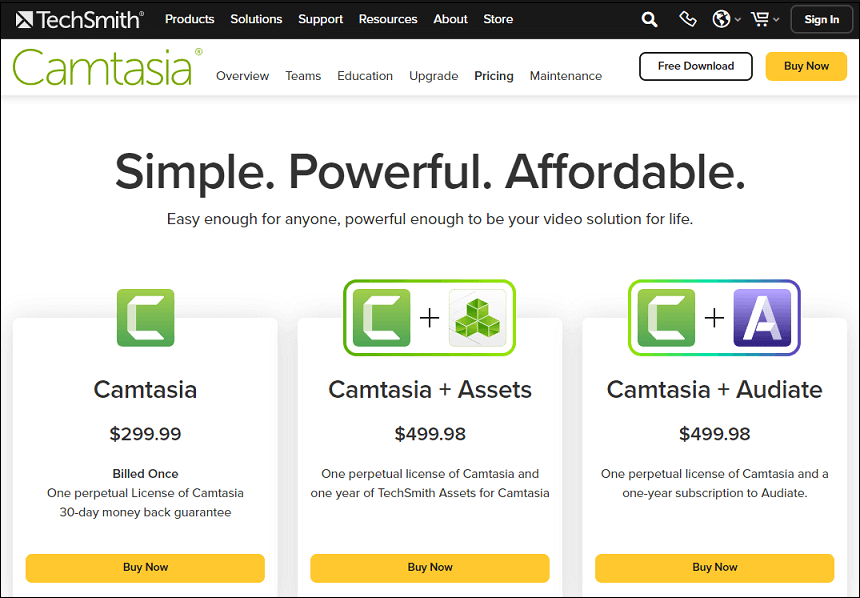
On the other hand, Camtasia is slightly more expensive than Movavi. You can only get it by purchasing its perpetual license at $299.99.
Note: Movavi and Camtasia both offer a free trial version that allows users to try the software before purchasing
Movavi vs Camtasia: Screen Capture
Camtasia and Movavi are powerful screen capture tools that enable users to set all parameters according to their needs. Each of these programs allows you to set the resolution, the size of the area to capture, and any other parameters.
Movavi:
Movavi offers three different functions in video capture. You will have three options, including Capture Screencast, Capture Game, and Capture Online Video. You can find the above options on the dropdown menu called Screencast on the Movavi dashboard. All you need to do is click the select button and then highlight the area of your screen you want to record. Remember, the Game option is always full-screen.
A great feature of Movavi is scheduled recording, which allows you to set a specific time when recording starts and ends, and it does this for you automatically, without you even needing to be in the room.
Camtasia:
Capture screen with Camtasia has a similar process as Movavi. The main difference is that Movavi creates MREC files, while Camtasia’s recordings are always in AVI file format, which means you can upload them to the Internet directly from Camtasia.
To start recording, go to the tools menu on the dashboard and select Camtasia Recorder, then select Set Capture/Input Option to define the area of the screen you’d like to record. Plus, this screen recorder allows you to add visual effects while you are recording.
Movavi vs Camtasia: Editing Features
Once the recording process is done, you’ll need to edit the video to make sure it’s exactly as you expected. Both programs come with built-in editing tools at no additional cost. Next, let’s take a look at the comparison of Camtasia vs Movavi in terms of editing features.
Movavi:
With Movavi, you have many tools to edit the video. The editing timeline has several tracks that allow you to add text, audio, and video. You can cut and merge clips as you like, add additional filters, create transitions, add titles, apply special effects, and more. In addition, it features an AI background removal tool, AI noise removal tool, AI-powered motion tracking tool, and color tools. If you’re looking for an intro or outro for your videos, there are many options to add to your video with ease.
Camtasia:
In Camtasia, you’ll find a lot of video editing options. For example, it enables you to add titles and transitions to the video, animate the video, zoom in or out of the video, trim the video, and color correct the video. You can even add royalty-free music to your videos without the threat of copyright issues. All you have to do is drag and drop them where you want them to be in the timeline.
That’s the complete comparison of Camtasia vs Movavi. If you’re looking for a replacement for them, continue to see the following content.
Best Movavi and Camtasia Alternative for Video Editing
#MiniTool MovieMaker
When it comes to an alternative to Movavi and Camtasia for video editing, MiniTool MovieMaker is definitely a must-try option, which is quite friendly to users, even if you have no any video editing experience. As a lightweight video editor, it can run smoothly even on a low-end PC.
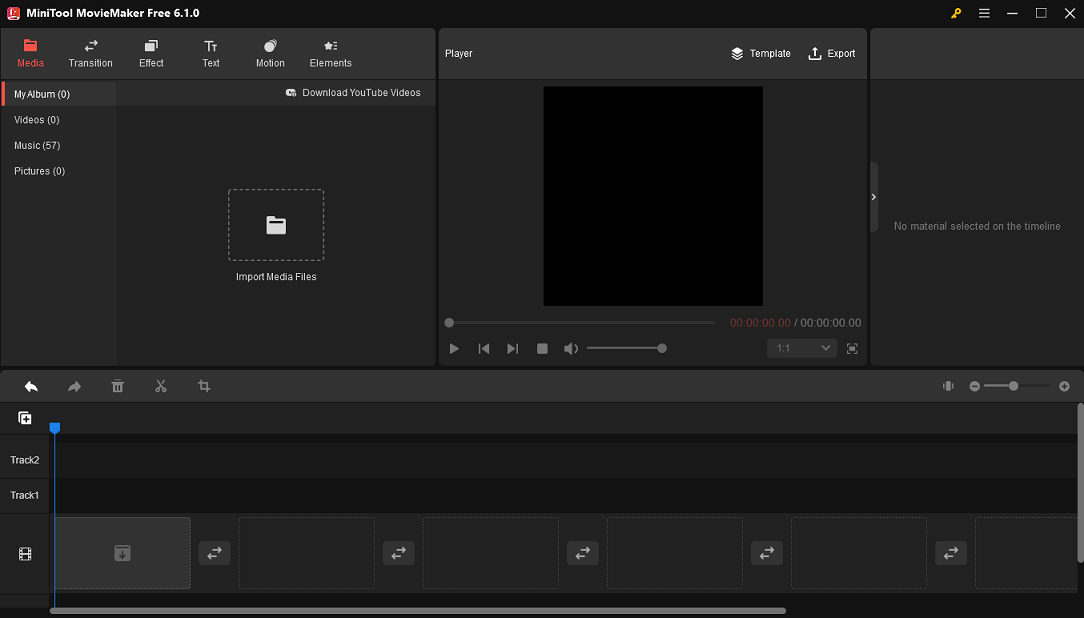
MiniTool MovieMaker is designed with a simple and intuitive interface, which makes it easy for you to get started. You can create videos quickly by making use of its built-in video templates with several clicks. Then, customize the template, like replacing its background music, trimming a clip, or changing the text.
Alternatively, you can start from scratch to make it more creative and special. You can split, trim, crop, flip, and rotate the video, adjust the property of videos and images, change video playback speed, mute the video, fade in/out audio, and more. Also, you can add music from its pre-set library, and add transition effects, filters, motion effects, animated elements, and text.
Finally, this video editor allows you to export your work in high-quality up to 1080P without any watermark.
Here’s how to create a video with MiniTool MovieMaker:
Step 1. Get MiniTool MovieMaker.
Download and install MiniTool MovieMaker by clicking the download button below. After that, open it, choose an aspect ratio, and close the pop-up window.
MiniTool MovieMakerClick to Download100%Clean & Safe
Step 2. Import media files.
Click on Import Media Files to import your videos, images, or audio files. Then, drag and drop them onto the timeline or click + in the lower right corner of them to add them to the timeline.
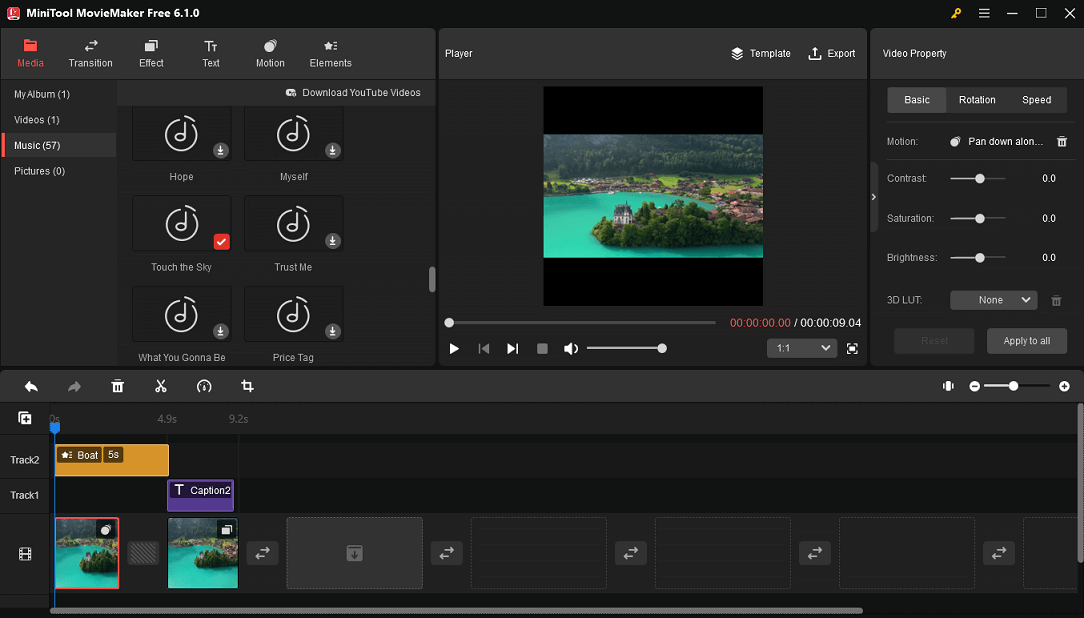
Step 3. Edit the video.
Now, you can make changes to the video, including splitting, trimming, cropping, adding text and music, applying transitions, filters, motions, and stickers to the video, changing the aspect ratio, and many more.
Step 4. Export the video.
To save and download the video to your computer, tap on Export on the toolbar. Then, name the video, choose its output format, determine the storage location, and customize quality, encoder, resolution, bit rate, and frame rate.
Best Movavi and Camtasia Alternative for Screen Recording
#MiniTool Video Converter
MiniTool Video Converter is one of the best free screen recorders for Windows 7/8/10/11. It could be the best alternative to Movaiv and Camtasia in terms of screen recording. It allows you to record everything that happens on your computer screen without a watermark or time limit and save the recording files in multiple formats.
In addition to recording the screen of your computer, it can also be used to convert file formats and download videos, music, or subtitles from YouTube.
Here’s how to record your screen with MiniTool Video Converter:
Step 1. Download and install MiniTool Video Converter on your computer and open it.
MiniTool Video ConverterClick to Download100%Clean & Safe
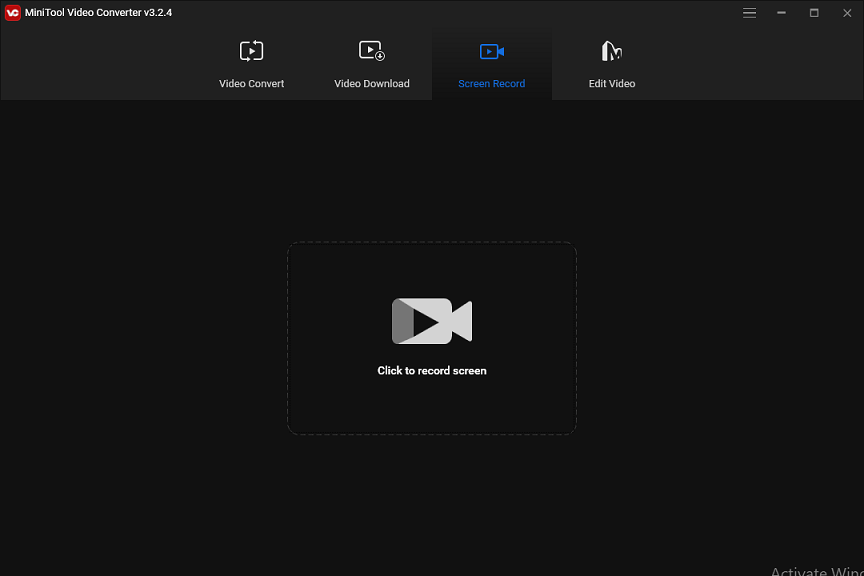
Step 2. In the Screen Record tab, tap on Click to record screen.
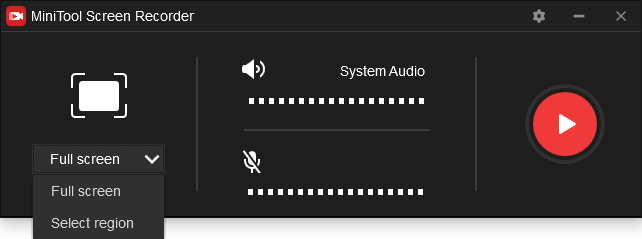
Step 3. You can then choose to record full screen or a specific region of the screen and choose whether to open the system audio and microphone when recording in the pop-up window.
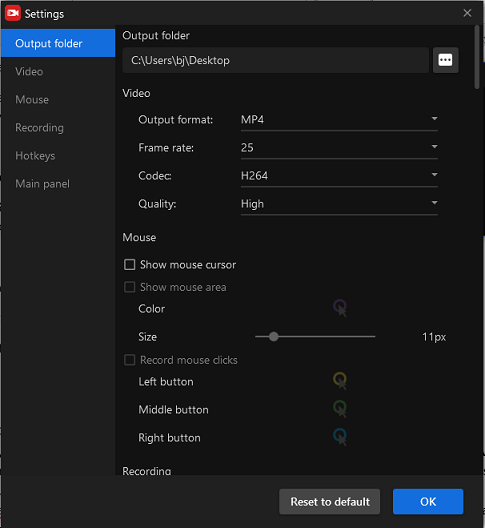
Step 4. Click Settings with a gear icon to set the output folder, output format, frame rate, codec, quality, and much more.
Step 5. To start recording, click the Record button or press F6 on the keyboard.
Step 6. Once done, press the F6 key to stop the recording process.
Step 7. Right-click a recorded video to preview, select all, delete, and rename the recording, or open it in the folder.
Final Verdict
In conclusion, both Movavi and Camtasia are versatile video editing and screen recording software. Movavi vs Camtasia: which one is a better option? Actually, the choice between them depends on your skill level, your budget, and your specific needs. If you’re a beginner with no experience and a limited budget, Movavi is the option for you. On the other hand, if you’re an experienced content creator with a higher budget, Camtasia will be more suitable for you.
However, if you want to explore more possibilities, try the Movavi and Camtasia alternatives, including MiniTool MovieMaker and MiniTool Video Converter. If you have any questions or suggestions while using them, please feel free to leave a comment on us or contact us via [email protected].


User Comments :