Do you know how to replace part of video? If you're not happy with one part of the original video, please read this article from MiniTool MovieMaker (one of the best free video editing software), which will help you solve this problem.
Sometimes, the footage you’ve shot or edited may contain unwanted elements like awkward pauses, errors, or parts that don’t quite fit. Instead of re-recording the entire video, replacing only a part of the video can save time and improve the overall quality. Therefore, learning how to replace part of video is an essential skill in video editing. In this article, I’ll explore the reasons why you might need to replace part of a video, the tools you can use, and the step-by-step process for doing it both offline and online.
Why Replace Part of Video
Here are some common scenarios where replacing a video section could be necessary:
- Content Updates: If a part of your video is outdated or no longer relevant (e.g., a product update or new information), replacing just the problematic section allows you to keep the rest of your video intact.
- Improving Quality: Sometimes, a certain part of the video is of poor quality. You may replace a lower-quality segment with a higher-quality one to ensure a more polished final product.
- Repositioning and Restructuring: If the video flow is awkward or unclear, replacing certain parts can help smooth transitions and create a more cohesive storyline.
- Correcting Mistakes: If there are mistakes like wrong audio, unwanted background noise, or technical issues in your video, you can replace the affected part with a new clip.
By replacing only the problem areas, you can save time compared to redoing the entire video. It also allows you to edit your video without losing previously well-edited sections.

Tools You’ll Need for Replacing Video Part
There are various tools available to replace parts of a video. Some are free and beginner-friendly, while others are more advanced and offer a wider range of features for professional editors. Here are a few popular tools:
MiniTool MovieMaker
MiniTool MovieMaker is a beginner-friendly video editing application that offers an intuitive interface. It is ideal for basic editing tasks, including replacing parts of a video. You can easily remove sections, replace them with new clips, and add transitions between them. This tool is perfect for those who want an easy, no-fuss video-editing experience.
Of course, in addition to the basic video editing features, it also supports 9 video tracks and 2 audio tracks, allowing you to create split-screen videos, picture-in-picture effects, and more. It also provides a rich audio library where you can choose background music and sound effects to add. While MiniTool MovieMaker looks like a simple video editor, it also has a lot of rich features to fulfill your different needs.
MiniTool MovieMakerClick to Download100%Clean & Safe
iMovie
iMovie is a video editing app available for macOS and iOS devices. It is free and easy to use, making it a great option for Apple beginners. iMovie allows users to trim video, cut video, and replace video clips quickly. The tool also provides a variety of built-in transitions, which can make the replacement process smoother.
Clideo
Clideo is an online video editing tool that provides simple, web-based video editing features. It allows you to cut and replace parts of a video without needing to install any software. Clideo is great for people who need to make quick edits without having to download anything.
Adobe Premiere Pro
Adobe Premiere Pro is a professional video editing software used by experienced filmmakers, YouTubers, and video editors. It provides advanced features like multi-camera editing, precise audio control, and powerful effects. You can replace specific parts of a video with it. While it has a steeper learning curve, it offers unmatched flexibility and precision.
How to Replace Part of Video Offline
For offline editing, MiniTool MovieMaker is a fantastic tool for beginners. It’s free, easy to use, and allows you to replace parts of a video effortlessly. Let’s go through the steps to replace part of video using this free video editor without watermark.
Step 1: Download and Install MiniTool MovieMaker
The first thing you need to do is download and install MiniTool MovieMaker. Click the button below to download free video editor, then follow the installation prompts on your computer. Once installed, open the program, and you’re ready to start editing.
MiniTool MovieMakerClick to Download100%Clean & Safe
Step 2: Import Media Files
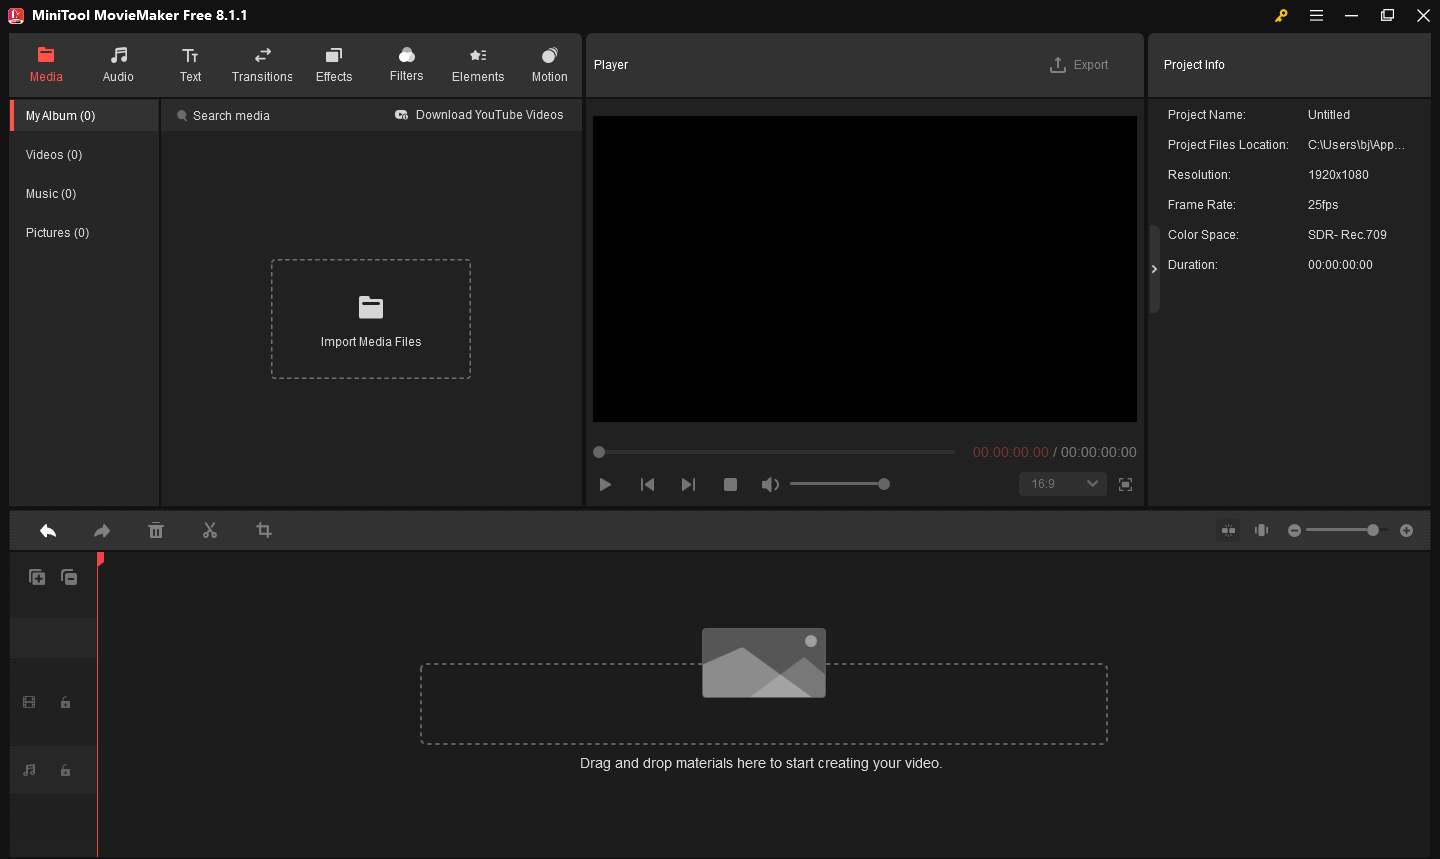
To begin with, you’ll need to import the video that you want to edit. Open MiniTool MovieMaker and click on New Project to create a new project. Then, click on the Import Media Files button to bring your video files into the program. After that, drag and drop your video file to the timeline from the media library.
Step 3: Replace the Video Part
Now, let’s move on to the actual process of replacing part of the video. There are two ways you can do this:
Option 1: Without Replacing the Original Audio
If you don’t want to change the original audio and only need to replace the video part, follow these steps:
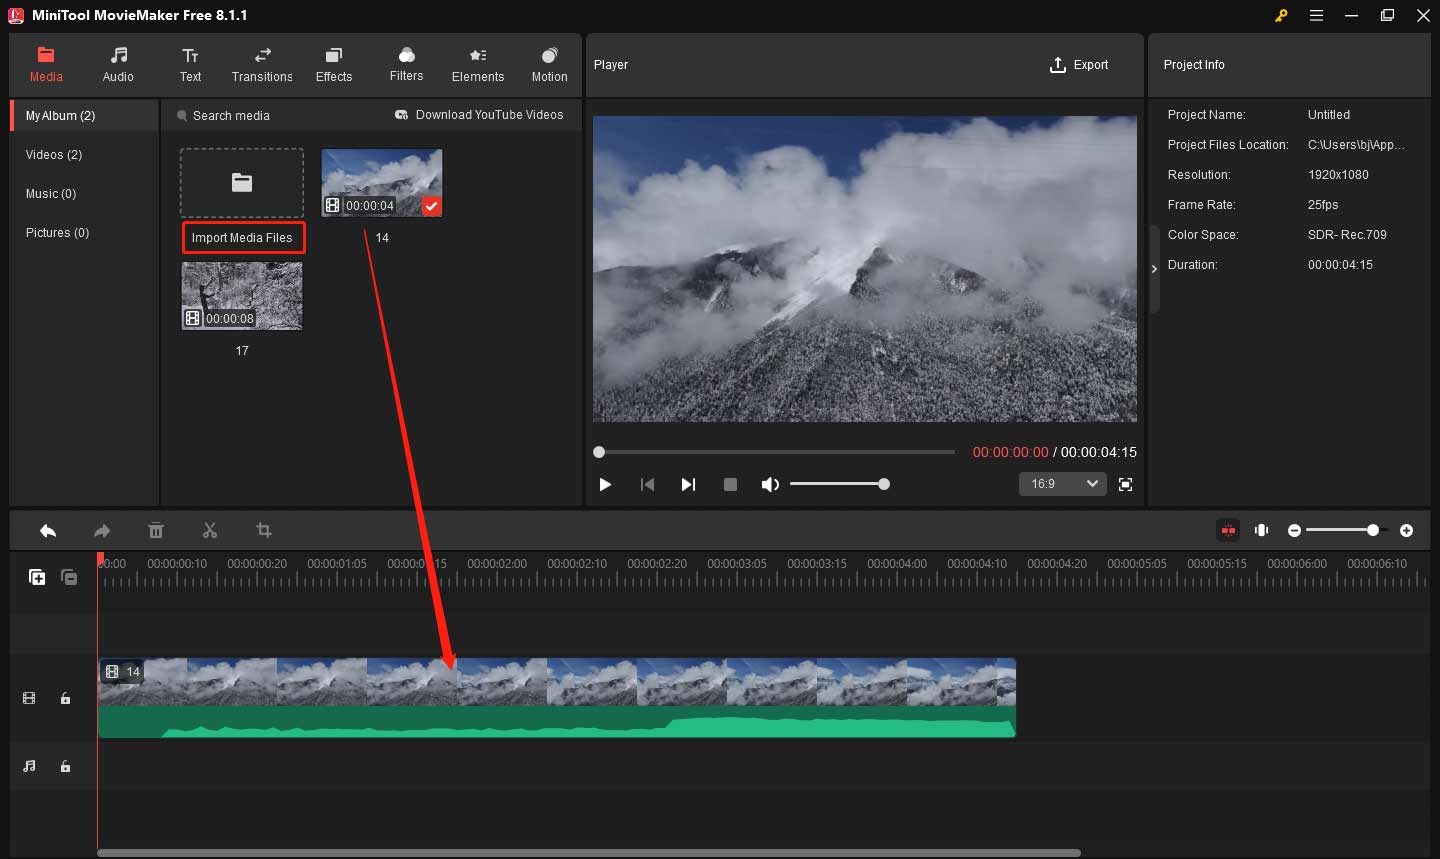
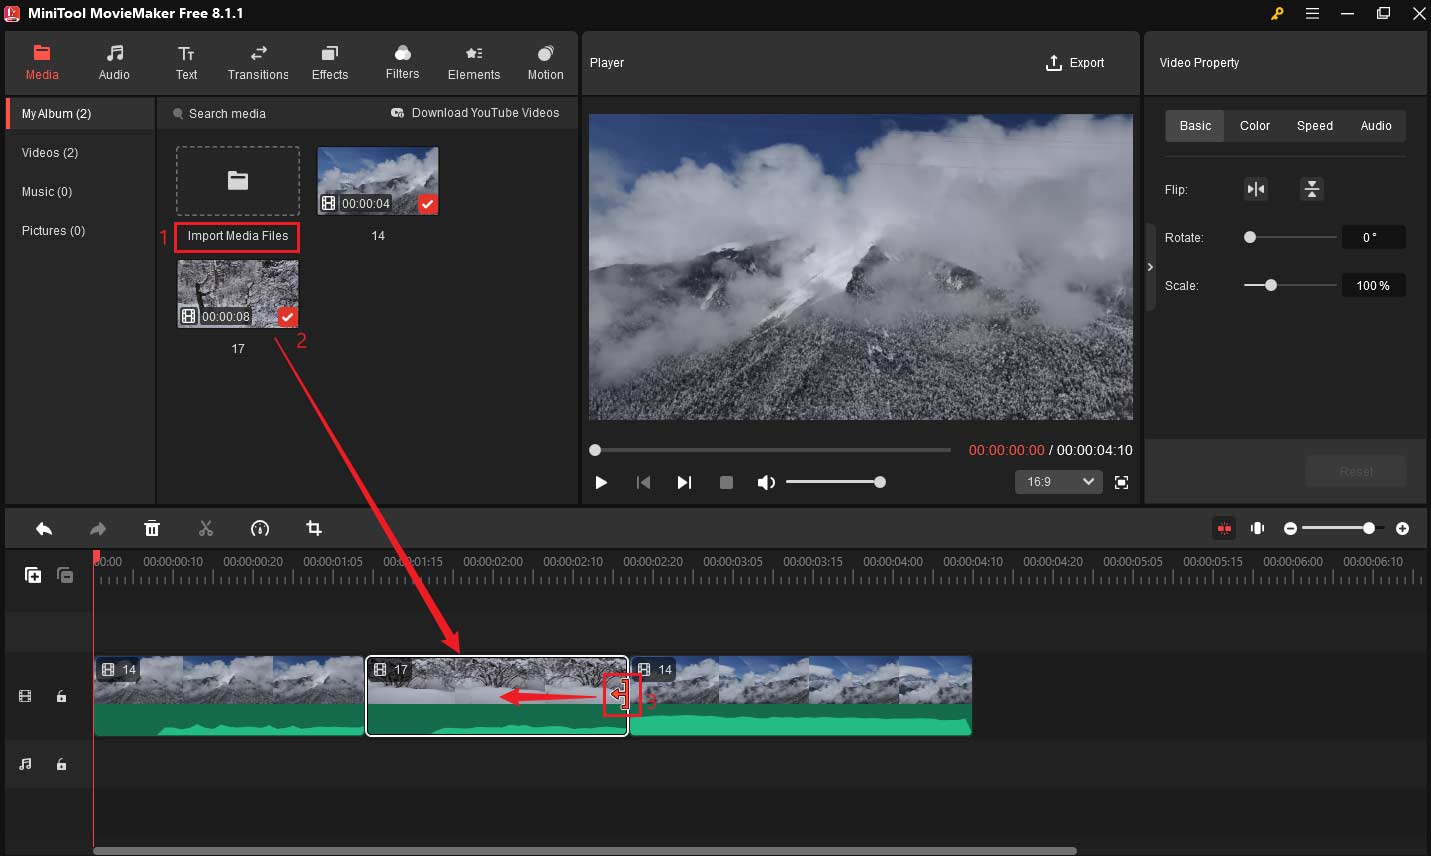
- Add the New Clip: Click Import Media Files again to import the new video clip you want to use to replace the old segment.
- Replace the Original Clip: Locate the section of the video you want to replace on the timeline. Drag the new video clip above the original video to hide it. This will ensure that the new video plays in place of the original one.
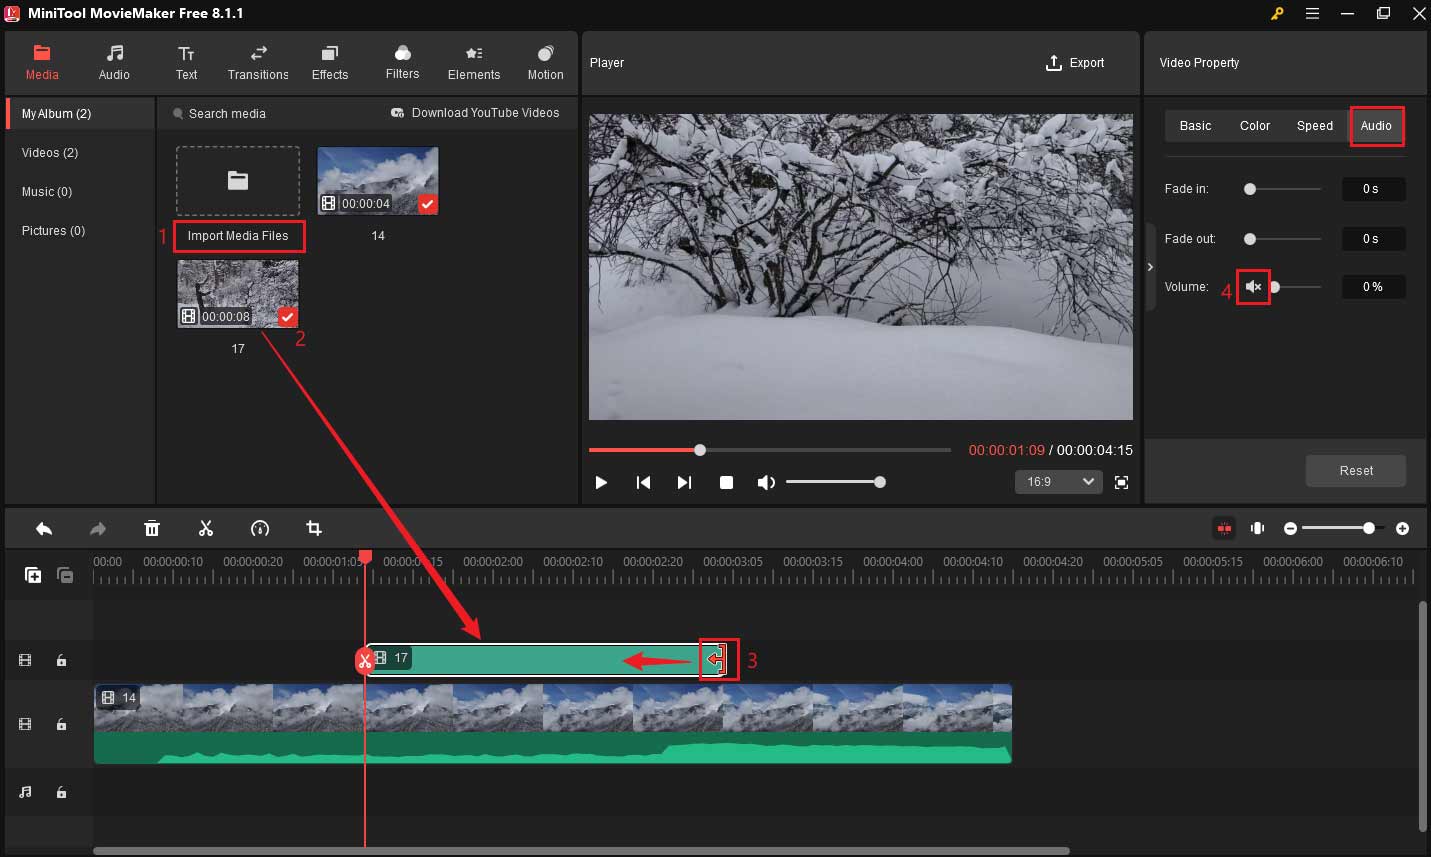
- Adjust the Length: Drag the edge of the new clip to adjust its length to match the section being replaced.
- Mute the New Clip (Optional): If the new clip has sound, you can click on the clip, go to the Video Property window, select the Audio option, and click the speaker icon to mute it.
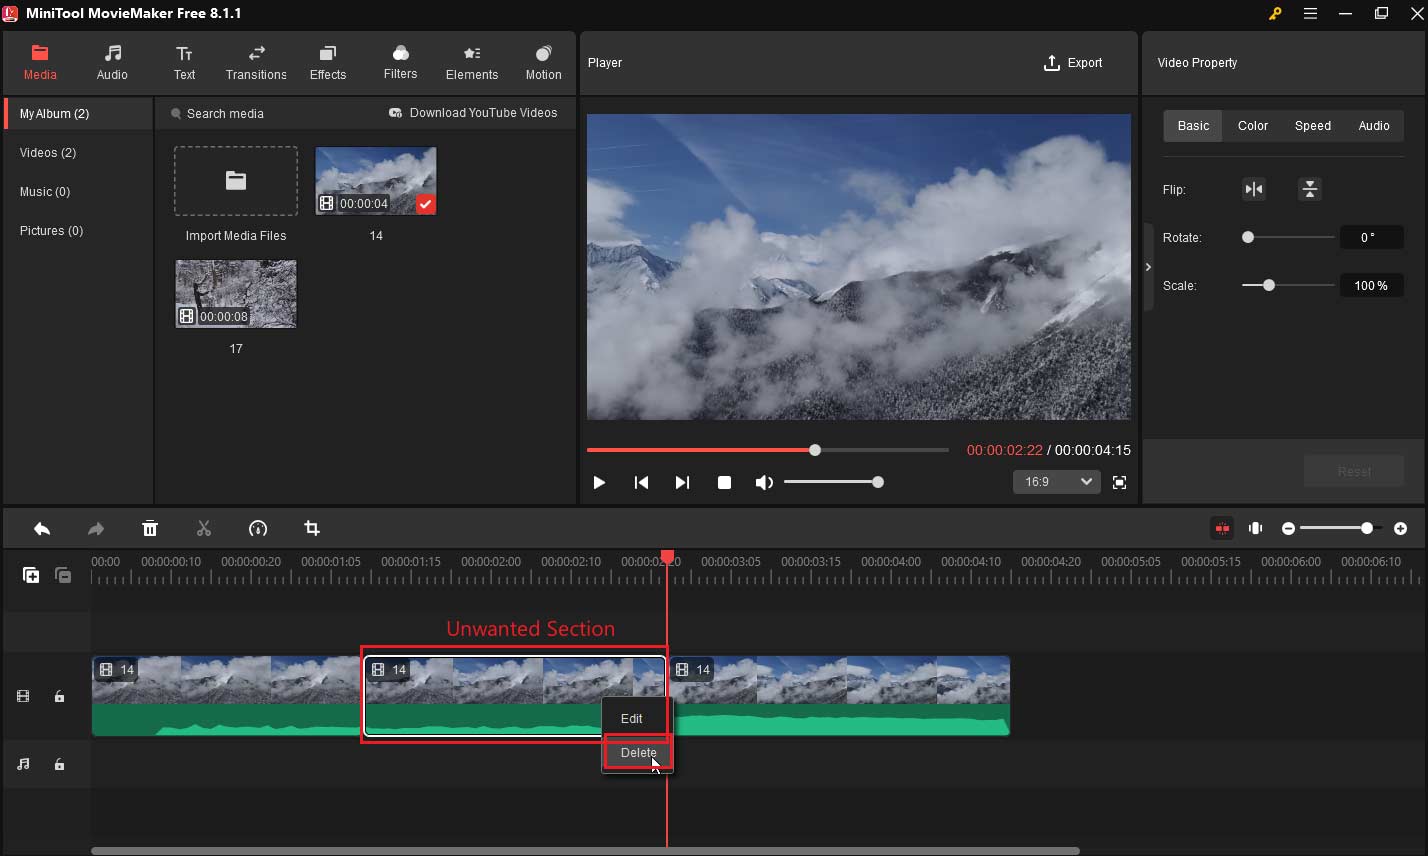
Option 2: Using the New Clip’s Audio
If you want to replace both the video and audio, you need to use the split feature to remove the unwanted section first. Simply click on the video, find the section you want to delete, and click the Split symbol on the playhead at the beginning and end of it to separate the segment. After that, right-click on the unwanted section and click the Delete button to remove it.
Once you’ve removed the unwanted section, import the new video clip with audio. Drag the new clip to the location of the removed section on the timeline. If you want to trim the new clip, just drag its edge inward to remove extra parts.
Step 4: Add Smooth Transitions Between Clips
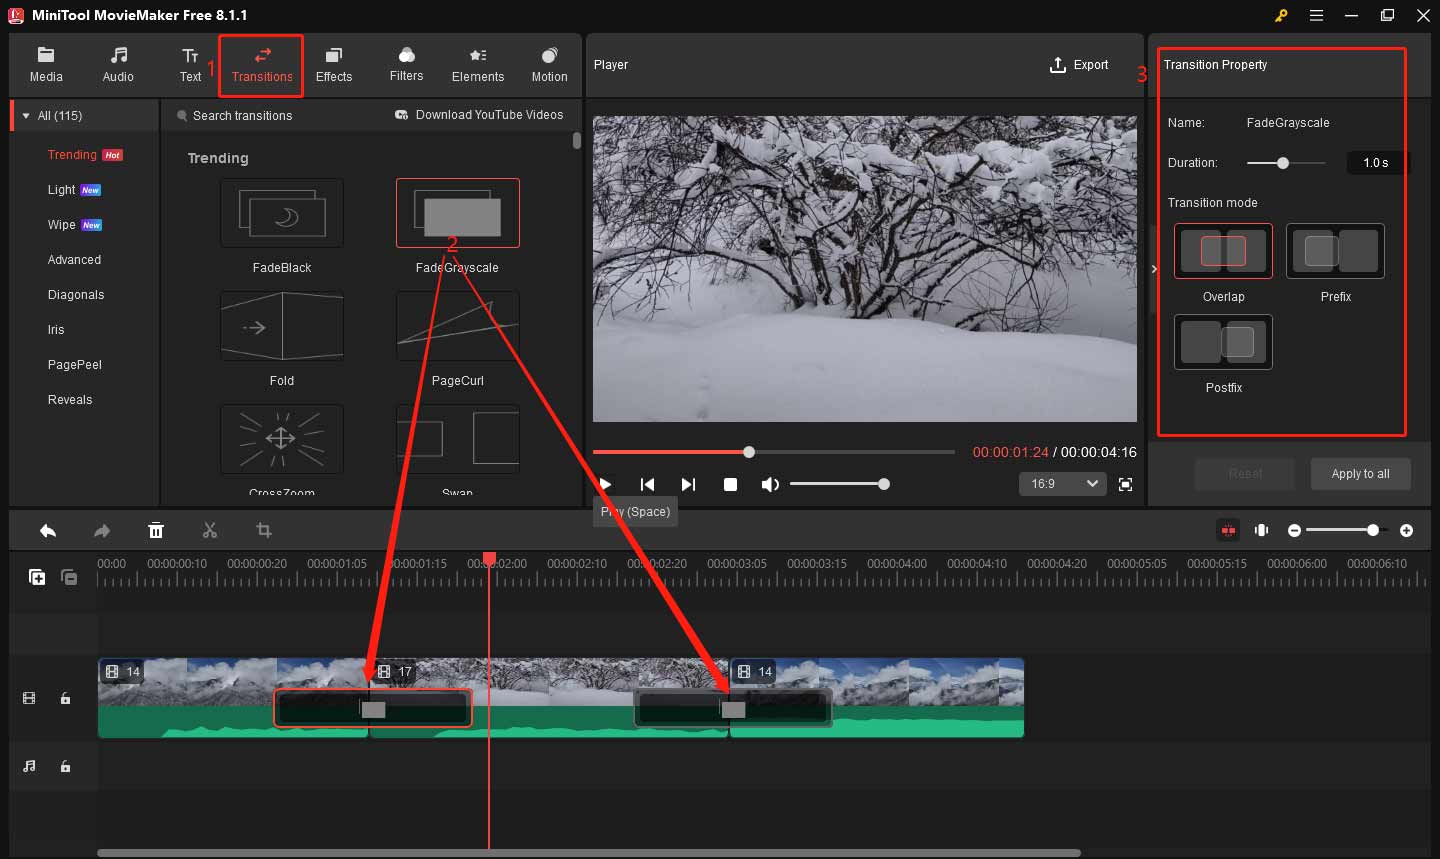
Replacing part of a video will create a visible jump, especially if the new footage differs from the original. To smooth out the transition, you can apply the built-in transitions in MiniTool MovieMaker. An appropriate transition will help the flow of the video feel more natural and polished.
- Go to the Transitions tab in the toolbar.
- Find the right transition and click the download icon on it.
- Drag your chosen transition between the clips on the timeline.
- Go to the Transition Property window, where you can change the transition’s duration and mode.
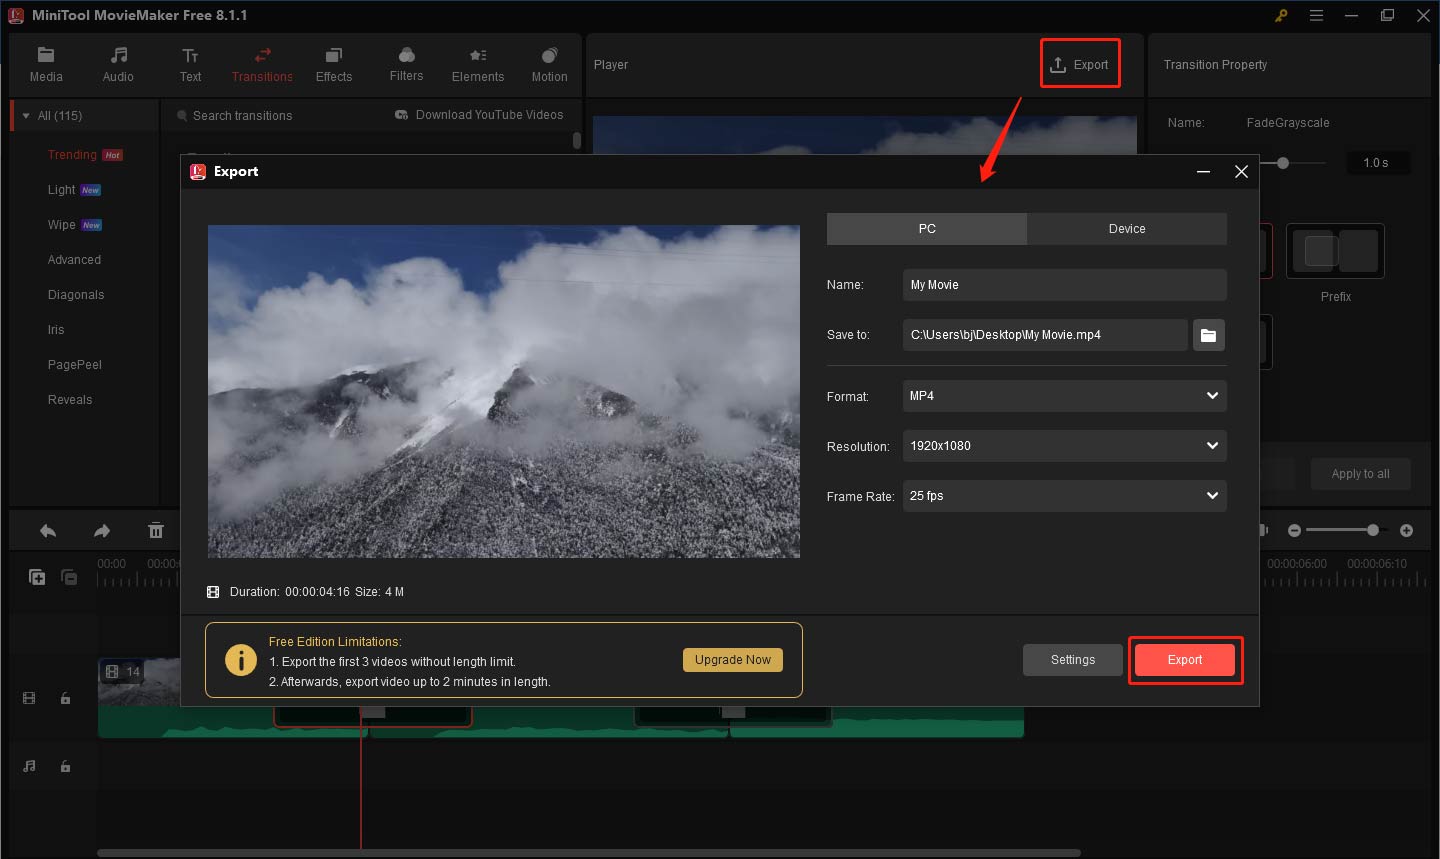
Step 5: Preview and Export Video
Before finalizing your video, click on the Play (Space) button in the preview window to see how the replaced section looks within the full video. If everything looks good, click Export in the top-right corner. An Export window will pop up, where you can give the newly created video a name, choose the destination folder, output format, resolution, etc. Finally, click Export to save the video.
How to Replace Part of Video Online
If you prefer not to download any software, Clideo offers an excellent online alternative. The process is simple and can be done directly in your web browser. Let’s see how to replace part of video online using Clideo.
Step 1: Upload Your Video
Open your browser and go to Clideo’s website. Click Get Started > Click to upload to import the video you want to edit.
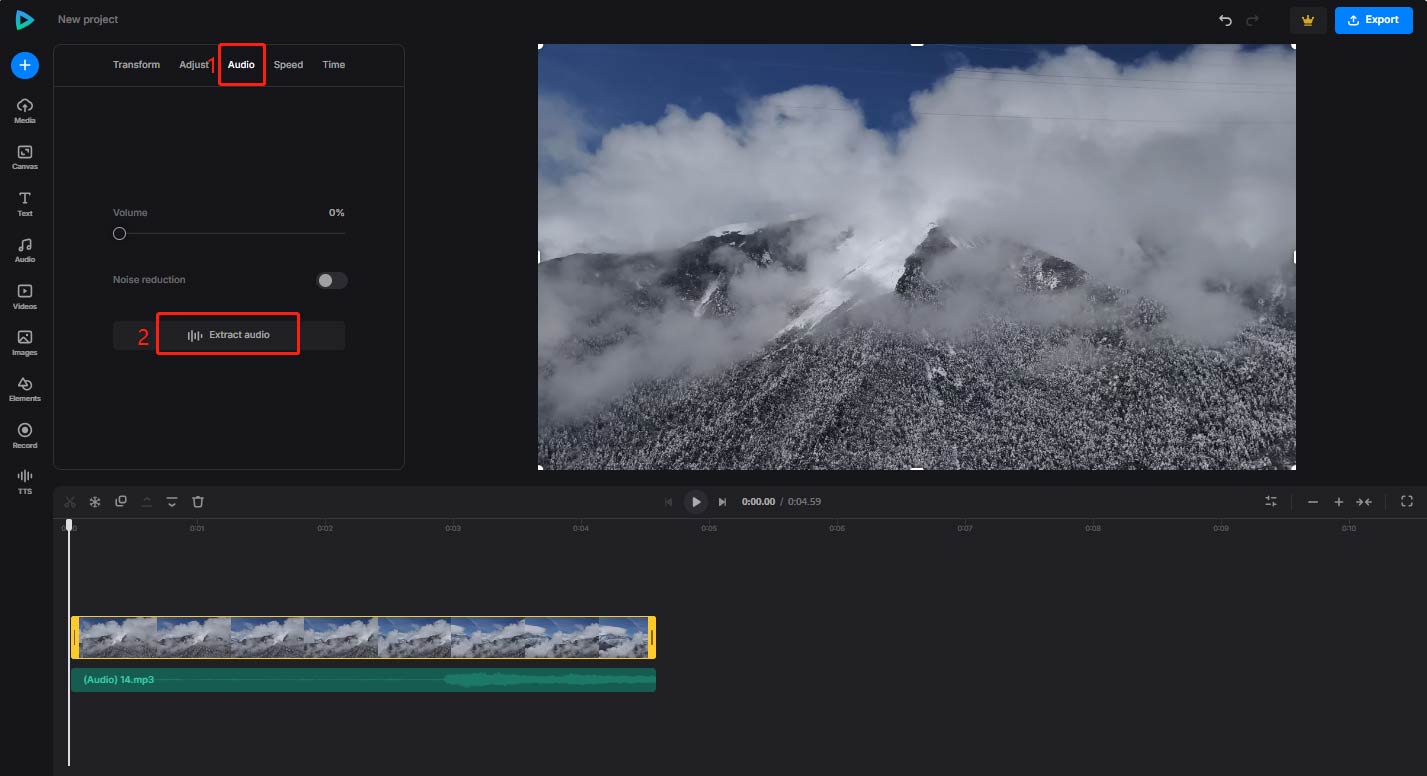
Step 2: Extract Audio from Video (Optional)
To keep the original audio, click the imported video to highlight it on the timeline, select the Audio option in the top toolbar, and click Extract audio to separate the audio from the video. You’ll see an audio clip below the video clip.
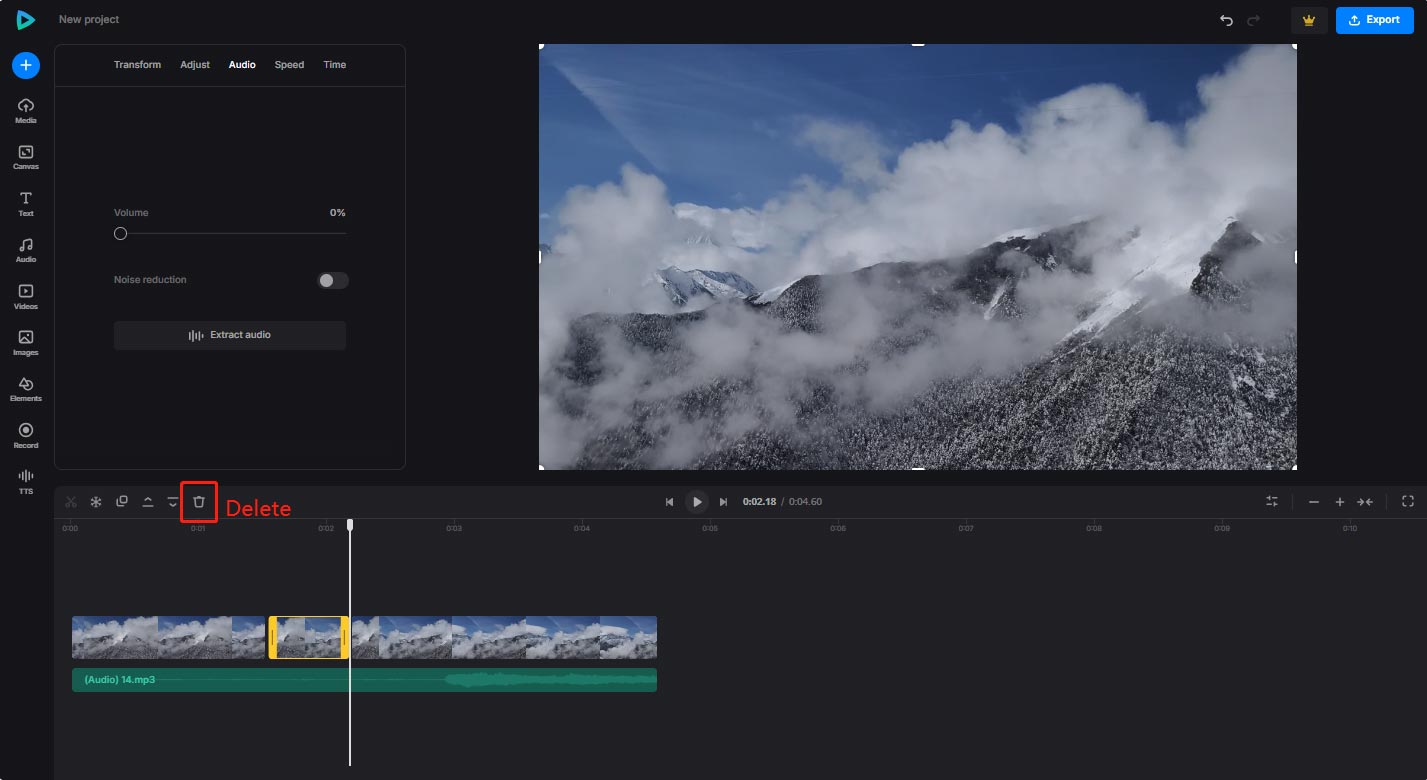
Step 3: Remove the Unwanted Segment
Move the playhead to the beginning and end of the unwanted part separately and click the scissors icon on the timeline toolbar. This will allow you to isolate the section that needs to be replaced. After that, click the unwanted clip and select the Delete icon on the timeline toolbar to remove it.
Step 4: Add New Video Clip
Once you’ve removed the unwanted part, click Upload in the left toolbar to upload the new video clip you want to use. Drag the new clip into the space left on the timeline just after removing the old video clip. You can also adjust the length of the new clip by dragging its edges inward.
Step 5: Export Your Video
Click the play icon to preview the video, you can make some adjustments according to your needs. Once you’re satisfied with the edits, click the Export button located in the upper right corner of the editor and finish the output settings. Clideo will begin processing your video and preparing it for download.
Tips for a Smooth Video Replacement Process
Here are some additional tips to help you get the best results:
- Plan Ahead: Before you start editing, know exactly which part of the video needs to be replaced and what new content will go in its place.
- Keep a Backup: Always keep a backup of your original footage. You never know when you might need to revert to the original video.
- Use High-Quality Footage: Ensure that your replacement footage is high quality and matches the original video in terms of resolution, aspect ratio, and style.
- Pay Attention to Audio: If your replacement footage includes audio, make sure the sound levels match the rest of the video. Use the audio editing tools in your video editor to adjust the volume and balance.
- Be Mindful of Timing: If your video has a specific rhythm or pace, make sure the new footage doesn’t disrupt that flow. Trim the footage as needed to maintain the video’s pacing.
- Preview before Exporting: Always preview your video before final export to make sure everything looks and sounds good.
Common Mistakes to Avoid
While editing videos, it’s easy to make mistakes. Here are a few common ones to avoid:
- Rough Edits: Don’t leave abrupt cuts in your video. Use smooth transitions to make changes feel natural.
- Overusing Transitions: While transitions are helpful, using too many can distract from the content. Use them sparingly.
- Forget to Save: Always save your project regularly to avoid losing progress.
Bottom Line
In conclusion, learning how to replace part of video is an essential skill for anyone involved in video production or content creation. Whether you use an offline app like MiniTool MovieMaker or an online editor like Clideo, the process is relatively simple.
By following the steps outlined in this guide, you can easily replace part of video, improve the quality, and enhance the overall viewer experience. Finally, if you have some problems editing your videos with MiniTool MovieMaker, please feel free to contact us via [email protected] for help.
About The Author

Position: Columnist
Yulia has a great passion for life. She enjoys photography and travel, and is always eager to record cherished moment through her lens. This also led to her strong interest in video editing, and she kept learning multimedia-related knowledge, hoping to bring readers better advice on images, audio, video, and related topics.
User Comments :