If you love makeup and are eager to share your skills with the world, recording videos and posting them on social media platforms is the fastest and greatest way to do so. In this post, I will show you how to make a makeup tutorial video in four steps: prepare necessities, write the script, set up the scene, and edit the video using the three best video editing software (MiniTool MovieMaker, Microsoft Clipchamp, and CapCut).
Nowadays, makeup tutorial videos have become the mainstream way to share makeup techniques, inspiration, and product reviews. For most people, watching makeup tutorials and following the steps demonstrated in the videos is the most effective and cost-efficient way to improve their makeup skills.
For content creators, producing makeup tutorial videos is an excellent way to make their work go viral on social media. Through these videos, they can both promote their own beauty brands and sell products, making monetization much easier.
So, whether you’re a professional makeup artist or a makeup enthusiast who loves recording makeup looks and sharing them on social media, this article is here to help. In this article, I will walk you through the entire process of creating makeup tutorial videos, covering essential preparations, how to craft a video script, how to set up your filming equipment, and how to edit your recorded footage to make it more engaging and professional. Read on!
Step 1. Write a Script for a Makeup Tutorial Video
How to make a makeup tutorial video? First things first, it is important to write a comprehensive and clear script for your makeup tutorial video, which will guide and shape the entire video production process. You will need to decide on a theme for your video, which can be a broad topic, such as how to achieve a natural makeup look quickly or how to create Halloween makeup looks. Or you can choose a niche area, like how to apply cat-eye makeup, how to make lips look plump, how to make your nose look more defined, etc.
Then, you need to plan the video flow. Design an intro, a product overview, tutorial steps, and an outro for your video. Note that the content should be clear and authentic. But that does not mean you cannot incorporate unique creative elements. Generally speaking, only audience-driven videos have the potential to go viral.

Step 2. Prepare Items for a Makeup Tutorial Video
To start a makeup tutorial video, cosmetics, of course, are an absolute must. In addition to that, you’ll also need some professional equipment to shoot the footage. Here’s a breakdown.
Essential Cosmetics List
- Primers: Primer helps makeup last longer and adhere better.
- Foundations: Choose based on your skin type, and it’s best to select a foundation that matches your skin tone.
- Beauty Sponge: Using a beauty sponge is the most suggested method to apply foundation. But you can also use a foundation brush to blend it in.
- Concealer: Using a concealer that matches your foundation shade to cover imperfections will make your base makeup look cleaner.
- Loose Setting Powder or Compact: Helps makeup last longer and reduces shine, creating a matte finish.
- Face Palette: Better select a convenient and all-in-one face palette, which includes a bronzer, highlight, and blush to sculpt your facial contours.
- Eyeshadow Palette: Palettes or liquid eyeshadow are all good.
- Eyeliner: Eyeliner helps you better define your eye contours, making your eyes appear more vibrant.
- Mascara: Choose black or brown mascara as needed. This will make you as beautiful as a Barbie doll.
- Eyebrow Pencil: Use an eyebrow pencil or gel to shape or fill in your brows as needed.
- Lipstick or Gloss: Using it will make you look more radiant.
- Finishing Setting Spray: Use setting spray to enhance makeup longevity, remembering to spray evenly across the face.
Essential Items for Filming
Filming Equipment
Video resolution is crucial, especially when filming makeup tutorial videos. If your budget allows, opt for a professional camera; for content creators on a tighter budget or just starting, a smartphone is equally sufficient. Here are some recommendations.
Camera:
- Panasonic Lumix GH7
- Fujifilm X-H2S
- Sony ZV-E1
- Sony ZV-E10
- Sony Alpha a6400
- Canon G7X Mark III
- Canon EOS 90D
- Nikon Z30
Smartphone:
- iPhone XR
- iPhone XS Max
- iPhone 15 Pro
- iPhone 16 Pro Max
- iPhone 17 Pro
- iPhone 17 Pro Max
Microphone
Ensure that the audio is clearly audible in the video. Dynamic microphones are durable and versatile, with lower sensitivity but greater affordability. USB condenser microphones deliver optimal high-frequency audio recording performance at a higher price point. If your budget is really tight, using your phone to record audio is fine.
Lighting
In dim lighting, it’s difficult to focus on your makeup application, and it doesn’t show up clearly in videos. It’s best to prepare a lighting setup—it doesn’t need to be expensive, just effective. There are key lights, fill lights, backlights, and ring lights on the market. Just choose based on your needs.
Depending on your personal needs and preferences, you may also want to prepare a tripod or phone stander, a teleprompter, and so on.
Step 3. Set Up A Scene for Filming a Makeup Video
How to make a makeup tutorial video? Now, you’ve already got everything you need to create a makeup tutorial video. One last thing is to choose an appropriate scene for video filming. The background of your video is crucial for capturing viewers’ attention, helping them better grasp your makeup techniques. Choose a clean and tidy setting that aligns with your personal style. Ideally, select a dedicated filming space to elevate the overall visual appeal of your video.
After everything is prepared, it’s time for you to shoot your makeup tutorial now! When filming videos, pay attention to facial expressions and speaking rhythm, and try your best not to forget your lines. When demonstrating makeup techniques, avoid moving too quickly to ensure the audience can clearly see each step.
![How to Make a Car Vlogging Video [Here’s Your Pro Guide]](https://images.minitool.com/moviemaker.minitool.com/images/uploads/2025/09/how-to-make-a-car-vlogging-thumbnail.png)
Step 4. Edit Your Makeup Video
While the filming process is important, post-production is equally crucial. Raw footage can be lengthy, so it’s best to trim the excess and edit it into a professional, polished video. In this section, I recommend three free and powerful video editors. Read on for more.
Option 1. MiniTool MovieMaker
MiniTool MovieMaker is a powerful and free video editor designed for Windows users. It is completely free of ads, bundles, or watermarks, empowering you to edit videos with no hassle. It features a wide range of basic and advanced editing functions, yet boasts an extremely clean interface layout, making it suitable for both beginners and experienced users.
Except for basic editing, like video/audio trimming, splitting, merging, speed controlling, etc., MiniTool MovieMaker also supports multi-track editing, video text overlay, photo collage, high-resolution editing, copy and paste on timeline, and more. With this video editor without watermark, you can trim unnecessary segments from makeup videos, correct color tones, and add transition effects to create a professional-level result.
Here’s how to make a makeup tutorial video using MiniTool MovieMaker.
1. Download and Install MiniTool MovieMaker
Click the button below to download this program. Then, install it on your computer by following the setup tutorials.
MiniTool MovieMakerClick to Download100%Clean & Safe
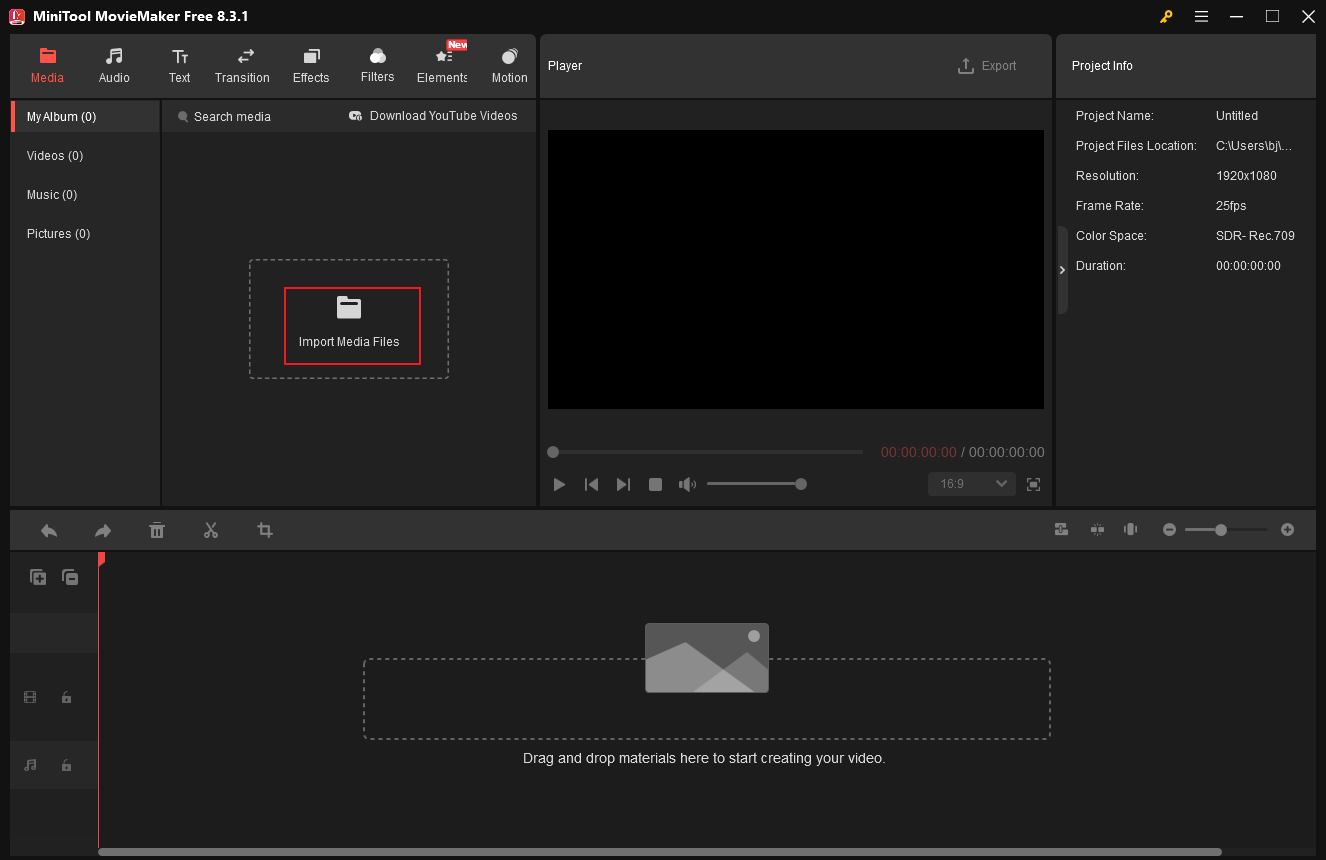
2. Import Your Makeup Tutorial Video
Launch MiniTool MovieMaker and click on the New Project option to enter the main user interface. Next, click on the Import Media Files option to import the video you shot before.
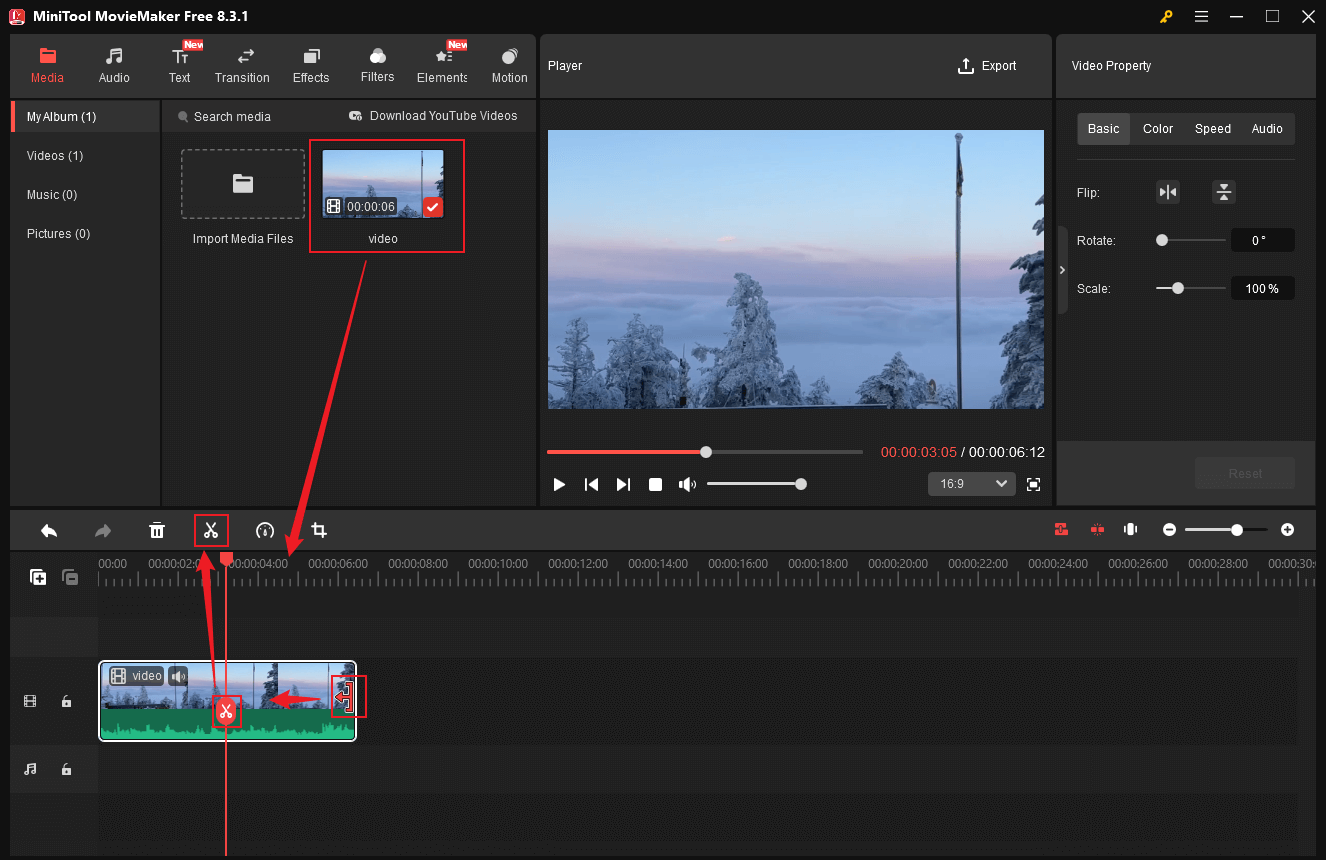
3. Remove the Unwanted Video Part
Drag and drop the added video to the timeline.
- Split Video: To extract clips and delete them from the video, drag the red playhead to the desired place and click the Split icon to cut the video into two segments. Repeat this step until all the unwanted video parts are separated. Then, right-click the unwanted part and choose the Delete option.
- Trim Video: Hover the mouse cursor over one of the two edges of the video until the Trim icon appears, then drag it inward to remove the unwanted part.
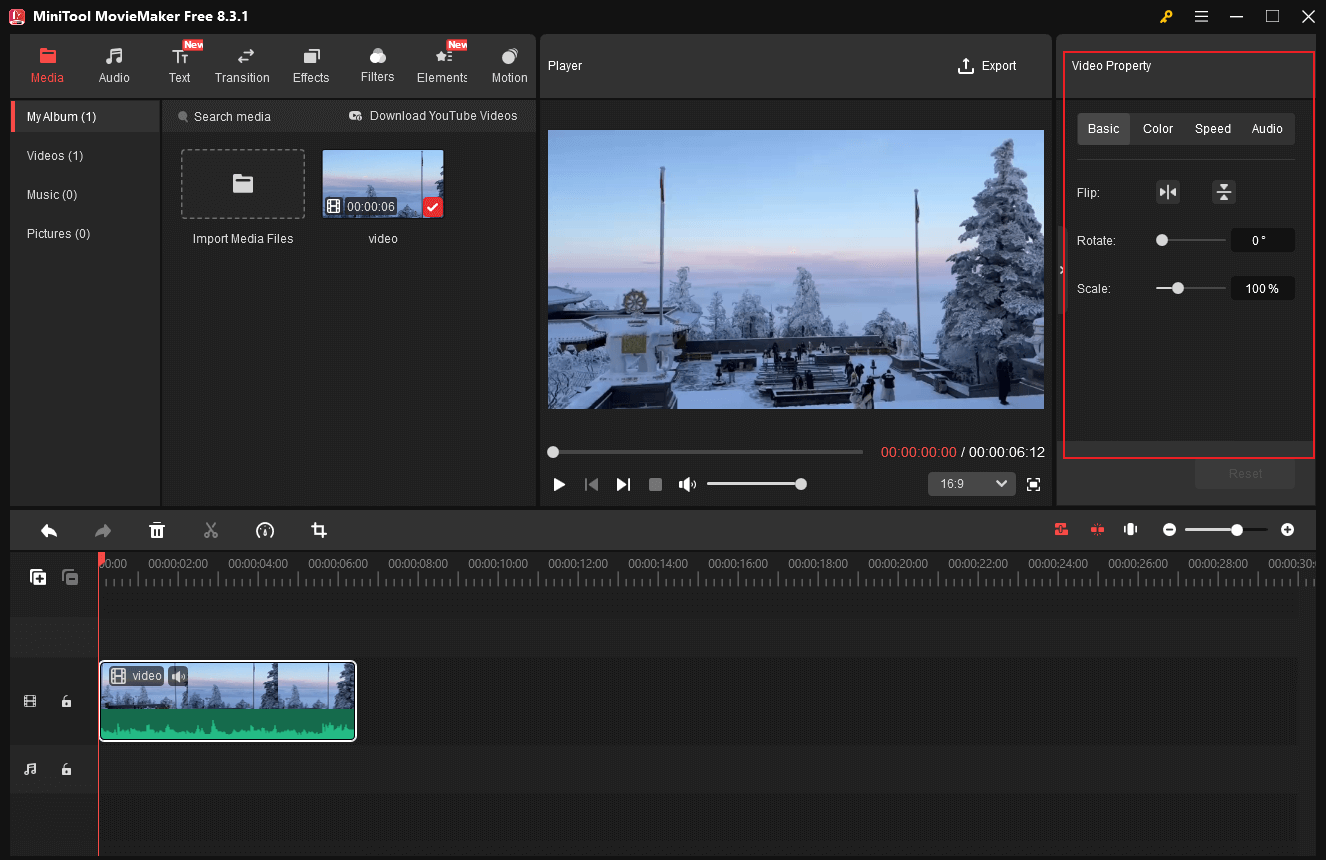
4. Adjust Video Property
Click the video on the timeline. In the top right Video Property section, you can flip, scale, and rotate video. Also, you can change the video contrast, saturation, brightness, speed, etc.
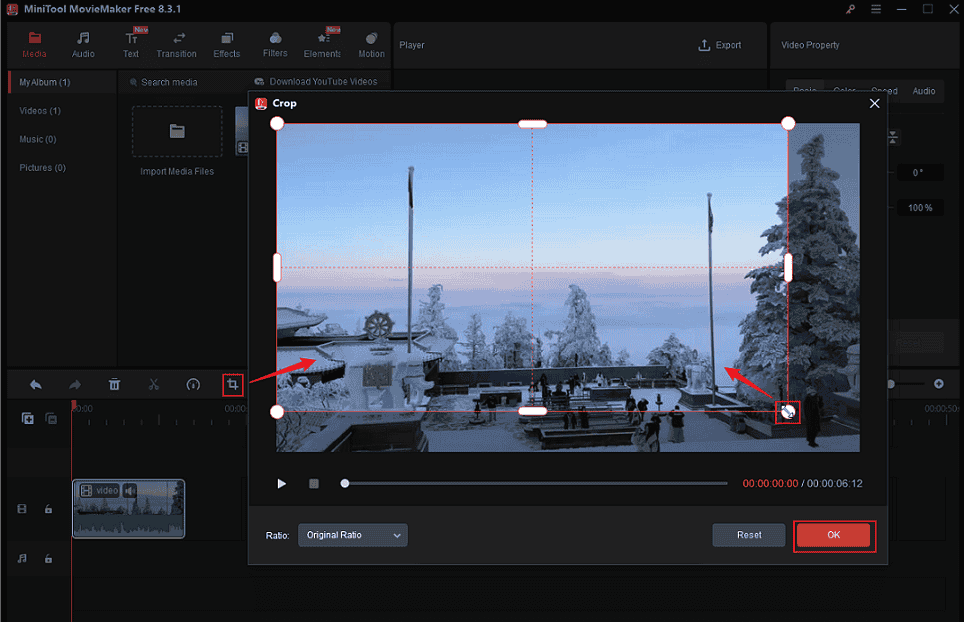
5. Crop the Video
Choose the video clip on the timeline you want to crop, then click the Crop icon in the toolbar above to open the Crop window. There, drag the cropping handles inwards to crop the video. When you’re satisfied with it, click OK to save the changes.
6. Make the Makeup Tutorial Video More Interesting
Add some stickers, music, captions, etc., that match your video style.
Add Music to the Video
Music is indispensable in a makeup video. MiniTool MovieMaker has an audio library and also allows you to add music from the local folder. Here are two methods to add music to the video.
- Add music from the local folder: Click the Import Media Files option in the Media section to import music from your own collection.
- Add music from the Audio library: Download the music you prefer in MiniTool MovieMaker’s Audio section. Then, drag it to the audio track and trim the audio based on your needs.
Add Captions
To make audiences understand the video content clearly, add captions to your video. Navigate to the Text section, choose your preferred caption style, and click the Plus icon to add it to the video. Next, adjust text duration by dragging the edges of the caption on the timeline. In the top right Text Property window, input text and customize font, size, and more.

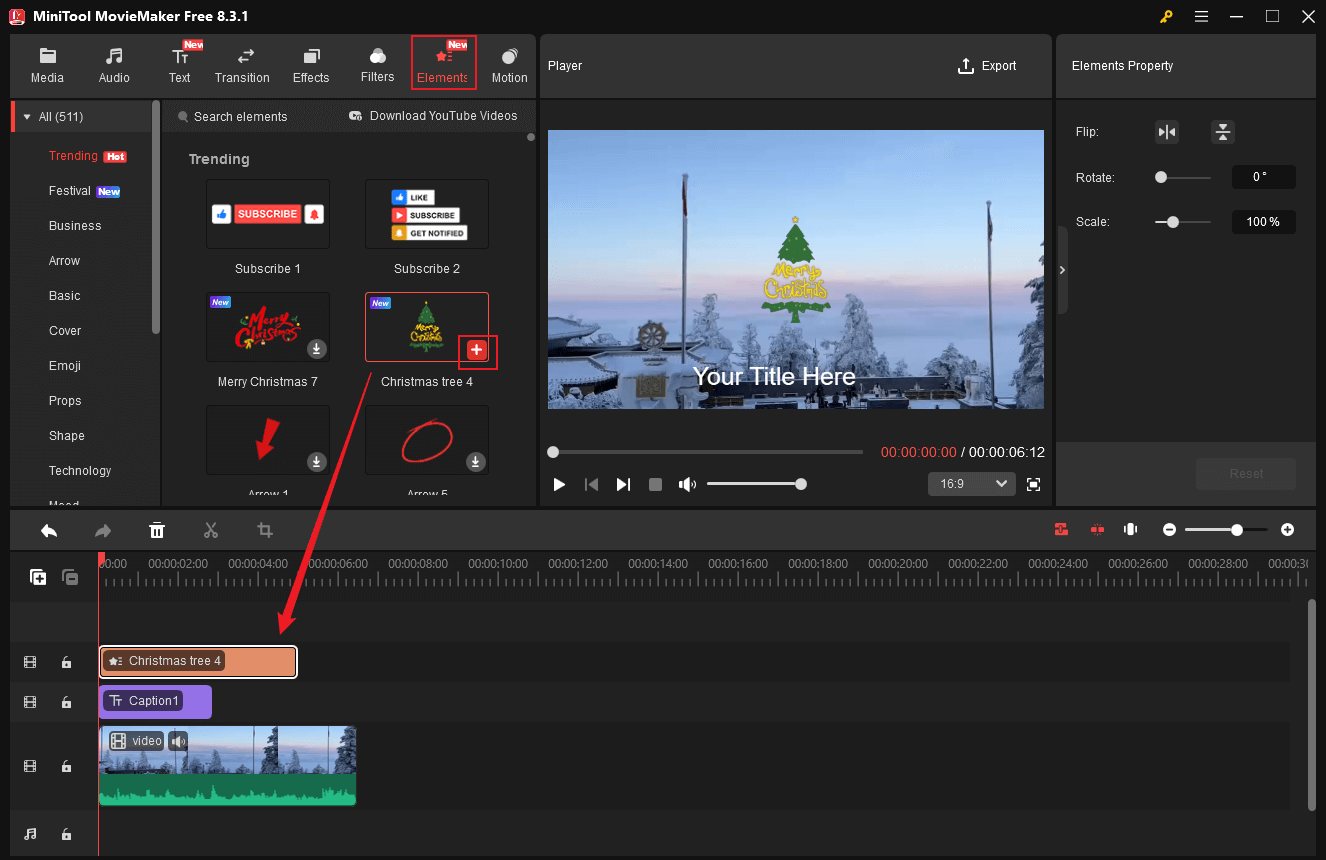
Add Stickers
Head to the Elements section, download the desired stickers, and drag them to the timeline. Drag the stickers on the timeline to adjust their appearance time in the video.
Furthermore, you can add transitions, effects, and filters to the video.
7. Export the Video
Click the Export icon at the top right of the Player window to access the Export window. Then, rename the makeup video, choose an output destination, and set the output format, resolution, and frame rate. Finally, click the Export button to export the video.
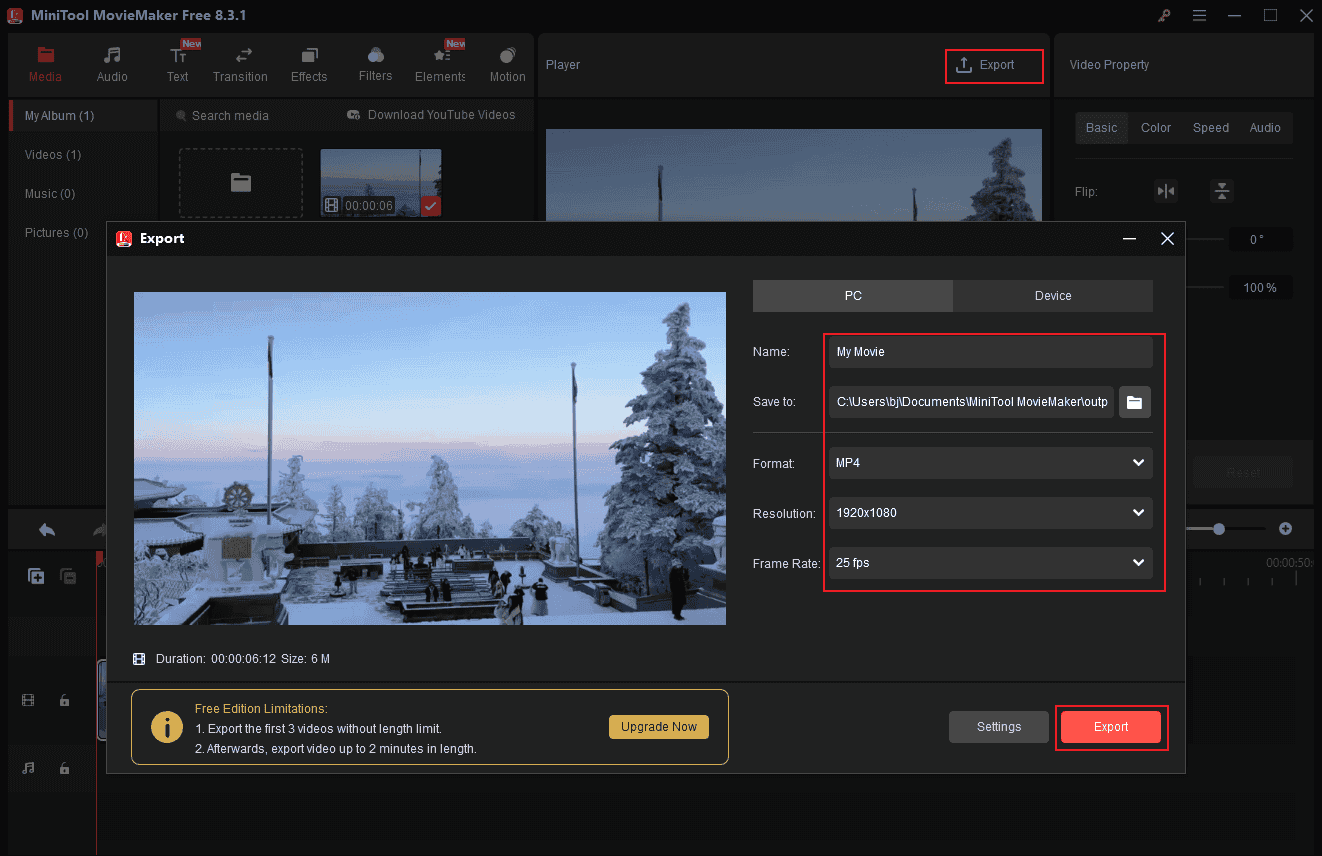
When the exporting process completes, click the Find Target button to locate the video in the local folder.
More than that, MiniTool MovieMaker can serve as a video compressor, audio extractor, video/audio merger, file converter, media player, photo video maker, and more. Click the download button below to explore more!
MiniTool MovieMakerClick to Download100%Clean & Safe
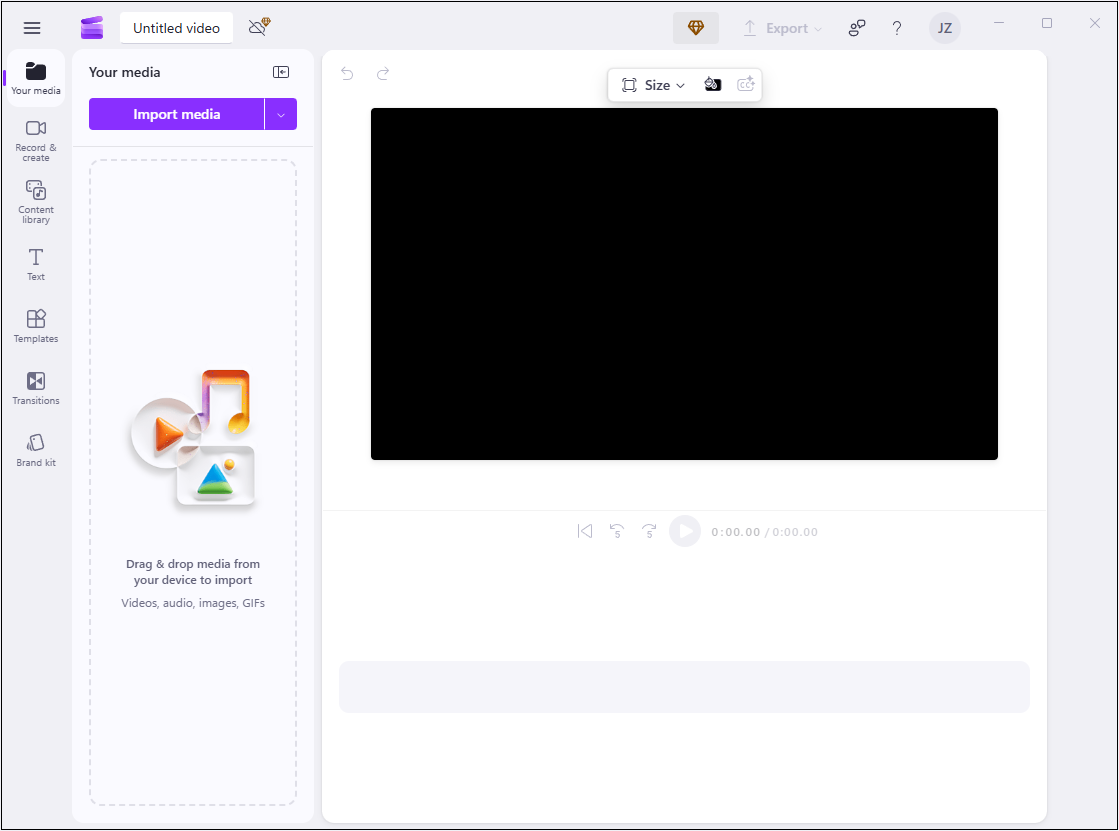
Option 2. Microsoft Clipchamp
Microsoft Clipchamp is also an ideal choice for video editing. It is easy to use and features a wide range of editing functions. Clipchamp supports trimming, cropping, splitting, flipping, rotating, and more. In addition, it offers a wide range of video templates, text styles, transitions, music, stickers, and more, making it easy to spice up your videos. Moreover, Microsoft Clipchamp supports high output video resolutions, including 4K, 1080P, etc. It has a desktop version and a browser-based version, making it convenient to access.
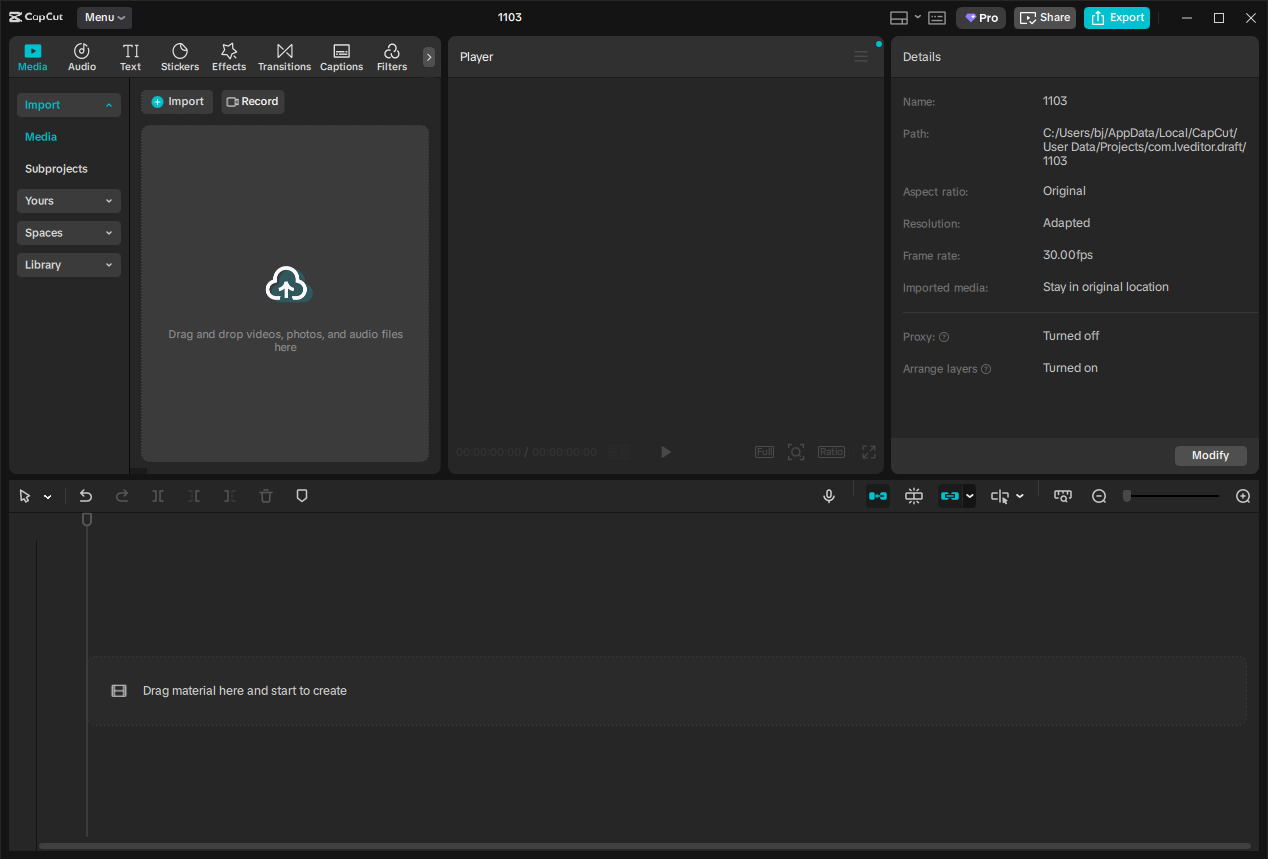
Option 3. CapCut
CapCut is a well-known and powerful free download video editor supported by Windows, Mac, iOS, and Android. It has a straightforward user interface and advanced tools for video creation. Plus, CapCut provides a resource library that includes extensive transitions, stickers, music, caption styles, and more. The free plan of CapCut offers most of the main features, making it perfect for editing videos with a limited budget. If your budget allows, you can try the Pro plan, which offers more professional tools.
![How to Make a Pinterest Video Effortlessly on Windows [Pro Guide]](https://images.minitool.com/moviemaker.minitool.com/images/uploads/2025/09/how-to-make-a-pinterest-video-thumbnail.png)
Now, It’s Your Turn
With these tips on creating makeup tutorial videos above, I believe you have a solid grasp of the process now. After learning how to make a makeup tutorial video, it’s time for you to channel your inspiration and create original, captivating makeup tutorial videos. Follow the steps mentioned above to film a makeup tutorial video and edit it with the 3 best video editing software. I hope this article will be helpful to you! You can contact us via [email protected] if you have any questions about using MiniTool MovieMaker. Also, you can send me messages directly on Twitter, and I’ll help you as soon as I can.
User Comments :