What are Charity Videos
Videos created by or for non-profit groups with the goals of educating, raising money, and promoting support for public welfare causes are known as charity videos. These videos connect with audiences through storytelling, emotional resonance, and calls to action, thereby motivating people to share the message, volunteer, or make a financial donation.
By showcasing an organization’s character and the results of its efforts, charity videos encourage viewers to get involved. For fundraising purposes, videos can accurately depict beneficiaries and the flow of funds, thereby enhancing credibility and trust. Therefore, after watching a charity video, viewers are more likely to make a donation.
Charity videos also enjoy high shareability on social media, enabling them to raise awareness for a cause more effectively and achieve their objectives.
4 Main Types of Charity Videos
Charity videos come in many different types. Here are four main ones.
Fundraising Videos
Fundraising videos, as the name suggests, are used to raise money for charities or nonprofit organizations. These videos are made to promote specific fundraising campaigns and typically include a strong call to action, encouraging people to donate to particular projects.
Event Videos
Event videos are also a type of charity video, which have a wide range of uses. They can promote an event, capture and preserve highlights, etc. These videos allow people who cannot attend in person but still wish to stay informed about the organization’s activities to learn about the event content.
How-to Videos
How-to videos are used to teach people how to use products or services. They help establish credibility with potential customers, demonstrate your expertise in the subject matter, and show your commitment to providing quality services.
Case Study Videos
Case study videos show how the charity organization impacts its beneficiaries. It is an excellent way to demonstrate the organization’s influence. Such videos can highlight the achievements of institutional projects and establish trust with volunteers, supporters, and potential donors.
![How to Make a Car Vlogging Video [Here’s Your Pro Guide]](https://images.minitool.com/moviemaker.minitool.com/images/uploads/2025/09/how-to-make-a-car-vlogging-thumbnail.png)
How to Make a Charity Video
Many of you might encounter this situation: you plan to make a nonprofit charity video, but struggle with where to start. Professional charity videos attract more attention and are more likely to achieve their goals. In this section, I’ll show you how to make a charity video with three steps. Read on for more.
Part 1. Prepare a Detailed Script
First, you need to prepare a script for the video, which should include the following: an introduction to your organization, the reason for creating this video, the purpose of the video, and a call to action for viewers. A clear script can help you create videos better.
Part 2. Shoot Resource Videos
There are a lot of preparations for video shooting. You need to find a suitable character for the video who can be an active donor, organization leader, or other important person, making the video more convincing.
Next, you should decide on the shooting location. At the same time, pay attention to the light, scene setup, framing, and props. Please note that videos should ideally be kept short. In this fast-paced era, viewers tend to lose patience easily. Prioritize important information in the video.
Part 3. Edit the Video
Editing the video is also an essential part of making a charity video. Resource videos might be plain, so spice them up! In the following content, I recommend three professional video editors to help you create more attractive charity videos.
Option 1. MiniTool MovieMaker
MiniTool MovieMaker is a powerful and free video editor that comes with various editing functions. In addition to its basic editing functions, like trimming, cropping, splitting, speeding up, slowing down, rotating, etc., this application has advanced features, including video text overlay, multi-track editing, high-resolution editing, photo collage, copy and paste on timeline, and more.
Moreover, MiniTool MovieMaker has a resource library, which offers a variety of transitions, filters, effects, stickers, audio, motions, and more. You can add them to your videos for free. Furthermore, MiniTool MovieMaker supports a wide range of formats, such as MP4, MOV, MKV, AVI, MPG, FLV, MP3, AAC, M4A, WAV, PNG, JPG, and so on. As you can see, this application can process videos, images, and audio.
Now, follow the instructions below to make a charity video using MiniTool MovieMaker.
1. Download and Install MiniTool MovieMaker
Click the button below to download this program. Then, follow the setup instructions to complete the installation on your computer.
MiniTool MovieMakerClick to Download100%Clean & Safe
2. Import the Video
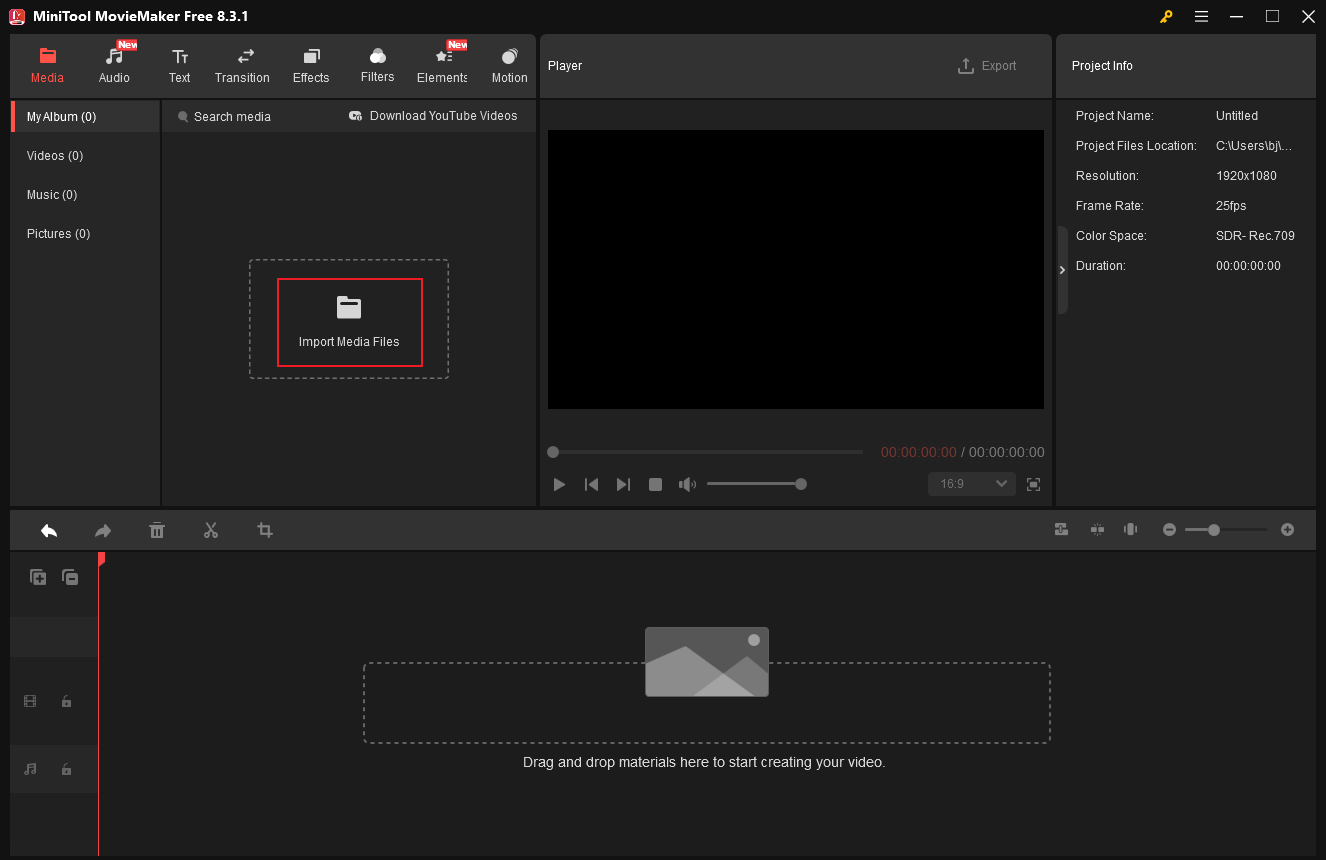
Launch MiniTool MovieMaker and click on the New Project option to access the main editing page. Then, click on the Import Media Files option to import the video you shot for charity purposes. Then, drag and drop the added video to the timeline to start editing.
3. Split the Video
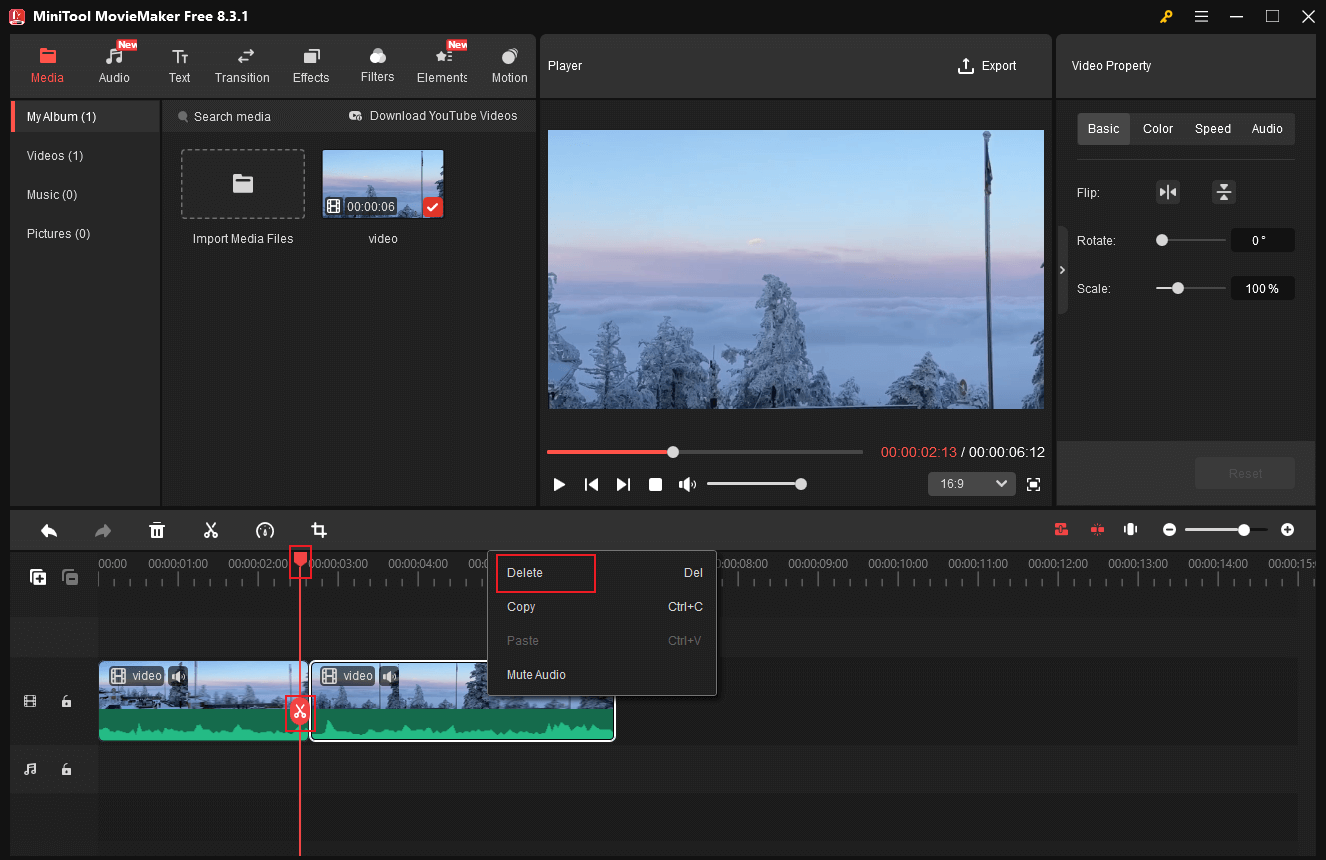
If the unwanted clip is in the middle of the charity video, split the video and delete the unwanted one. To extract segments from the video, drag the red playhead to the desired place and click the Split icon to cut the video into two segments. Repeat this step until the unwanted clip is separated. Next, right-click the unwanted part and choose the Delete option.
4. Trim the Video
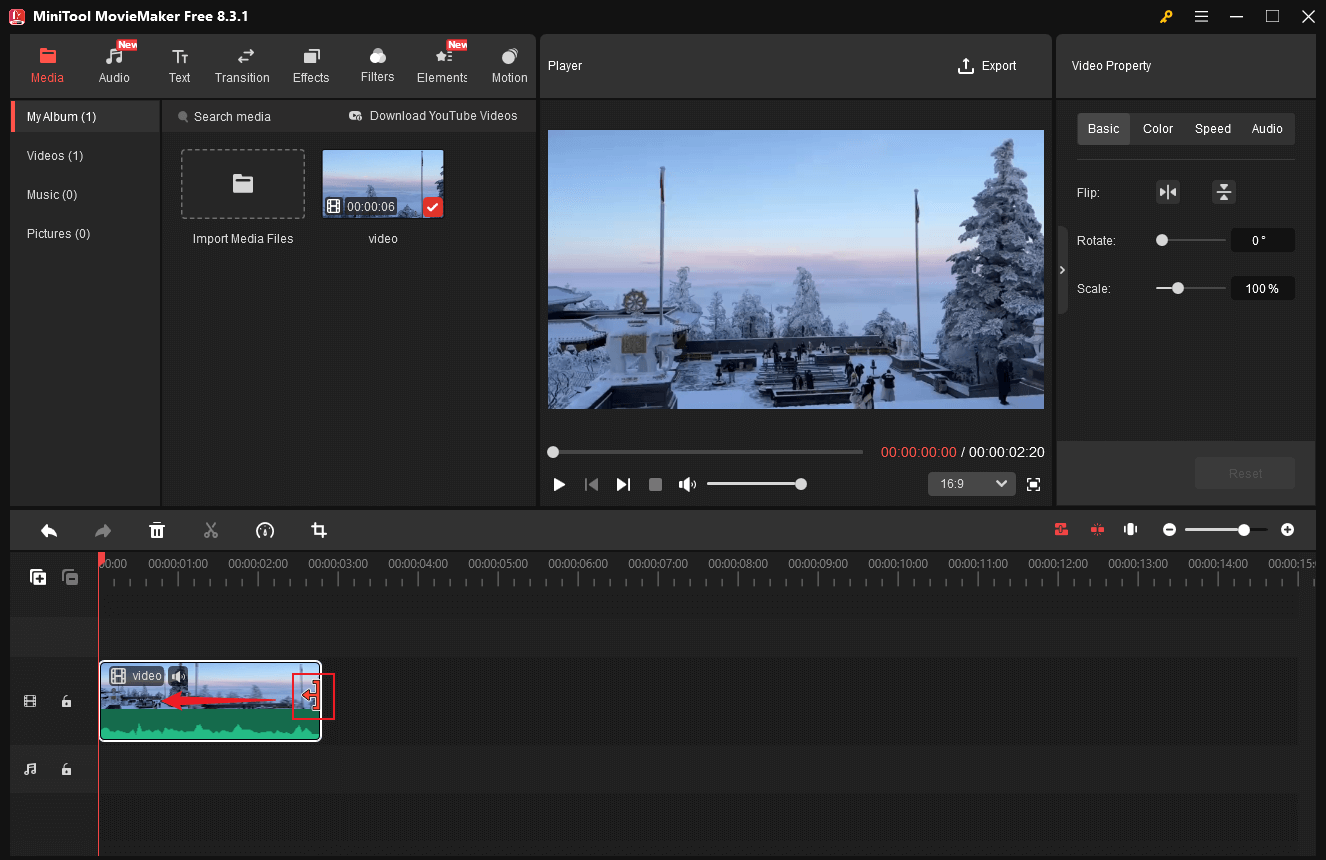
Hover the mouse cursor over one of the two edges of the video until the Trim icon appears, then drag it inward to remove the unwanted part.
5. Crop the Video
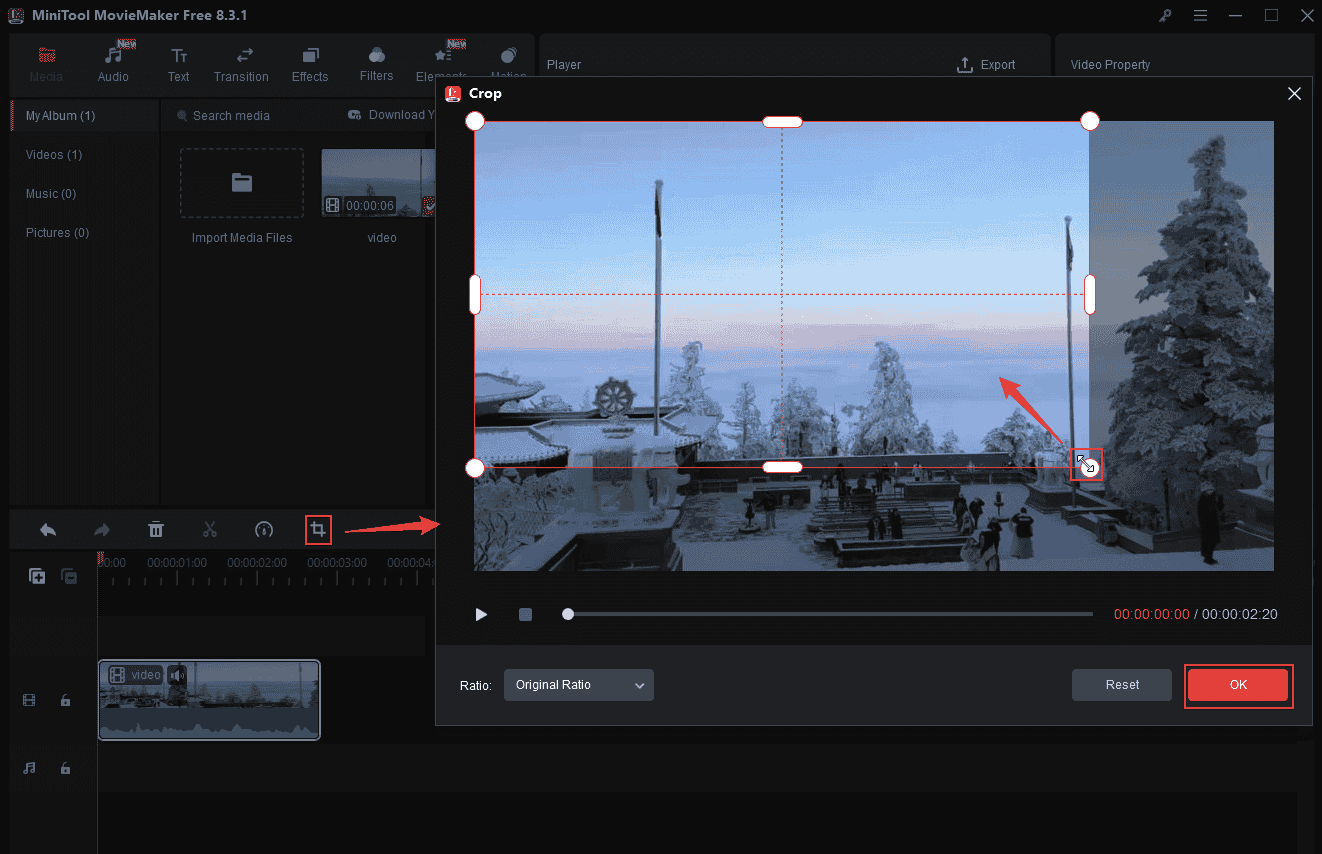
Choose the clip on the timeline you want to crop, then click the Crop option in the toolbar above to access the Crop window. Drag the cropping handles inwards to crop the video. Then click OK to save the changes.
6. Make the Charity Video More Unique
To make your charity video more interesting, you can add some transitions, effects, filters, stickers, and motions that suit your video style.
Add music to the video
Music can evoke emotional resonance. Selecting suitable music for your video is important. Here are two options to add music to the video.
- Add music from your own collection: Click the Import Media Files option in the Media section to import the audio from the local folder.
- Choose music from the Audio section: Download the desired music in MiniTool MovieMaker’s Audio section. After that, drag it to the audio track and trim the audio to match the video duration.
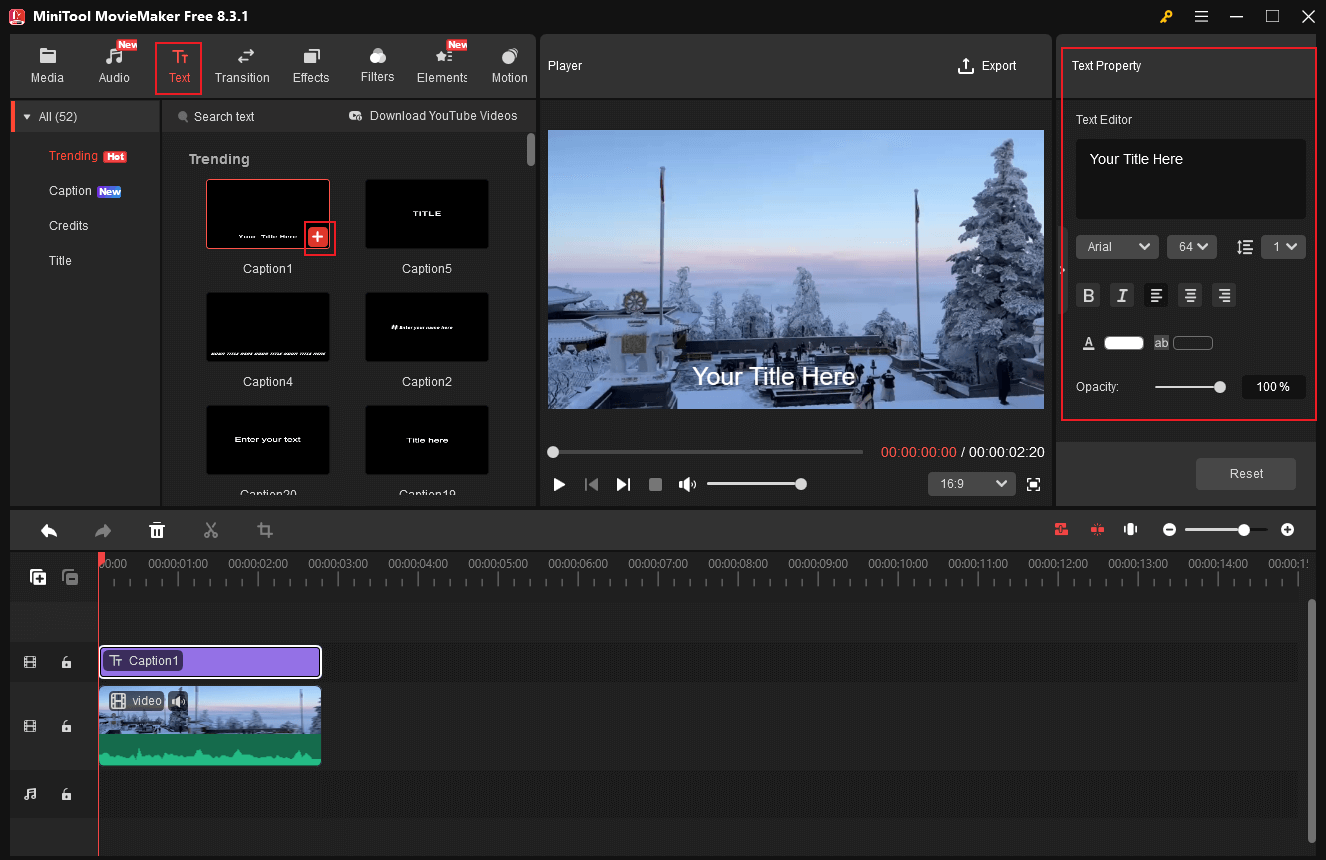
Add captions
To express information clearly, better add captions for important content. Go to Text, choose a preferred caption style, and click the Plus icon to add it to the video. Then, adjust text duration by dragging the edges of the caption on the timeline. In the top right Text Property window, you can input text and customize font, size, and more.
Furthermore, based on your additional needs, you can add transitions, effects, filters, and elements to the video.
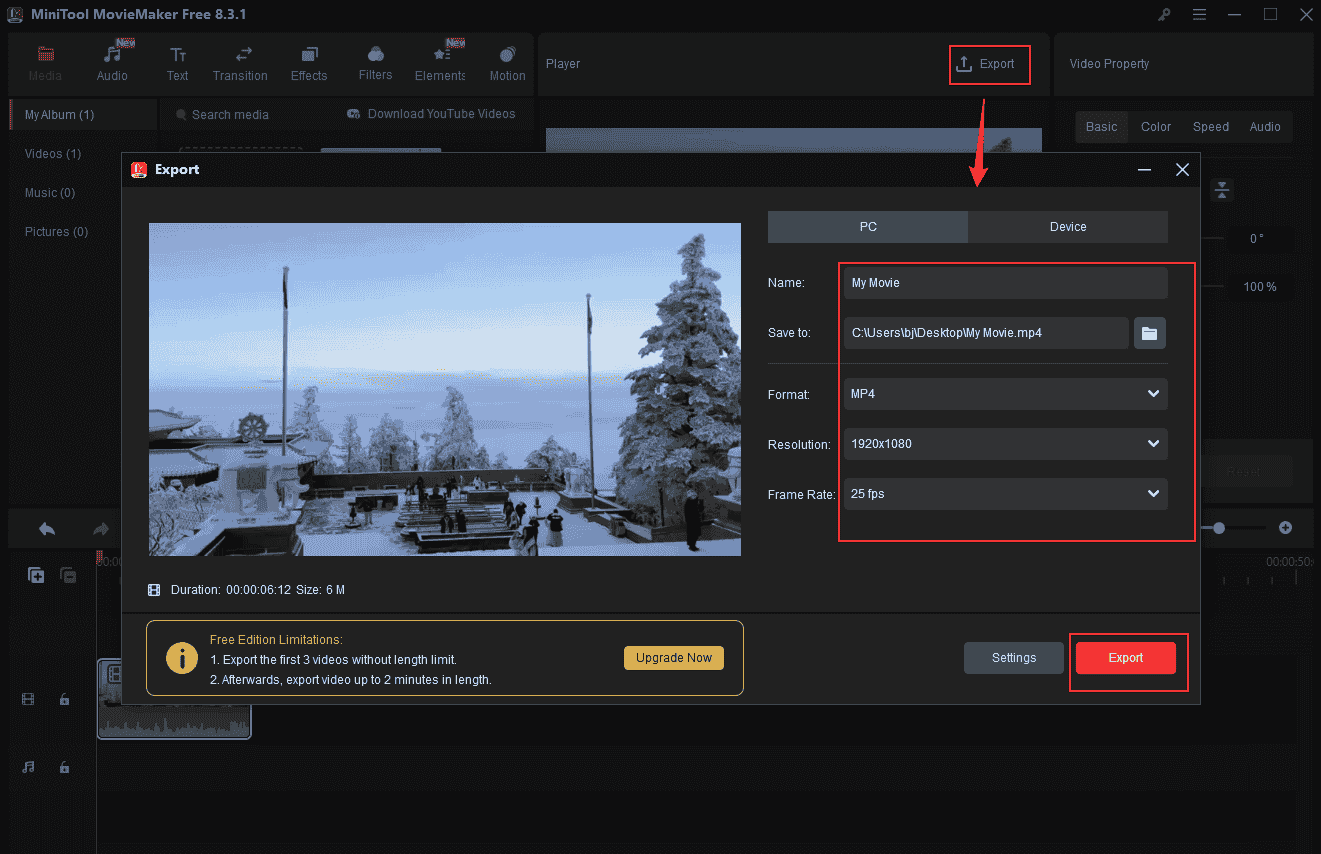
7. Export the Video
Click the Export icon at the top right of the Player window to enter the Export window. There, you can rename the charity video, select an output destination, and customize the output format, resolution, and frame rate. Then, click the Export button to export the video.
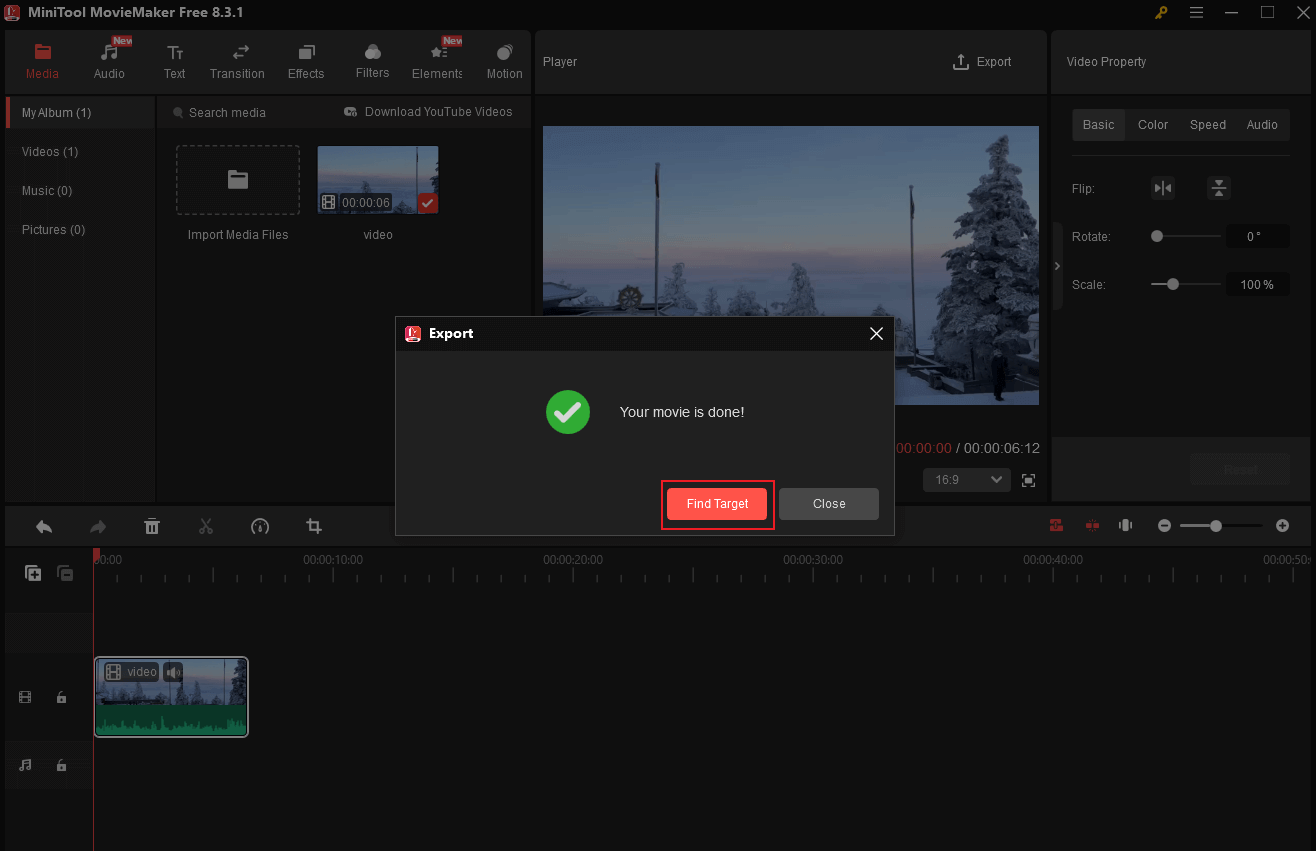
When the exporting process completes, click the Find Target option to locate the video in the local folder.
Furthermore, MiniTool MovieMaker can serve as a video compressor, audio extractor, video/audio combiner, file converter, and more. Click the download button below to explore more!
MiniTool MovieMakerClick to Download100%Clean & Safe
Option 2. Microsoft Clipchamp
Microsoft Clipchamp is an easy-to-use video editor that is also perfect for Windows users. It enables you to trim, crop, split, reverse, speed up, slow down, and rotate video. In addition, Clipchamp has a resource library, including a variety of transitions, templates, text styles, music, stickers, annotations, and more. You can add them to your charity video according to the needs. This application features an intuitive layout, making navigation easy.
More than that, Microsoft Clipchamp supports exporting videos in multiple resolutions, such as 4K, 1080P, 780P, etc. Furthermore, it features an AI-powered tool, which can generate captions automatically.
Here’s a quick guide on how to make a non-profit charity video using Microsoft Clipchamp:
1. Download and Install Clipchamp
Make sure that your computer has Microsoft Clipchamp installed. If not, go to the Microsoft Store to download and install this program.
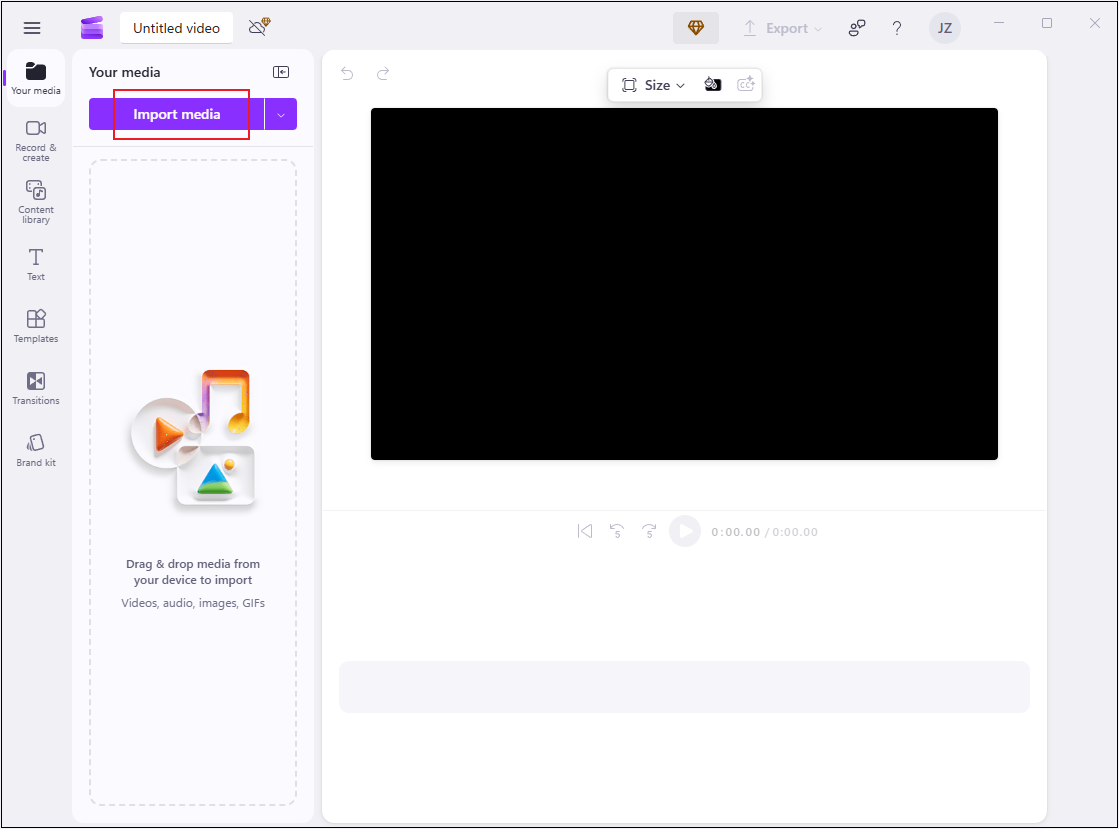
2. Import the Charity Video
Launch Clipchamp and click the Create a new video option to enter the editing page. Then, click the Import media option to add the video.
3. Edit the Charity Video
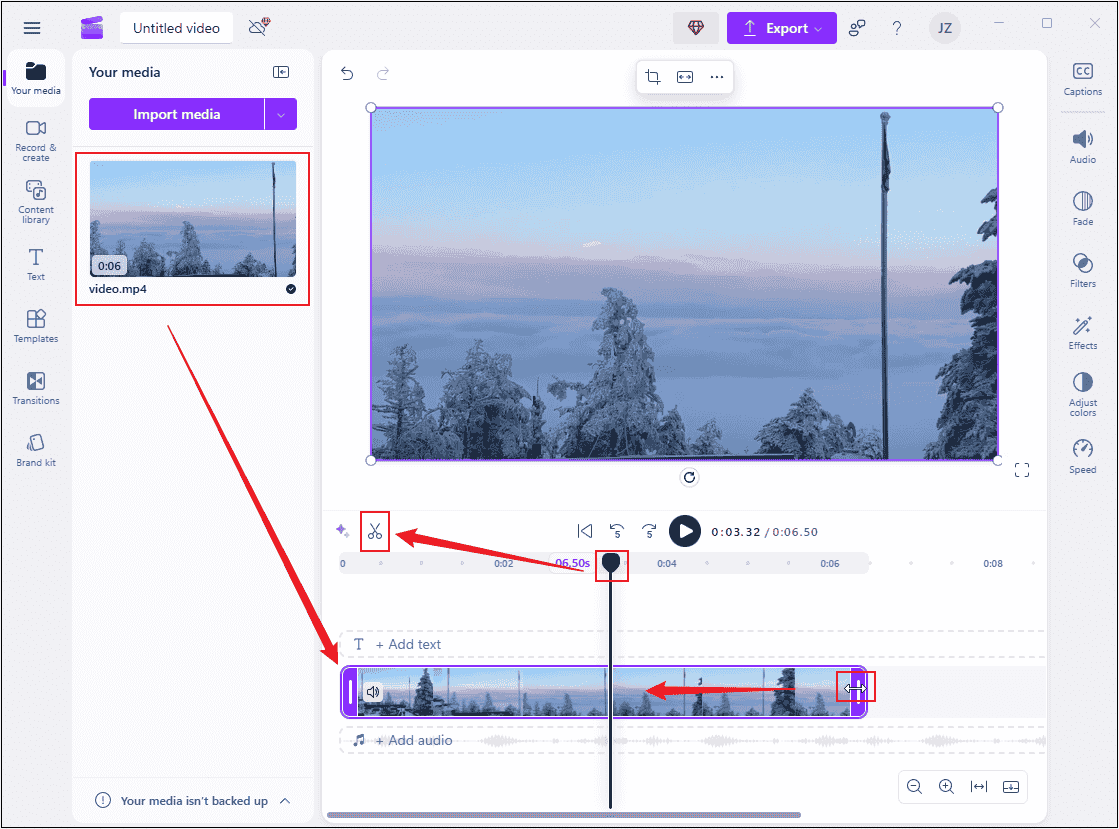
Drag the added video to the timeline.
Trim the Video: Hover the mouse cursor on one of the two edges of the video on the timeline. When the double-arrow icon appears, drag it inwards to remove the unwanted part.
Split the Video: Drag the playhead to where you want to split the video and click the Scissors icon in the toolbar above.
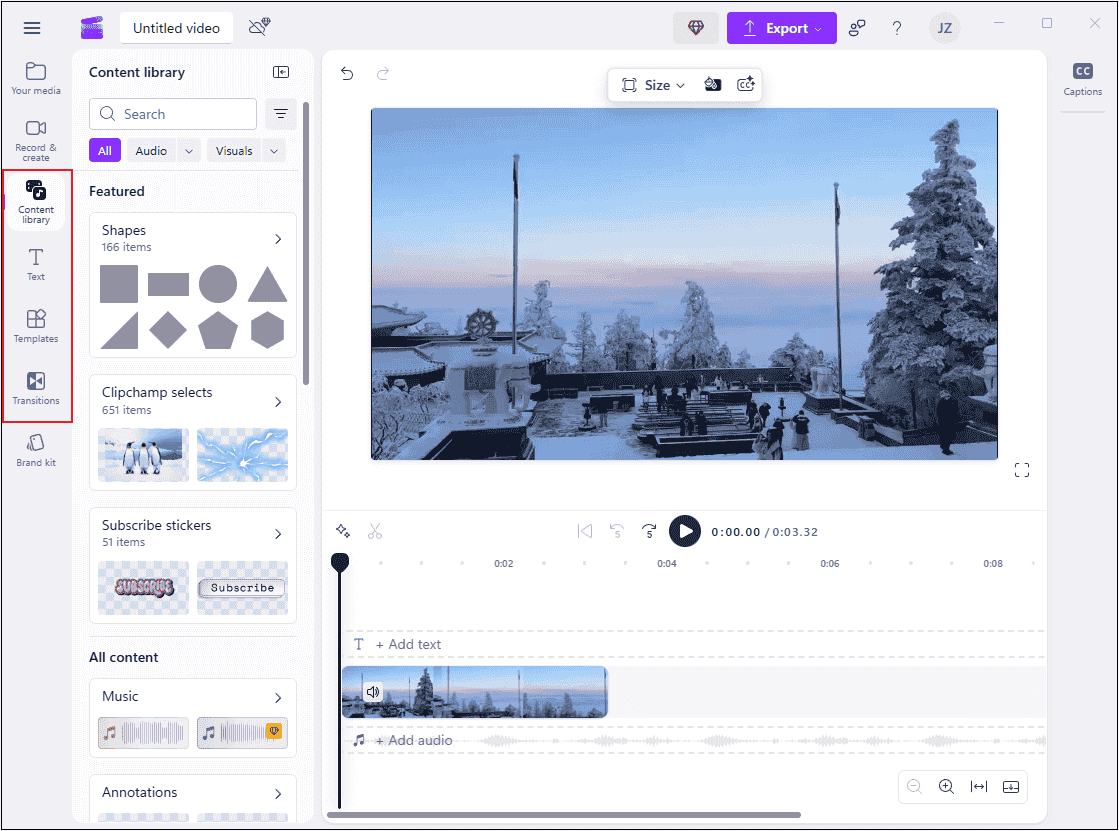
4. Add More Content to the Charity Video
There are various resources in the left menu; choose the preferred ones and add them to the video based on your needs.
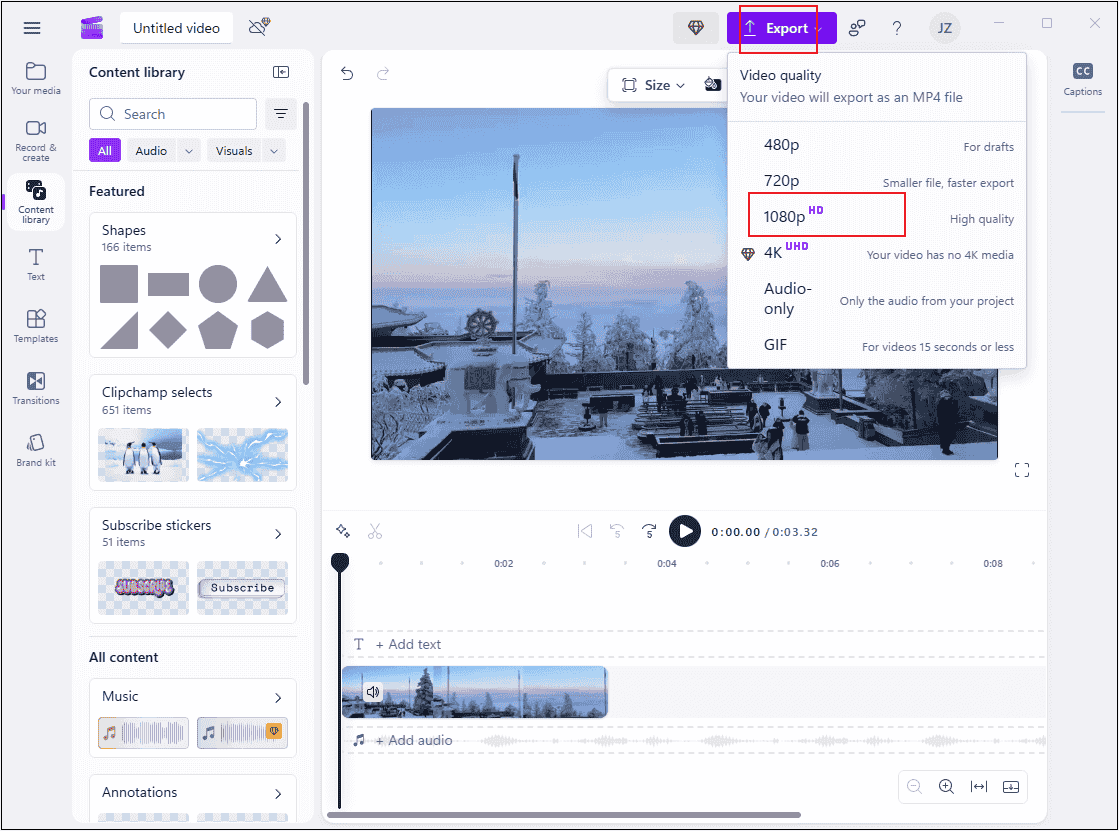
5. Export the Charity Video
When you’re satisfied with the video, click the Export option at the top right and choose a resolution (for example, 1080p).
Option 3. CapCut
CapCut is a well-known and advanced video editing program developed by ByteDance, which is compatible with Windows, Mac, Android, and iOS. This free download video editor supports basic editing functions, like trimming, cropping, splitting, rotating, reversing, speeding up, etc. CapCut only supports single-layer editing, but you can overlay more effects.
Moreover, CapCut has a resource library that includes a wide range of transitions, filters, stickers, motions, music, text styles, and more. Furthermore, CapCut offers AI-powered tools, such as AI video maker, auto captions, voice changer, long video to shorts, and so on. Now, you can follow the details below to create a non-profit video using CapCut.
1. Download and Install CapCut
Visit CapCut’s official website to download and install this program on your computer.
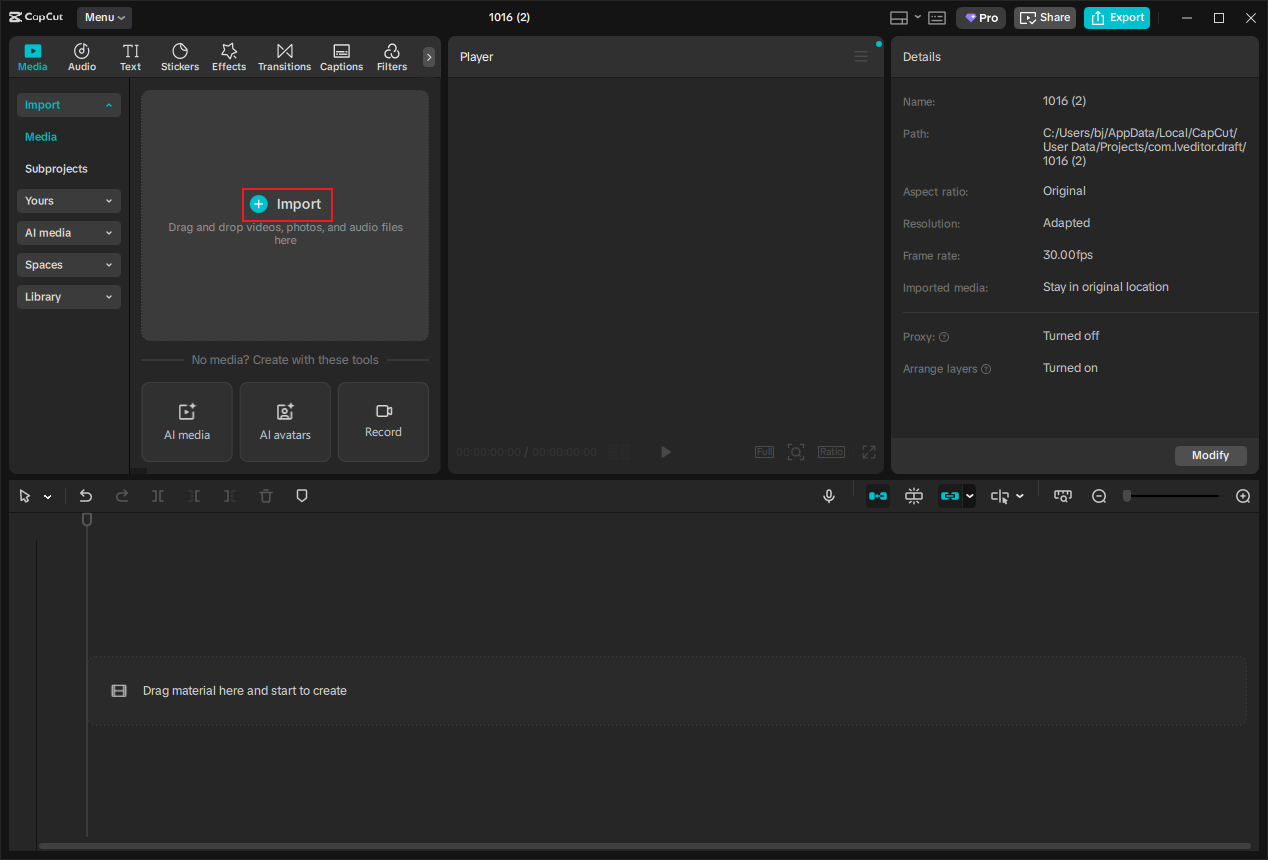
2. Import the Charity Video
Run CapCut and click Create project to enter the main interface. Then, click the Import option to add the charity video you want to edit.
3. Edit the Video
Drag the added video to the timeline.
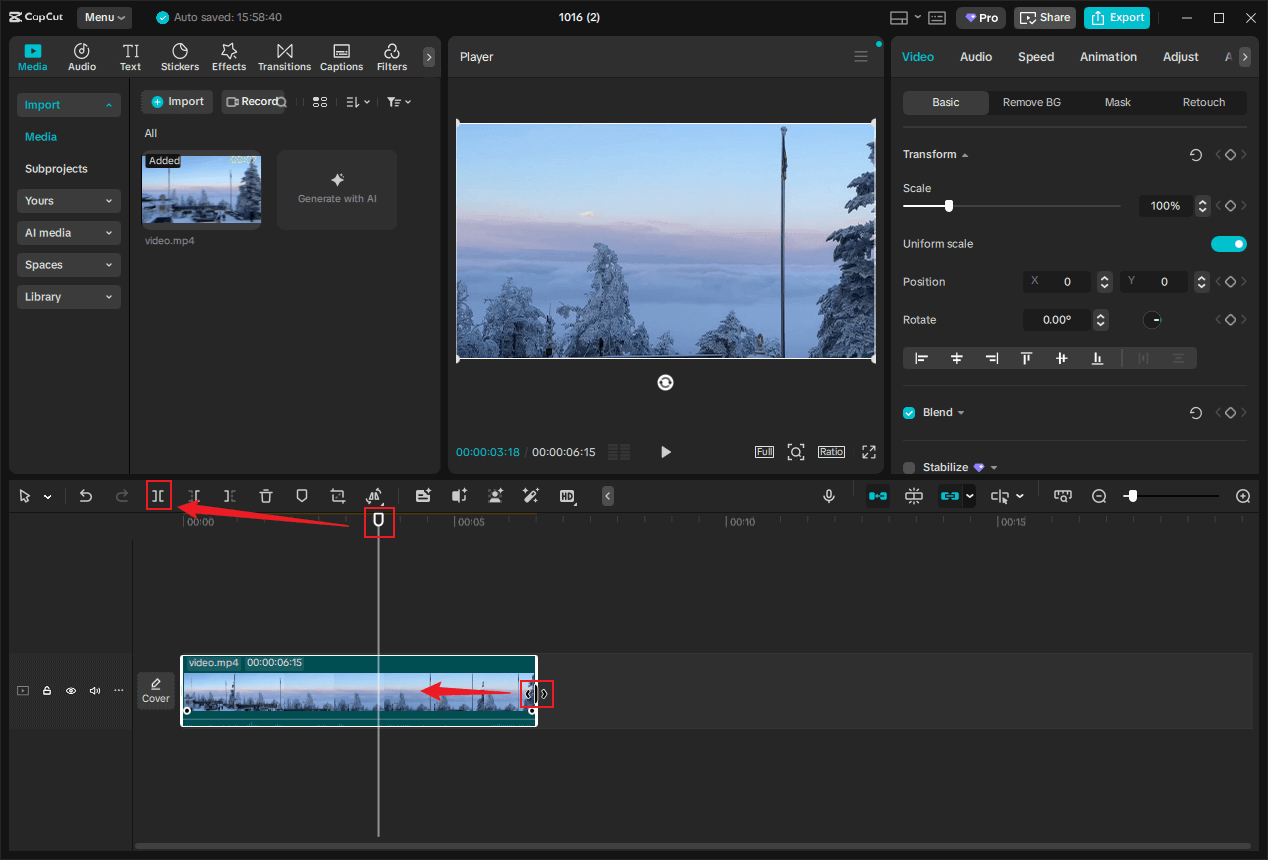
Split the Video
Drag the playhead to the desired place and click the Split icon.
Trim the Video
Hover the mouse cursor on the two edges of the video on the timeline until the Trim icon appears; drag it inwards to delete the unwanted part.
4. Make the Charity Video Next Level
You can add transitions, filters, stickers, effects, music, and text to the video from the top left section.
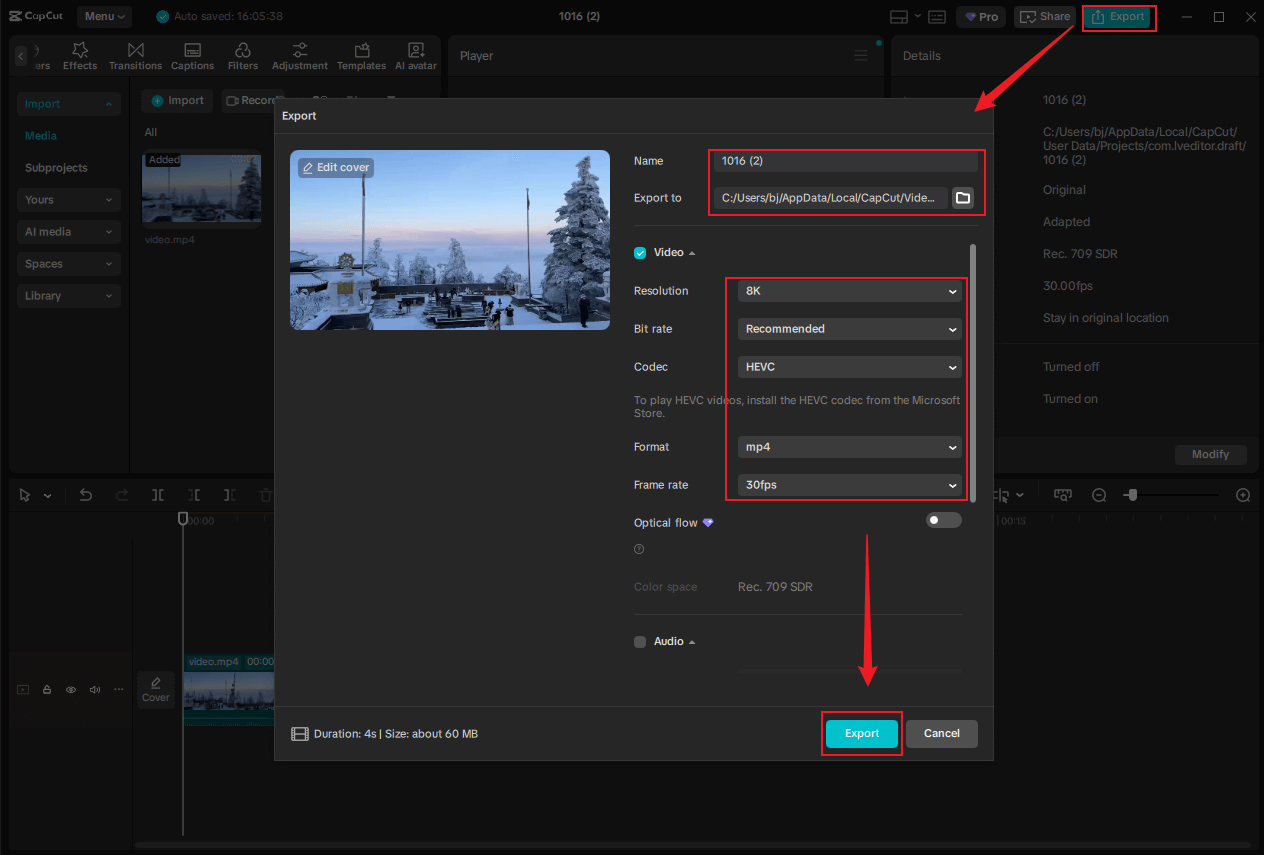
5. Export the Video
Click the Export option at the top right to enter the Export window. There, you can rename the video and choose an output destination. Also, you can customize the video resolution, format, bitrate, and other parameters as you prefer. After that, click the Export button to save the video to the local folder.
All done!
Looking for inspiration to make a charity video? This post can do you a big favor!Click to Tweet
![How to Make a Pinterest Video Effortlessly on Windows [Pro Guide]](https://images.minitool.com/moviemaker.minitool.com/images/uploads/2025/09/how-to-make-a-pinterest-video-thumbnail.png)
In Summary
Making videos and posting them on social media is a great way to promote your charity organization’s activities. Before creating videos for nonprofit organizations, it’s best to understand some basic information, such as what charity videos are and their typical types, which you can find in this article.
To make a charity video, there are three main steps you need to do: script preparation, resource video shooting, and video editing. When it comes to video editing, I recommend three user-friendly and professional video editors: MiniTool MovieMaker, Microsoft Clipcamp, and CapCut. With them, you can create charity videos with ease.
You can contact us via [email protected] if you have any questions about using MiniTool MovieMaker. Also, you can send me messages directly on Twitter, and I’ll help you as soon as I can.
User Comments :