This post explains three methods to edit Webex recordings. Use MiniTool MovieMaker if you want a free, no-watermark video editor with essential features. Consider Microsoft Photos Legacy if you need quick and simple edits. Try Flixier to edit Webex videos online if you don’t want to install an application.
Webex is a good platform for video conferencing or other meetings. It has a meeting recording feature. After recording your video conference on Webex, you may need to edit the recording for some reason. How to edit Webex recordings? Here are three reliable options: MiniTool MovieMaker, Microsoft Photos Legacy, and Flixier.
| Software | MiniTool MovieMaker | Microsoft Photos Legacy | Flixier |
| Platform | Windows | Windows | Web |
| Price | Free | Free | Free + Paid |
| Watermark-Free | Free | Free | No, the free version has a watermark. |
| Auto Captions | No | No | Yes, paid plans |
| Direct Webex Import | No | No | Yes |
| Best for | Watermark-free fine editing | Built-in quick trimming | Online, auto captions, no install required |
Useful Tips for Editing Webex Recording:
Recording Webex meetings helps with reviewing details, improving notes, or sharing information. Editing makes recordings more professional. Here are key tips:
- Remove Unnecessary Parts: Cut small talk, pauses, or interruptions using trim, crop, or split tools.
- Add Annotations: Include text, images, arrows, voiceovers, or captions to boost engagement and accessibility.
- Brand Your Recording: Add an intro video or company logo for clear ownership.
After that, choose a tool like MiniTool MovieMaker, Windows’ built-in editor, or Flixier for editing and enhancing the meeting recordings.
How to Edit a Webex Recording Using MiniTool MovieMaker
Fast Track:
- Download Webex recordings to the computer.
- Install MiniTool MovieMaker.
- Open the software and import the Webex recordings.
- Trim clips and add transitions and text.
- Export the recording.
MiniTool MovieMaker is an easy-to-use and feature-rich video editor. It offers essential tools such as trimming, cropping, transitions, text, intros/outros, mosaic, and elements to edit and enhance videos. When you’re seeking a video editor to edit Webex recordings, MiniTool MovieMaker is worth a try.
Step 1: Save Webex Recordings
Sign in to your Webex User Hub on a web browser. Select Recordings from the left navigation panel, locate the meeting you want to save, and click the Download icon next to it.
Step 2. Install MiniTool MovieMaker on Your Computer
You need to get the installation package by clicking the download button below and then installing it on your desktop.
MiniTool MovieMakerClick to Download100%Clean & Safe
Step 3. Import Webex Recordings and Add to Timeline
Enable MiniTool MovieMaker and close the popup to enter the main editing interface. Click the Import Media Files area to choose your Webex recordings and click Open to import them. Later, click the plus icon on the target videos and directly drag and drop them to the timeline.
Step 4. Edit the Webex Recordings
- Trim a Video Clip: To remove the unwanted parts of the beginning or end of a video, you need to move the cursor to the beginning or end of the video clip until it becomes a double-headed arrow and drag the arrow rightwards or leftwards to the start or end of the desired part.
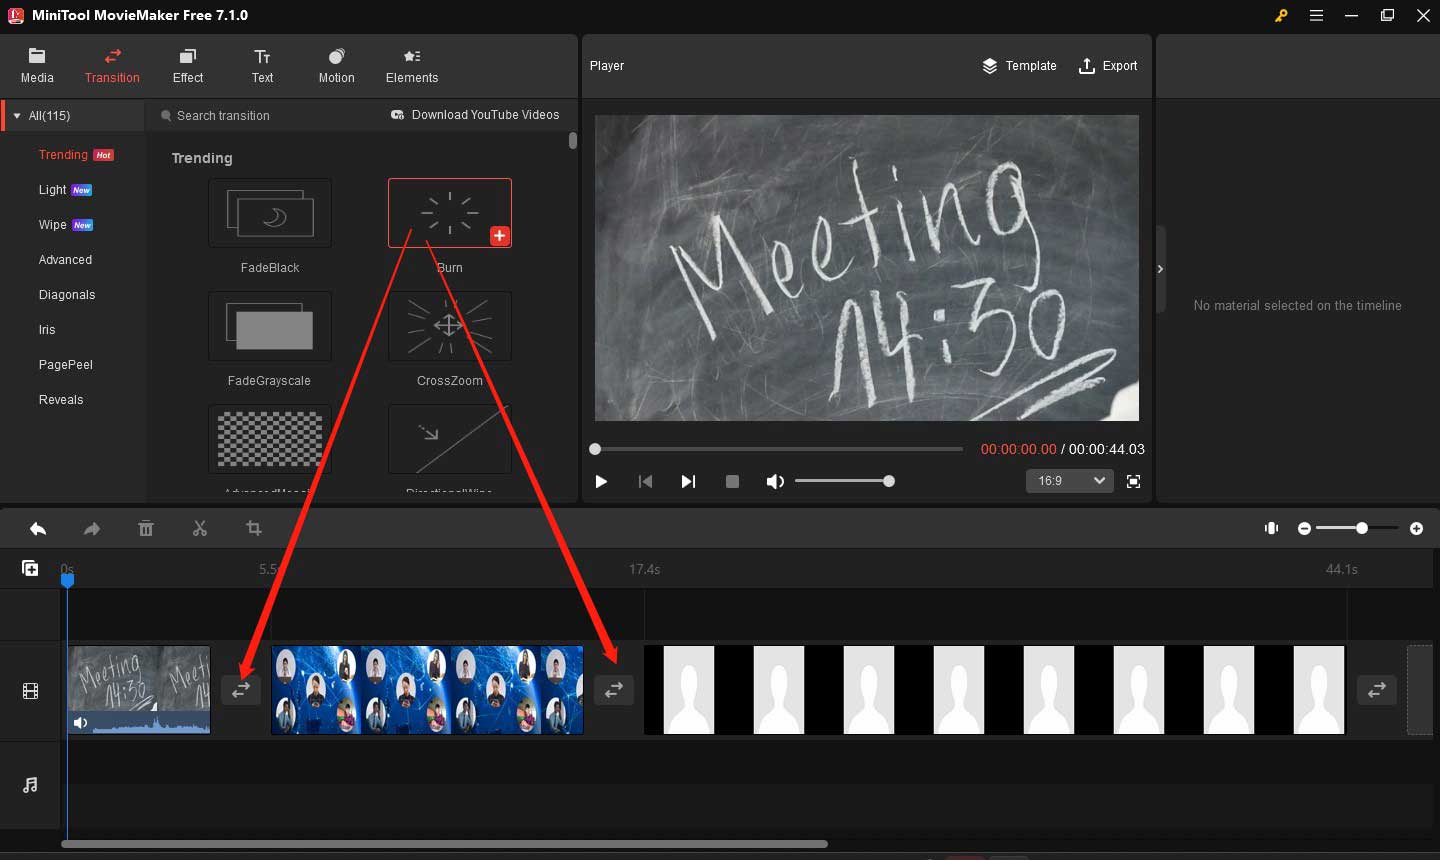
- Add Transitions: To connect two or more video clips seamlessly, you can add transitions to videos. Just click the Transition tab, choose a transition you like, and directly drag and drop it to the location between the two clips.
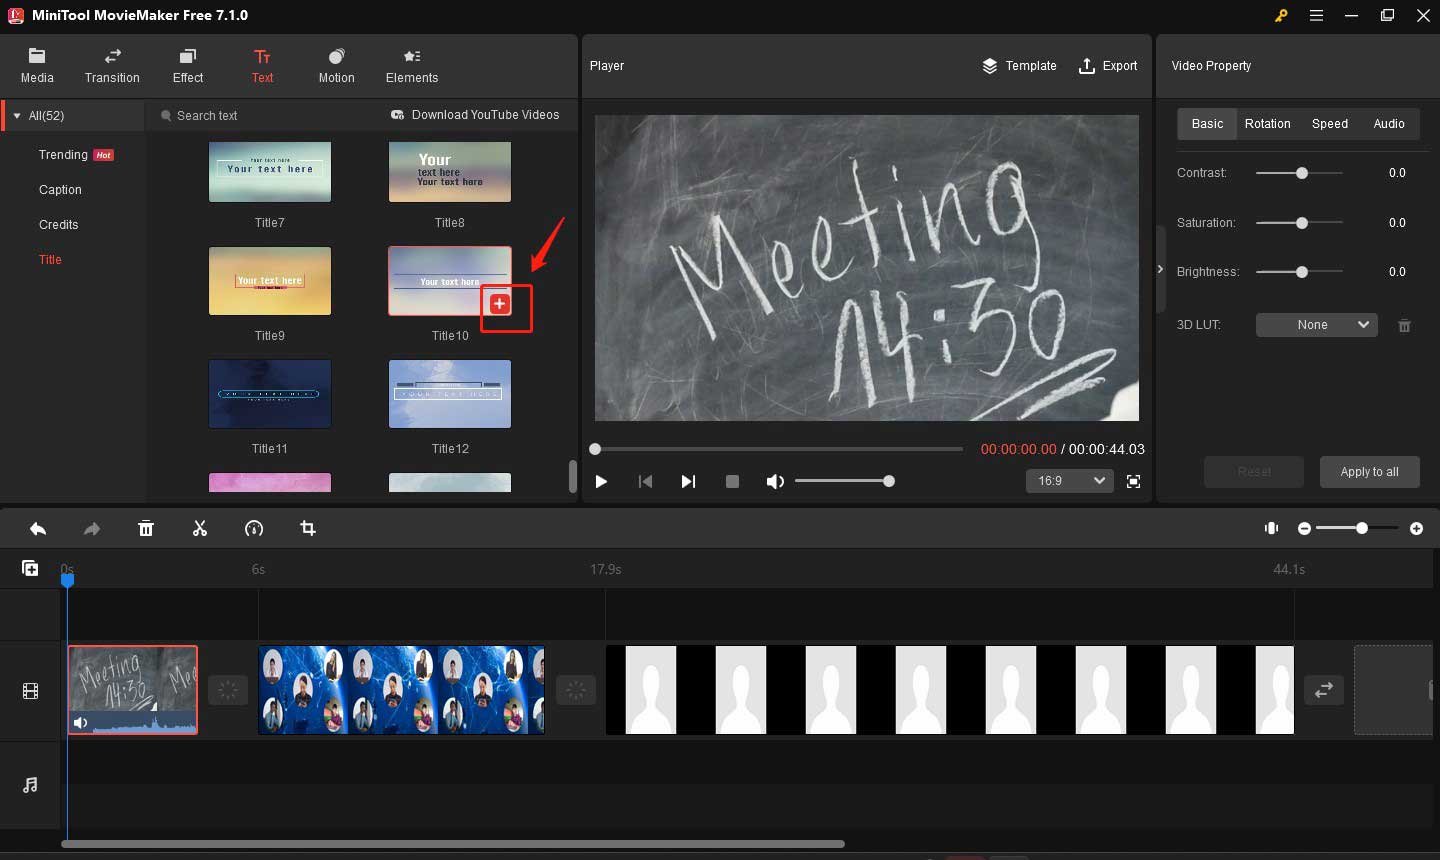
- Add Text: MiniTool MovieMaker offers you many types of text styles and you can add captions, credits, and titles to your recordings. For example, add an intro video to brand your recordings. You need to go to the Text tab and click the Title option in the left panel. Then click on the first clip on the timeline to highlight it and click the plus icon on the target title to add it in the front of the highlighted clip. Later, you can edit the text in the Text Property section.
You can also make other editions like adding motion effects and animated stickers like arrows.
Step 5. Export Your Edited Webex Recording
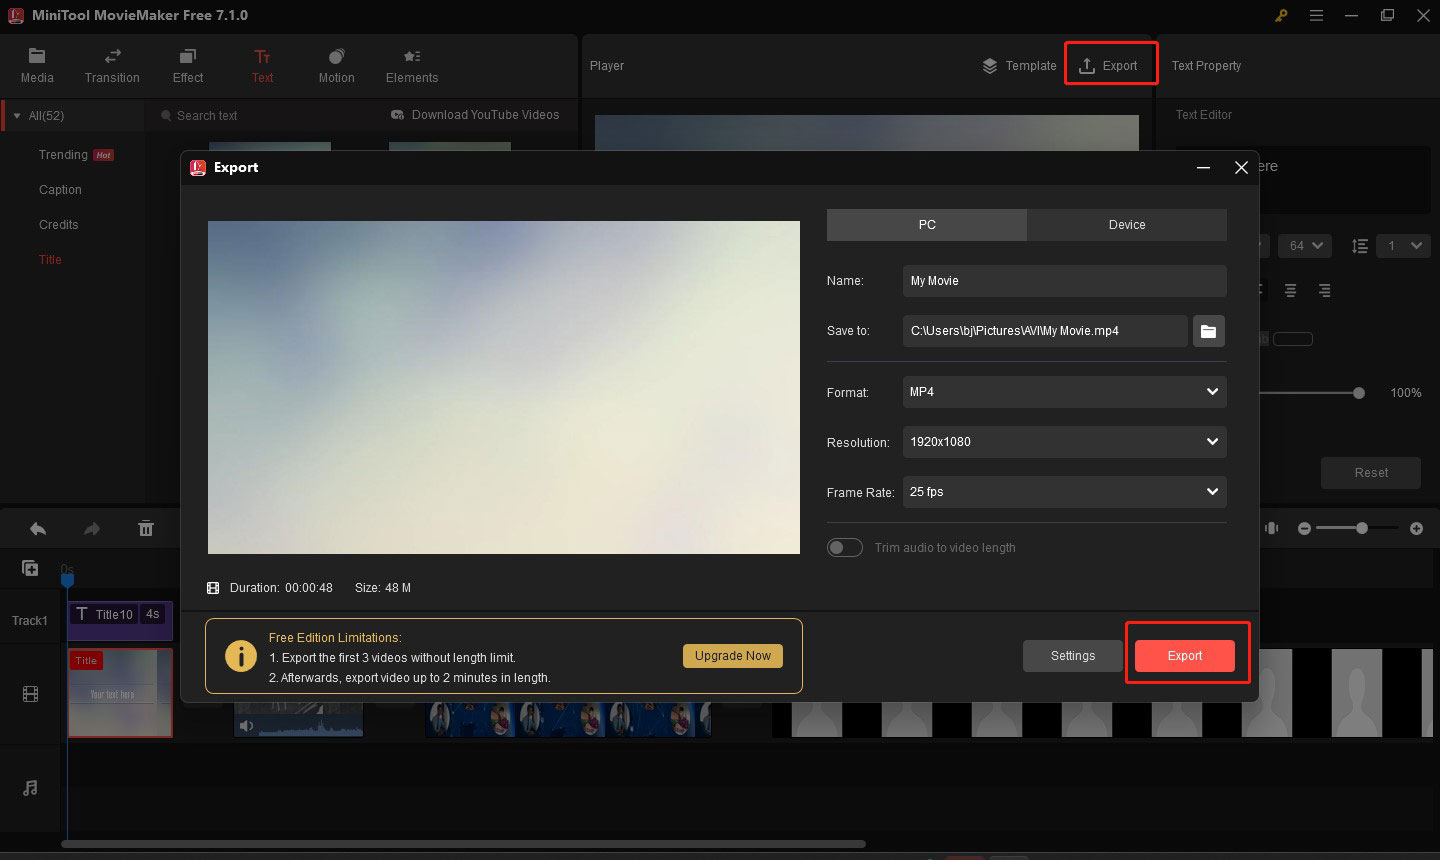
Click the Export icon in the Player section and personalize the output parameters like format, final destination, resolution, and others. Finally, click on the Export button to save the Webex recording.
MiniTool MovieMaker is among the least intimidating video editors I’ve come across.https://www.pcmag.com/reviews/minitool-moviemaker
How to Edit a Webex Recording Using Microsoft Photos Legacy
Fast Track:
- Open Photos Legacy and click Video Editor.
- Create a new project and add Webex recordings.
- Add a title card and trim recordings.
- Save the video.
Microsoft Photos Legacy is the built-in program of Windows that not only enables you to view, edit, and create albums but also allows you to make movies with its editing features. You can use it to edit Webex recordings. For example, you can remove unwanted parts using a trimming or splitting tool, introduce the video using a Title card, or others. Below is guidance on how to edit a Webex recording using Microsoft Photos Legacy.
Step 1. Open Microsoft Photos Legacy and click the Video Editor tab. Click the New video project button to create a black project, name your video, and click OK.
Step 2. Click on + Add to choose to upload your Webex recordings from your PC, collection, or the web. Then click on Place in storyboard to add them to the storyboard for the edition.
Step 3. Make Video Editions
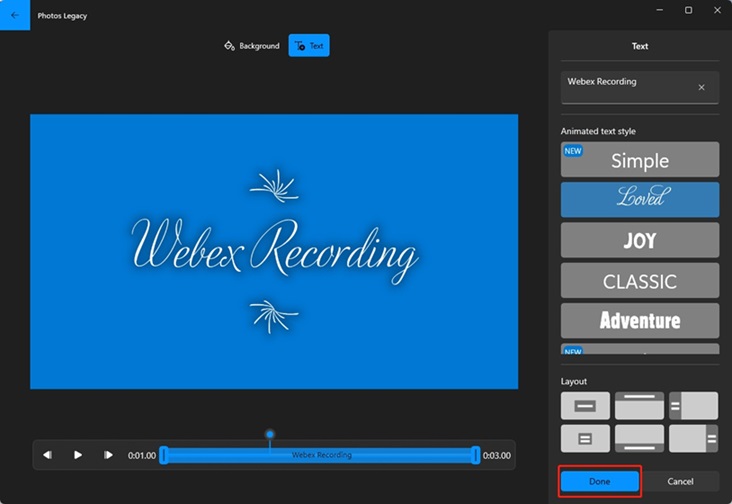
- Add a Title Card: Choose the option Add Title Card and click on the Text option to add a title to state what the recording is about. Enter the words, choose the text style and layout you like, and click on Done to save the changes.
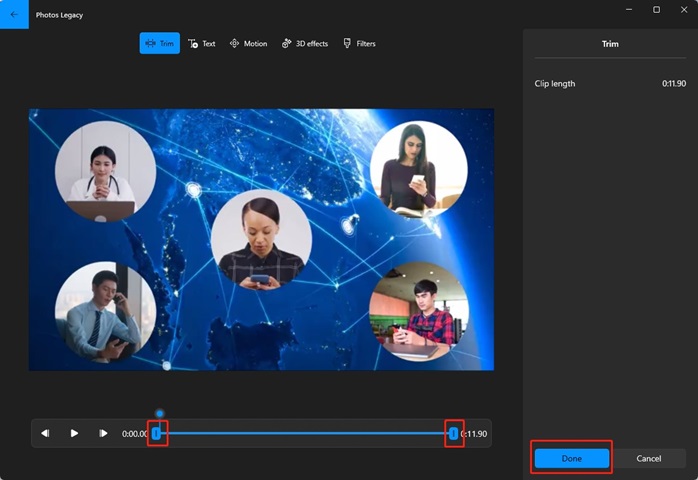
- Trim a Recording Clip: Click on the recording clip you want to trim, choose the Trim option on the toolbar to open the Trim window, adjust the blue box on both ends framed in the below screenshot to trim the clip, and click on Done.
Step 4. Click on Finish video, choose video quality, and click on the Export button to save it.
How to Edit a Webex Recording Using Flixier
Fast Track:
- Go to Flixier and upload Webex recordings.
- Add subtitles, trim videos, etc.
- Save and download the final result.
Flixier is an online video editor that works right in your browser – no download required. It offers features like cutting, trimming, cropping, adding text, transitions, animations, subtitles, and sound. You can also connect your Webex account for easy uploads. Follow the guide below to edit your Webex recordings with Flixier.
Step 1. Go to the website of Flixier and click on the Get Started button to enter the editing interface.
Step 2. Import your Webex recordings. There will appear a popup that indicates the sources you can import from. You can click on the Webex option, enter your Webex account, and click on Sign in. Then allow required permissions to Flixier and click on Done to finish connection.
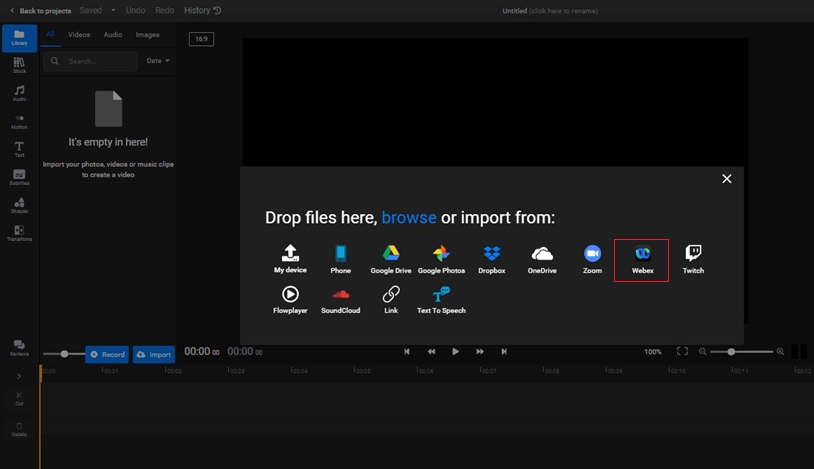
Step 3. Click the Import button, click the Webex option, choose the recordings you need, and click on Select to upload those recordings to Flixier. Then directly drag and drop them to the timeline.
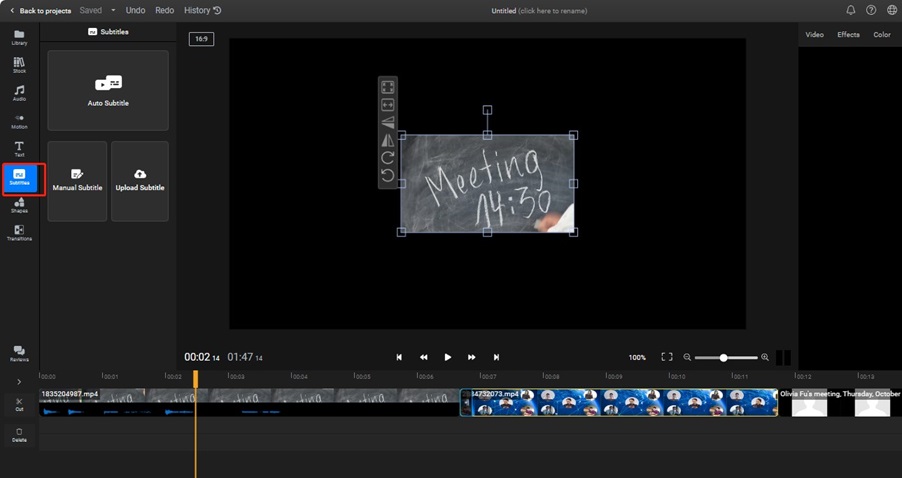
Step 4. Use Its Editing Tools. For example, you can click the Subtitles option in the left panel and choose the option Auto Subtitle, Manual Subtitle, or Upload Subtitle to add subtitles to your Webex recordings. You can also cut a video clip by dragging the yellow playhead to the desired place and click on the Cut button on the left side. Then if you want to delete a video section, you can right-click on the target section and choose the Ripple Delete option.
Step 5. After you finish editing Webex recordings, you can click the Export button to download the video.
“Flixier is a fast, accessible, and reliable tool for modern content creation. If your priority is speed, ease of use, and not being tied to a single machine, it’s a strong option.“https://www.capterra.com/p/212983/Flixier/reviews/

How to Record Webex Meetings as a Participant
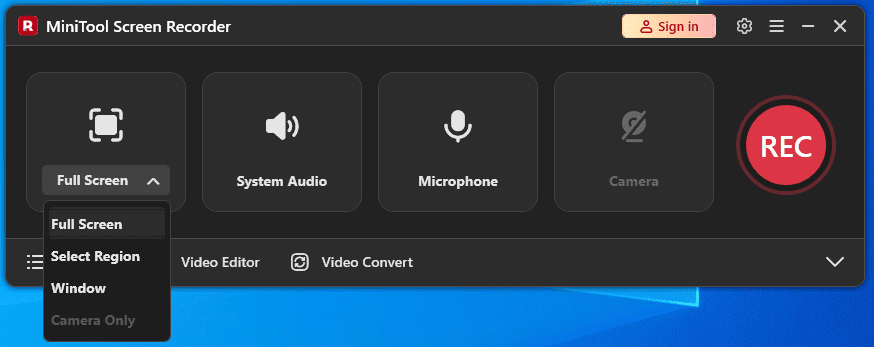
Webex has a built-in recorder that can record meetings. However, only the host or alternate host of the meeting has the right to record the Webex meeting, which means the participants of the meeting can’t make a video conference recording. If you want to record the Webex meeting, you can try a good third-party screen recorder. MiniTool Screen Recorder is a good choice.
MiniTool Screen RecorderClick to Download100%Clean & Safe
With MiniTool Screen Recorder, you can easily choose what to record on Webex, along with system audio and microphone. During recording, you can draw on the screen (like arrows, step numbers, and shapes) to mark important information. The software has no time limits or watermarks.
Wrapping Up
Webex is a good platform for meetings and contact and it has a built-in recorder to make meeting recordings. How to edit Webex recordings? The above has shown 4 useful movie makers and offered detailed guidance on how to edit a Webex recording using them. You can follow the above tips for creating a good Webex recording to edit your recordings with the above tool like MiniTool MovieMaker.
Hope this article is helpful to you. If you have any questions or comments while using MiniTool MovieMaker, please don’t hesitate to email us at [email protected].
Edit Webex Recordings FAQ
2. Select the Webex site for which you want to change settings, and click Settings.
3. Click Recording Management under Recordings.
4. Find the recording you want to play, delete, download, or share.
2. Click Play, then select Edit playback range.
3. Drag the timeline markers at the beginning and end of the video to set your new start and stop points.
4. Click Save playback range and exit.
About The Author

Position: Columnist
Cora is a tech writer specializing in digital media workflows, with over six years of hands-on experience in video post-production, media transcoding, and screen capture. Her writing is always clear and practical. Cora also produces in-depth software reviews for users across skill levels to help them find the right tool and enjoy video editing.
User Comments :