Creating your own GIF is not complicated. This post teaches you how to create GIFs from your videos or images in just a few clicks. Discover user-friendly GIF makers (like the movie maker from MiniTool) to transform your videos/photos/screens into captivating GIFs effortlessly.
GIFs are a popular and effective format for conveying emotions, sharing reactions, and engaging users (commenting or sending messages) on social media platforms. In contrast to still images and text, GIFs provide a straightforward, vivid, and humorous form of communication.
Today, most people enjoy using GIFs, but think that making a GIF is a complex process or requires advanced skills. However, this is not the case. Now, creating a GIF is easier than you think.
In this post, I’ll guide you through 5 simple methods to create GIF from videos, images, and even your screen. Let’s get started.
What Is a GIF
First, let’s have a basic understanding of the GIF file and learn its strengths and weaknesses.
Definition
GIF stands for Graphics Interchange Format and is a common image format that supports looping animations. Of course, GIF can be used to store static images.
Strengths and Weaknesses
In contrast to other raster file formats like JPEG and PNG, the key characteristic of GIF relies on its simple animation, giving an emotive communication method. The GIF format uses lossless compression without significant quality loss. Additionally, if you prefer silent expression, GIFs can be an ideal choice as they do not include sound.
However, the GIF format is limited to 256 colors, which is a big limitation compared to other image formats.
How to Create GIFs from Videos/Photos
GIFs are great for expressing feelings. You can make your own from videos or images of your daily life, like your cute cat or a funny moment. So, in this section, I’ll illustrate 3 methods to make a GIF from photos or a video on the desktop.
Method 1: Use MiniTool MovieMaker
MiniTool MovieMaker is primarily designed to create video from images, and it’s also a free GIF maker for Windows, allowing you to create a GIF from videos or images with ease. It provides essential editing tools to edit and enhance your footage before finalizing your GIF. Best of all, it has no file size limits, no watermarks, and no ads.
Featuring an intuitive interface, MiniTool MovieMaker is easy to use and requires no skills. If you’re an entry-level user, this application should be a fantastic choice to help you make high-quality GIFs.
Follow the steps to create GIFs using MiniTool MovieMaker.
Step 1: Download and Install
Click the button below to download and install the free GIF maker on your PC.
MiniTool MovieMakerClick to Download100%Clean & Safe
Step 2: Import Your Video or Images
When you launch the software, close the promotion window to enter the main interface. Then, click the Import Media Files button to upload your video or images. Next, drag and drop your footage to the timeline.
Step 3: Edit Your Footage
It’s necessary to process your video or images in advance to ensure a high-quality GIF in the end.
1. Extract the Highlights
Generally speaking, the ideal duration of a GIF is 2 to 6 seconds. So, it’s necessary to trim video to remove unwanted parts. Just hover your mouse over the clip’s start or end until the Trim icon appears, then drag the icon inwards.
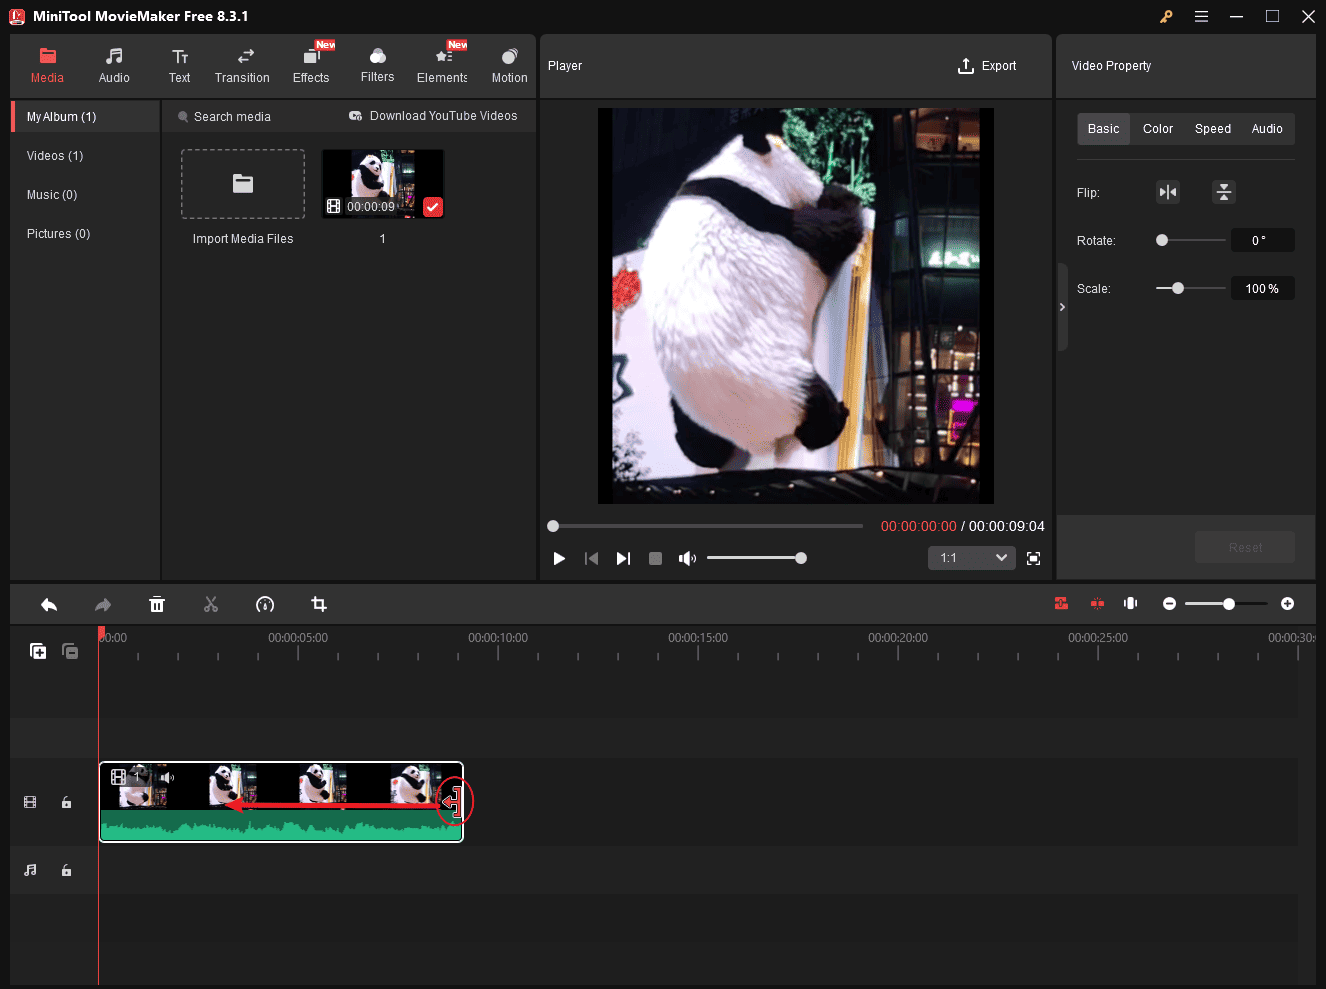
Additionally, you can adjust the duration of the GIF to suit your needs. If the key moment is too short, copy and paste the clip multiple times to create a looping effect.
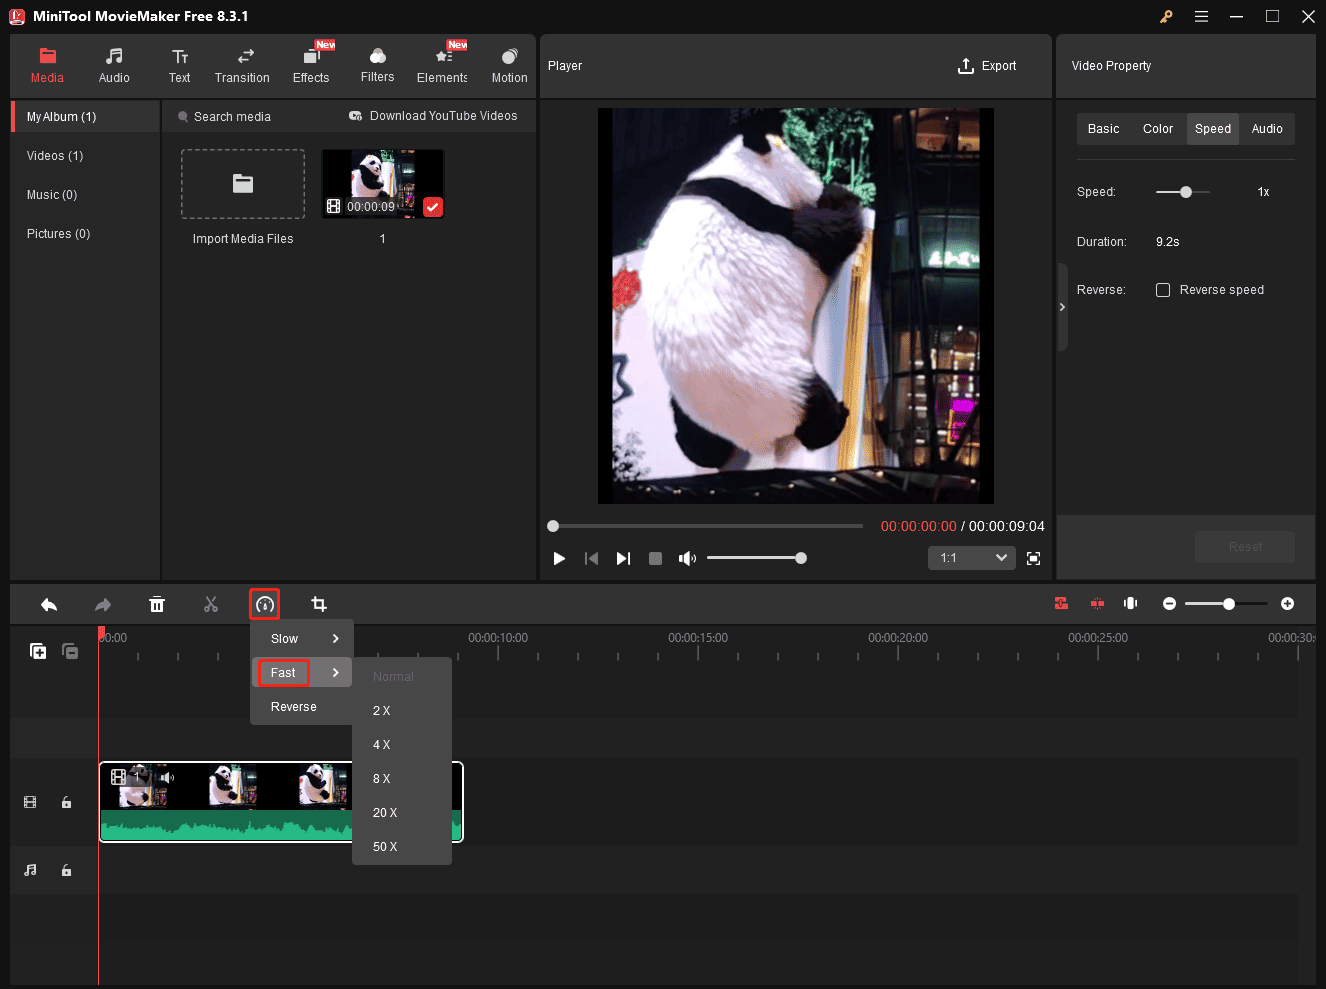
However, on the other hand, if your wanted clip is long, speed it up. Click the Speed icon on the timeline toolbar, select Fast, and then click the desired value.
When you’re going to make a GIF from photos, reduce the duration of each image, as the default length of a single picture is set to 5 seconds. So, you need to reduce the image duration, like trimming a video clip, or go to the Image Property to enter a number in the Duration box.

2. Focus on the Action
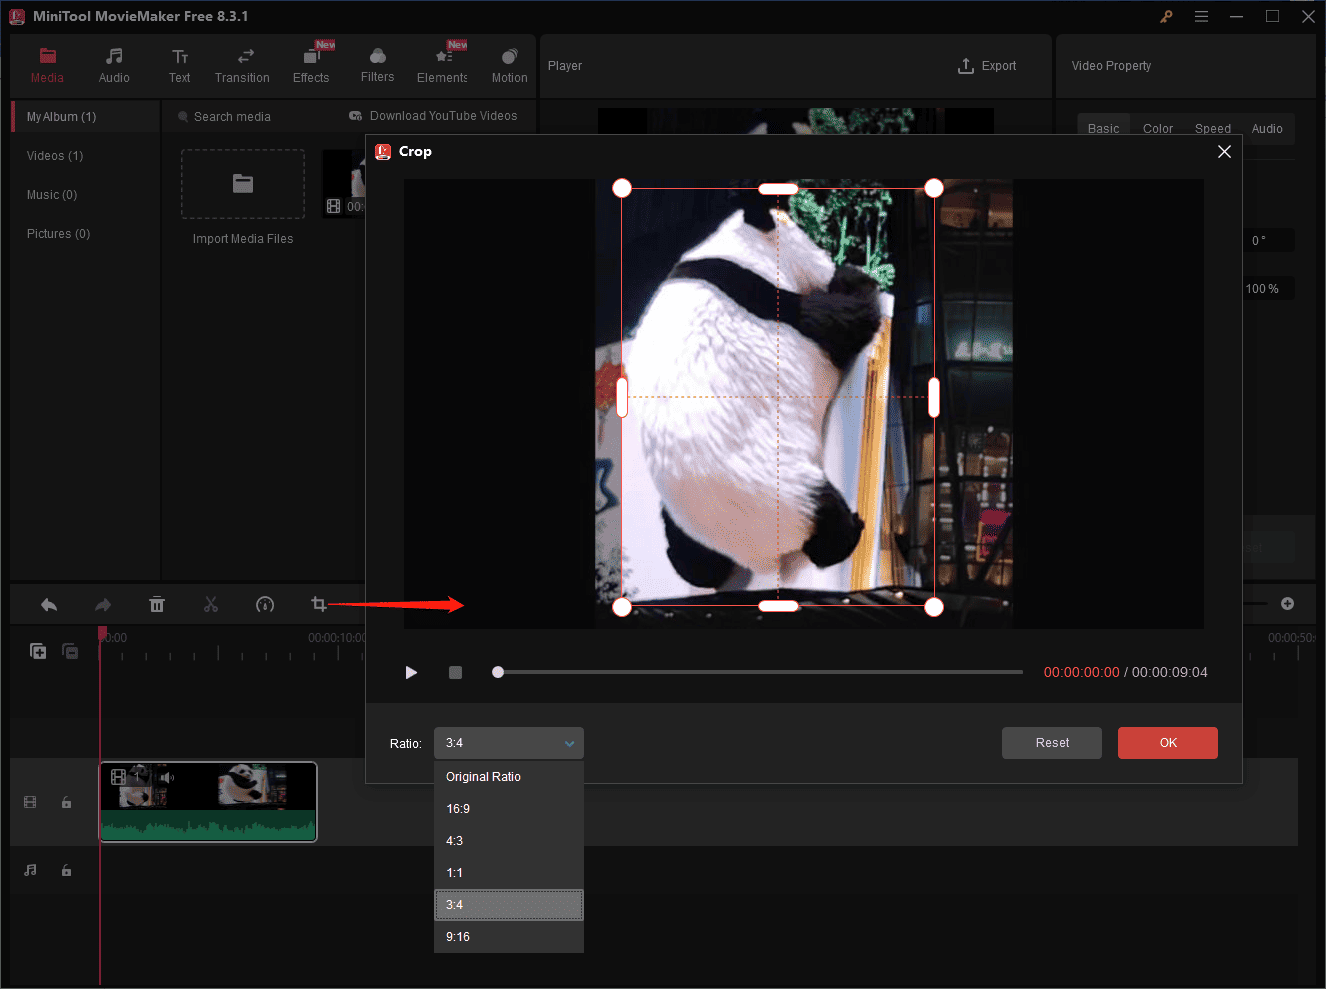
In many cases, a full frame is not necessary when creating a GIF. You can crop the video/image to remove irrelevant parts of the scene or zoom in on the clip to focus on the action.
To crop the media, click the Crop icon on the timeline toolbar, choose a ratio from the Ratio dropdown list or keep the original ratio, resize the red rectangle, and adjust its position to select the area you want to save. Finally, click OK to apply your changes.
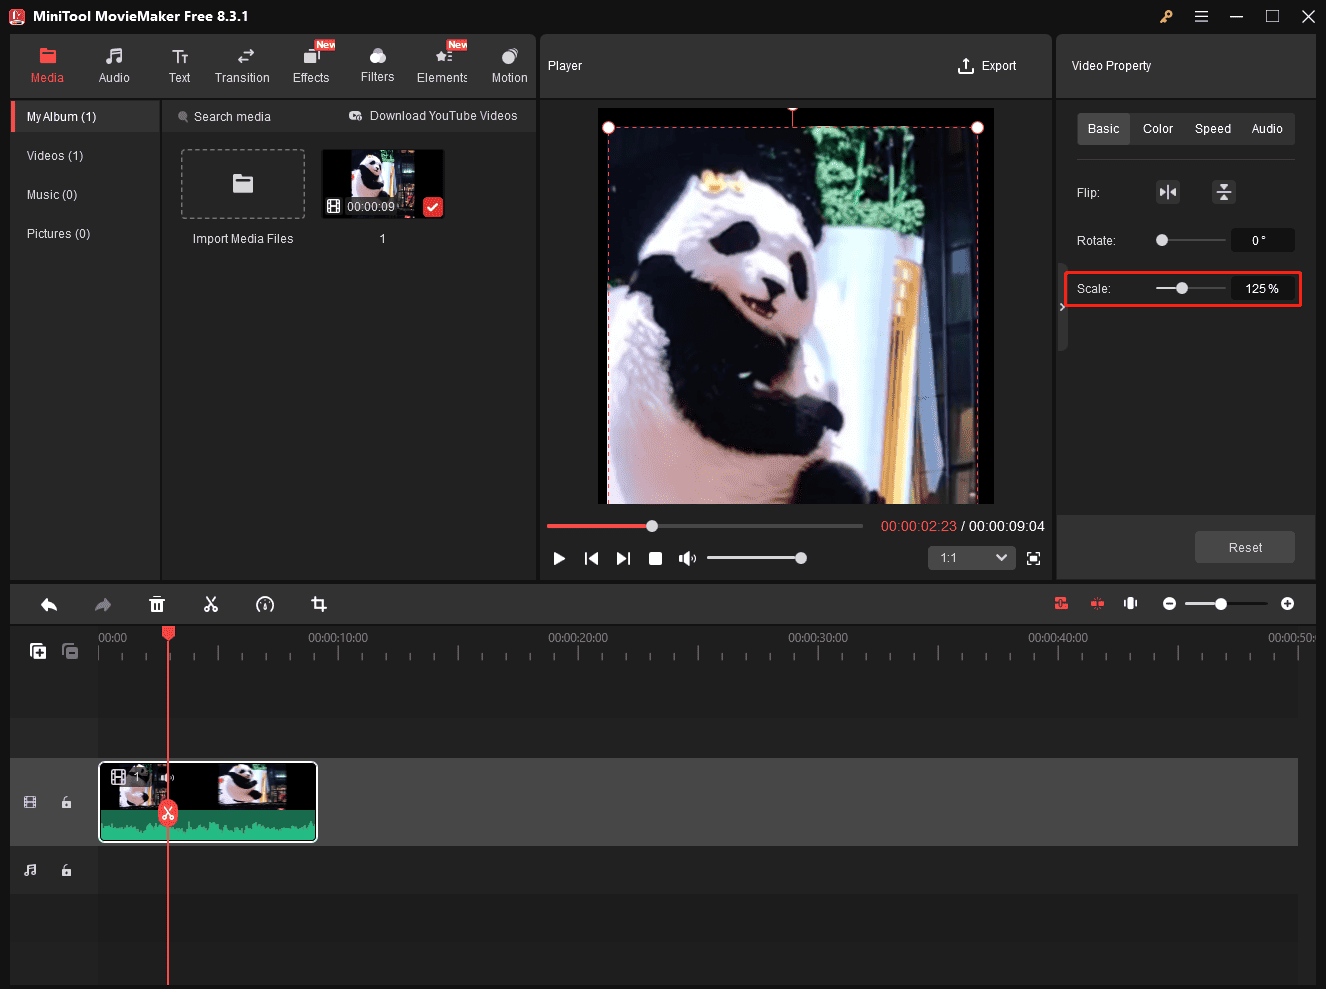
If you need to zoom in on the clip, go to the Basic tab and drag the Scale slider to the right.
3. Add Captions
Real GIFs do not include audio, so captions can be the voice of your GIF. Therefore, add several words to enhance communication and sync the text to appear with the relevant action as possible.
Go to Text at the top, then choose Caption on the left sidebar, and click the + icon at the bottom of the desired text template. Then, drag the edge of the text layer on the timeline to adjust its duration and change its position on the frame in the video player. Next, go to the Text Editor to type and edit your text.

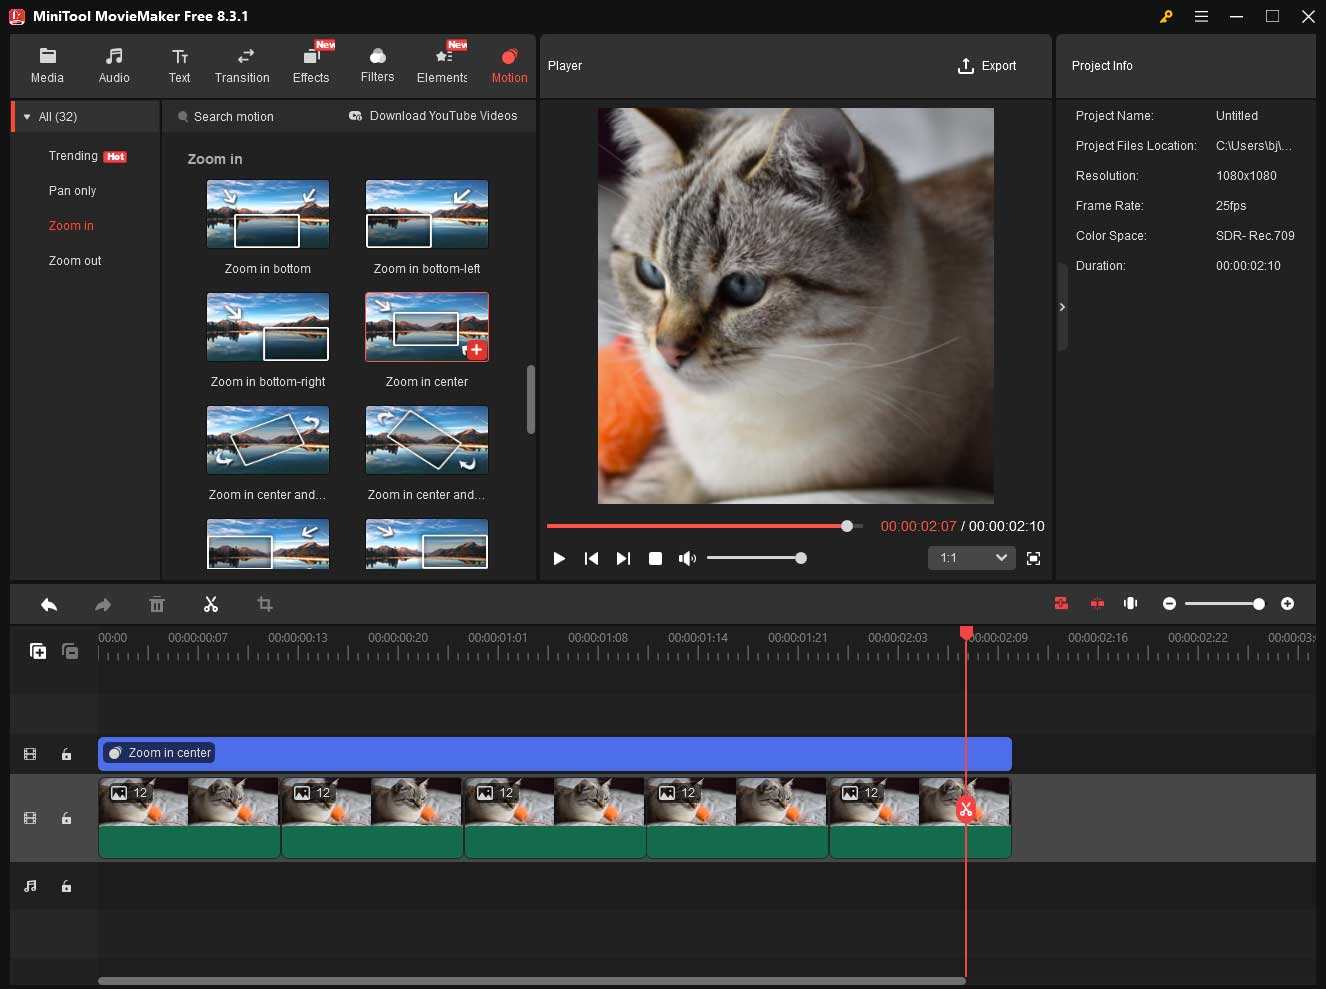
4. Add Motion Effects for Images
To turn still images into an animated GIF, you can apply motion effects like panning or zooming to create a sense of movement.
Go to Motion, choose a category, Pan only, Zoom in, or Zoom out, and add a desired effect to the image. For instance, zoom in on a face to emphasize the reaction.
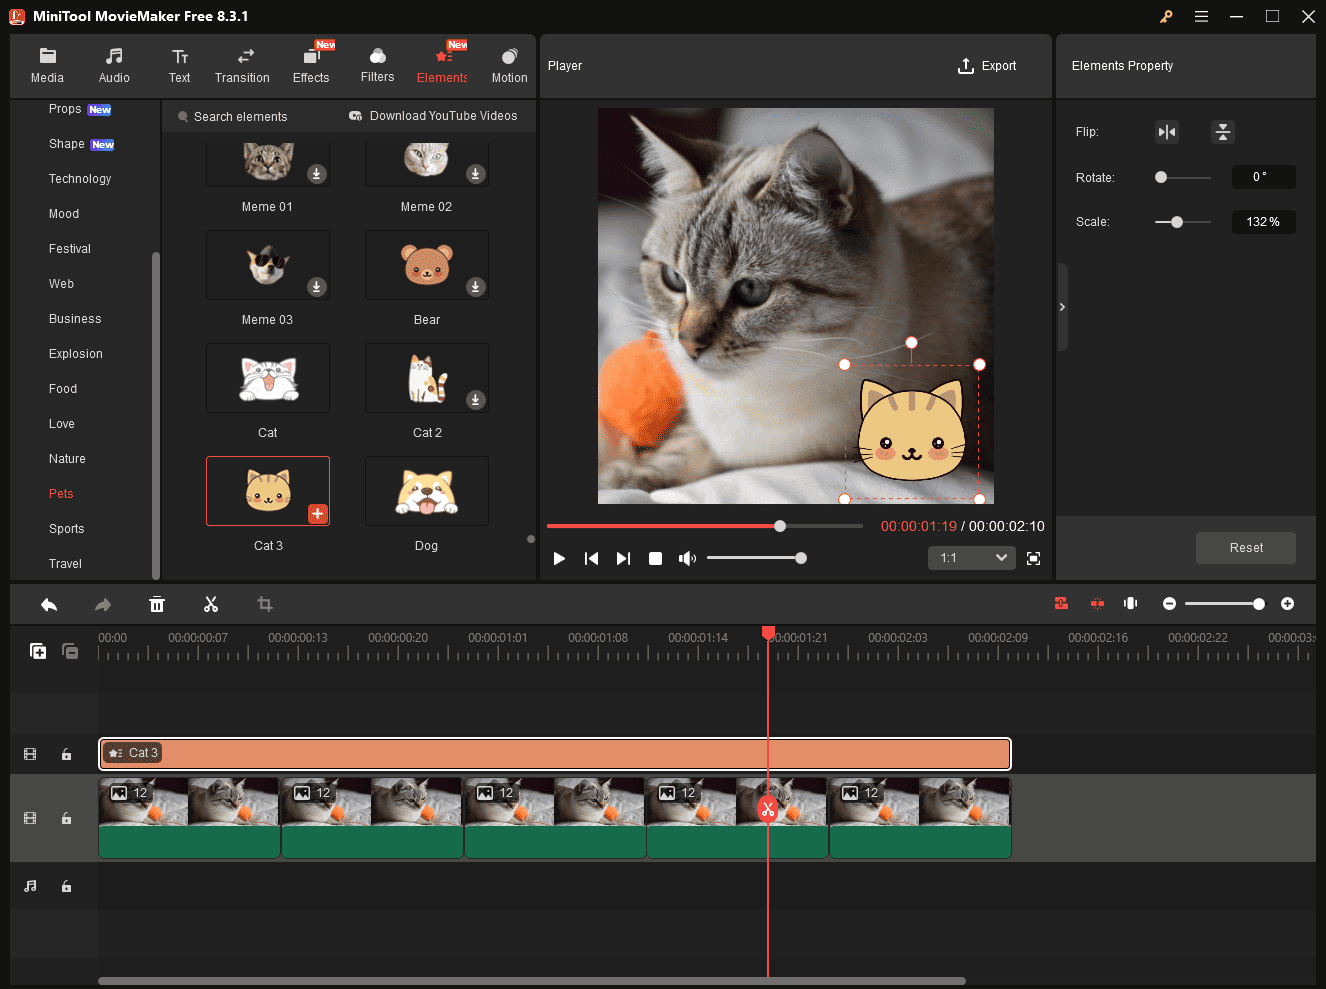
5. Add Animated Stickers
MiniTool MovieMaker offers a huge library of animated stickers. Browse through the hundreds of options and add a suitable one to spice up and make your GIF more expressive.
Go to Elements at the top, download your favorite one, and add it to the timeline. Then, rotate, flip, scale it, change its position, etc.
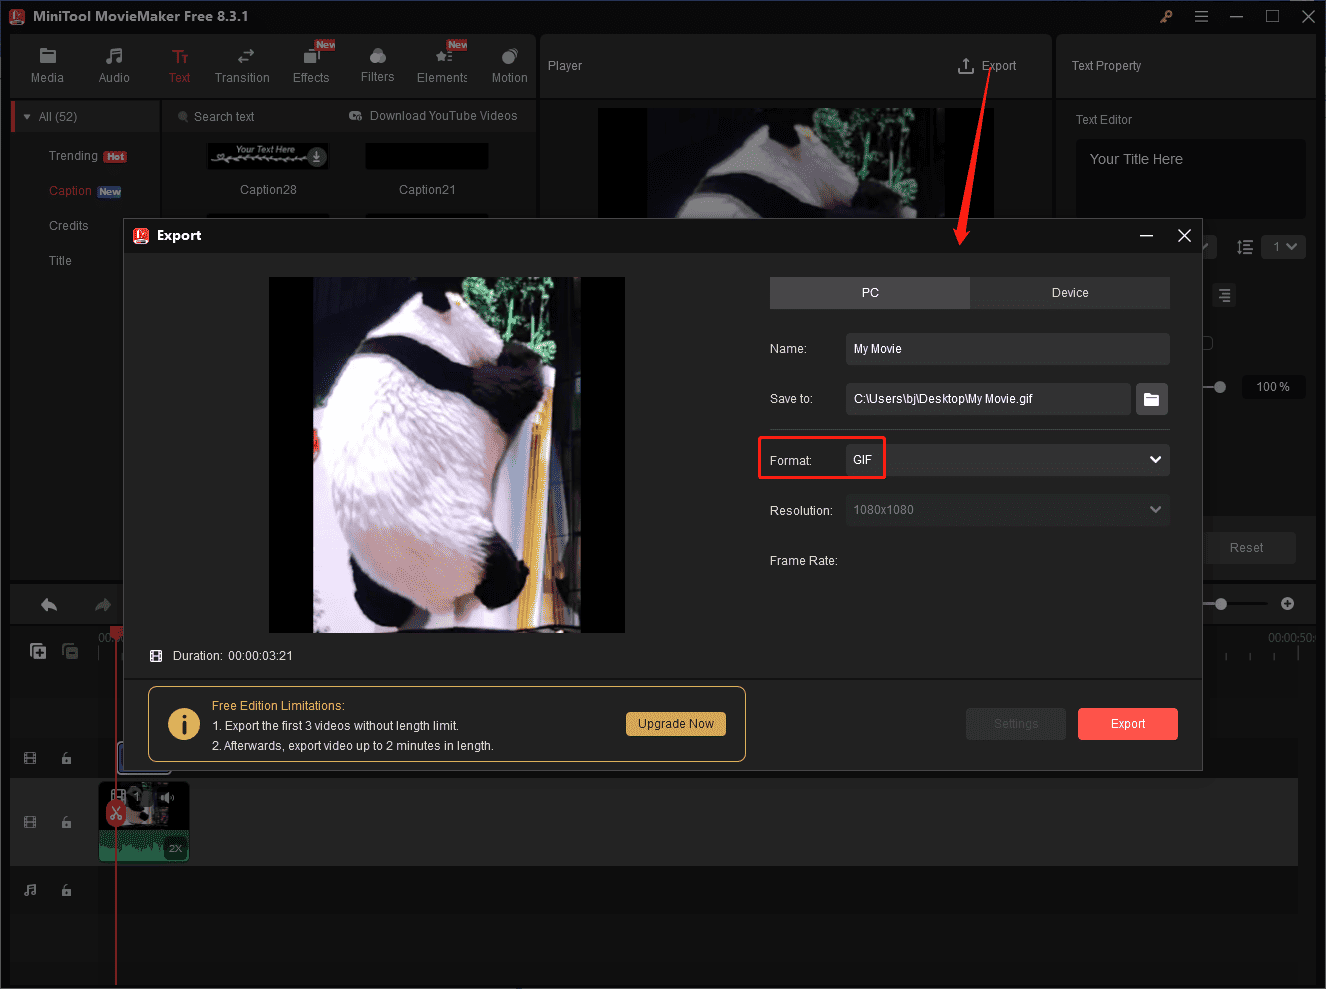
Step 4: Create and Save Your GIF
Click the Export button in the upper right corner, set Format to GIF, select the output folder, and click the Export button again to start generating your GIF.
Creating GIFs with MiniTool MovieMaker is a straightforward process, especially when you long to turn your favorite video into an animated GIF. If you want a more professional tool for advanced animations, Adobe Photoshop is a good option. Let’s continue.
Method 2: Use Photoshop
As the industry-leading raster graphics editor, Photoshop is undoubtedly an excellent tool for creating animated GIFs, especially for complex animations. It provides extensive control over animation and image editing.
If you’re a professional photographer or graphic designer, Photoshop should be your go-to solution when turning images into an animated GIF.
Option 1: Create GIF from Images
First, let’s learn how to make a GIF in Photoshop with image sequences.
Step 1: Upload the Frames of Your Images
Use Adobe Illustrator or other ways to prepare your frames in advance. Launch Photoshop, go to File > Scripts > Load Files into Stack to choose two or more files, and click OK.
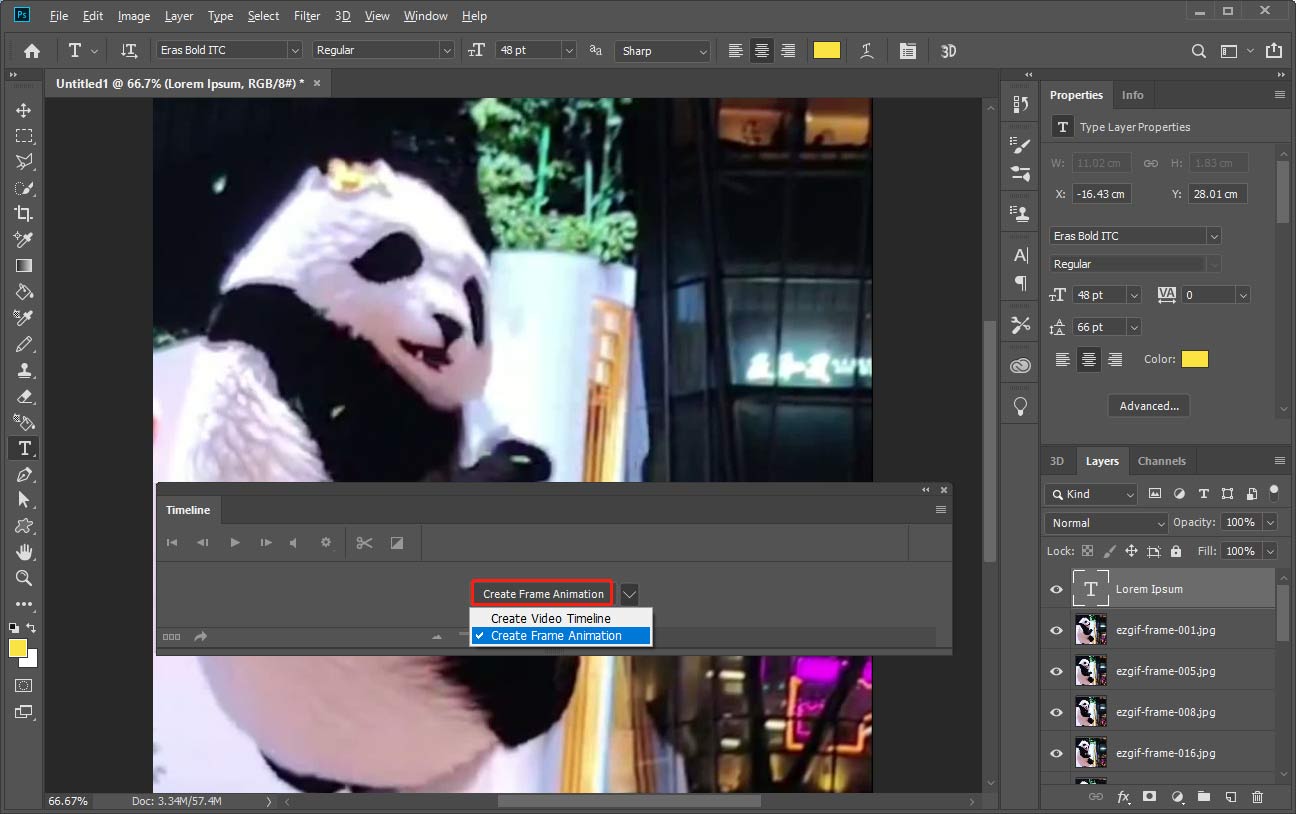
Step 2: Enable Create Frame Animation
Click Window on the top and select Timeline from the dropdown list. Then, click the dropdown arrow in the middle of the Timeline and click Create Frame Animation.
Step 3: Turn Layers into Animation Frames
Click the hamburger icon in the right corner of the Timeline panel and select Make Frames From Layers to split the layers into frames.
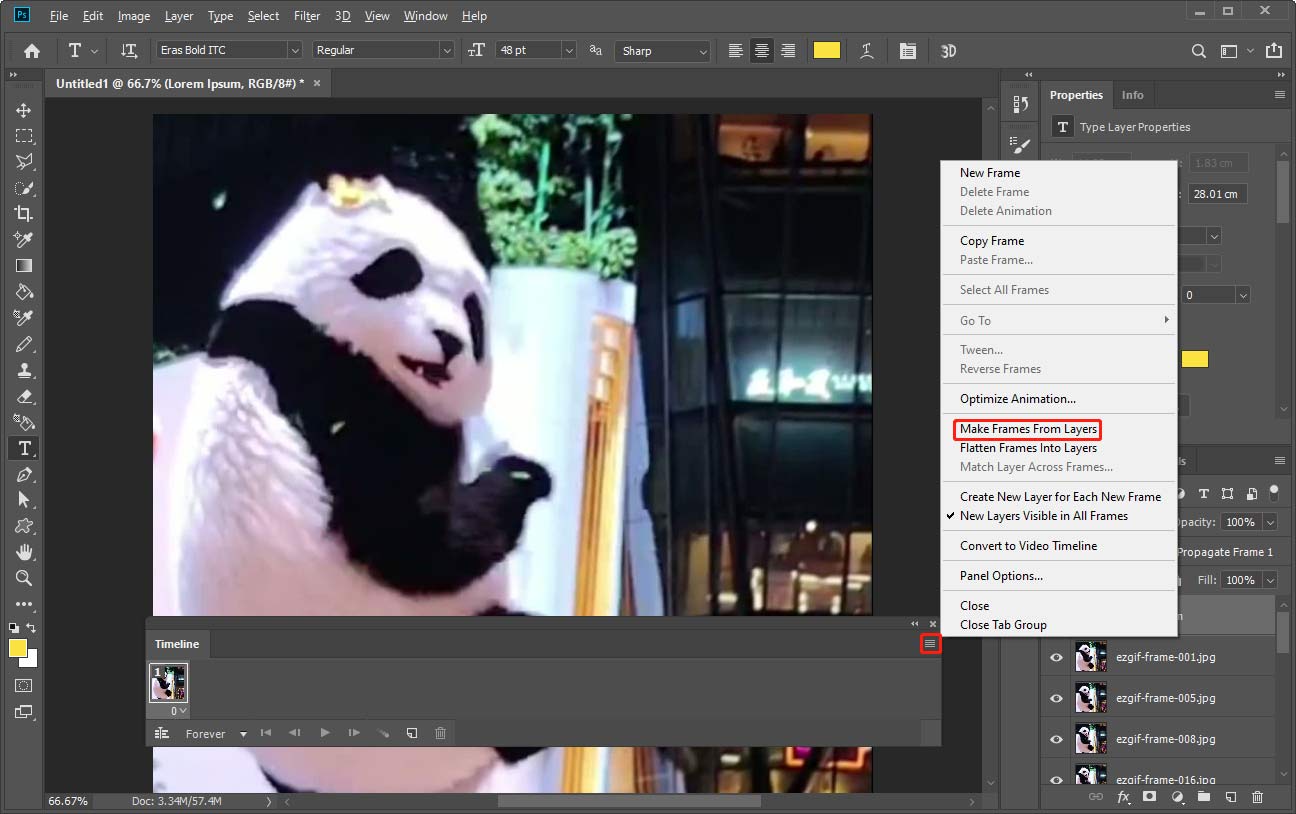
You can then click the Play animations button on the Timeline to preview the animation. Also, you can change the frames’ order by simply dragging them, or use the trash icon to delete a frame.
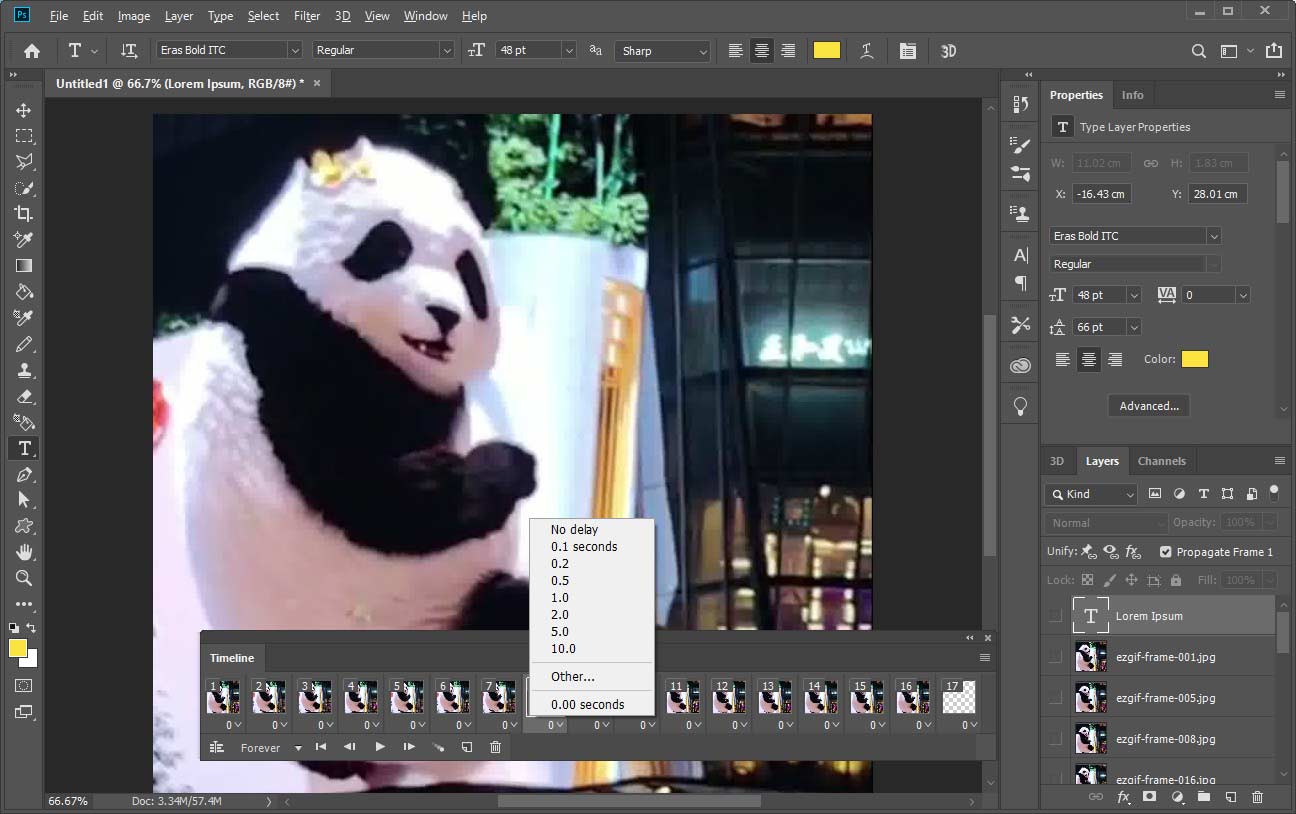
Step 4: Loop the GIF
By default, the GIF will loop at the Forever setting. Don’t change this. Then, you can adjust the display time for individual frames.
Step 5: Export the GIF
Go to File > Export > Save for Web (Legacy) to open export settings. Make sure the GIF is the output format. Then, you can choose a preset and click Save to export and save the GIF to your computer.
Option 2: Make a GIF from Video
Likewise, you can convert videos to GIFs in Photoshop, and the process is much simpler.
#1 Go to File > Import > Video Frames to Layers to open your video.
#2 Edit each layer like trimming on the timeline. For detailed steps, please refer to this post: Photoshop Video Editing – How to Edit Videos in Photoshop CS6.
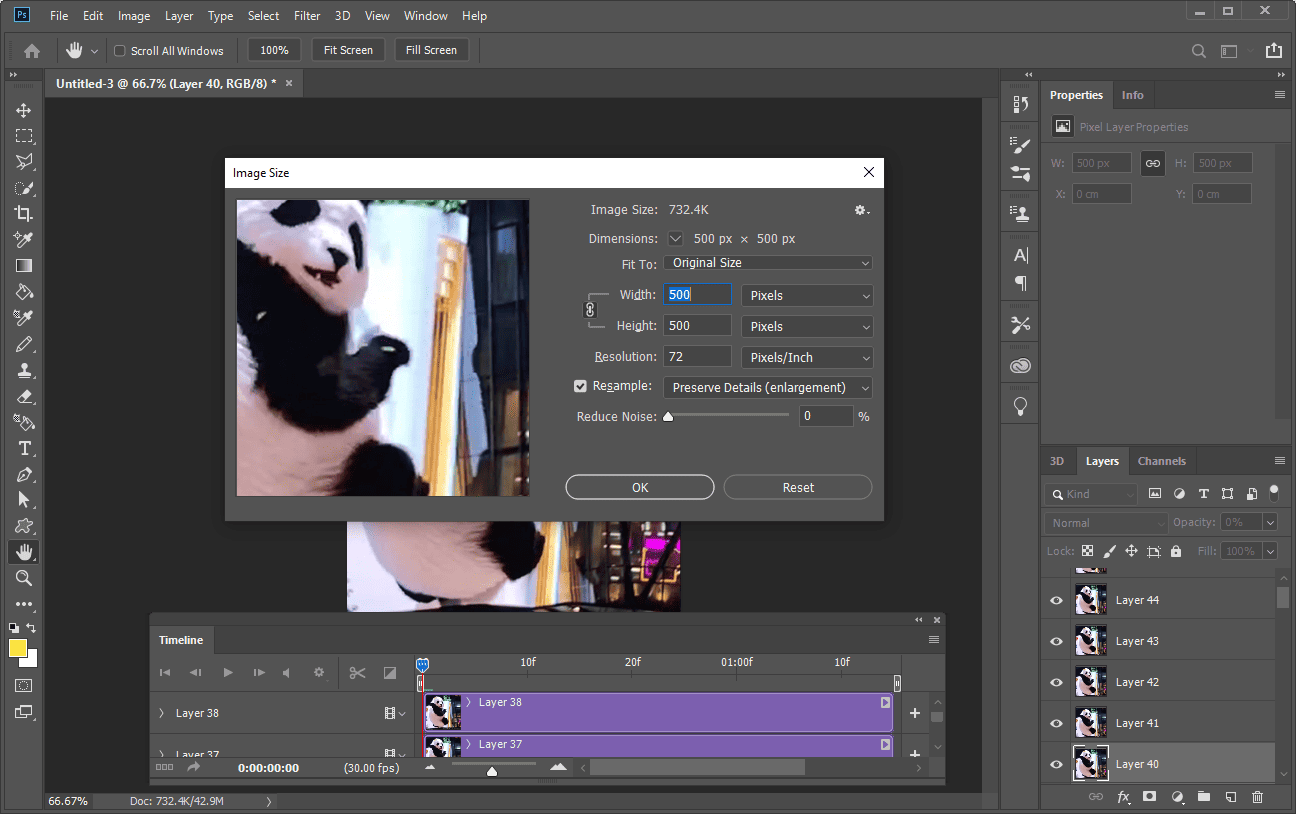
#3 Go to Image > Image Size to decrease the size (the general width of a GIF is 500-600 pixels) if your video is large, like 1080p.
#4 Click File > Export > Save for Web (Legacy) to export and save your GIF.
However, if you think Photoshop is not quick to master or need a simpler tool for GIF creation, a free online GIF maker is your solution.
Method 3: Use Ezgif
Ezgif is often considered the first choice for creating GIFs from online video files due to its zero cost and simplicity. Even better, this service has no account required and does not include a watermark on your GIF.
Option 1: Convert MP4 to GIF
First of all, let’s see how to create a GIF from a video on the Ezgif website.
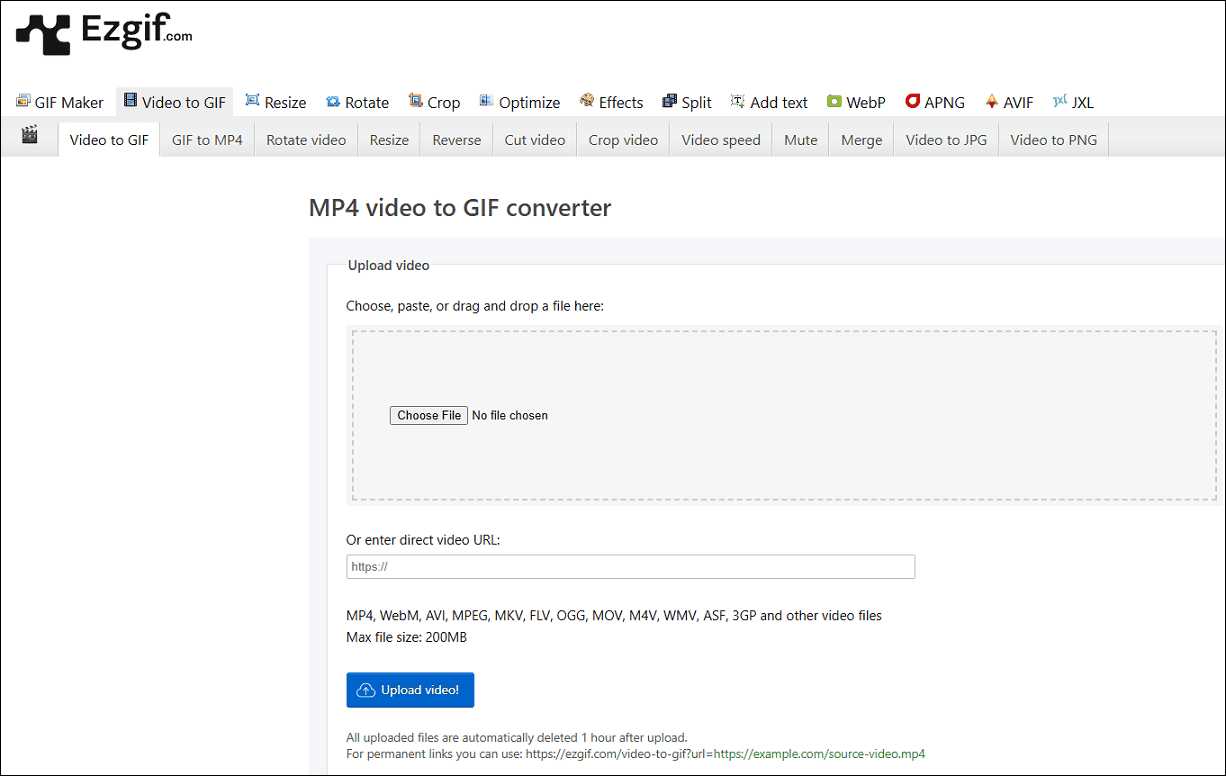
Step 1: Upload an MP4 file to Ezgif
Navigate to the Ezgif website (https://ezgif.com/) and click the Video to GIF option to open the MP4 video to GIF converter page. Click the Choose file button to upload your MP4 or another video file no more than 200MB, and click the Upload video button.
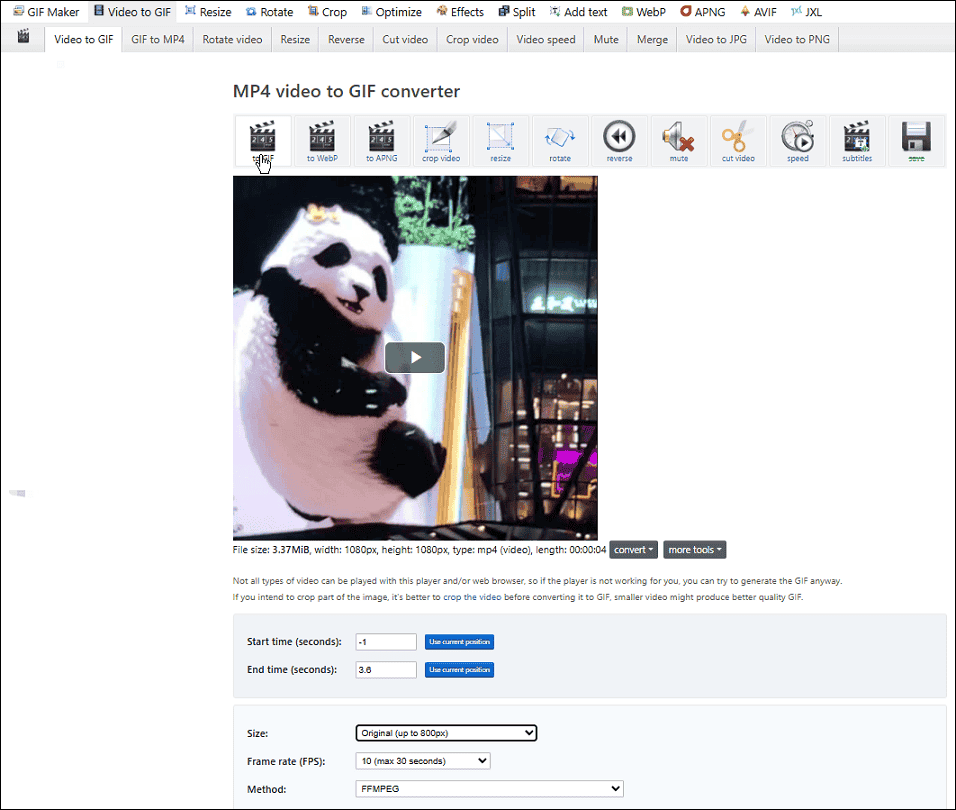
Step 2: Customize the GIF
Enter the start time and end time to choose the section of the video you want to convert to a GIF. Then, adjust the size and frame rate of your GIF according to the tips at the bottom of the screen.
Step 3: Create & Save the GIF
Click the Convert to GIF button to start generating your GIF. Next, you can continue with other options to reduce the GIF size, crop the GIF, add text, apply effects, and more. Once finished, click Save to download the GIF to your computer.
Option 2: Create GIF from Images
This section shows you how to create a GIF from images on Ezgif.
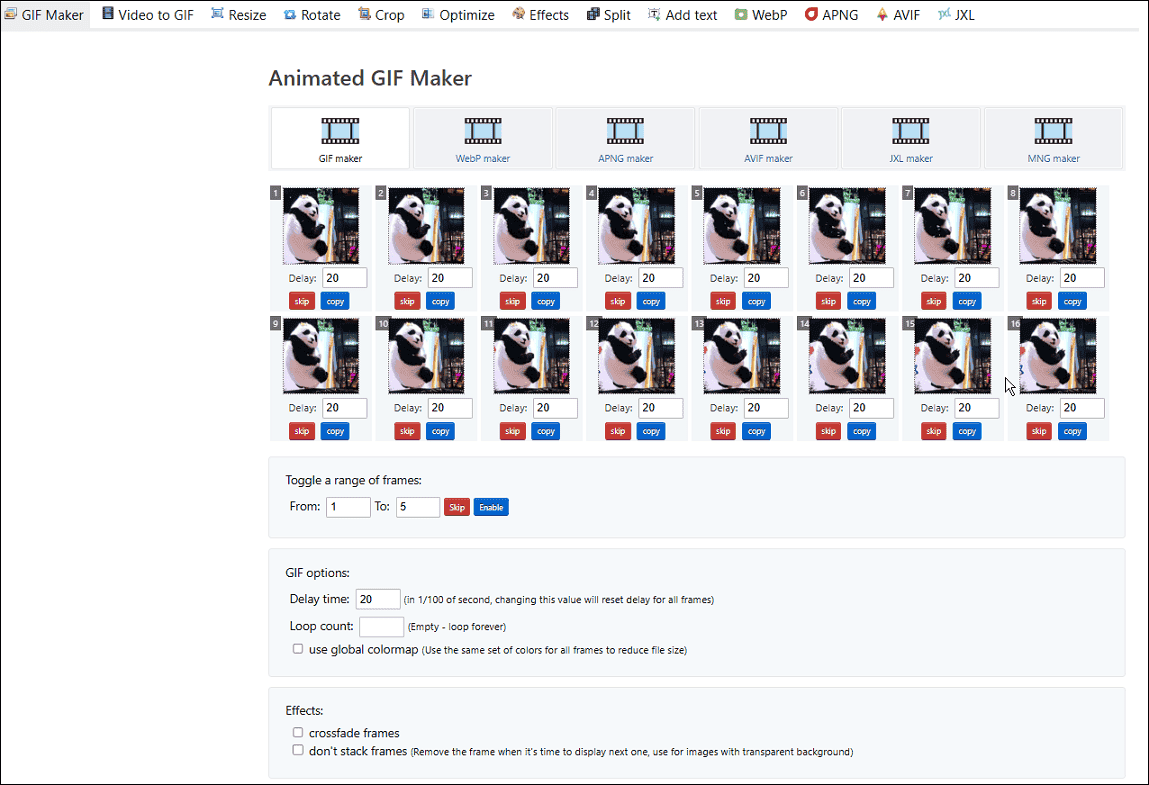
Step 1: Upload Your Images
Open Ezgif in your browser and click GIF Maker. Then, click Choose Files to select images from your PC, and click the Upload files button. Ezgif supports common image file types, accepting up to 2,000 files at once as long as the total size doesn’t exceed 200MB.
Step 2: Adjust Settings
Change the frame order by simply dragging them, modify the Delay time to change the speed of the final GIF, set the Loop count, etc.
Step 3: Create the GIF
Click the Make a GIF button to start the process. Once done, save it on your PC.
It’s easy to create GIFs from existing videos or images. What if you want to make a screen directly from your PC screen? Let’s continue.
How to Create a GIF from Your Screen
When you desire to share a short tutorial or software demo through emails or messages, you can also create a GIF from your screen and send it immediately.
Method 1: Use ScreenToGif
ScreenToGif is a free screen-capturing application that enables you to record your screen, webcam, or a whiteboard. It offers a built-in editor to edit your recordings and can export them as animated GIFs or other video/image formats.
If you want a free GIF recorder for Windows, don’t miss ScreenToGif. Here’s how it works.
Step 1: Download and Install
Go to the ScreenToGif website (https://www.screentogif.com/) to download and install the application on your PC.
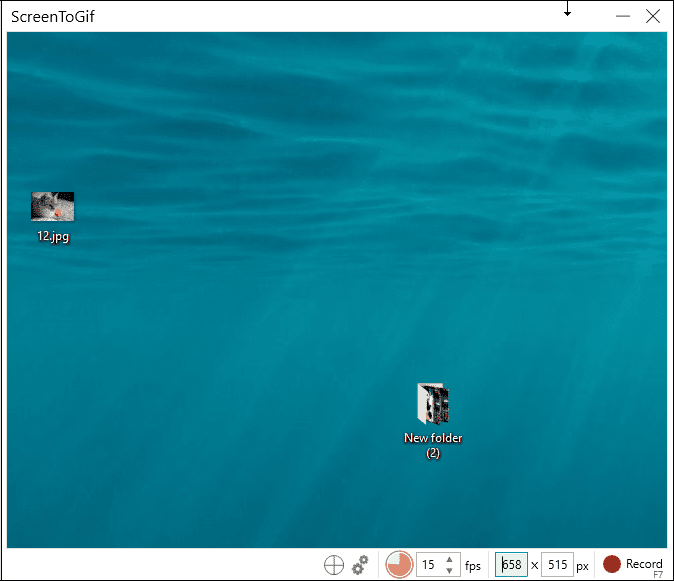
Step 2: Select the Recording Area
When you launch the software, click the Recorder option. Then, resize the application window to fit what you want to capture on your desktop.
Step 3: Start the Recording
Click the Record icon or press F7 to start your recording. To end the recording, press F8 or click the Stop icon. Then, your recording will open in the built-in editor.
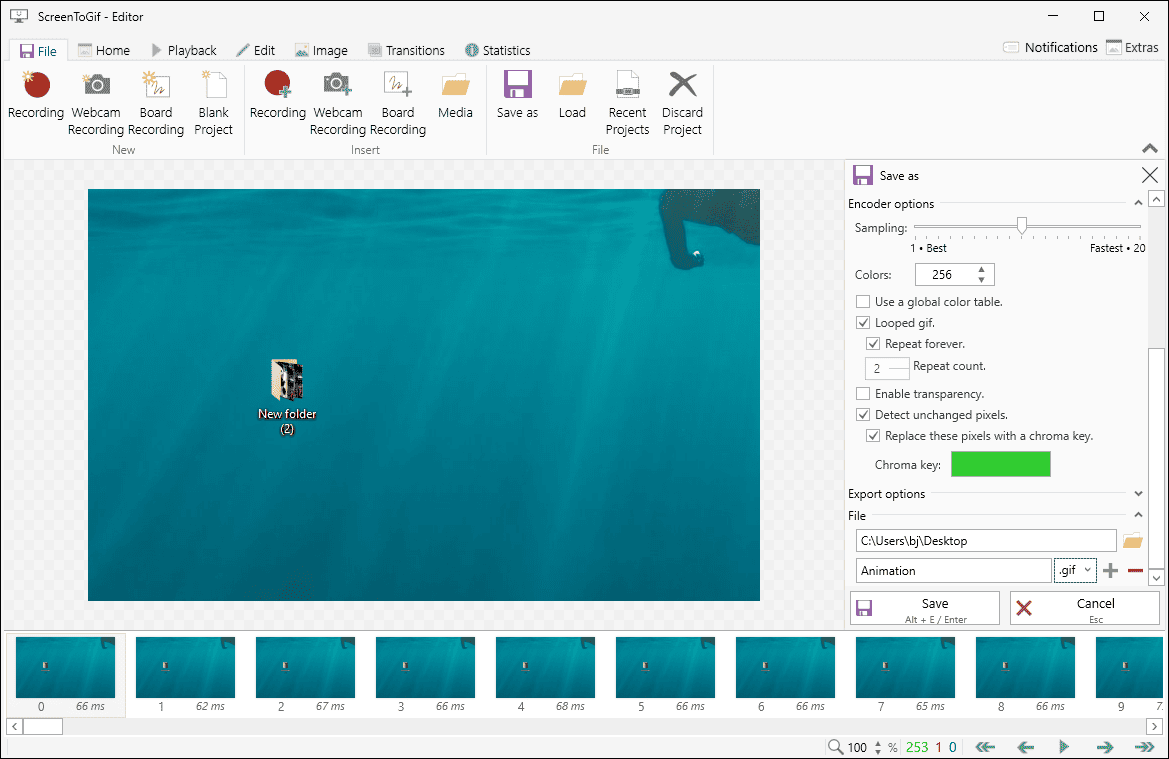
Step 4: Export the GIF
Click File and select the Save as option to change the encoder and export options. Finally, click the Save button.
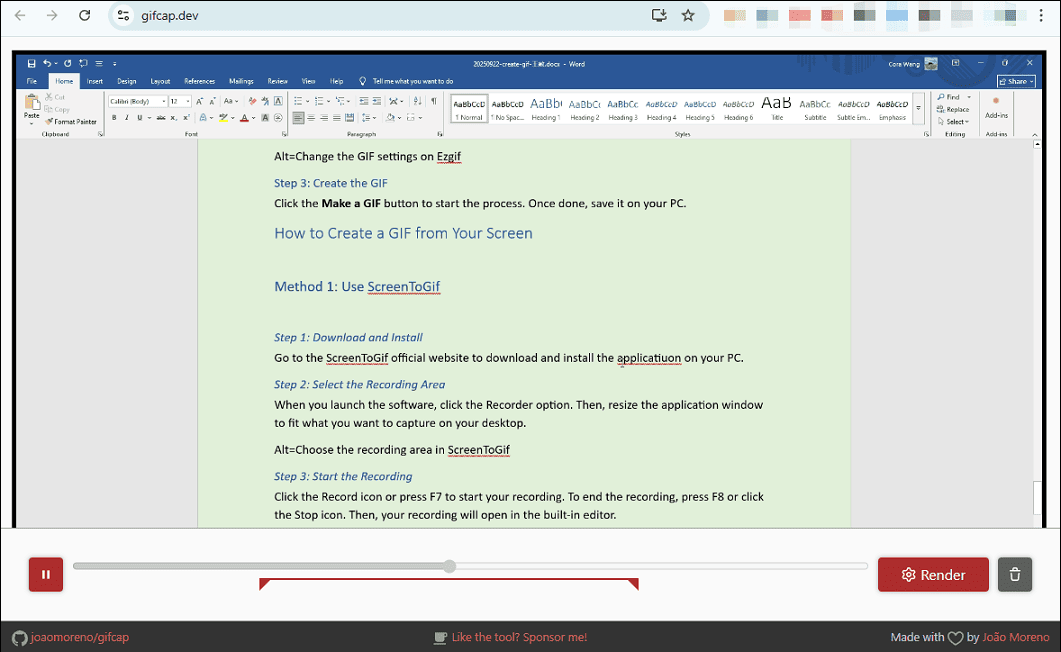
Method 2: Use GIFcap
GIFcap permits you to create animated GIFs from screen recordings effortlessly. It’s free to use and requires no registration. Everyone can create GIFs from their screens thanks to its simple interface.
Step 1. Access GIFcap Screen Recorder
Visit the GIFcap website (https://gifcap.dev/) and click the Start Recording button.
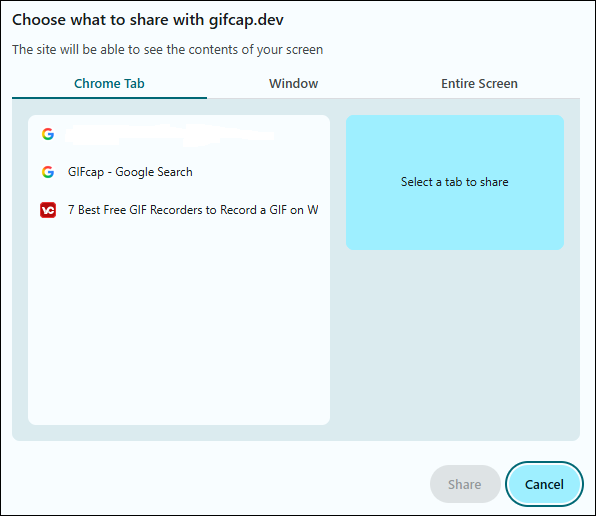
Step 2: Choose the Recording Content
A window will immediately pop up, asking you to select a specific Chrome tab, window, or the entire screen to capture.
Step 3: Start Recording
After confirming your choice, click Share. Then the recording begins immediately. To end the recording, click the Stop sharing button at the bottom.
Step 4: Export the GIF
The recording will automatically play in a Chrome tab. You can drag the red handles at the bottom to trim your recording. Then, click Render to create your GIF. Finally, download and save the GIF on your PC.
Final Thoughts
As mentioned at the beginning of the post, it is not hard to create GIFs. You should now believe that after you’ve seen the steps. Whether you are interested in creating GIFs from videos, still images, or your screen, you can find a suitable tool here.
Finally, when you encounter problems while using MiniTool MovieMaker, please contact us at [email protected] for help.
About The Author

Position: Columnist
Cora is a tech writer specializing in digital media workflows, with over six years of hands-on experience in video post-production, media transcoding, and screen capture. Her writing is always clear and practical. Cora also produces in-depth software reviews for users across skill levels to help them find the right tool and enjoy video editing.
User Comments :