

When I edit a video tutorial, I often need to enlarge the clip to highlight specific details and focus on the main subject. So, how to zoom in on a video? This is not hard with a video editing application with keyframing or preset zoom-in effects.
3 Video Zoomers You Can Try
- MiniTool MovieMaker
- Adobe Premiere
- Corel VideoStudio
Here is a concise comparison table of these three applications.
| Software | MiniTool MovieMaker | Adobe Premiere | Corel VideoStudio |
| Platform | Windows | Win/Mac | Windows |
| Price | Free (No watermark) + Paid | Paid | Paid |
| Zoom Implementation | Keyframe animation | Keyframe animation | Keyframe animation (Pan & Zoom) |
| Learning Curve | Very Easy | Advanced | Moderate |
| Suitable For | Beginners | Professionals | Intermediate users |
How to Zoom in MiniTool MovieMaker
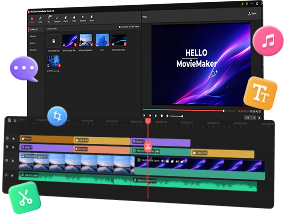
MiniTool MovieMaker is a simple video editor that allows users to add keyframes for the position, scale, and rotation of a video/image/element to create smooth animation effects. Undoubtedly, it is an ideal tool for zooming in on videos. Featuring a clean layout, the software is perfect for beginners to scale videos or create other motion effects.
How to zoom in on a video? Follow me:
1. Install the Video Zoomer
Click the button below to download and install the video editor on the PC.
 MiniTool MovieMaker
-
 Split and trim videos to remove redundance.
 - Change video aspect ratio to match screen sizes.
- Add bubble texts, bgm, transitions, and more effects.
- Create PiP or split-screen videos by multitrack editing.
2. Import the Target Video
After running the software, close the pop-up window to enter the main interface. Then, click Import Media Files on the left side to import the video and drag it to the timeline.
3. Create Animated Zoom Effects
Select the video on the timeline and move the playhead to the exact point where the zoom should begin. Under the Basic tab, go to the Scale option and click the Add Keyframe icon next to it to set the first keyframe.

Next, drag the playhead forward to where I want the zoom-in effect to finish, move the Scale slider to increase the value, or directly drag the corner handle on the preview screen to enlarge the frame. Then the software will automatically create a second keyframe.

Then, move the playhead to the first keyframe to preview the gradual zoom-in effect.
4. Export the Video
Click the Export button in the upper-right corner. From the next window, select the output format, folder, resolution, and frame rate. Finally, click Export again to save the video.

How to Zoom in VideoStudio
Another video zoom software you can use is VideoStudio. It has an intuitive interface that lets you easily access all the editing options and modify videos in minutes. Loaded with tons of editing features, this tool empowers you to cut video, do color correction, add overlays/ animated titles, filters to video, edit green screen video, zoom in/ out video, and many more.
In addition, VideoStudio can also be used as a slideshow maker to make a video from photos. See also: How to Make an Instagram Slideshow with Music.
Follow the step-by-step guide to learn how to zoom in video with VideoStudio.
Step 1. Download VideoStudio, run the installer, and follow the instructions to finish the setup process.

Step 2. Import the video to VideoStudio and add the video from Library to the video track.
Step 3. Select the video clip and click on Pan and Zoom in the toolbar to open the Pan and Zoom window.
Step 4. Go to the Edit Mode box and choose the On the Fly option. Then adjust the size and position of the marquee on the original video. The result shows in the Preview window.
Step 5. Play the video and fine-tune the marquee. Then adjust the settings and click OK to save changes.
Step 6. Finally, go to Share workspace and click the computer icon to select the target output video format. Type a file name and specify the location where you want to save the video. Then export the video.
How to Zoom in Adobe Premiere
When it comes to zooming in video, Adobe Premiere must be one the list of best video zoomers. As a top-notch video editing software, Adobe Premiere allows you to zoom in/ out video and offers cool zoom effects that you can quickly zoom your video.
If you have already installed Adobe Premiere but don’t know how to use it to zoom in on a video. Below are the detailed steps on how to zoom in on a video in Premiere.
Step 1. Launch Adobe Premiere after installing it on your computer.

Step 2. Drag and drop the video to the timeline, navigate to Effect Controls and expand the Motion drop-down menu.
Step 3. Next, click the timer icon of both Position and Scale, and drag the blue playhead to the end of the video.
Step 4. Then adjust the Position and Scale properties to get the frame zoomed in. Keyframes will be created automatically.
Step 5. To speed up the zoom movement, move the keyframes closer. To slow down the zoom movement, move the keyframes farther apart.
Step 6. When you are done, navigate to File > Export > Media. From the Export Settings window, choose the video format you want, name the file and choose a new save path. Then click on Save > Export to export the zoomed video.
Conclusion
If you are a beginner in video editing, you’d better use MiniTool MovieMaker because it’s easy to use and available on Windows for free. For those who are professionals, Adobe Premiere is highly recommended here because it’s feature-rich and powerful.
If you have any questions when using MiniTool MovieMaker, contact the support team via [email protected] for assistance.
People Also Ask
- Right-click on the computer screen and choose Display settings.
- Click on Advanced display settings in the Settings
- Change the screen resolution and apply the change.
- Open Google Chrome on your computer.
- Click the three dots at the top right corner of the window.
- Tap on the “–” (minus sign) next to Zoom to zoom out on Google.
About The Author

Position: Columnist
Cora is a tech writer specializing in digital media workflows, with over six years of hands-on experience in video post-production, media transcoding, and screen capture. Her writing is always clear and practical. Cora also produces in-depth software reviews for users across skill levels to help them find the right tool and enjoy video editing.
User Comments :