MiniTool MovieMaker is a wonderful application for video creation and editing and it allows you to add pictures and videos to make an excellent video. This article will show you how to add pictures and videos to movie maker.
MiniTool MovieMaker, a free and easy-to-use video editing software for beginners, enables you to create videos from scratch or using movie templates. You can choose media like pictures and videos from your devices and add pictures and videos to movie maker.
What’s more, it provides you with both basic and advanced editing tools such as trimming, splitting, rotation, adding filters, making color correction, speeding up or slowing down the video, and much more. Generally, MiniTool MovieMaker is a good video editor that you should try.
The following contents give you detailed information about what media formats MiniTool MovieMaker supports and provide you with step-by-step guidance to add pictures and videos to movie maker.
Media Formats Supported by MiniTool MovieMaker
To upload media efficiently and correctly, you need to know what media formats MiniTool MovieMaker allows you to import. MiniTool MovieMaker supports importing three types of media including videos, music, and pictures. Now, let’s see the media formats supported by it.
The video formats it allows you to upload include MP4, 3GP, MPG, WMV, MOV, MKV, FLV, AVI, VOB, RMVB, and WEBM.
The picture formats you can upload consist of PNG, JPG, JPEG, GIF, BMP, ICO, and TIF.
The music formats you can upload include MP3, M4A, M4R, WAV, FLAC, AAC, AMR, and APE.
After knowing the import formats supported by MiniTool MovieMaker, we are going to see how to add pictures and videos to movie maker. You can download and install MiniTool MovieMaker on your computer in advance.
MiniTool MovieMakerClick to Download100%Clean & Safe
How to Add Pictures and Videos to MiniTool MovieMaker
MiniTool MovieMaker supports importing pictures and videos from your computer. This part offers detailed steps to add pictures and photos to MiniTool MovieMaker’s movie template and new project. You can refer to the following tutorial to import files to movie maker.
How to Add Pictures and Videos to a Movie Template
To help you create a wonderful video quickly and easily, MiniTool MovieMaker provides you with four themes of movie templates including Travel, Love, Family & Friends, and Festival. You can check the below steps to add photos to movie maker or add videos to movie maker.
Step 1. Launch MiniTool MovieMaker and click the Movie Templates button in the project library window.
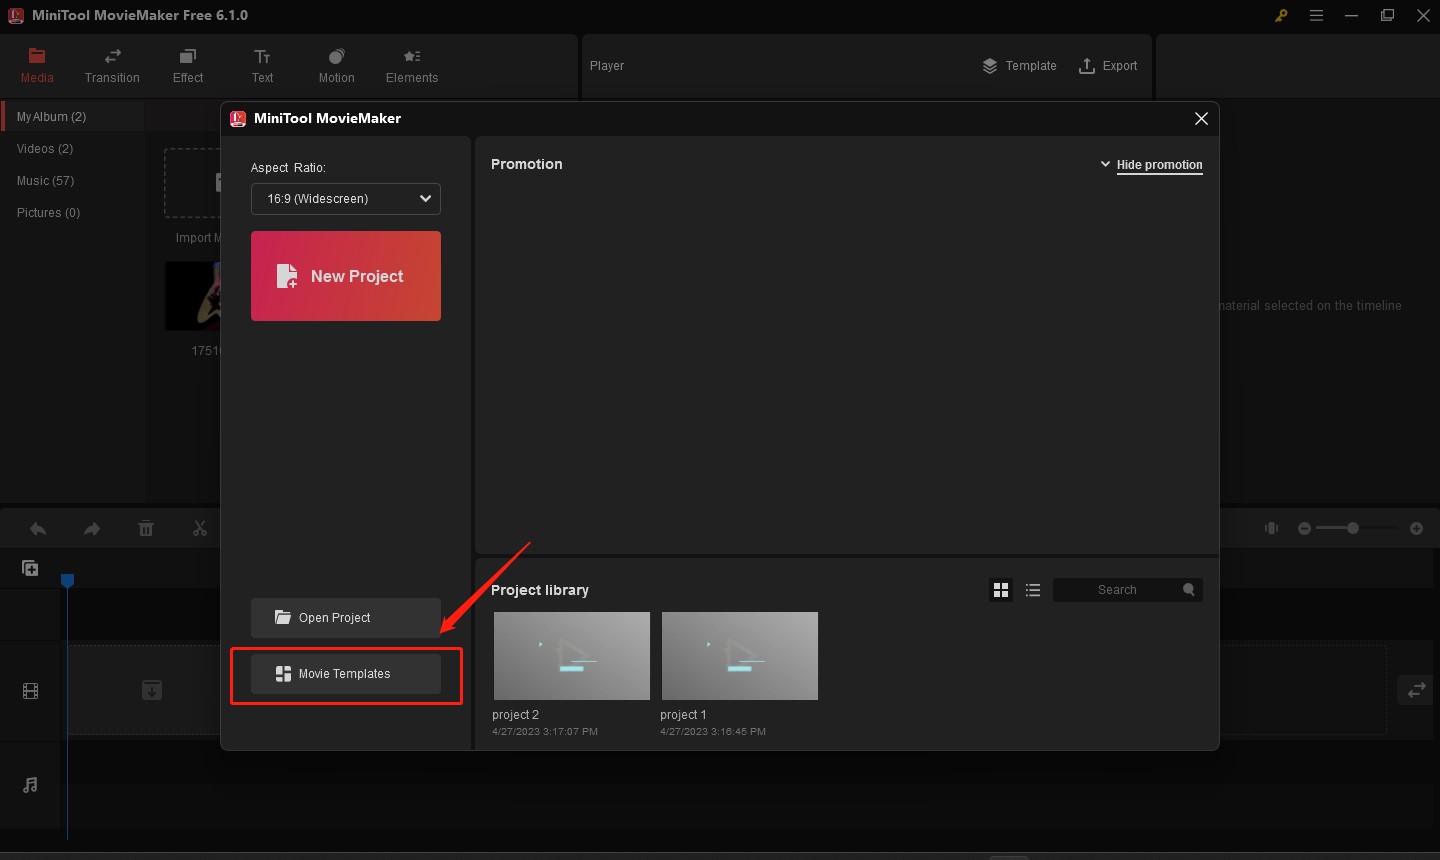
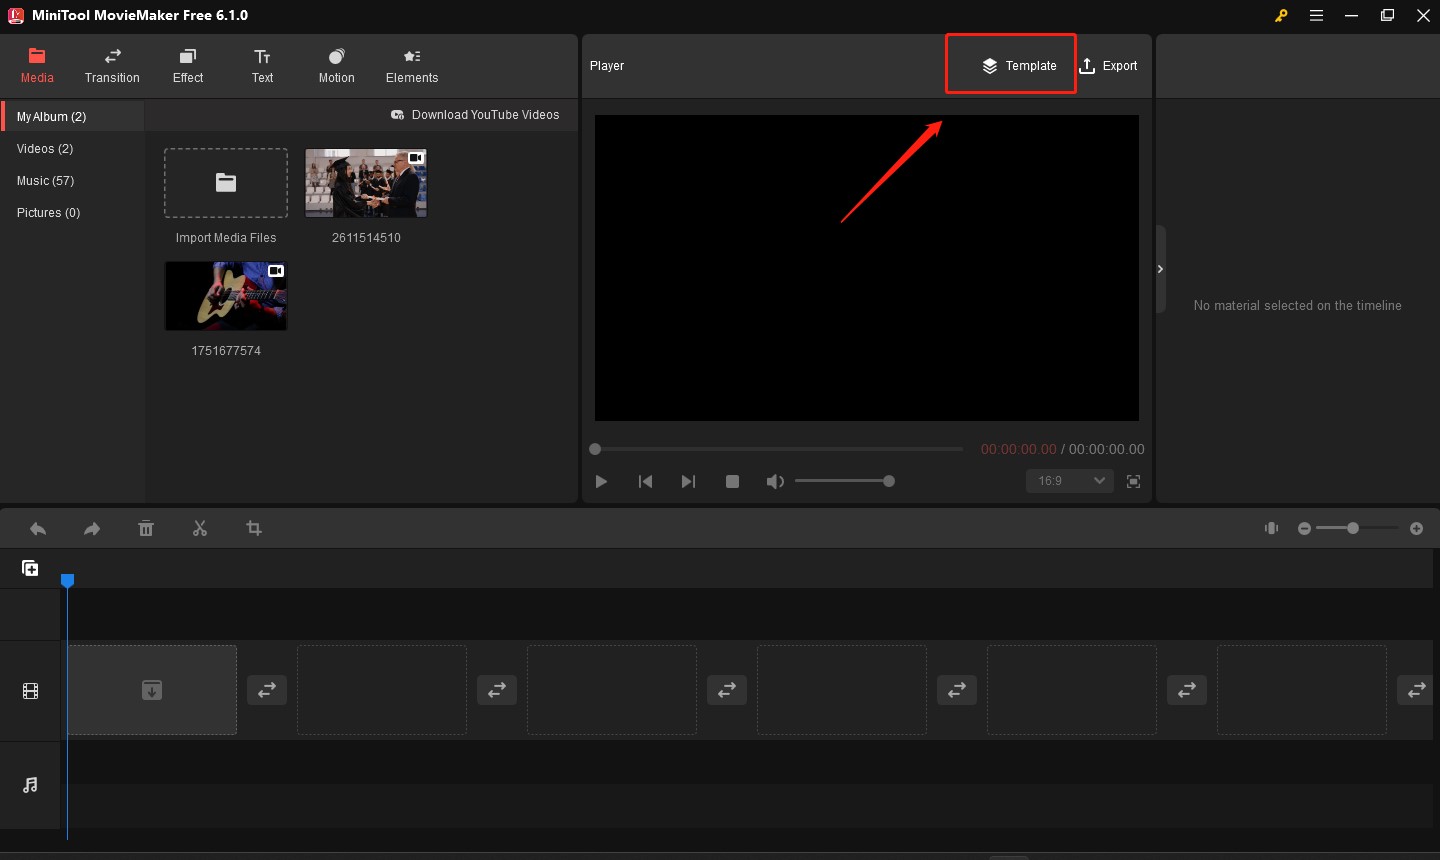
Or you can close the project library window and click on the Template option in the Player section.
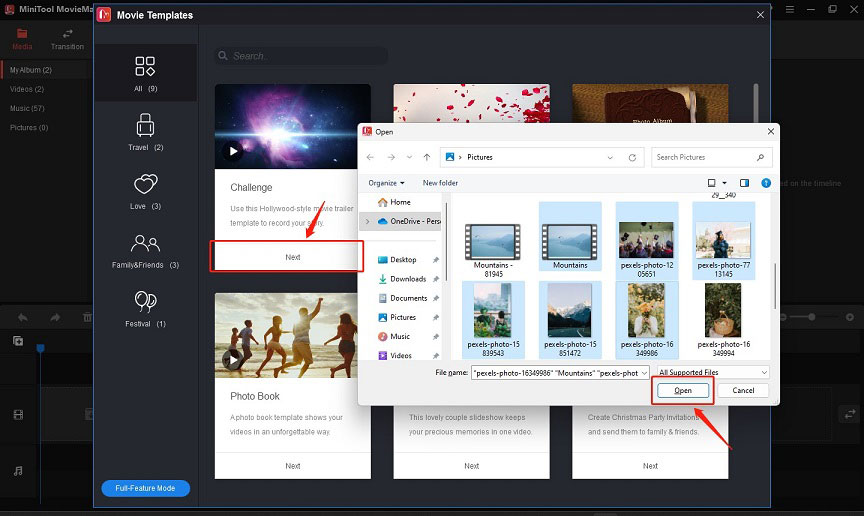
Step 2. Choose one movie template you like in the Movie Templates popup and click on the Next button to choose the pictures and videos you need. Press Ctrl on the keyboard and click on the photos and videos you want to upload, and then click Open to import files to movie maker.
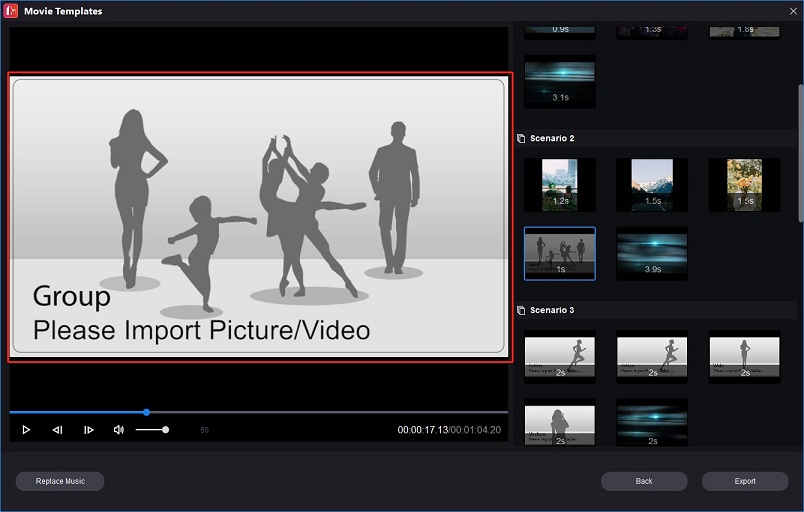
To avoid the following scene in your video, you need to upload enough source files to fill in all the empty positions.

How to Add Pictures and Videos to a New Project
In addition to creating videos using movie templates, you can also create a video from scratch by yourself. Here are steps to add pictures and videos to movie maker.
Step 1. Open MiniTool MovieMaker and close the project library window.
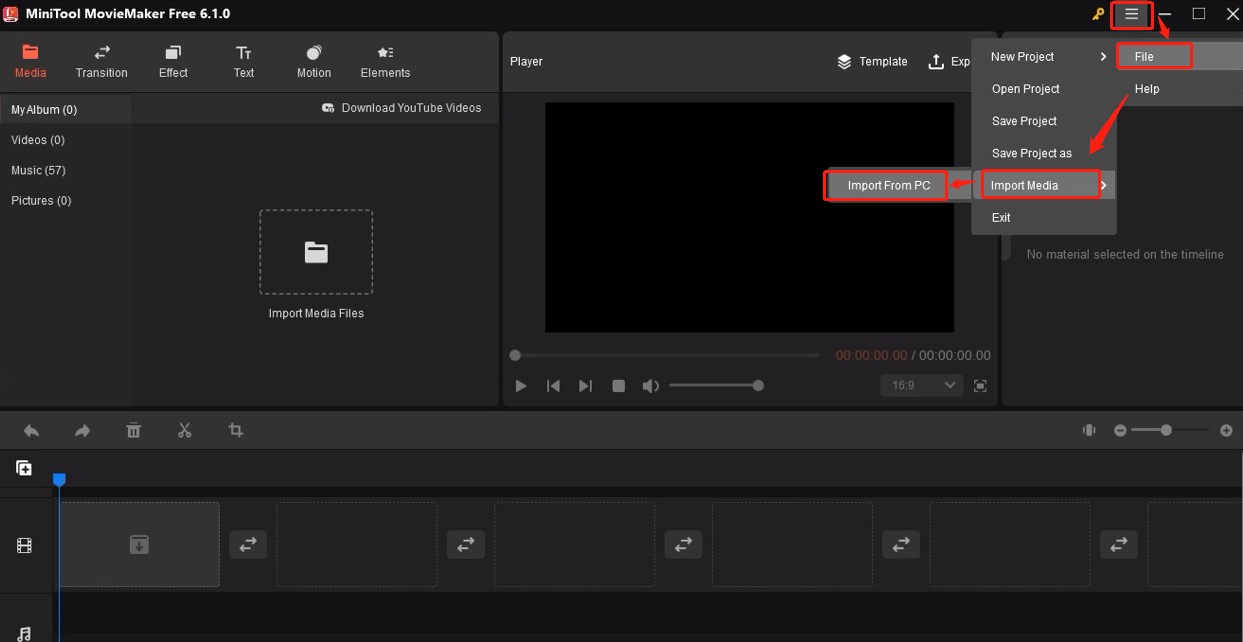
Step 2. Click Import Media Files to select photos and videos from your computer. Press Ctrl and tap on the videos and photos you need and click Open to import these files simultaneously.

Or click on the More icon in the higher-right corner, go to File, choose Import Media, and click Import From PC to upload media files from your computer.
Step 3. If you just want to add these media files to the timeline one by one, you just need to click the plus icon to add a photo or video clip to the timeline or directly drag and drop it to the timeline.
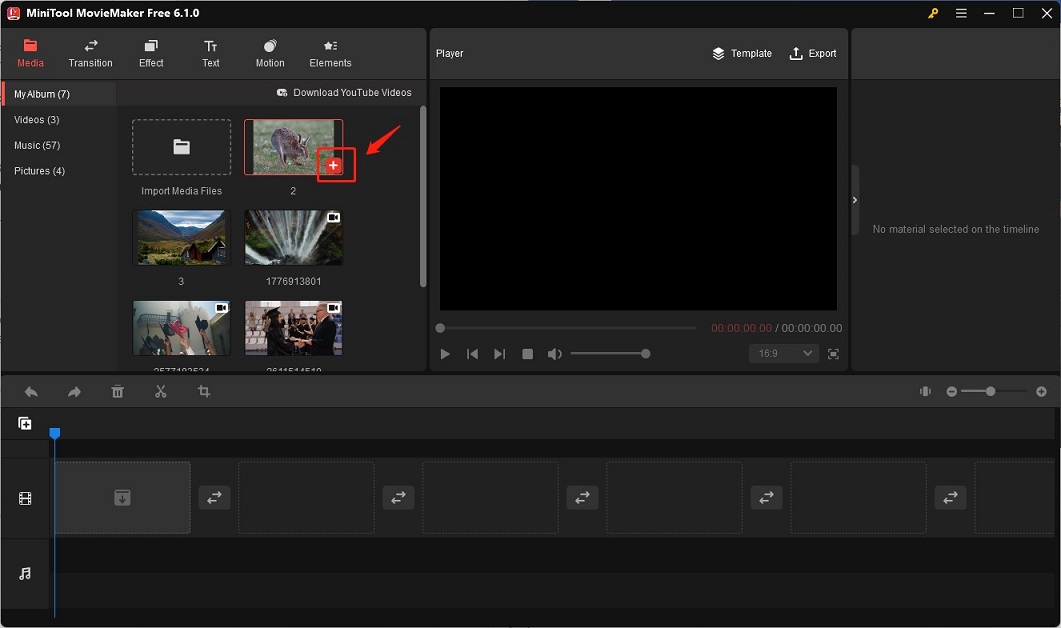
Or if you want to add them at the same time, you need to select all the media files you need to add to the timeline and click the plus icon on any media file you select to add photos and videos to movie maker in sequence.
![8 TikTok Video Makers to Create Cool Videos for TikTok [PC/Phone]](https://images.minitool.com/moviemaker.minitool.com/images/uploads/2023/06/tiktok-video-maker-thumbnail.jpg)
How to Save the MiniTool MovieMaker Video
After importing files to movie maker and adding these pictures and videos to the timeline, you can use the editing tools to edit the footage and make your video better. Then you need to save the video after editing and MiniTool MovieMaker supports exporting a video to PC and device.
If you export a video to PC, you can save it in MP4, AVI, MOV, WMV, WKV, WEBM, GIF, and MP3. For devices, MiniTool MovieMaker supports exporting to devices including iPhones, smartphones, and Galaxy Notes. Below are steps you can refer to.
#1. Export to PC
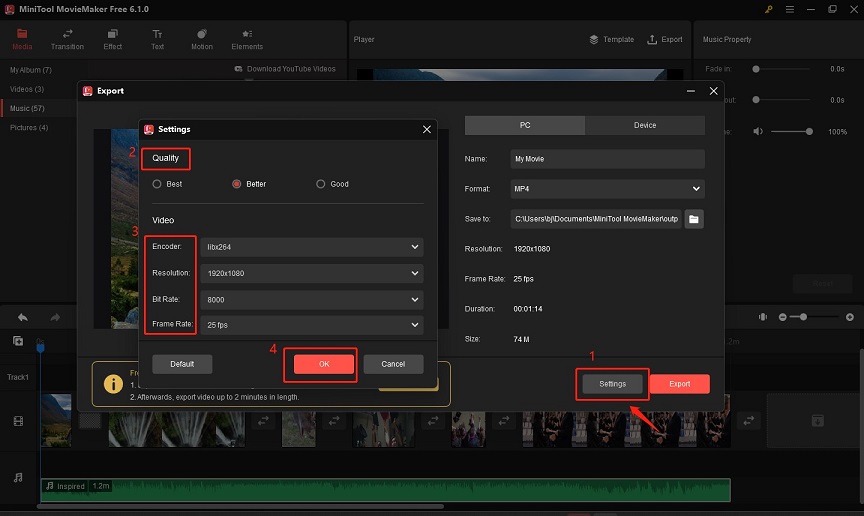
Step 1. Click the Export icon in the Player section to open the Export popup. You can rename the video and choose its output format and its location for storing.

Step 2. Tap on the Settings button to make further adjustments like video quality, encoder, resolution, bit rate, and frame rate, then click OK to save the changes.
Step 3. Click the Export button on the Export window to save it.
#2. Export to Device
Step 1. Click the Export icon in the Player section and choose the Device tab in the Export window.
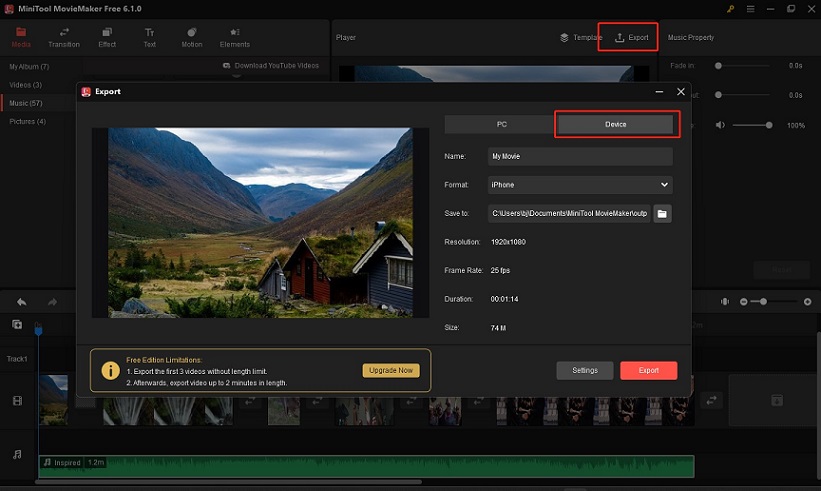
Step 2. Expand the Format dropdown and choose one mobile device on which you want to play videos, and you can also click the Settings button to personalize your video.
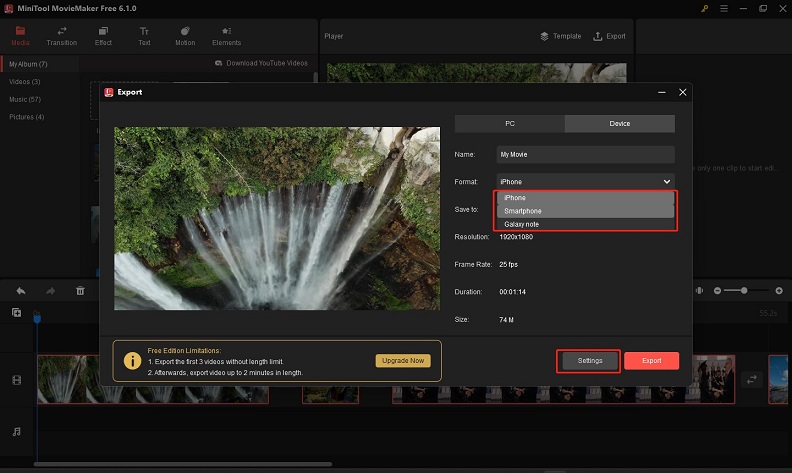
Step 3. Click the Export button to save it.

Wrapping up
After reading this article, you have known how to add pictures and videos to movie maker. Hope this article is helpful to you, and you can use the MiniTool MovieMaker to make more excellent videos with your pictures and videos.
If you have any questions or comments about MiniTool MovieMaker, please don’t hesitate to email us at [email protected].
About The Author

Position: Columnist
Olivia is always full of enthusiasm for life and loves to record. She often records beautiful and memorable moments of life with her camera and then uses some editing tools to put the photos, videos and audio together. She also has a passion for writing and offers suggestions to readers on images, audio, videos and news. To provide more professional articles and solve problems for readers, she is continuing to learn multimedia as well.
User Comments :