Want to convert a WAV file to MP4 with images to upload to YouTube? This post from MiniTool MovieMaker (a free movie maker app) will detail how to convert WAV to MP4 with image files and how to convert WAV files.
Why Convert WAV to MP4 with Image
WAV is an audio file format standard for storing an audio bitstream on personal computers. It’s a common lossless audio format with high-quality sound. WAV files are typically uncompressed, and thus they are quite large in size. MP4 is a popular video file format that’s supported by almost all devices, editing applications, media players, and online video platforms. So, why convert WAV to MP4 with image?
Generally, people convert audio to video because audio files cannot be shared directly on video platforms like YouTube, Instagram, Facebook, and TikTok. Again, that is why people need to convert WAV to video with image.
In addition, compared with audio, video can convey deeper and richer information, making it more vivid, intuitive, emotionally rich, and interactive.
How to Convert WAV to MP4 with Image
In this part, we’ll show you how to convert WAV to MP4 with image with MiniTool MovieMaker, an easy-to-use and feature-rich photo video maker app.
Why MiniTool MovieMaker Is the Best WAV to MP4 Converter with Image
- It has a user-friendly interface so you can quickly learn how to use the program.
- It comes with some audio editing tools, such as trimming and applying fade-in/out effects.
- It allows you to enhance your images and video clips with many editing tools and effects.
- It supports exporting MP4 videos up to 4K resolution.
- It won’t add a watermark to your rendered video.
Follow the steps below to turn your WAV file into a video with images using MiniTool MovieMaker.
Step 1. Click the button below to download free video editor and finish the installation on your PC.
MiniTool MovieMakerClick to Download100%Clean & Safe
Step 2. Open this WAV to MP4 converter with image and close the promotion window to enter the app’s main UI.
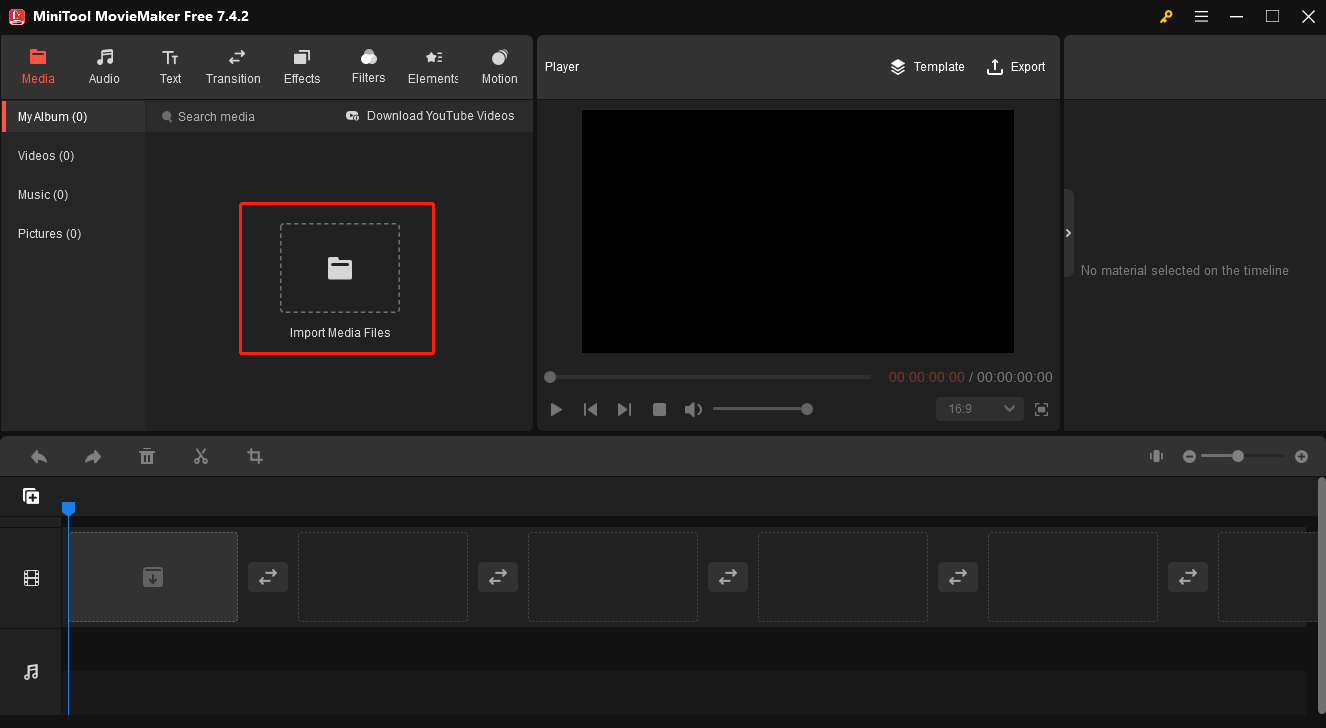
Step 3. Click the Import Media Files button under the default Media tab to open your WAV file, images, and video clips.
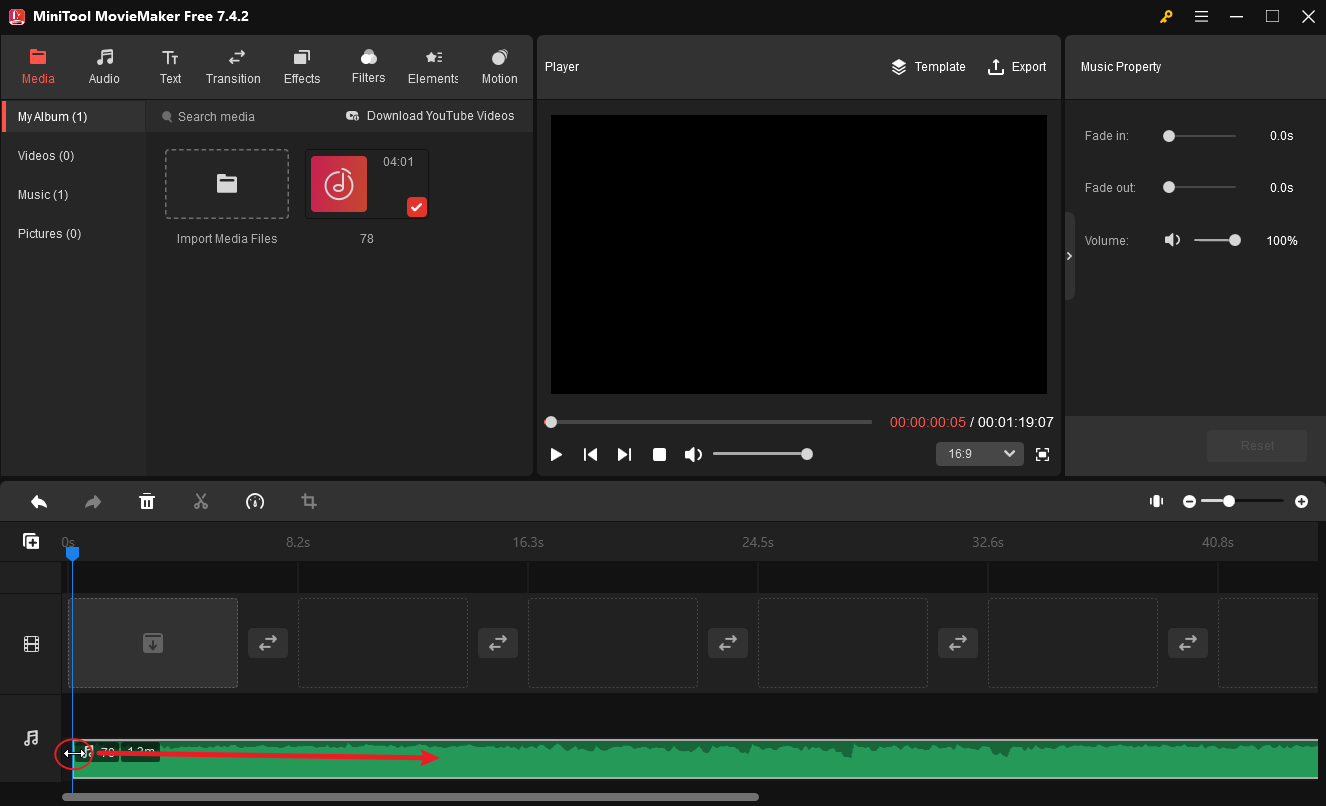
Step 4. Drag and drop the WAV file onto the audio track on the Timeline. You can then edit it by following the tips below.
Trim WAV: select the audio clip on the timeline, hover your mouse cursor over the start or end point of the clip, and you will see a double-headed arrow appear. Drag the arrow inwards to remove the unwanted parts at the beginning or end of the clip.
Edit music property: go to Music Property, and you can adjust the volume, and apply fade-in/-out effects.
Adjust WAV speed: click the audio clip on the timeline and click the Speed icon. Then, choose Slow or Fast and pick up a value to decrease or increase the speed.
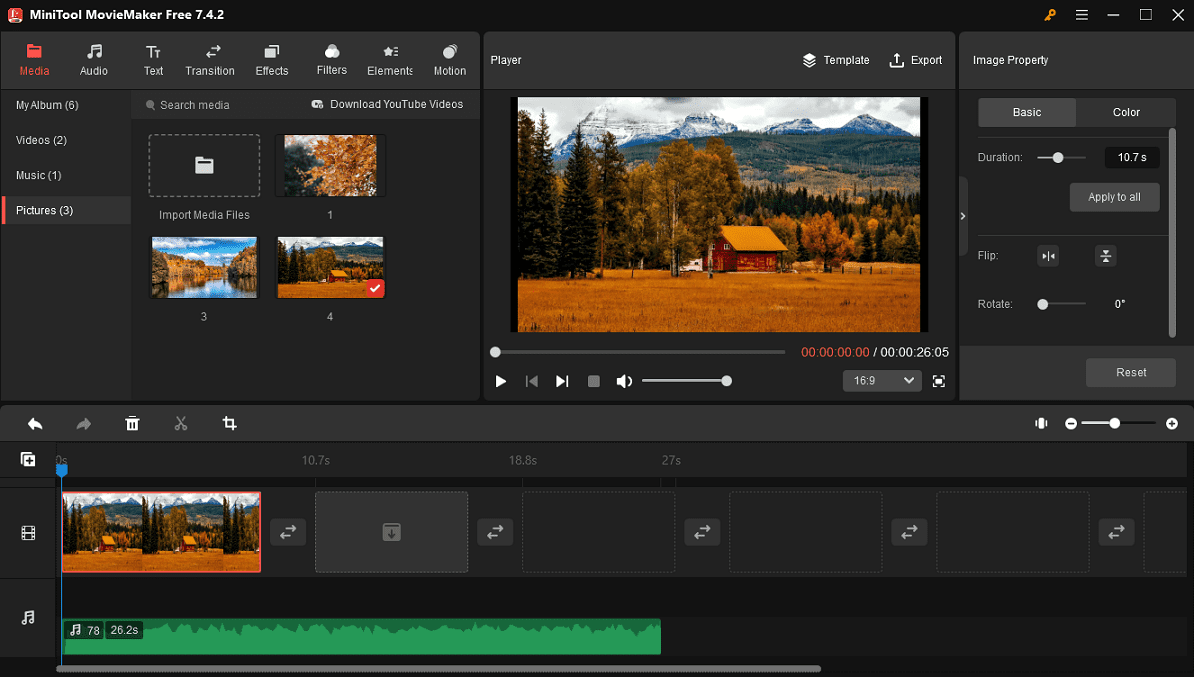
Step 5. After completing audio editing, go to the media library and add your images and video clips to the timeline. You can use the Shift key to add multiple clips to the timeline at the same time. Then, edit your images and video clips.
Adjust the clip’s order: select a video clip or an image and drag it to another clip to swap the location.
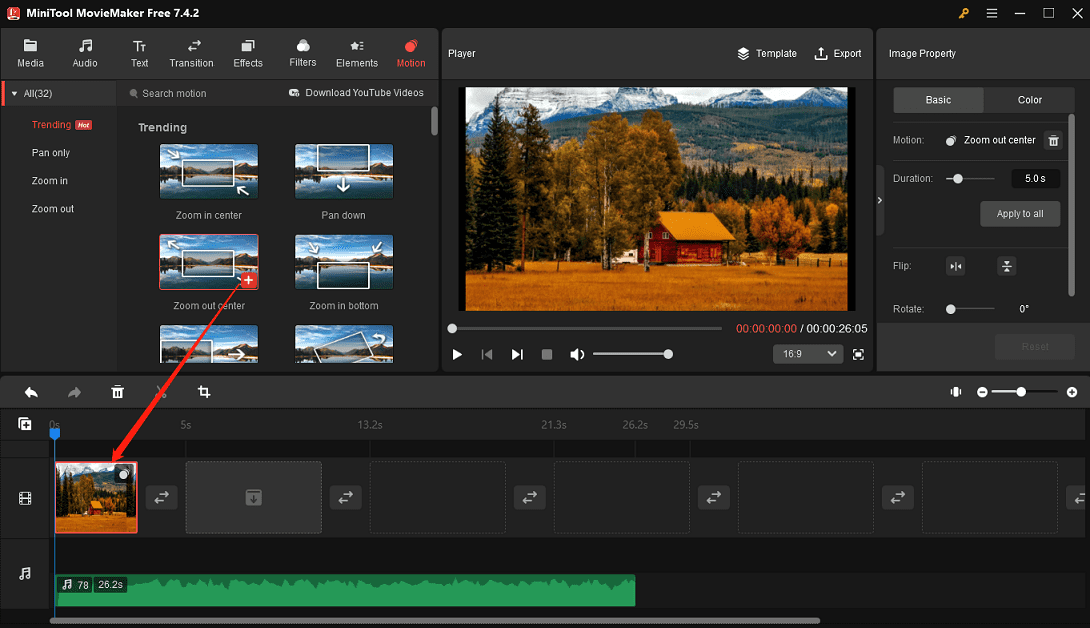
Edit image property: click the picture on the timeline to open the Image Property where you can adjust the image duration up to 30 seconds and flip or rotate the photo under the Basic tab or switch to Color to correct the clip’s color.
Likewise, you can click on the targe video clip to edit the video property.
Crop image/video: If you want to remove unwanted outer areas from your footage, crop it. Select the clip on the timeline, click the Crop button on the timeline toolbar, then manually adjust the red rectangle to crop your image or video, or select a preset aspect ratio to crop it.
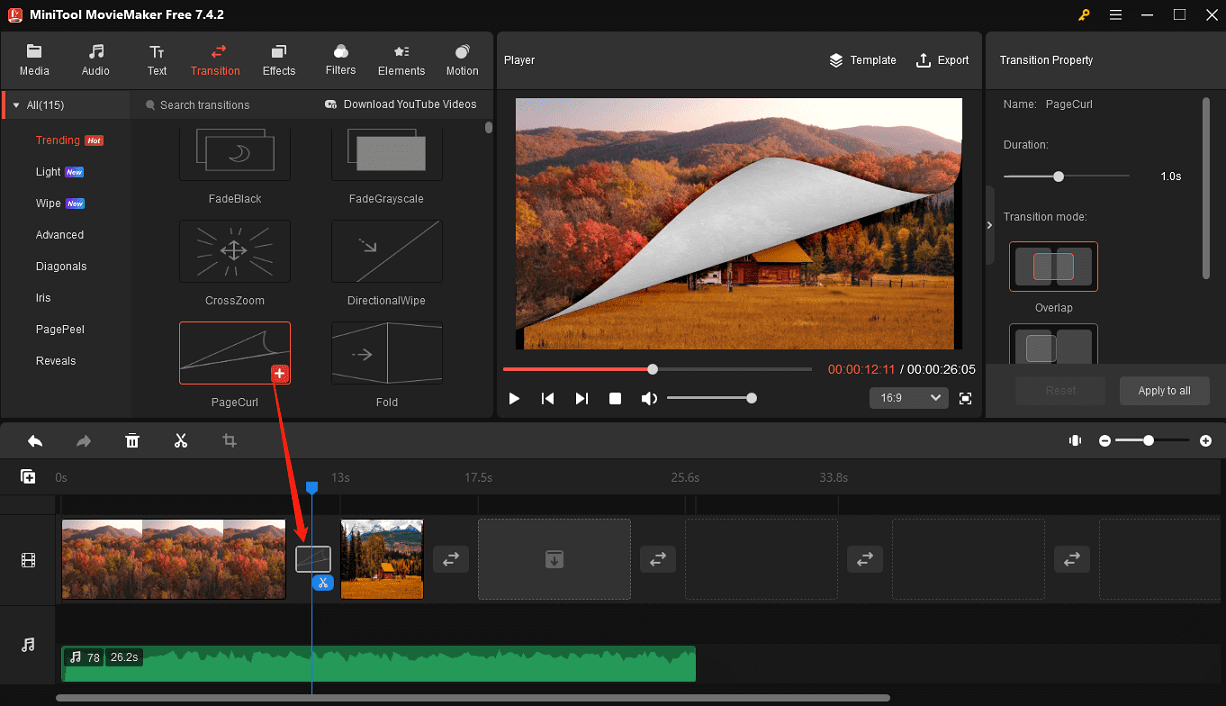
Add transition effects: add a transition between clips to make your final video more appealing. Go to Transitions, find and download the desired one, and drag and drop it to the gap between any two videos/images. Next, edit the transition’s duration and mode in Transition Property.
Add filters or special effects: go to Filters to add a cinematic filter to your image or video in just one click or go to Effects to add overlays, opening and closing effects, and more to your footage.
Add text: go to Text and choose a text template to add captions, a title, or end credits to your video.
Add motion effects: add pan and zoom effects to images to give them a dynamic feel. Go to Motion, select an effect, and drag it to your image on the timeline.
Step 6. Choose the correct aspect ratio for the final video based on your needs. Open the aspect ratio drop-down list under the video player and choose from 16:9, 9:16, 4:3, and 1:1.
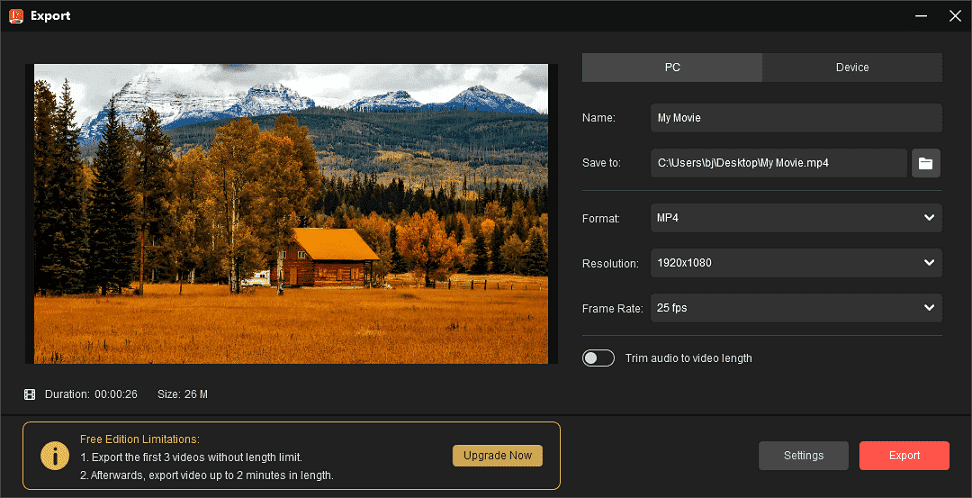
Step 7. Finally, click the Export button in the upper right corner. By default, MiniTool MovieMaker saves videos as MP4 files, so you don’t need to change it. Select the video resolution, and frame rate, or click Settings for more options, and click Export to start rendering the video.
Best Free WAV Converter
On the contrary, sometimes you may need to extract audio from a video and save it as a WAV file, or want to convert WAV to other audio file formats. Therefore, a WAV converter is needed to accomplish this task. Here comes the free WAV converter – MiniTool Video Converter, an audio/video converter without watermarks and file size limits.
MiniTool Video ConverterClick to Download100%Clean & Safe
Here’s a simple guide:
Step 1. Launch MiniTool Video Converter after finishing the installation.
Step 2. Under the default Video Convert tab, click the Add or Drag files here to start conversion area to add your video or WAV file.
Step 3. Click the Edit button in the Target box to open the output format window.
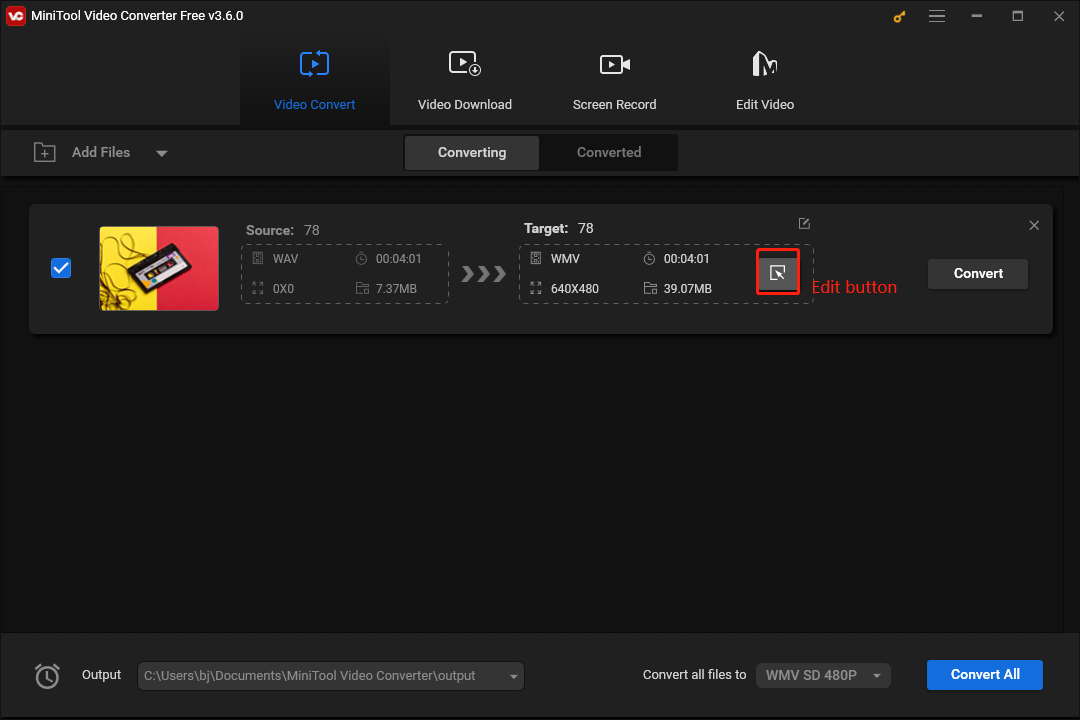
Step 4. Go to the Audio tab, click WAV or another audio format you want, and click the preset profile with the desired audio quality.
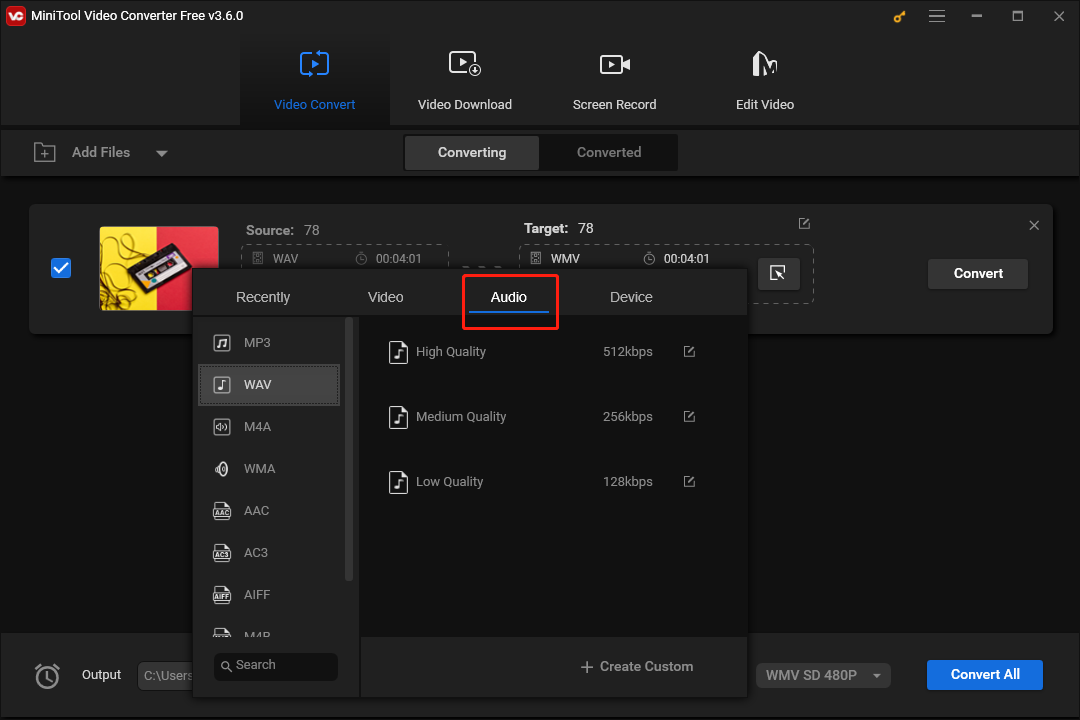
Step 5. Click the Convert button to start the conversion task.
Conclusion
Now, it’s your turn. Follow the steps above to convert your WAV file to an MP4 video to share it on social media platforms. And, if you encounter problems creating videos with MiniTool MovieMaker or Video Converter, don’t hesitate to get in touch with us via [email protected].
About The Author

Position: Columnist
Cora is a tech writer specializing in digital media workflows, with over six years of hands-on experience in video post-production, media transcoding, and screen capture. Her writing is always clear and practical. Cora also produces in-depth software reviews for users across skill levels to help them find the right tool and enjoy video editing.
User Comments :