How to remove audio from MP4 files on a Windows PC? This post from MiniTool free video editor provides you with 3 free offline methods: MiniTool MovieMaker, Clipchamp, and CapCut, and 3 online tools: VEED.IO, Clideo, and Canva.
MP4, also known as MPEG-4 Part 14, is a popular and widely used multimedia container for storing video, audio, and other data, such as subtitles, images, and more. This format is renowned for its efficient compression method, which decreases file size while maintaining video quality to the maximum. Therefore, MP4 is perfect for video streaming and sharing.
Sometimes, you may like the visuals of an MP4 video, but the sound can be disappointing. You want to remove the sound of the video and add better audio to it. How to remove audio from MP4? Here are 6 free and effective methods for you.
How to Remove Audio from MP4 Offline
In this section, let’s see how to strip audio off an MP4 on Windows with three offline tools: MiniTool MovieMaker, Clipchamp, and CapCut.
Option 1: MiniTool MovieMaker
MiniTool MovieMaker is an all-in-one and free video editing software for Windows users. It features a straightforward user interface, allowing you to quickly and easily navigate to target functions. Plus, MiniTool MovieMaker has no ads, bundles, viruses, or watermarks, providing an enjoyable user experience.
MiniTool MovieMaker is capable of removing audio from MP4 files efficiently. Except for that, it can also delete audio from other formats, like MOV, AVI, MPG, MKV, WMV, FLV, and so on.
Moreover, you can export the video in multiple formats, including AVI, WEBM, GIF, etc. MiniTool MovieMaker allows you to customize the output parameters, like frame rate, bitrate, resolution, etc.
How to remove audio from MP4 using MiniTool MovieMaker? Here’s the step-by-step guide:
1: Download and install MiniTool MovieMaker.
Click the download button below to download MiniTool MovieMaker and follow the setup instructions to complete the installation.
MiniTool MovieMakerClick to Download100%Clean & Safe
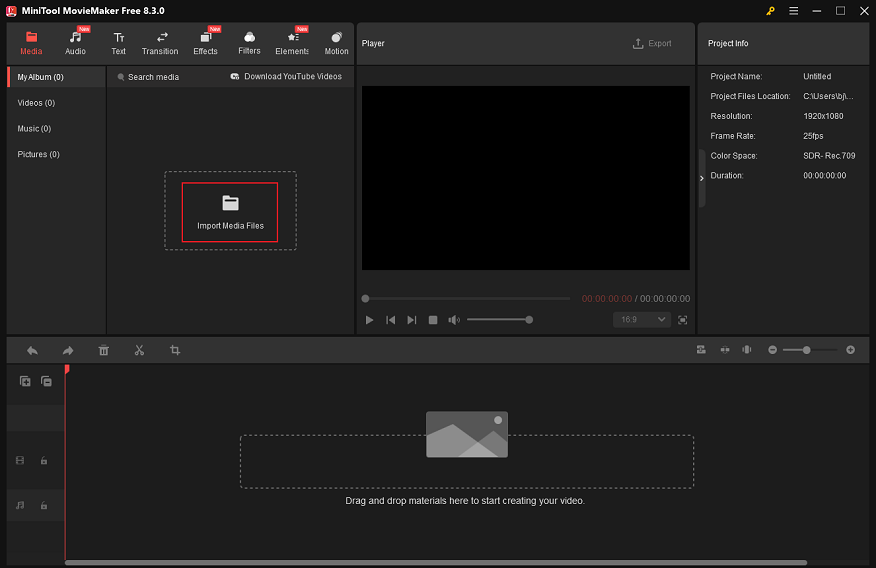
2: Import the target MP4 video.
Launch MiniTool MovieMaker and close the promotion window to enter the main user interface. Click on the Import Media Files option to import the MP4 video you want to remove audio from.
3: Remove audio from the MP4.
Drag and drop the added video to the timeline. There are 3 ways to remove audio from the MP4.
1. Right-click the video on the timeline and choose Mute Audio.

2. Click on the Speaker icon on the timeline video to delete audio from MP4.
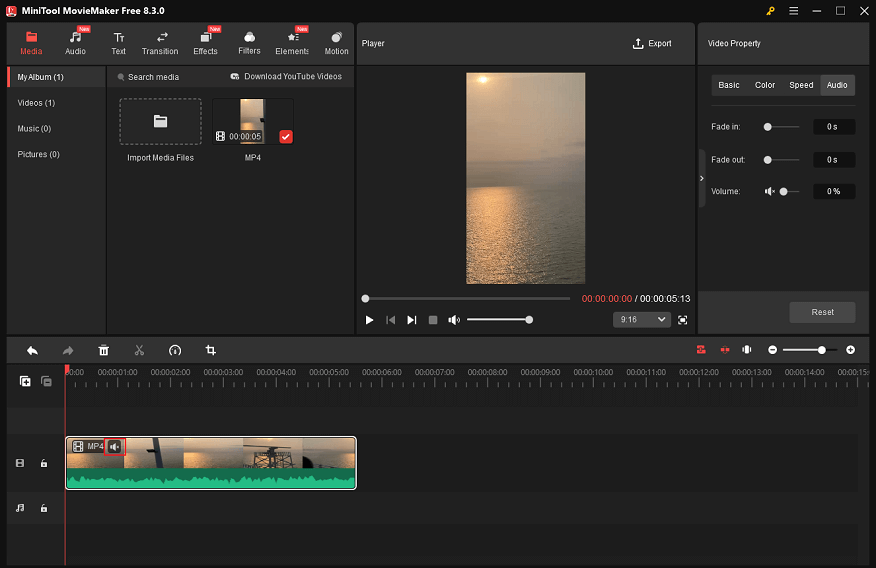
3. Choose the Audio tab in the Video Property section, then drag the Volume to 0%.

4: Add the desired audio.
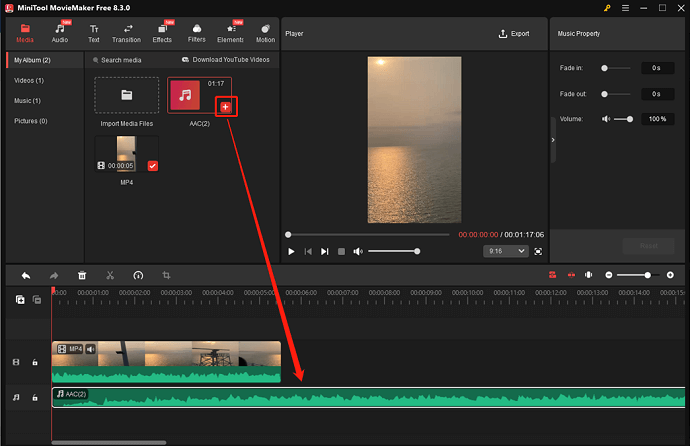
1. Add your own audio.
Click the Import Media Files option to import the audio from your local folder.

Then, hover the mouse on the added audio until the Plus icon appears; click it to add the audio to the audio track.
Drag the playhead to the end of the video, click the audio on the track, and click the Scissors icon to split the audio.
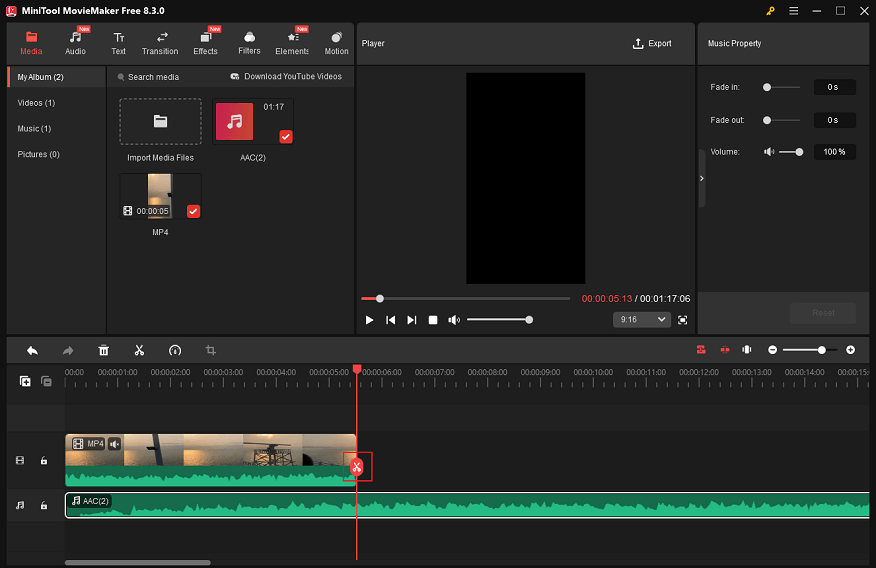
Click the unwanted audio clip and click the Delete icon.

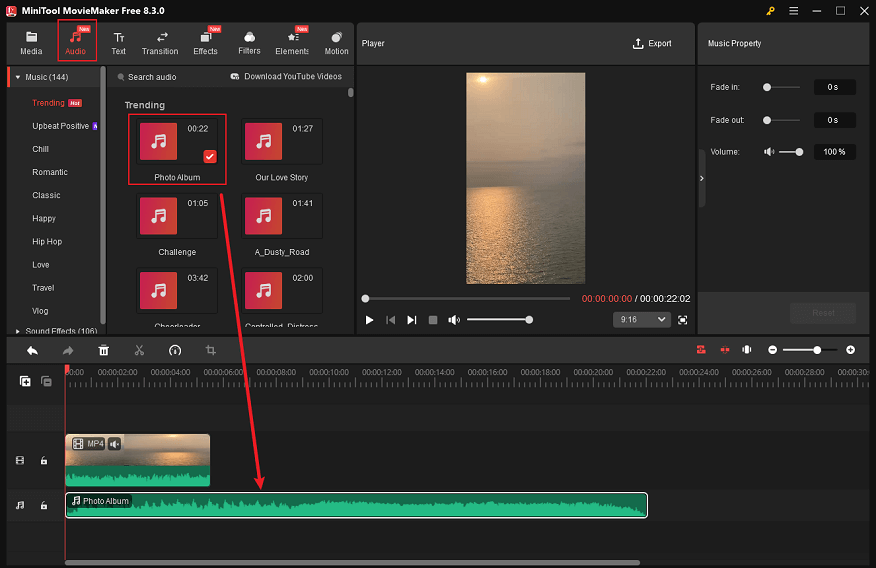
2. Add audio from the audio library.
Go to the Audio section, select the audio you want, and drag it to the audio track.
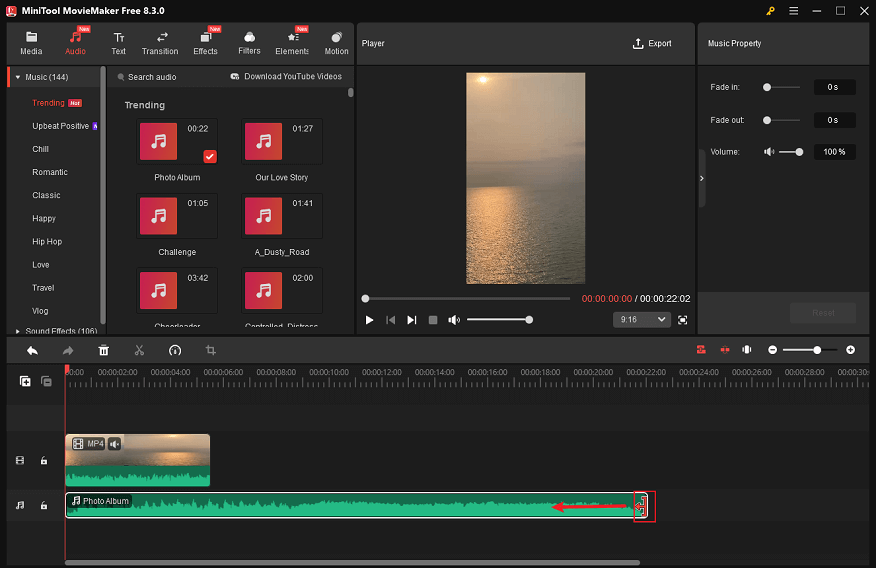
Hover the mouse cursor at the end of the audio on the timeline until you see the Trim icon; drag it leftwards until the audio duration matches the video duration.
5: Edit the Video
Trim the video:
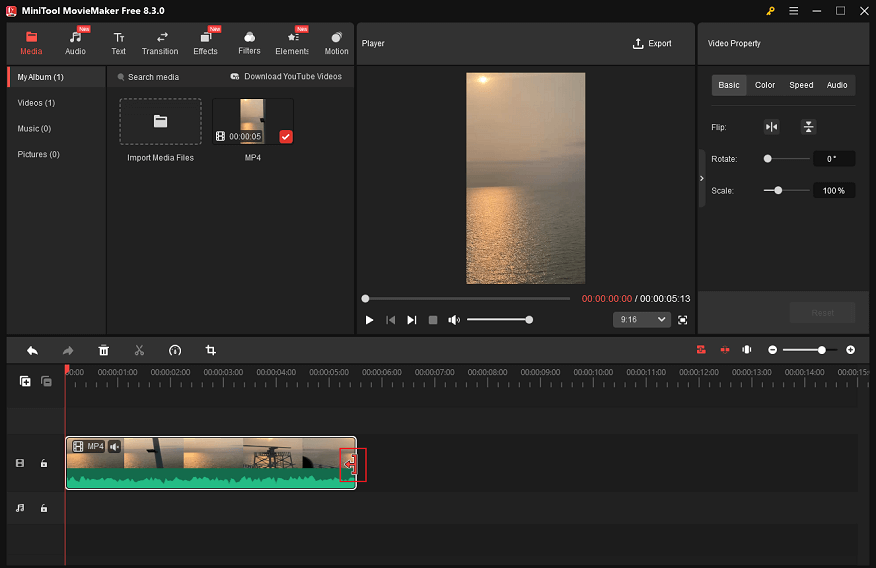
Click on the video on the timeline, hover the mouse cursor to the beginning/end of the video, and you will see the Trim icon; drag and move it rightwards/leftwards to delete the unwanted part.
Split the video:
Drag the red playhead to the desired place and click the Scissors icon to cut the video into two clips. Delete the unwanted part if you want.

Make the video next level:
There are plenty of audio, transitions, effects, filters, elements, and motions in the Media library of MiniTool MovieMaker. Choose some based on your needs and add them to the video.
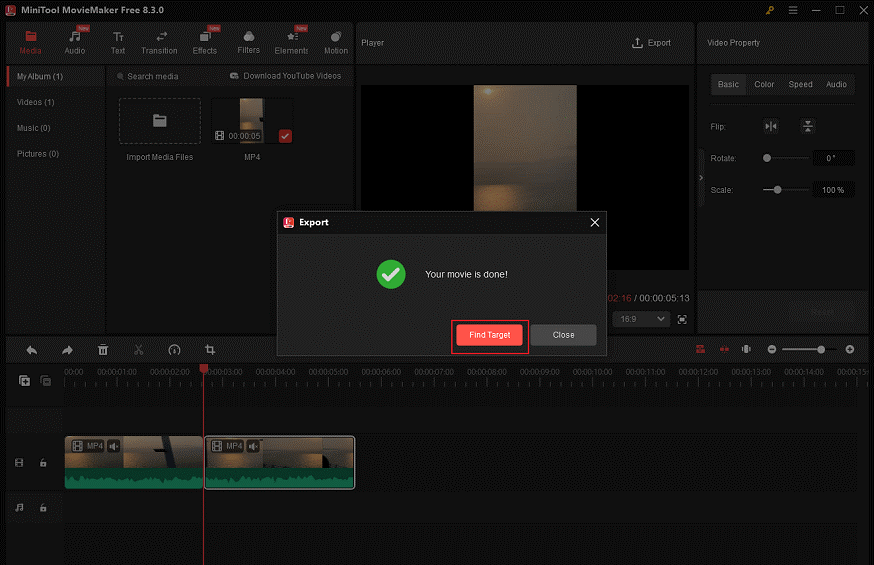
6: Export the video.
Click on the Export icon at the top right of the Player window to access to Export window. Next, select the desired output format, resolution, and frame rate. After that, click on the Export button to save the video.
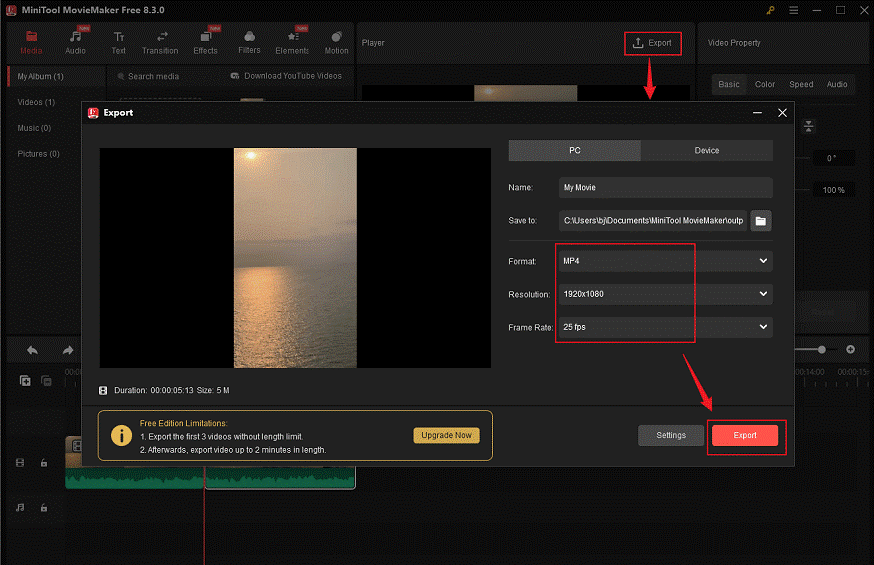
When the exporting process completes, click the Find Target button to locate the video in the local folder.
In addition to being an audio remover and video editor, MiniTool MovieMaker can also serve as an audio extractor, GIF editor, file converter, media player, and video compressor. Click the download button below to explore more!
MiniTool MovieMakerClick to Download100%Clean & Safe
Option 2: Microsoft Clipchamp
Clipchamp is a professional and free download video editor developed by Microsoft that can also remove audio from MP4. It offers various editing functions, allowing you to crop, split, and trim videos. Plus, Clipchamp can change video speed, add filters, transitions, and more.
In addition, Clipchamp provides a wide range of video templates, enabling you to create a video without any effort. After editing, the video can be exported in multiple resolutions, like 720p, 1080p, 4k, etc.
Here’s how to remove audio from MP4 with Clipchamp:
1: Download and install Clipchamp.
Go to Microsoft Store on your PC and download and install Clipchamp.
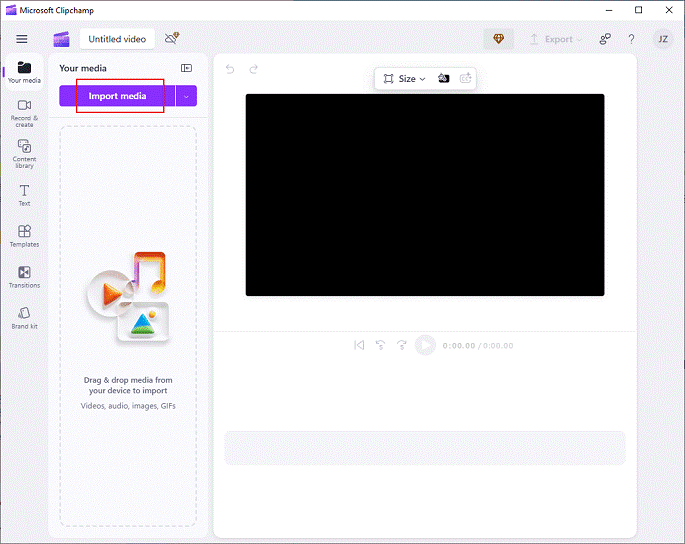
2: Import the video you want to remove the audio from.
Launch Clipchamp, log in, and click on Create a new video to enter the editing interface. After that, click the Import media button to add the target MP4 video.
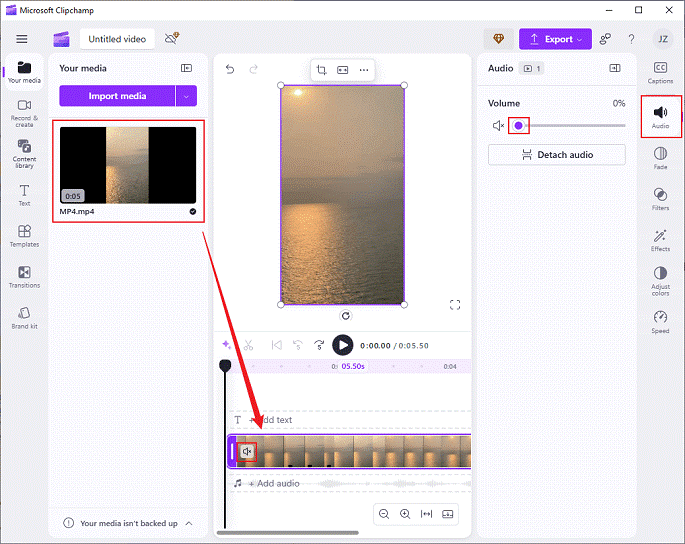
3: Remove the audio track from MP4.
Drag the added video to the timeline and click the Speaker icon on the video to mute the video. Alternatively, you can click the Audio button in the left menu. Then, drag the purple dot icon to set the Volume to 0%.
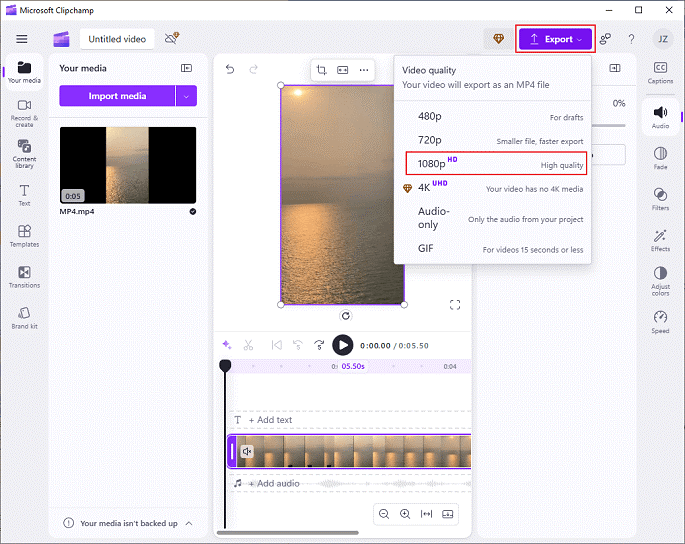
4: Export the video.
Click on the Export button at the top right and select the resolution you want (for example: 1080p). Then, click on Save to your computer.
That’s it!
Option 3: CapCut
CapCut is a well-known video making app that comes with a variety of editing tools. It can not only remove audio from MP4 file, but also allows you to trim, crop, split, reverse, and rotate video. Besides, CapCut provides various elements, filters, transitions, and more. You can add them to your video as you prefer.
Follow the details below to remove audio from MP4 on a PC:
1: Download and install CapCut.
Navigate to CapCut’s official website to download this program and install it on your computer.
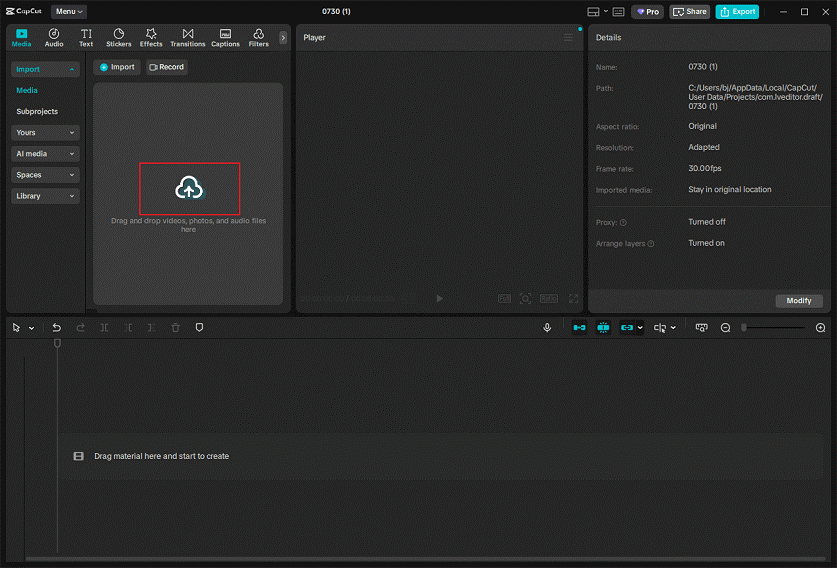
2: Add the target MP4 video.
Launch CapCut, click on the Create project button, and click the Drag and drop videos, photos, and audio files here area to add the video.
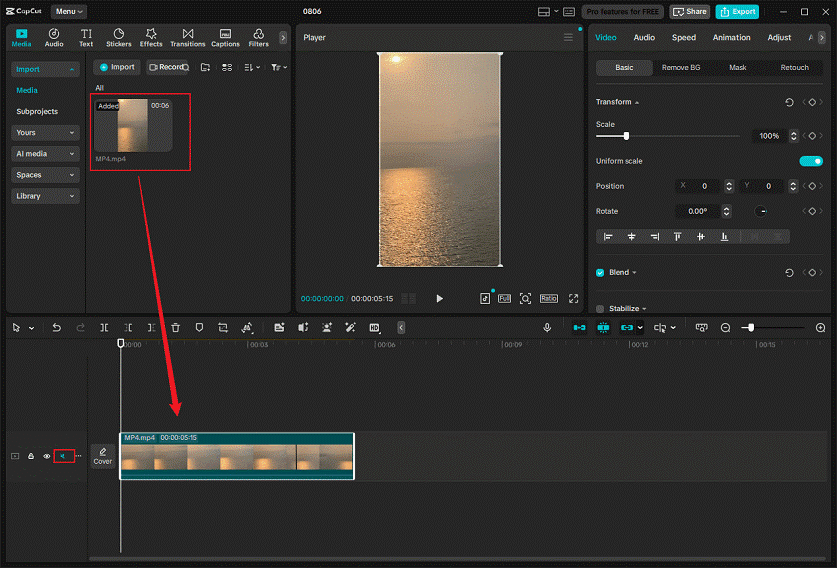
3: Remove audio from MP4.
Drag and drop the imported video to the timeline. Then, click on the Speaker icon on the left side of the video track to mute the video.
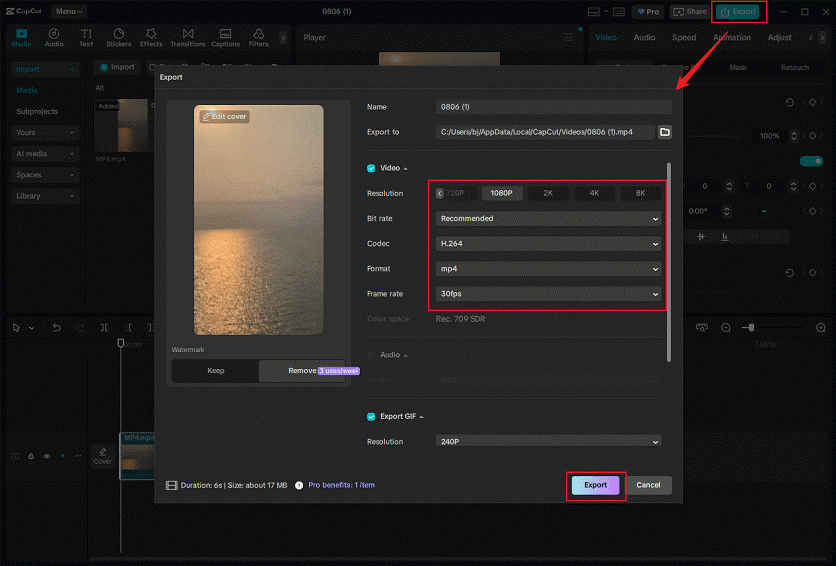
4: Export the video.
Click on the Export icon at the top right to open the Export window. Then, set the desired resolution, format, codec, frame rate, and bitrate. Once done, click the Export button to save the video.
Done! You can remove audio from MP4 easily with CapCut!
How to Remove Audio from MP4 Online
Don’t want to install software on your computer? Out of storage space? Don’t worry! Here are 3 online audio removers: VEED.IO, Clideo, and Canva. They’re browser-based. As long as you have an internet connection on the computer, you can use them smoothly.
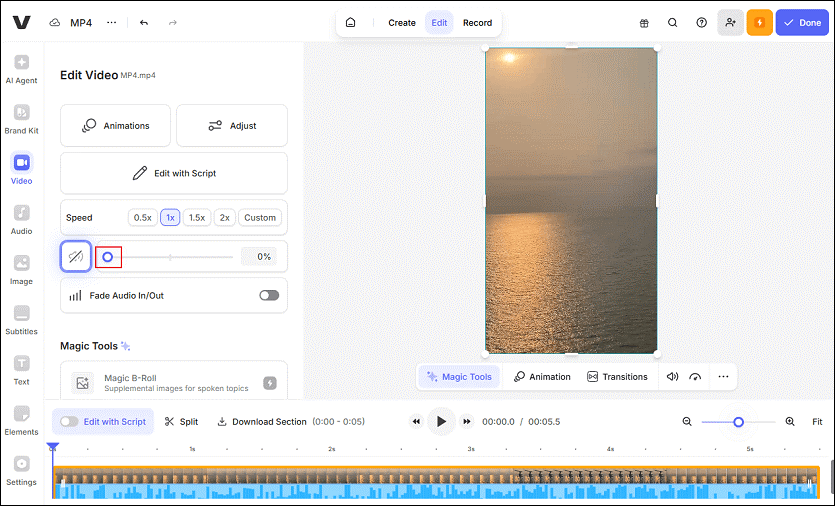
Option 1: VEED.IO
VEED.IO is an online video editing platform that comes with various and powerful functions. It allows you to remove audio from video, add audio to video, add a photo to video, add subtitles to video, cut audio, change audio speed, convert audio to text, remove video background, and more.
Additionally, VEED.IO has AI features. It can serve as an AI image generator, AI presentation maker, AI video generator, and more. Moreover, VEED.IO has an intuitive user interface that enables you to navigate easily.
How to remove audio from MP4 files with VEED.IO? Here’s a step-by-step guide:
1: Access VEED.IO.
Launch the browser on your computer and search for VEED.IO’s audio remover (https://www.veed.io/tools/remove-audio-from-video/remove-audio-from-mp4).
2: Import the target MP4.
Click on the Choose MP4 File option and then click the Upload a file button to add the MP4 video.
3: Remove the audio track.
Click the video on the timeline. Then, in the Edit Video section, drag the white dot icon to set the volume to 0%.
4: Export the video.
Click on the Done option at the top right and click on Export Video. Then, click on the Download icon to save the video on your computer. Also, you can share the video on Facebook, Twitter, etc.
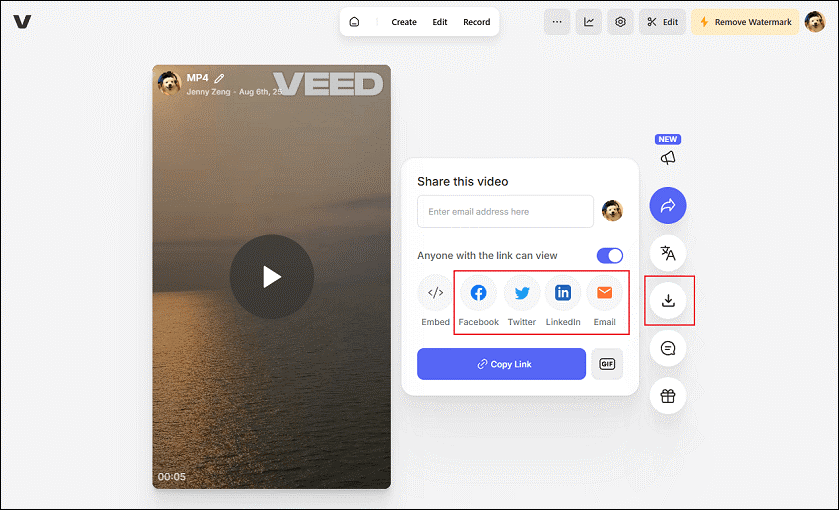
So easy! VEED.IO enables you to strip the audio from the MP4 efficiently!
Option 2: Clideo
Clideo is also a professional online video processor that can move the audio track from an MP4. It is compatible with Windows, Mac, iOS, and Android. Plus, Clideo supports a wide range of formats, including MP4, AVI, VOB, MPG, WMV, MOV, and more.
Additionally, Clideo can act as an audio cutter, audio joiner, video creator, and more. It lets you convert text to speech, add subtitles to videos, turn audio into text, and perform other features. Just follow the instructions below to remove audio from MP4.
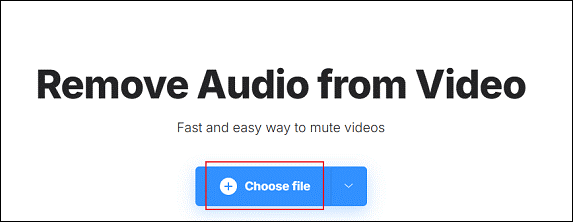
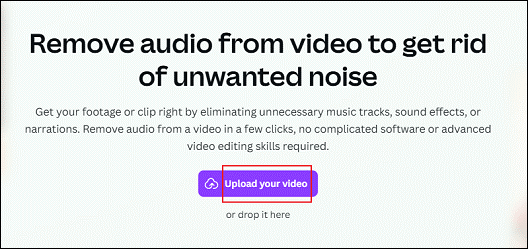
1: Go to Clideo’s audio remover.
Visit https://clideo.com/mute-video on the browser.
2: Import and mute the MP4 video.
Click on the Choose file option to add the MP4 video you wish to delete audio from. Then, Clideo will automatically remove the audio track from the video.
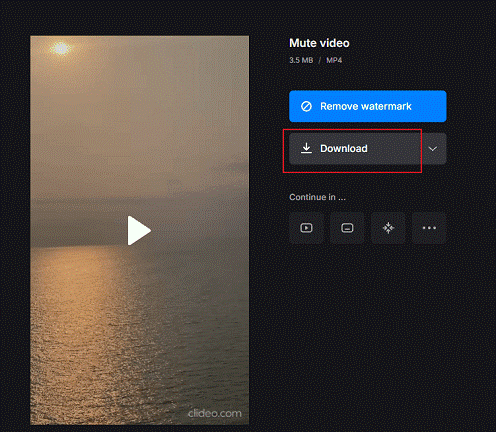
3: Export the video.
Click on the Download button to save the video to the local folder.
By following the simple steps above, you can easily delete audio from an MP4 video using Clideo.
Option 3: Canva
Canva is also a browser-based audio remover that enables you to delete audio from video. It provides video editing functions, like crop, flip, speed up, and slow down a video. It also allows you to add text, overlays, filters, motions, etc., to a video.
Now, you can follow the specific guides below to remove audio from MP4:
1: Access Canva’s video editor.
Open the browser on your computer and search for Canva’s audio remover (https://www.canva.com/features/remove-audio-from-video).
2: Upload the video.
Click on the Upload your video to add the MP4 video to Canva.
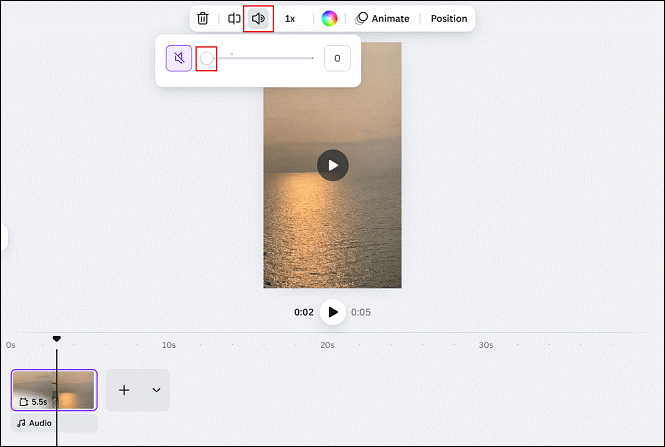
3: Remove the audio track.
Click on the video on the timeline, click the Speaker icon on top, and drag the white dot icon to set the volume to 0.
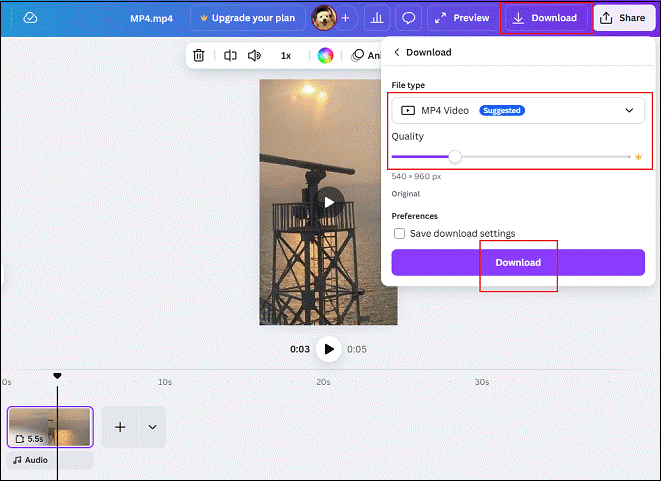
4: Export the video.
Click on the Download button at the top right to expand the drop-down list. Then, choose the desired file type and adjust the quality as you prefer. After that, click on the Download option to save the video on the computer.
Now, check the video in your local folder!
Bonus: How to Extract Audio from MP4
As mentioned above, MiniTool MovieMaker can serve as an audio extractor, enabling you to extract audio from various file formats, including MP4, MOV, MKV, AVI, MPG, FLV, and others. Now, follow the instructions below to extract audio from MP4.
1: Download and install MiniTool MovieMaker.
Click the download button below to download MiniTool MovieMaker and install it on the computer.
MiniTool MovieMakerClick to Download100%Clean & Safe
2: Import the target MP4.
Click on the Import Media Files option to add the MP4 video you want to extract audio from.

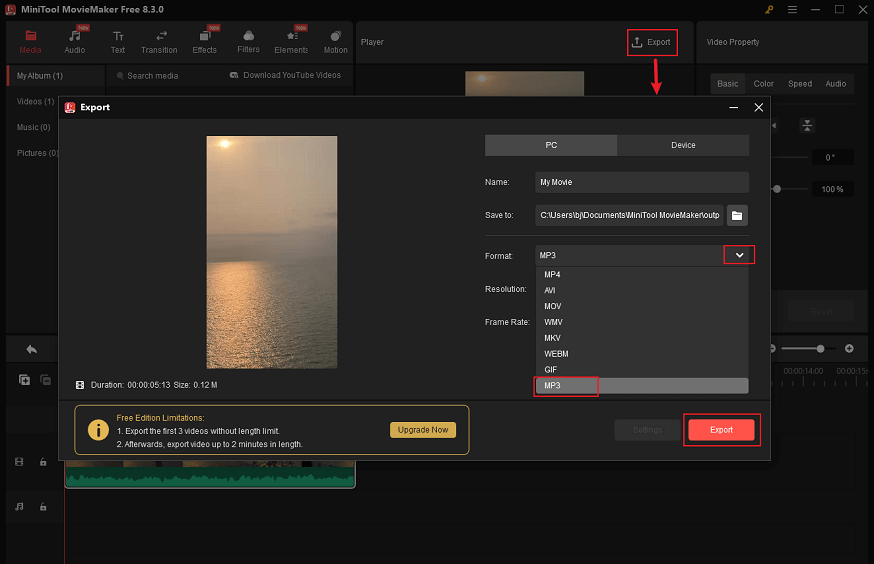
3: Extract audio from the MP4 and export it.
Drag the added video to the timeline.

Click on the Export icon at the top right of the Player window to enter the Export window. Then, expand the Format option and choose MP3. After that, click the Export button to save the audio to the local folder.
In Summary
How to remove audio from MP4 on Windows? This post recommends 6 professional offline & online audio removers: MiniTool MovieMaker, Clipchamp, CapCut, VEED.IO, Clideo, and Canva. And it shows you how to remove the audio track from MP4 step by step.
With these user-friendly and reliable tools mentioned above, you can delete an audio from an MP4 with no effort! Hope this article can do you a big favor! You can contact us at [email protected] if you have any questions about using MiniTool MovieMaker. Also, you can send me messages directly on Twitter, and I’ll help you as soon as I can.
User Comments :