This post explains how to edit Twitch videos for YouTube using the built-in Clip system and MiniTool MovieMaker. To extract highlights of up to 60 seconds directly on Twitch, select the built-in Clip Creator. To create long videos, save the Twitch stream to the computer, and edit it using MiniTool MovieMaker.
Twitch is a popular video live streaming platform that mainly focuses on live streaming of video games. Additionally, this service allows people to do many other types of broadcasts, and you might have streamed many times on Twitch. Then, you can upload your top stream moments from broadcasts to YouTube and TikTok to promote your channel. In most cases, you’ll need to do some editing before sharing your gaming highlights or other great moments on social media.
Therefore, this post explains how to edit Twitch videos for YouTube using Twitch’s built-in Clip system and MiniTool MovieMaker.
| Feature | Twitch Built-in Clip Tool | MiniTool MovieMaker |
| Maximum video length | ≤60 seconds | Unlimited |
| Trimming / Cutting | ✓ (only trim) | ✓ (trim + split middle segments) |
| Convert to vertical (9:16) | ✓ | ✓ (precise cropping + composition adjustment) |
| Add subtitles/text | ✗ | ✓ (multiple styles) |
| Add background music | ✗ | ✓ (audio library + local import) |
| Add effects/elements | ✗ | ✓ |
| Color adjustment/speed control | ✗ | ✓ |
| Export resolution | Original resolution | Up to 4K |
| Watermark-free | ✓ | ✓ |
| Price | Free | Free + Pro |
| Best for | Quickly sharing instant highlights | Creating well-edited videos, tutorials, and merging multiple clips |
How to Edit Twitch Videos with the Built-in Clip Creator
Fast Track:
- Open the Clip Creator on Twitch.
- Set the duration for the video.
- Adjust the clip’s layout.
- Save and download the video.
Twitch provides a built-in Clip creator to help you create, edit, and share videos on social media, including YouTube Shorts, TikTok, X.com/Twitter, Facebook, and Reddit. Now, let’s see how to edit Twitch Streams using the built-in tool.
Step 1. Create a Clip
Case 1: While you’re on a live stream, click the Clip icon in the lower-left corner of the screen to open the Clip Creator. Then, use the slider below the video player to set the length of the video you want to create, up to 60 seconds.
Case 2: If you want to edit a past broadcast, find the target video by clicking Content on the left sidebar and selecting Video Producer in the Creator Dashboard. Next, click the video to open it, click the Go to VOD page option above the video preview window, and click the Clip icon. Next, drag the sliders to choose the desired parts for up to 60 seconds.
After selecting the right moments, give the clip a name and click the Publish button to create the clip. Once done, you can click the Download button to download the clip to edit it with professional video editing tools, or just save it, or copy the shareable link.
Step 2. Edit the Clip’s Layout
To make your Twitch video look more professional, you can adjust the layout before sharing it. Return to the Creator Dashboard and go to Content and Clips. Click the clip’s title to expand it, and then click the Crop to Portrait button.
Next, drag and drop the green box on the video player to select the parts you want to be visible, and click the Save & Export button to save changes. Then, you can directly share the clip to YouTube Shorts and TikTok.
How to Edit Twitch Videos for YouTube with MiniTool MovieMaker
Twitch’s built-in Clip tool only allows you to create videos of up to 60 seconds and adjust the video layout through cropping. What if you want to upload a video longer than 60 seconds to YouTube or TikTok? To do this, you need a third-party video editor to edit Twitch clips for TikTok and YouTube. Before that, you need to download the video you want to edit.
1. Save Twitch Streams
Twitch streamers can download their previous broadcasts directly from the website as VOD videos or highlights.
You should enable the Store past broadcasts setting on the Twitch website ahead of time so that your streams can be downloaded as VOD later. For this, click on your Twitch profile icon in the upper right corner of the website, select Creator Dashboard, click on Settings > Stream, and enable the Store past broadcasts setting in the VOD Settings.

To download a Twitch stream:
- Go to Content > Video Producer in the Creator Dashboard.
- Navigate to the video you want to save, click the three-dot menu icon under the video, and select the Download option to download the VOD to your computer.
- To save the stream as a highlight, click the Highlight button, drag and drop the end of the yellow bar to set the length of your highlight, click the Publish Highlights button, and then save the highlight.
2. Edit Twitch Streams Using MiniTool MovieMaker
Fast Track:
- Install MiniTool MovieMaker on the computer.
- Import the downloaded Twitch streams.
- Trim, split, and crop, and add captions.
- Add music and change the video aspect ratio.
- Export the video.
MiniTool MovieMaker is an easy-to-use, feature-rich video editor ideal for Twitch streams. It offers all the essential tools to create professional-quality videos, making it a great choice for beginners. You can trim, split, adjust aspect ratios, add captions, apply filters/transitions/effects, edit audio, and do basic color correction. It exports videos (MP4) up to 4K for free, without watermarks.
Here’s how to edit Twitch videos for YouTube using MiniTool MovieMaker.
Step 1. Install MiniTool MovieMaker
Click the download button below to get the installer of the video editor without watermark. After installing, open the software and close the promotion window to enter the editing page.
MiniTool MovieMakerClick to Download100%Clean & Safe
Step 2. Import your downloaded Twitch video(s)
Click the Import Media Files button to open the File Explorer and import the Twitch clip you saved on your computer. Then, click the + icon at the bottom of the clip to add it to the timeline.
Step 3. Trim the Twitch video
Select the clip on the timeline, then place your mouse cursor over the clip’s start or end point until you can see a double-headed arrow appear. Drag this arrow inwards to remove unwanted parts at the beginning or end of the video.

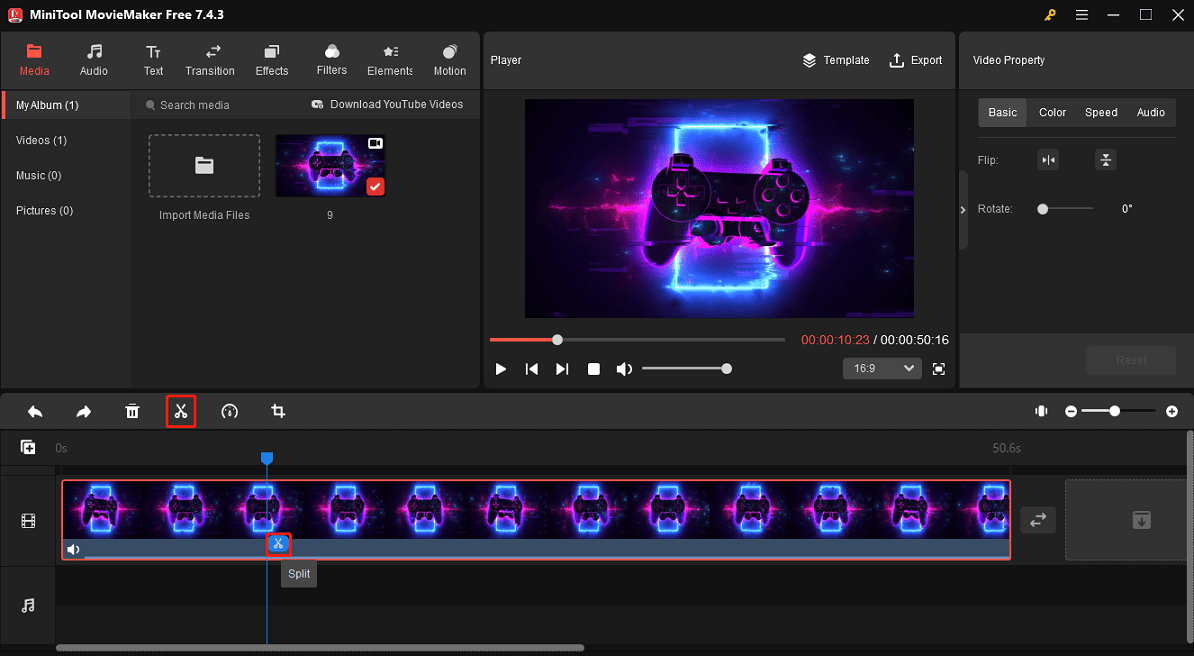
Step 4. Split the Twitch video
You can split a whole Twitch broadcast into multiple clips and delete some clips to separate the highlights. Click the clip on the timeline, move the blue playhead to the target place, and click the Split icon on the playhead or the Split icon on the timeline toolbar to split it into two parts. Then, repeat this step to split the video into multiple clips until you get all the highlight parts, and delete the clips you don’t want.
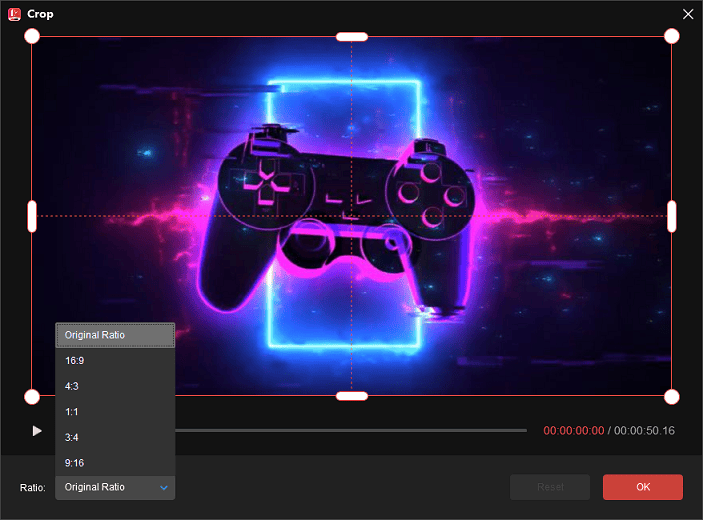
Step 5. Crop the Twitch video
If you want to highlight something in your video, you can crop it to remove distracting elements from the top, bottom, left, and right of the clip. Select the video on the timeline, and click the Crop icon to open the Crop window. Then, drag any handle on the red rectangle, move the rectangle to select the area you want to save, and click OK to save the changes.
Or you can choose an aspect ratio from the list to crop your Twitch clip. For example, select 9:16 to upload the video to YouTube Shorts or TikTok.
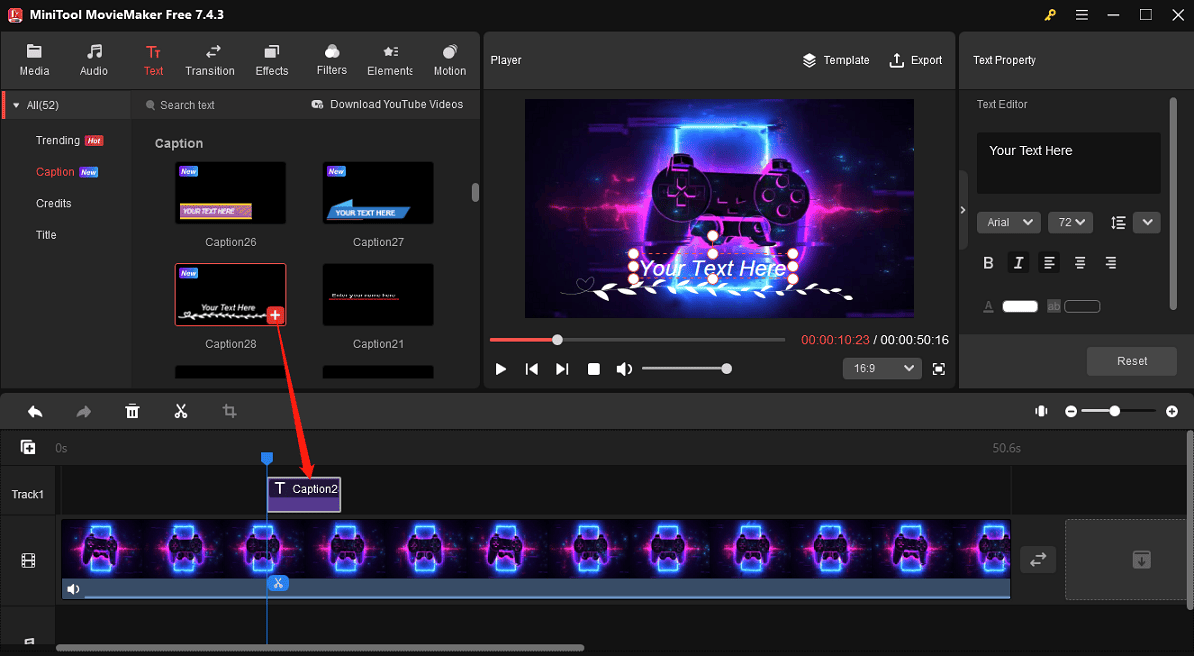
Step 6. Add captions to the Twitch clip
Add annotations to the video to add vitality. Go to Text > Caption on the top, select a text template from the available options, and click the + icon to add it to the timeline. Next, go to the Text Editor to enter and edit your text. You can drag the edges of the text track on the timeline to adjust its duration.
Step 7. Add music to the Twitch video
You can add some background music to enhance the emotional impact of the video. Go to Audio, expand the Music tab, and you can download a song and add it to the timeline. Or you can import another music file saved on your PC by clicking Media > Import Media Files.
To avoid copyright issues, make sure the music you download is copyright-free. Otherwise, your video may be muted or not be uploaded to the social media site.
Then, go to Music Property to adjust the volume and apply the fade-in/out effects. You can also trim the music on the timeline to adjust its length.
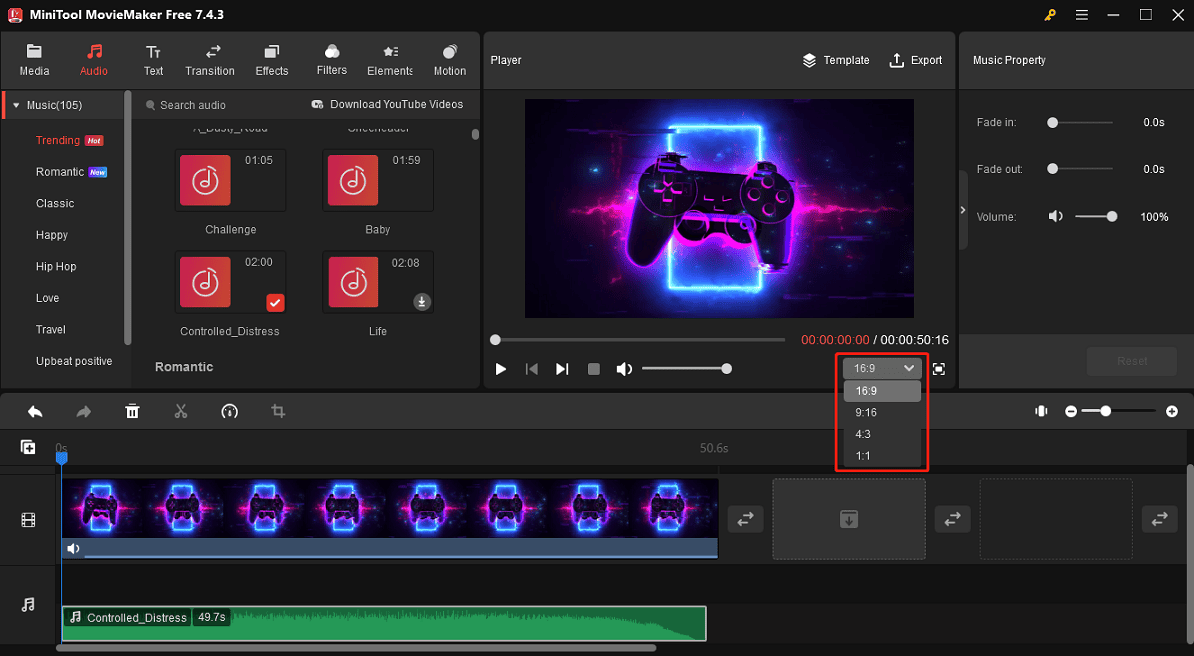
Step 8. Set aspect ratio
MiniTool MovieMaker supports 4 video aspect ratios: 16:9, 9:16, 4:3, and 1:1. Choose the right ratio for your Twitch clip to make it a perfect fit for your social media platform. 16:9 for YouTube landscape videos, 9:16 for YouTube Shorts and TikTok videos. To set the ratio, open the ratio drop-down list and select the target one.
Step 9. Export the video
Click the Export button in the top right corner, then give the file a name, select the destination folder, output format, video resolution, frame rate, quality, bitrate, etc. Finally, click the Export button to start rendering the video. Once done, upload the edited Twitch streams on YouTube and TikTok.

MovieMaker by MiniTool is an inexpensive, easy-to-use video editing program. It includes a fair number of effects and gives you easy ways to join your clips, add transitions, and overlay objects and text.https://www.pcmag.com/reviews/minitool-moviemaker
Conclusion
Although Twitch offers a built-in Clip editor, its editing capabilities are limited. So, you can try a third-party video editor like MiniTool MovieMaker for more editing capabilities. This post details how to edit Twitch Streams for YouTube and TikTok with this program, and we hope this will be helpful for you.
Finally, if you encounter problems using MiniTool MovieMaker or Video Converter, don’t hesitate to contact us via [email protected].
How to Edit Twitch Videos for YouTube FAQ
About The Author

Position: Columnist
Cora is a tech writer specializing in digital media workflows, with over six years of hands-on experience in video post-production, media transcoding, and screen capture. Her writing is always clear and practical. Cora also produces in-depth software reviews for users across skill levels to help them find the right tool and enjoy video editing.
User Comments :