This post illustrates how to edit Panopto videos after recording. Use the platform’s built-in trim tool if you only need to delete the beginning or end of the clip. For more features like speed adjustment, color correction, and merging clips, MiniTool MovieMaker is a reliable option. Just import the videos, trim and edit them as needed, and export the result.
Panopto is a video capture and streaming platform that allows instructors to record lectures and course presentations and live-stream learning sessions. Also, it enables students to create their own video recordings. After ending a recording, you might need to edit the Panopto videos. For example, trim the video to remove unnecessary parts at the beginning or end of the clip. So, how to edit Panopto videos? Here are two tools recommended for you: the built-in trim tool and MiniTool MovieMaker.
| Tool | Panopto’s Built-in Editor | MiniTool MovieMaker |
| Platform | Within the Panopto web interface | Windows desktop app |
| Price | Free (included with Panopto account) | Free + Ultimate |
| Export without watermark | Yes | Yes |
| Trim head & tail | Yes | Yes |
| Split / delete middle clips | No | Yes |
| Crop video area | No | Yes |
| Add captions | No | Yes |
| Add annotations/arrows/mosaics | No | Yes |
| Merge multiple clips | No | Yes |
| Adjust speed/color | No | Yes |
| Best for | Quickly cutting off the beginning and end | Any other editing needs |
How to Edit Videos in Panopto
Fast Track:
- In the Panopto editor, click Edit.
- Drag the trimming handle to select the video segment to save.
- Click Apply to save changes.
Panopto offers a built-in editor that only lets you trim videos. Here’s how to trim a video in the Panopto editor.
Step 1. In the video library, click the Edit button next to the target video to open the editor.
Step 2. Place your mouse cursor over the beginning or end of the timeline and you’ll see a dark gray edit handle.
Step 3. Click and drag the handle to trim sections of the video.
Step 4. Click the Apply button to save the changes.
If you want more tools and effects to edit and enhance your Panopto videos, try a third-party video editing application like MiniTool MovieMaker.
How to Edit Panopto Videos in MiniTool MovieMaker
Fast Track:
- Download the Panopto video to the PC.
- Install MiniTool MovieMaker.
- Import the Panopto video.
- Trim, change speed, and adjust color.
- Crop the video, add captions, and add elements.
- Export the video.
MiniTool MovieMaker is an easy-to-use and feature-rich video editor without watermark. It is one of the best video editing applications that helps beginners and amateurs create videos from images, video clips, and music. With its intuitive interface and rich features, it can transform your footage into a piece of art, giving your video a professional look. Moreover, it supports exporting MP4 videos up to 4K resolution for free.
Step 1: Download the Target Panopto Video
- Find the video you want to download in the video library and click the Settings icon next to it.
- Choose the Output option from the left-hand navigation.
- Under Video Podcast, select the video type and quality according to your needs and click Apply.
- Once done, click the Download Podcast option to get an MP4 video file.
Step 2: Install MiniTool MovieMaker
Click the button below to download free video editor and install this application on your computer.
MiniTool MovieMakerClick to Download100%Clean & Safe
Step 3: Add the Saved Panopto Video from the PC
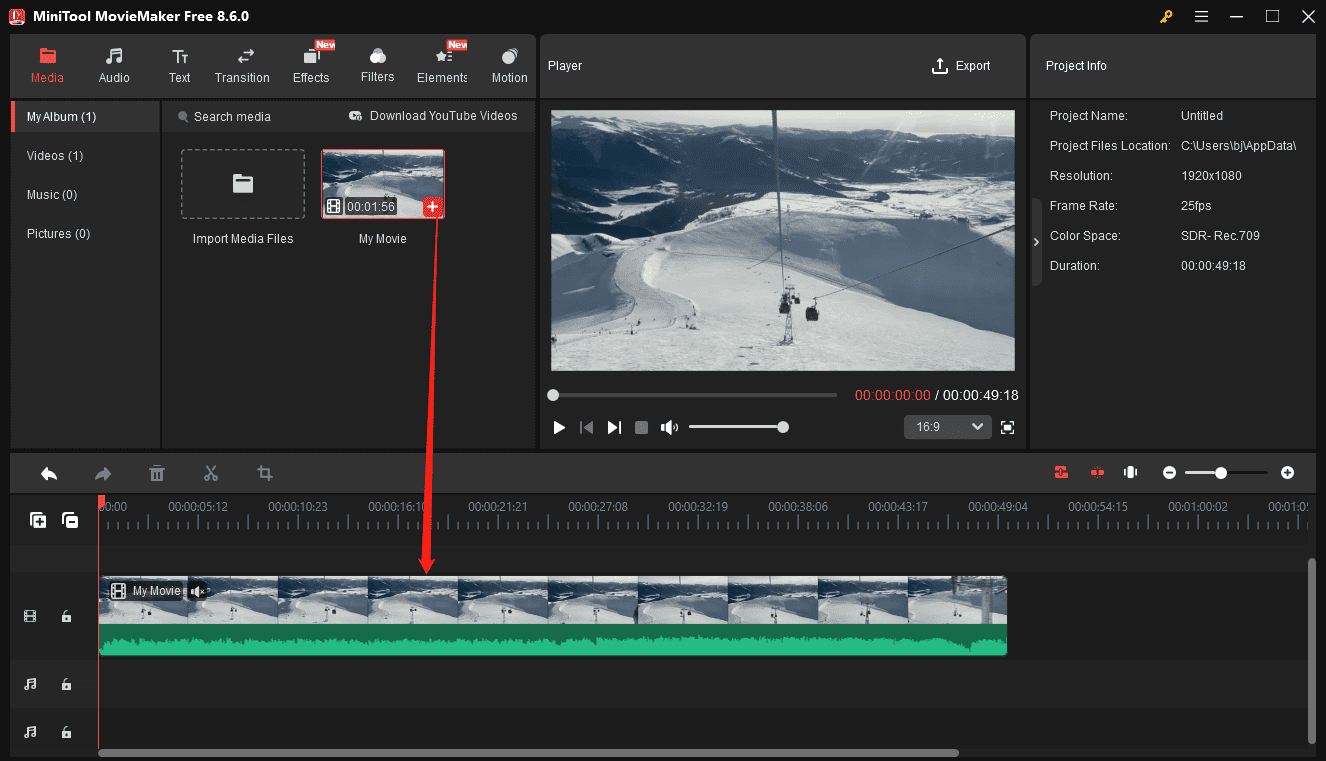
Launch MiniTool MovieMaker and close the promotion window to enter the app’s main interface. Under the Media tab, click the Import Media Files button to open your downloaded Panopto recording into MiniTool MovieMaker’s media library. Then, click the + icon on the clip or drag and drop it to the timeline.
Step 4: Trim the Panopto Video
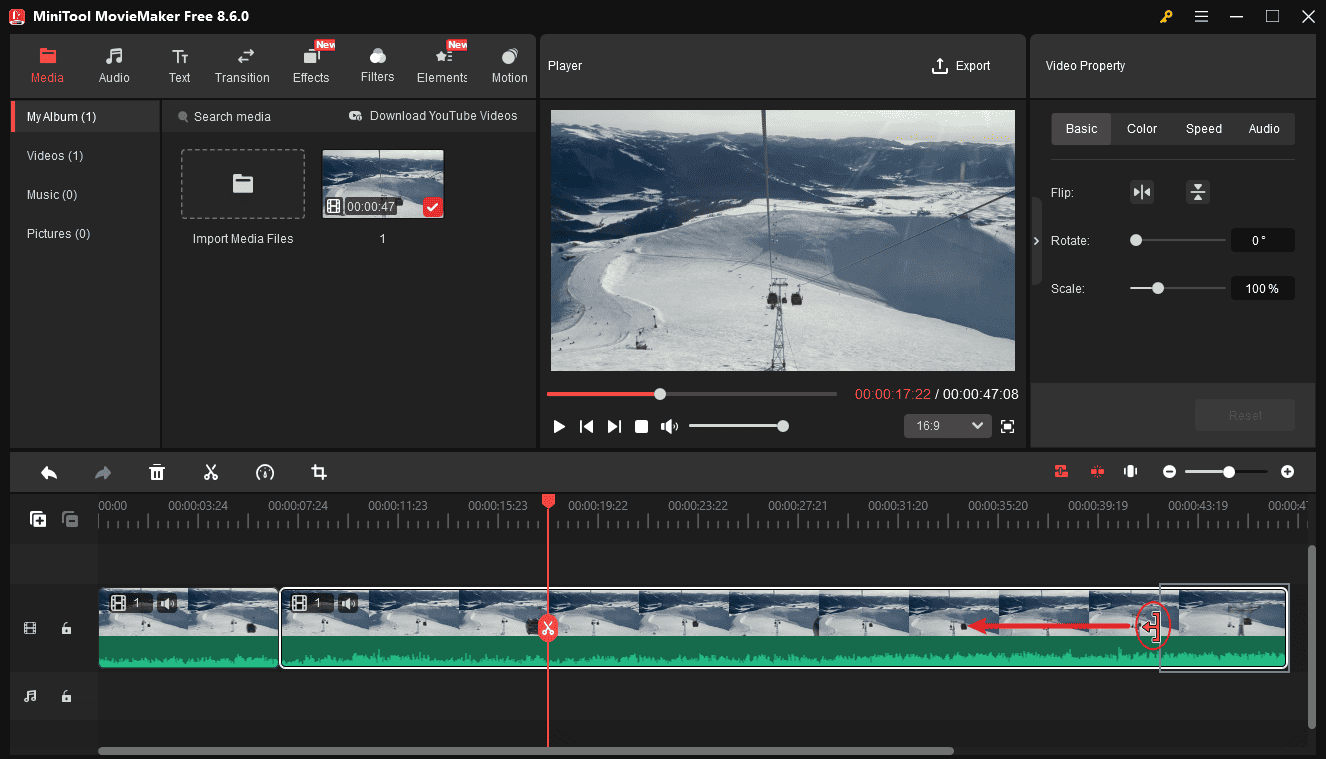
Click the Panopto video on the timeline, hover your mouse cursor over the start or end point of the clip, and you will see a double-headed arrow appear. Click and drag the arrow to remove unwanted parts at the beginning or end of the clip.
Step 5: Adjust the Clip’s Speed and Color
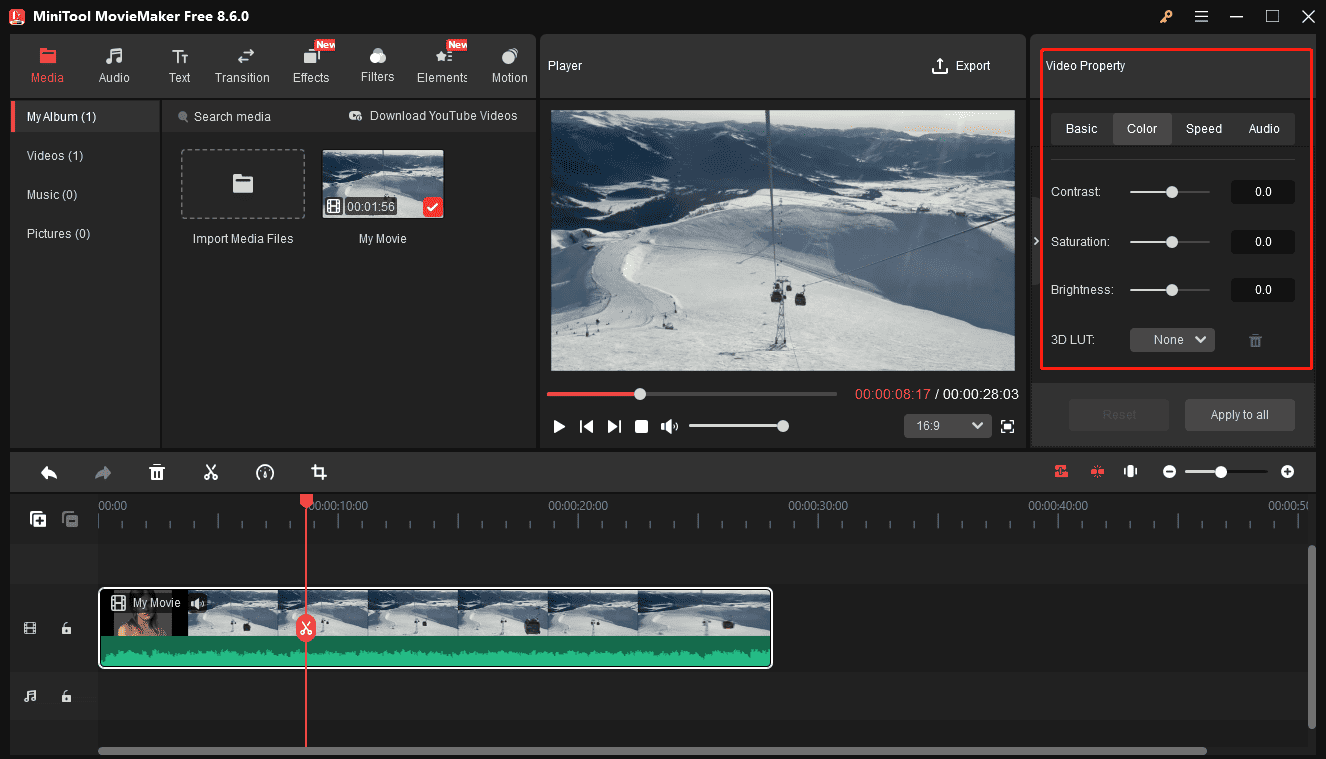
Edit video property: select the clip on the timeline to open Video Property. Rotate or flip the video under the Basic tab, go to the Color tab to adjust the clip’s contrast, saturation, and brightness, switch to the Speed tab to edit the video playback speed, and edit the clip’s audio in the Audio tab.
Step 6: Crop the Panopto Video
With the clip highlighted on the timeline, click the Crop icon on the timeline toolbar. Then, adjust the red rectangle and move it to select the area you want to save, or you can choose an aspect ratio to crop it, and click OK to save changes.
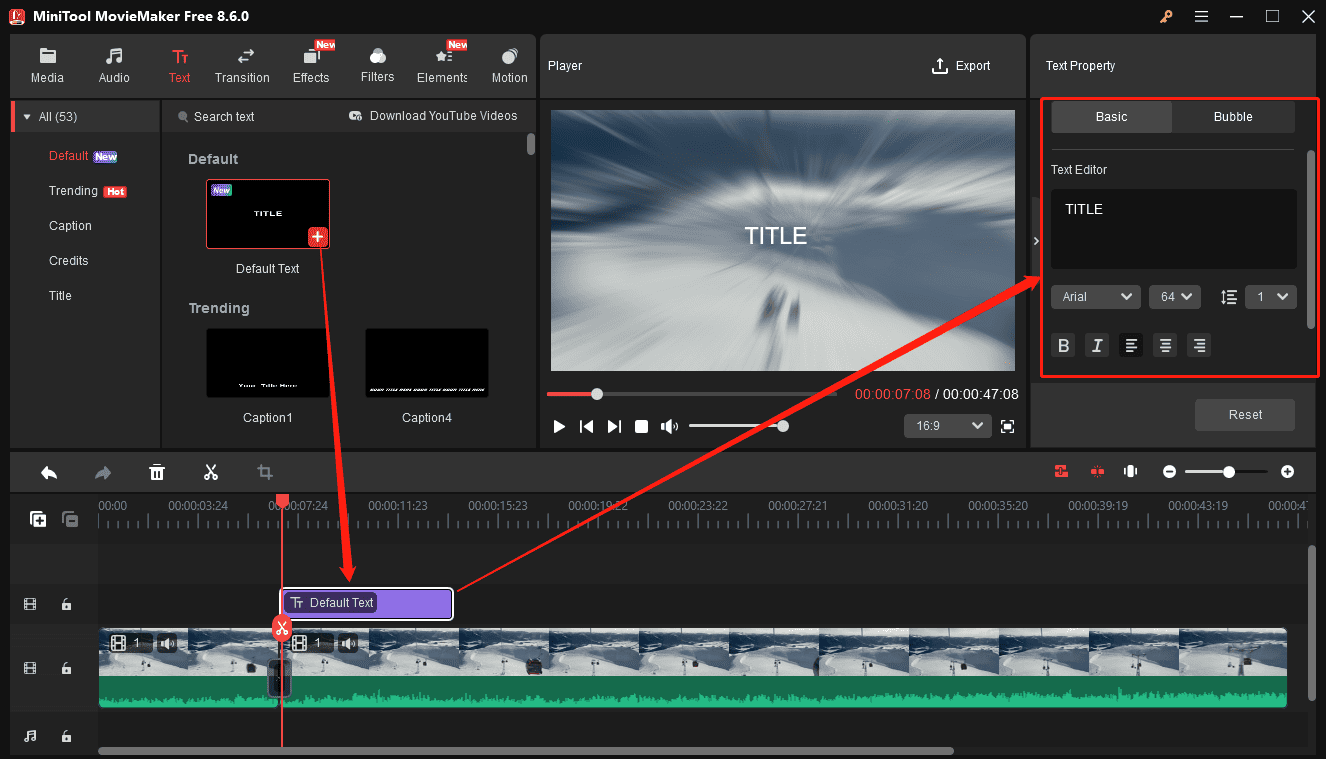
Step 7: Add Captions
Add captions: select the clip on the timeline and move the playhead to the position where you want the captions to appear, go to Text > Caption, add the desired text template to the timeline, and edit your text in the Text Editor.
Step 8: Add Elements
MiniTool MovieMaker provides various animated stickers to spice up your videos and images. If you want to highlight something in your video, you can add a shape to circle that area. Go to Elements > Shape, download a shape, and add it to the video. Then, you can scale or rotate it, adjust the duration, and its position.
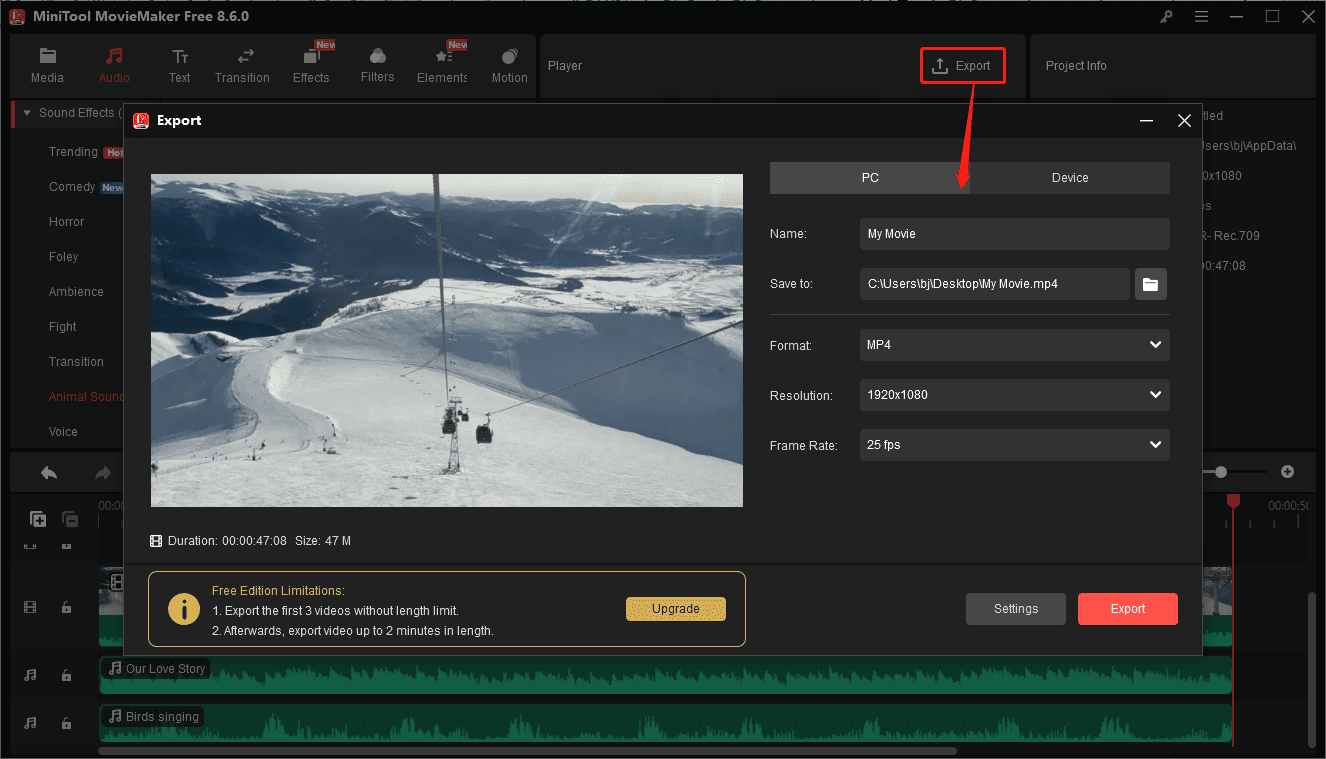
Step 9: Export the Video
After editing is complete, click Export in the top right corner. Configure the export settings, such as output folder, video format, resolution, frame rate, quality, and bitrate, and click the Export button to render the video.
Other features of MiniTool MovieMaker:
- Split, cut, and reverse videos.
- Combine multiple clips into a video.
- Add titles and end credits to the video.
- Apply filters and transitions to the video.
- Create an animated GIF from videos.
- ….
MovieMaker by MiniTool is an inexpensive, easy-to-use video editing program. It includes a fair number of effects and gives you easy ways to join your clips, add transitions, and overlay objects and text.https://www.pcmag.com/reviews/minitool-moviemaker
Conclusion
Panopto’s built-in editor only supports trimming videos. If you want to edit and enhance your Panopto recording with more options, MiniTool MovieMaker won’t let you down. Follow the steps above and start your creation now. If you encounter problems while using MiniTool MovieMaker, contact us via [email protected] for assistance.
How to Edit Panopto Videos FAQ
About The Author

Position: Columnist
Cora is a tech writer specializing in digital media workflows, with over six years of hands-on experience in video post-production, media transcoding, and screen capture. Her writing is always clear and practical. Cora also produces in-depth software reviews for users across skill levels to help them find the right tool and enjoy video editing.
User Comments :