In the world of high-definition (HD) video, two terms often come up in discussions: 1080i and 1080p. These two resolutions are widely used in televisions, monitors, and other display devices, but they have distinct characteristics that set them apart. In this article offered by MiniTool movie-making tool, we will delve into the differences between 1080i and 1080p, exploring their features and helping you understand which one may be better suited for your viewing needs.
1080i vs 1080p: Definition
First, let’s clarify what these terms actually mean. The number 1080 represents the vertical pixel count, which amounts to 1,080 pixels. Both 1080i and 1080p refer to the same resolution in terms of pixel count. However, the “i” and “p” stand for interlaced and progressive, respectively, and they denote different scanning methods used to display the image on the screen.
1080i stands for 1080 interlaced. In interlaced scanning, the image is displayed by alternating between odd and even lines, or fields, of pixels. This means that in each frame, only half of the lines are displayed at a time. The first frame displays the odd lines, and the next frame displays the even lines. This scanning method was commonly used in older CRT (cathode ray tube) televisions.
On the other hand, 1080p stands for 1080 progressive. With progressive scanning, the entire frame is displayed at once, with all lines painted sequentially from top to bottom. This method results in a smoother, more fluid image and is the standard for modern HD displays, including LCD, LED, and OLED screens.
1080i vs 1080p: Which Is Better 1080i or 1080p?
Now, let’s discuss the differences between 1080i and 1080p and which one is better. The key distinction lies in how the frames are displayed and the visual quality they offer.
In terms of visual quality, 1080p is generally considered superior to 1080i. The progressive scanning of 1080p produces a smoother image with more clarity and detail. The entire frame is displayed at once, ensuring that there is no loss of detail in fast-moving scenes. This makes 1080p ideal for sports, action movies, and gaming, where motion is a crucial factor.
On the other hand, 1080i has the advantage of requiring less bandwidth compared to 1080p. Since it only displays half of the lines in each frame, the data transmission requirements are lower. This made 1080i a popular choice for broadcasting television signals in the past, as it allowed for efficient use of bandwidth. However, as display technology advanced, and progressive scanning became more prevalent, broadcasters and content creators gradually shifted to 1080p.
So, which one is better, 1080p or 1080i? The answer depends on the context. If you have a modern display, such as an LCD or OLED TV, 1080p is generally the recommended option. Its progressive scanning ensures a smoother and more detailed image, especially for high-motion content.
However, if you’re dealing with older content or broadcasting signals that are still in 1080i, the choice may be out of your hands. In such cases, your display device will deinterlace the 1080i signal and convert it to a progressive format for display. This process can introduce some artifacts and reduce the overall image quality compared to native 1080p content.
1080p Video Editing
Since 1080p seems better than 1080i and has gained great popularity, many people want to create their videos or movies in 1080p. Then, they can rely on a professional 1080p video editor like MiniTool MovieMaker. Just follow the below steps to make a standard 1080p video according to your needs.
MiniTool MovieMakerClick to Download100%Clean & Safe
Step 1. Download and install MiniTool MovieMaker on your Windows computer.
Step 2. Open the program, select a proper video aspect ratio, and click New Project to enter its main interface.

Step 3. Click the Import Media Files option in the upper left under the Media tab to upload the media files you’d like to use to create your 1080p video, including video clips, photos, or music.

Step 4. Add the uploaded media files to the below timeline. Just drag and drop them to their corresponding tracks, videos/pictures on the video track and music on the audio track.
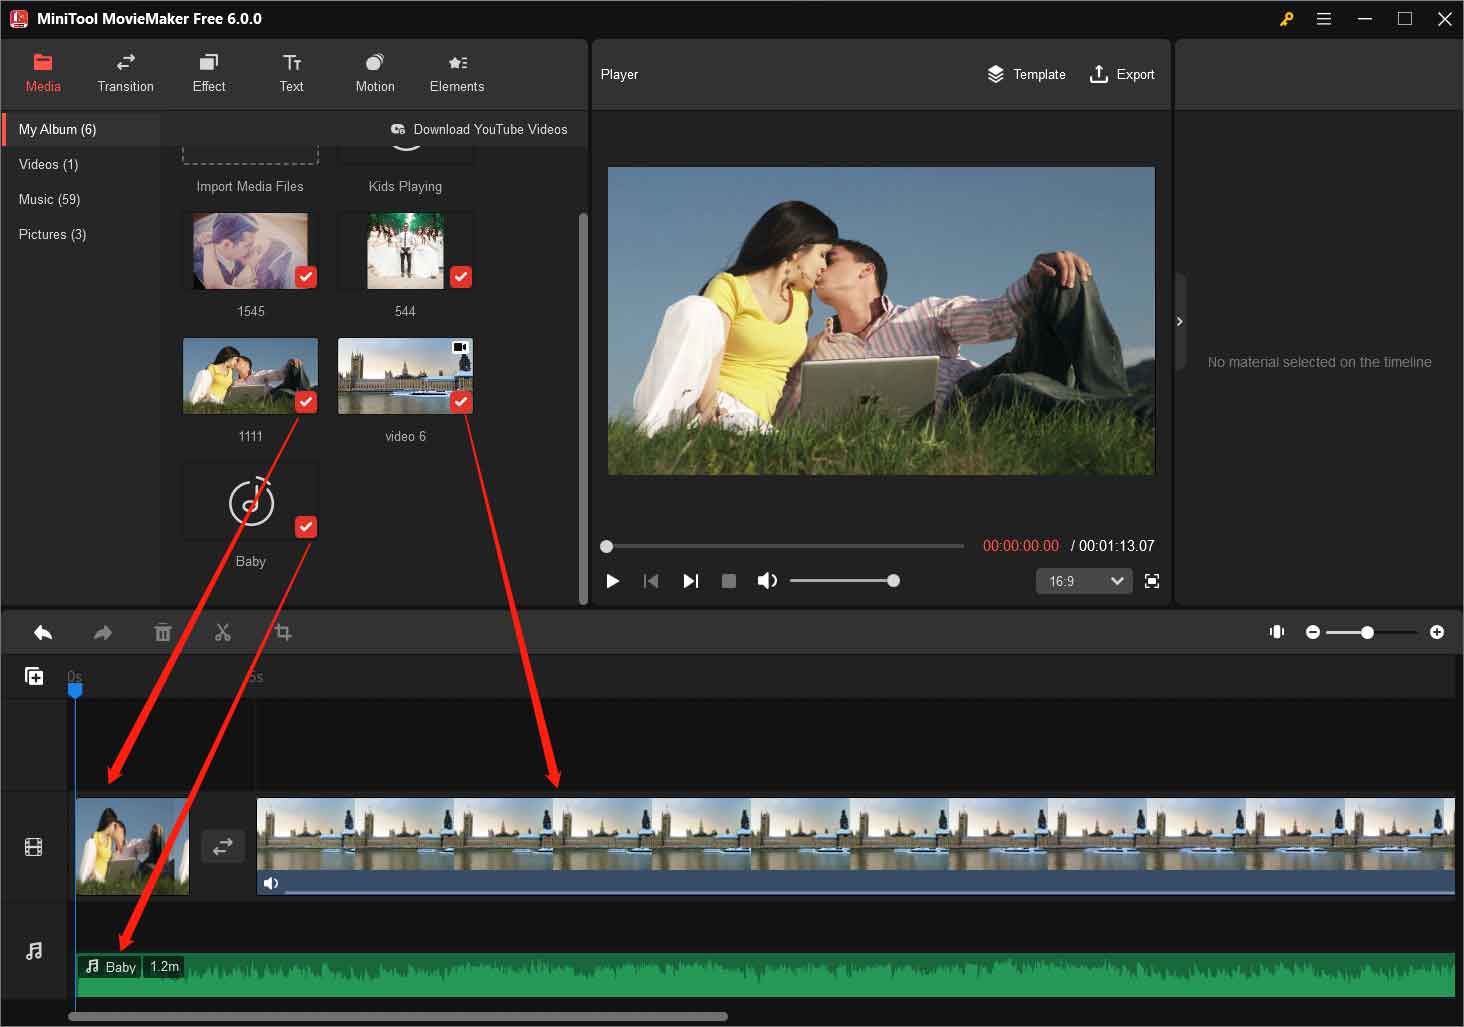
Step 5. Arrange the order of the media files by dragging and dropping them to the target location on the timeline.
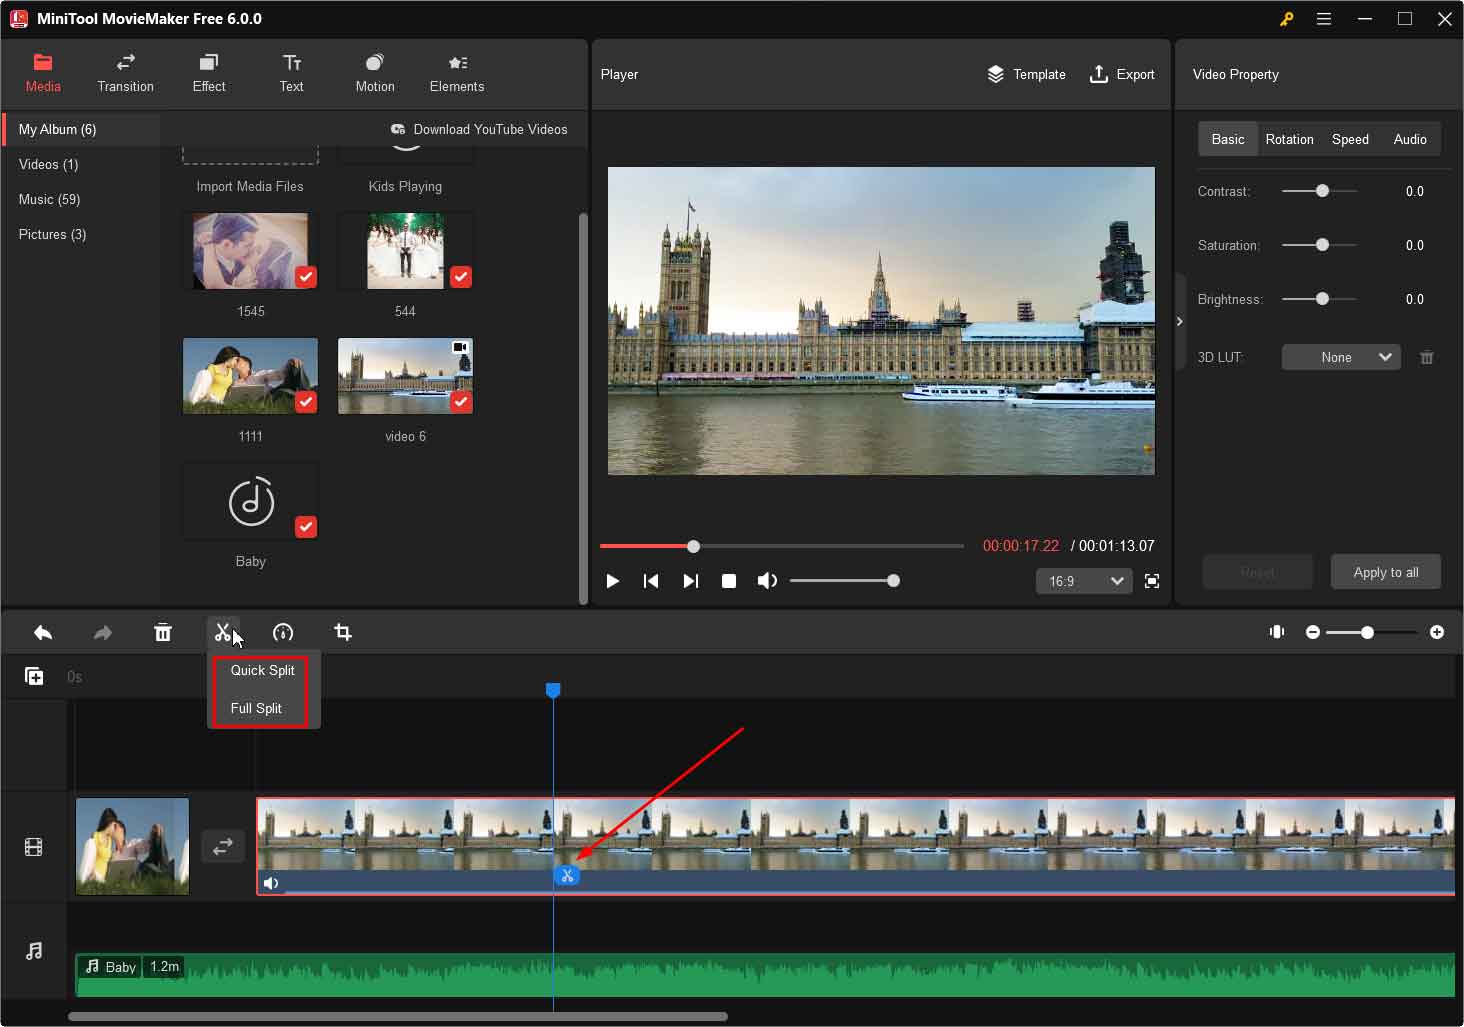
Step 6. Split your video clip. Place the playhead where you want to split the video clip and click the scissors icon on the playhead or click the scissors icon on the toolbar and select Quick Split.
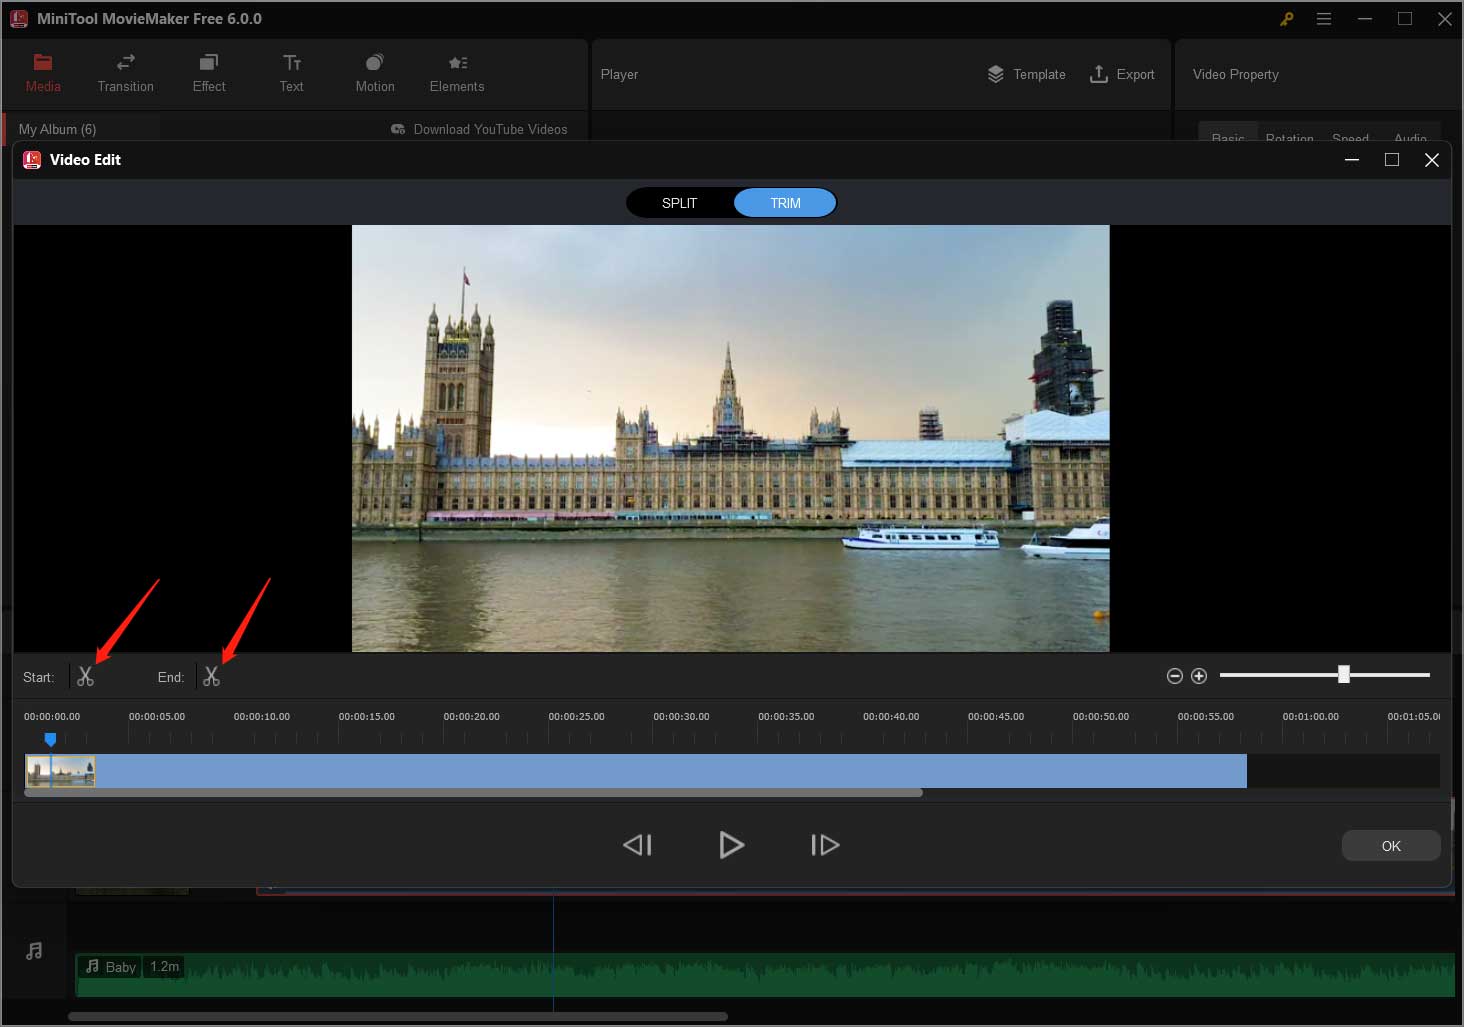
Step 7. Trim your video clip. Click on the target video clip, click the toolbar scissors icon, and choose Full Split. Then in the new popup, switch to the TRIM tab. Move the playhead at the start of the wanted video period and click the scissors icon behind the Start option on the toolbar. Next, put the playhead at the end of the wanted video period and click the scissors icon behind the End option on the toolbar. Click OK to save changes.
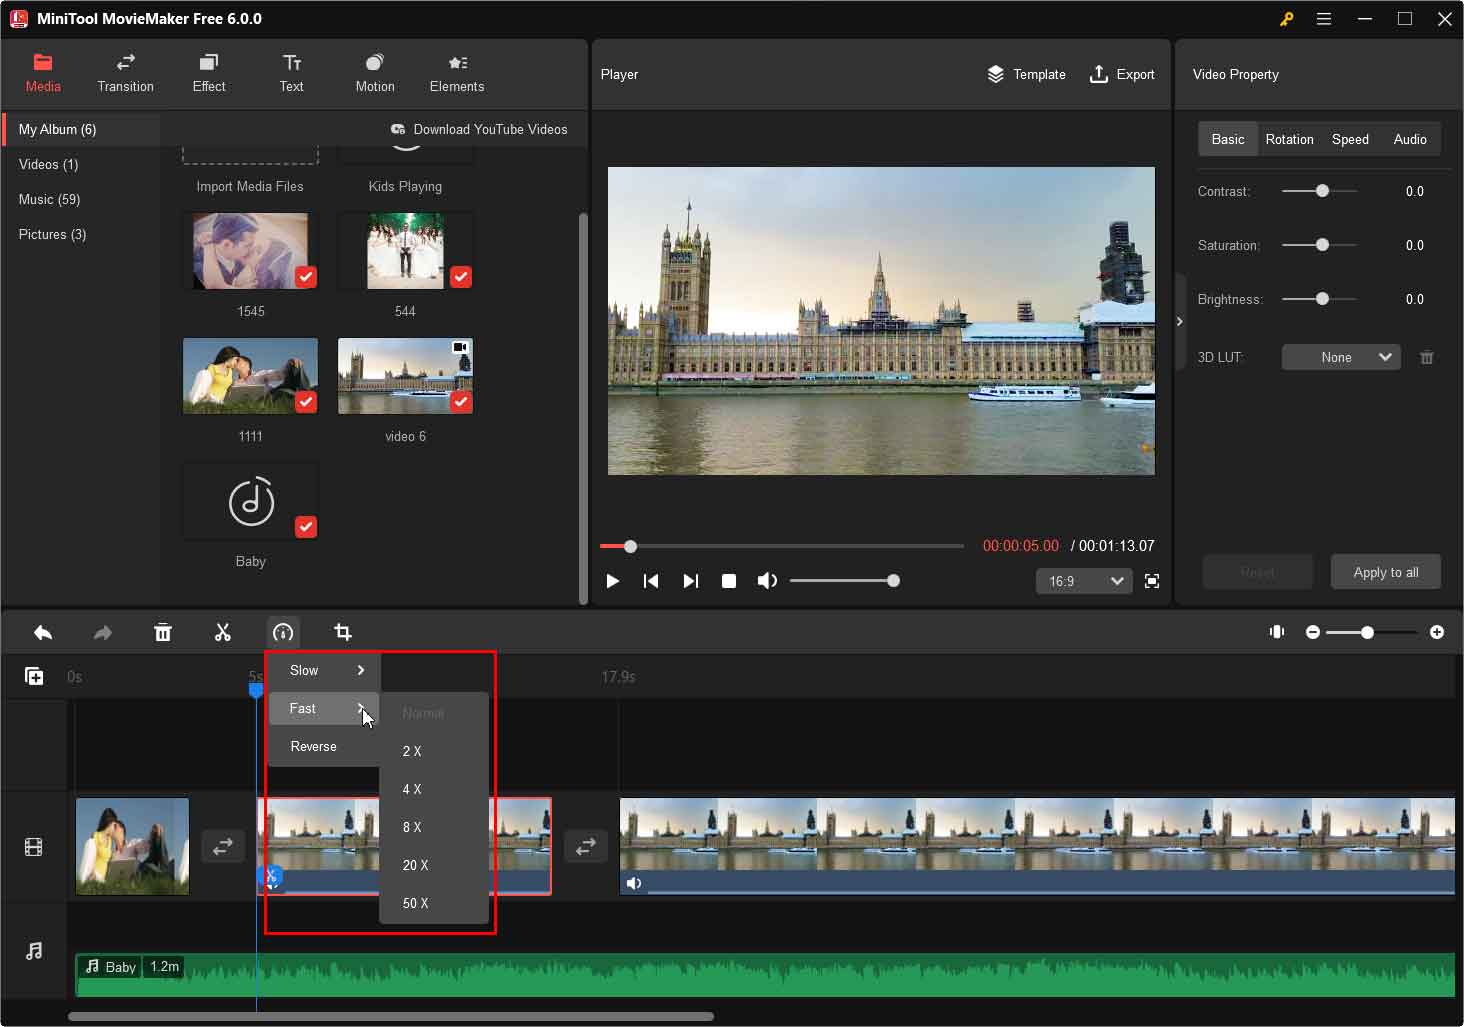
Step 8. Change the speed of a video clip. Highlight the video clip, click the Speed icon (dashboard) on the toolbar, and choose Slow, Fast, or Reverse.
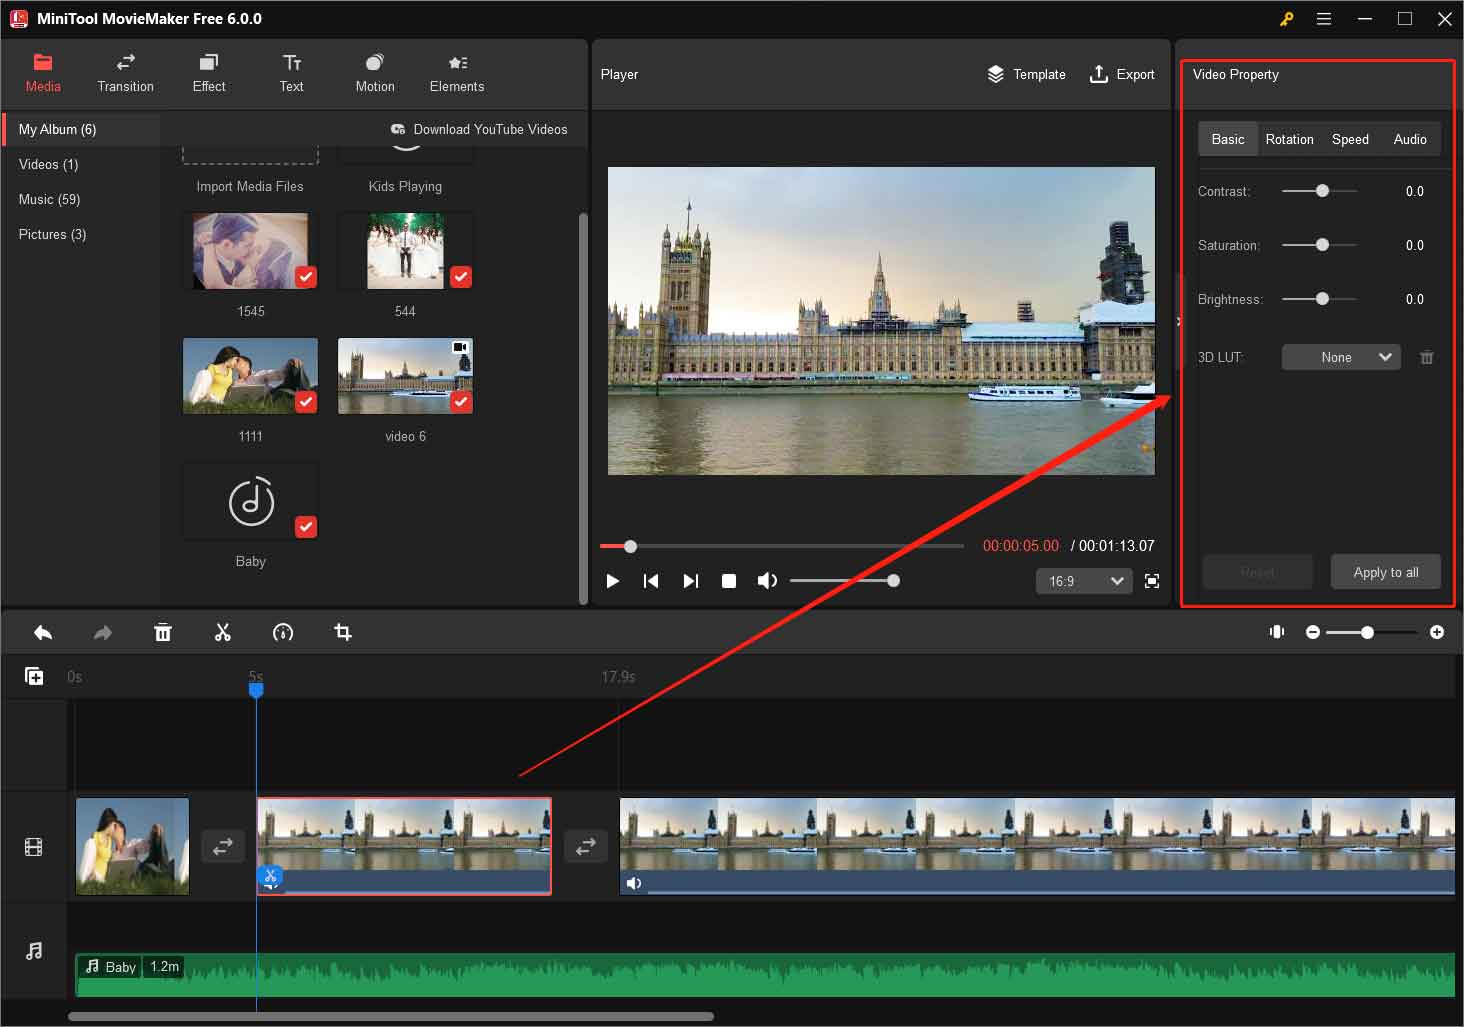
Step 9. Click on a video clip on the timeline to select it. The Video Property will appear in the upper right of the main window. There, you can adjust the contrast, saturation, brightness, speed, and audio of the video clip.
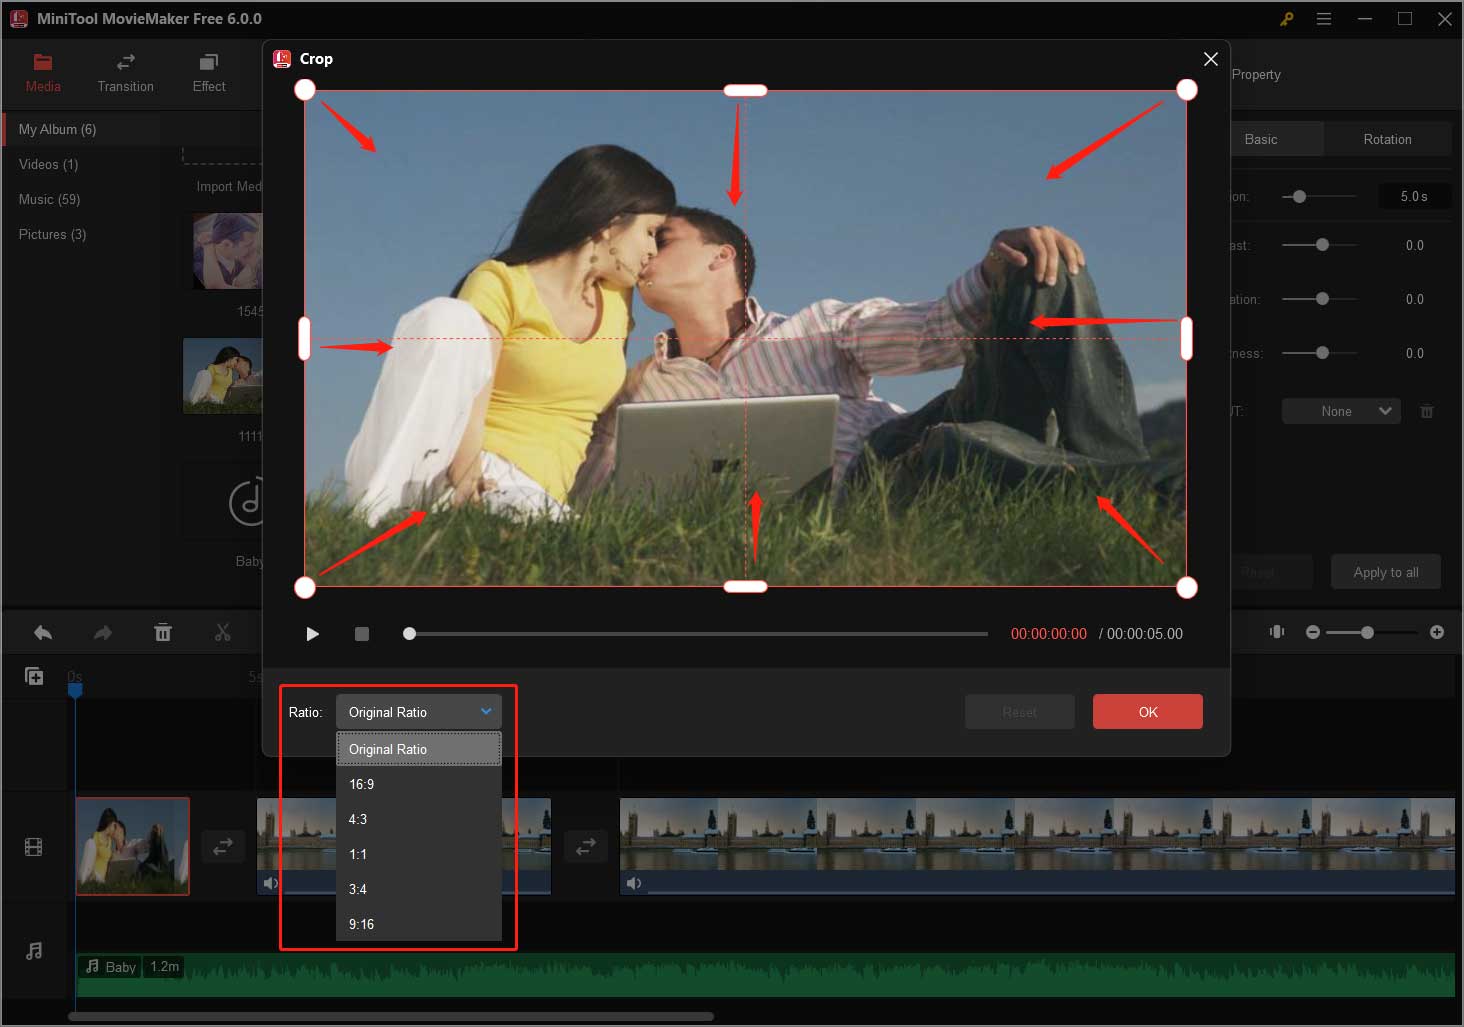
Step 10. If there are photos in your video, you can crop them manually or by a specific ratio. Just select the picture on the track and click the Crop icon on the toolbar. Of course, you can crop a video clip as you like.
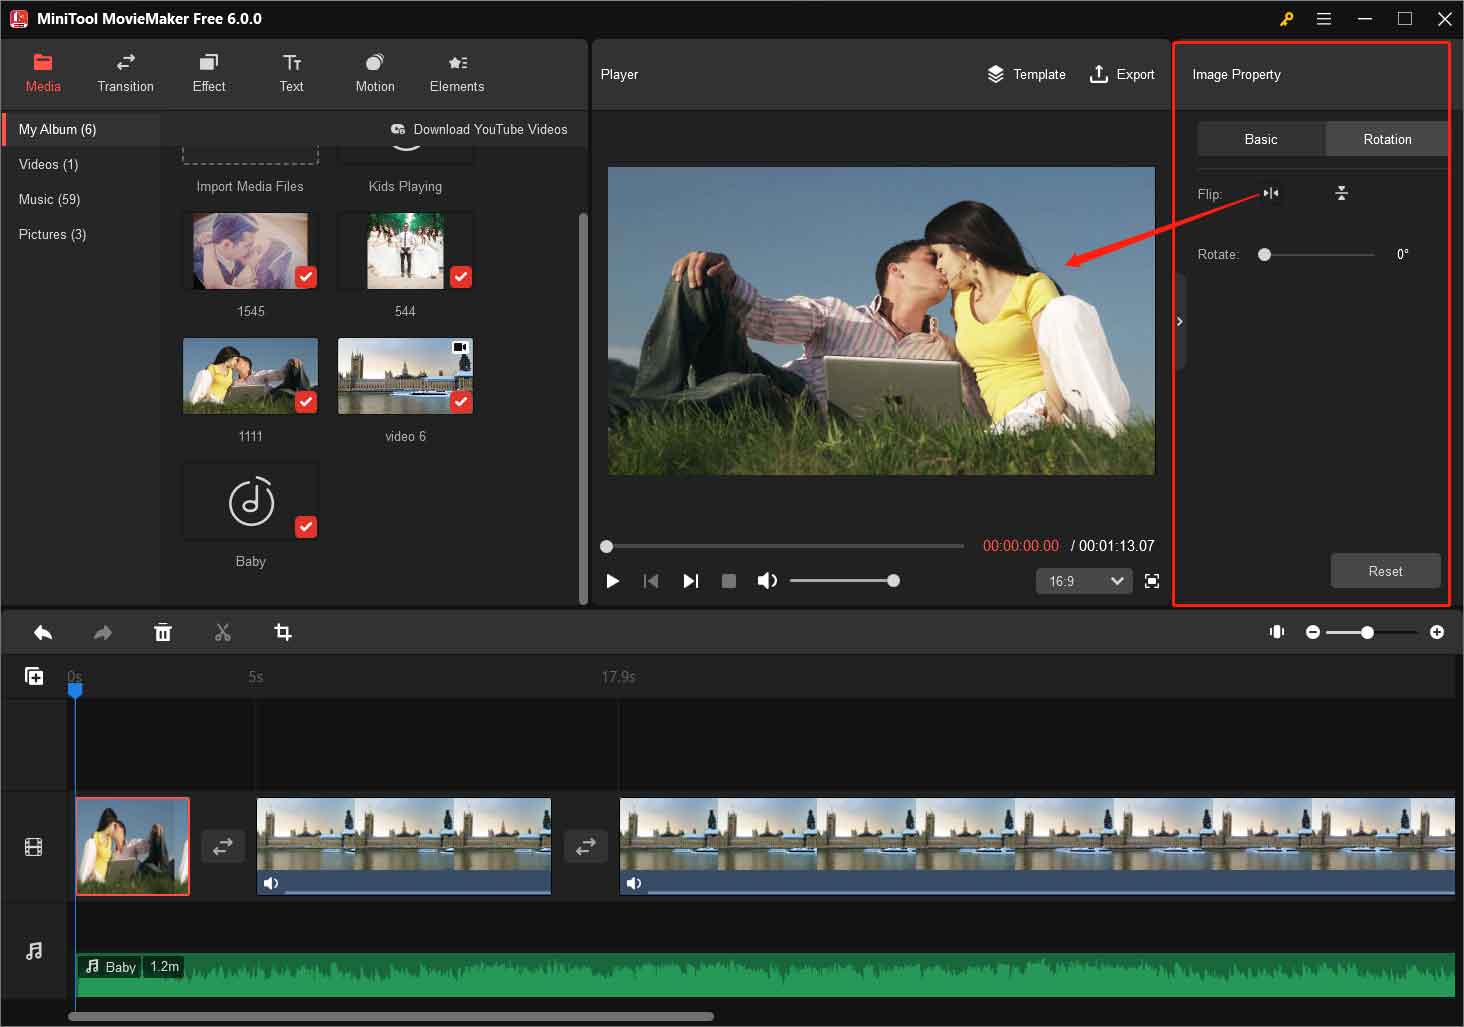
Step 11. Moreover, you can rotate or flip the photo in the upper-right Image Property section.
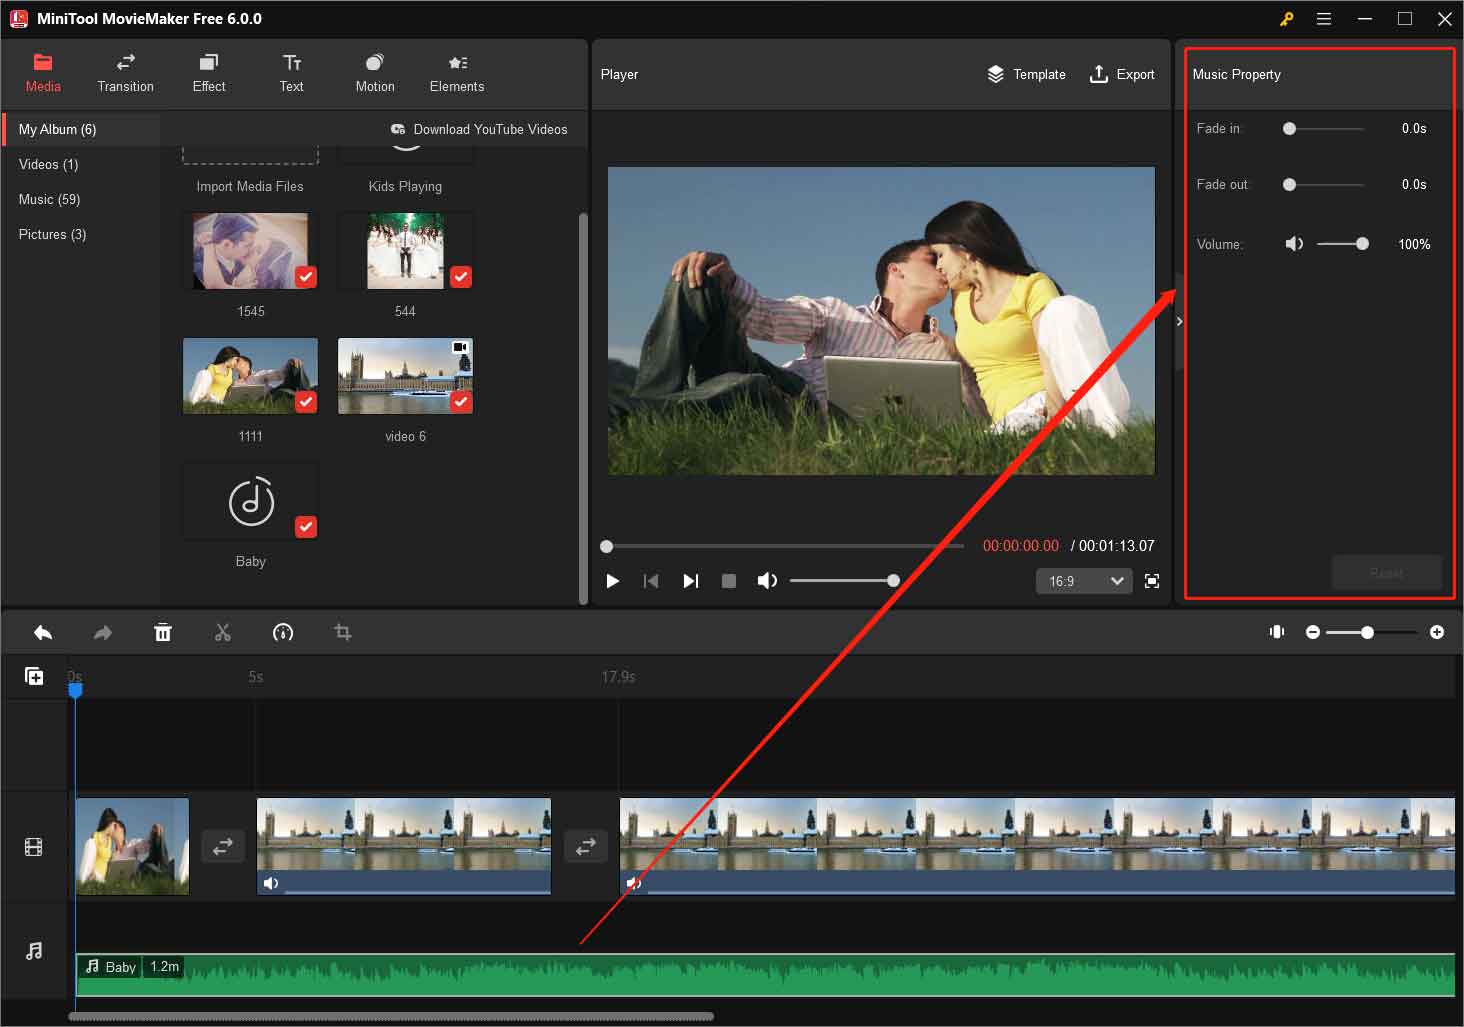
Step 12. Edit the music you add to your video. In the Music Property area, you are able to fade in / fade out the audio or change its volume.
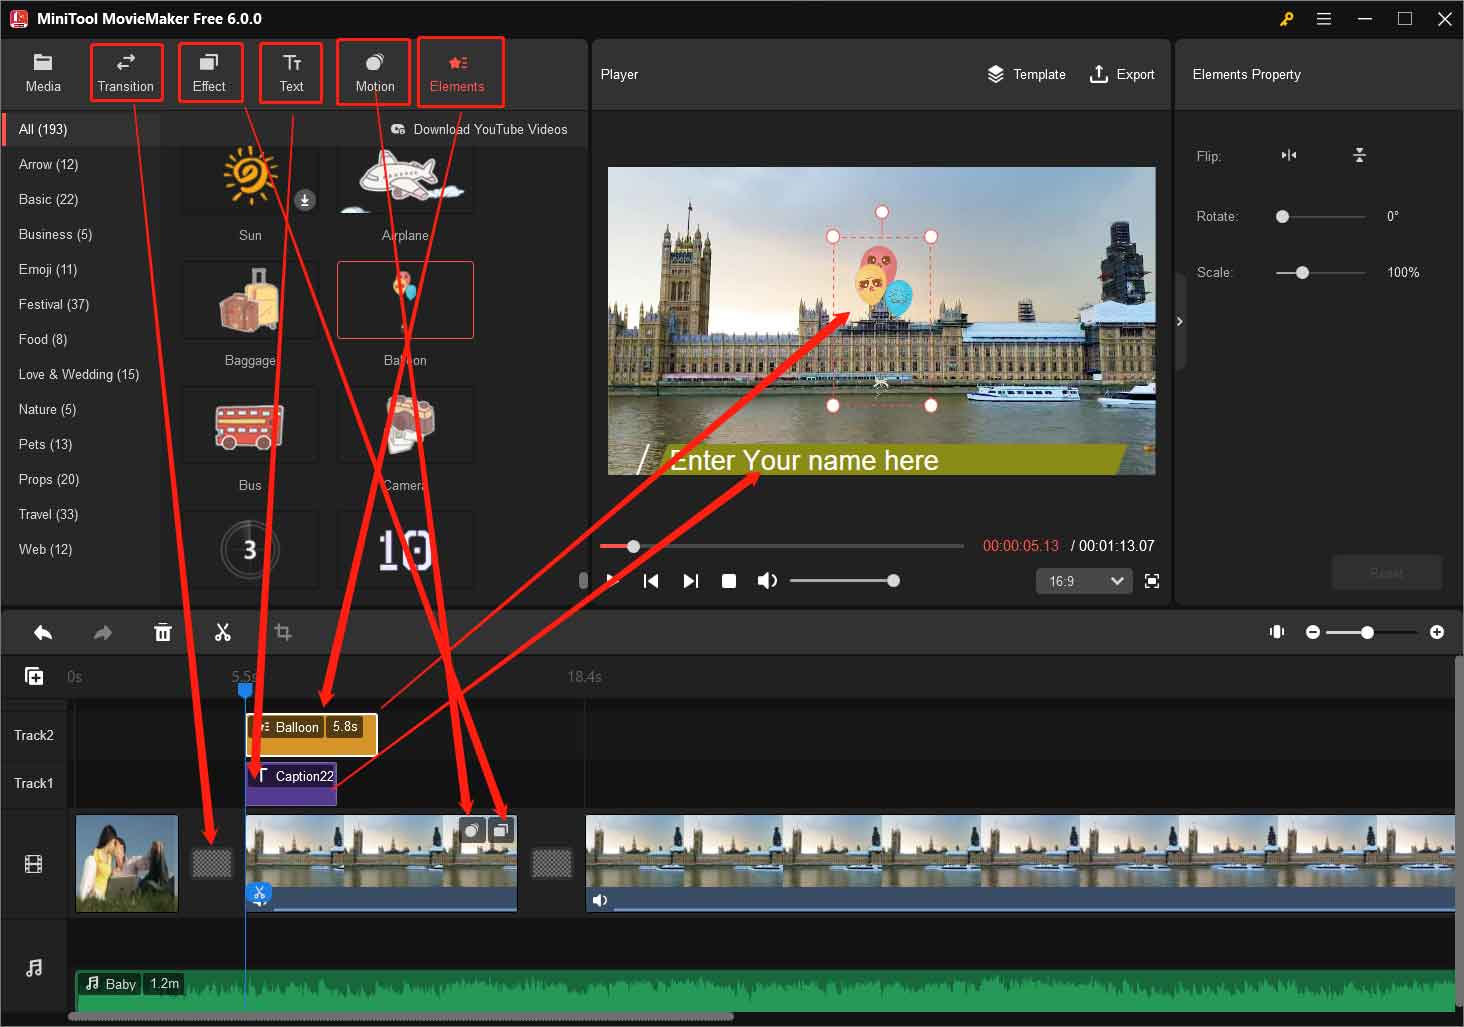
Step 13. Now, add the various effects to your video including transition, filter effect, text, motion, and animated elements.
Step 14. Preview your video in the Player section. If there is something you are still not satisfied with, continue editing until everything is ok.
Step 15. Click the Export option to save your video in 1080p resolution.
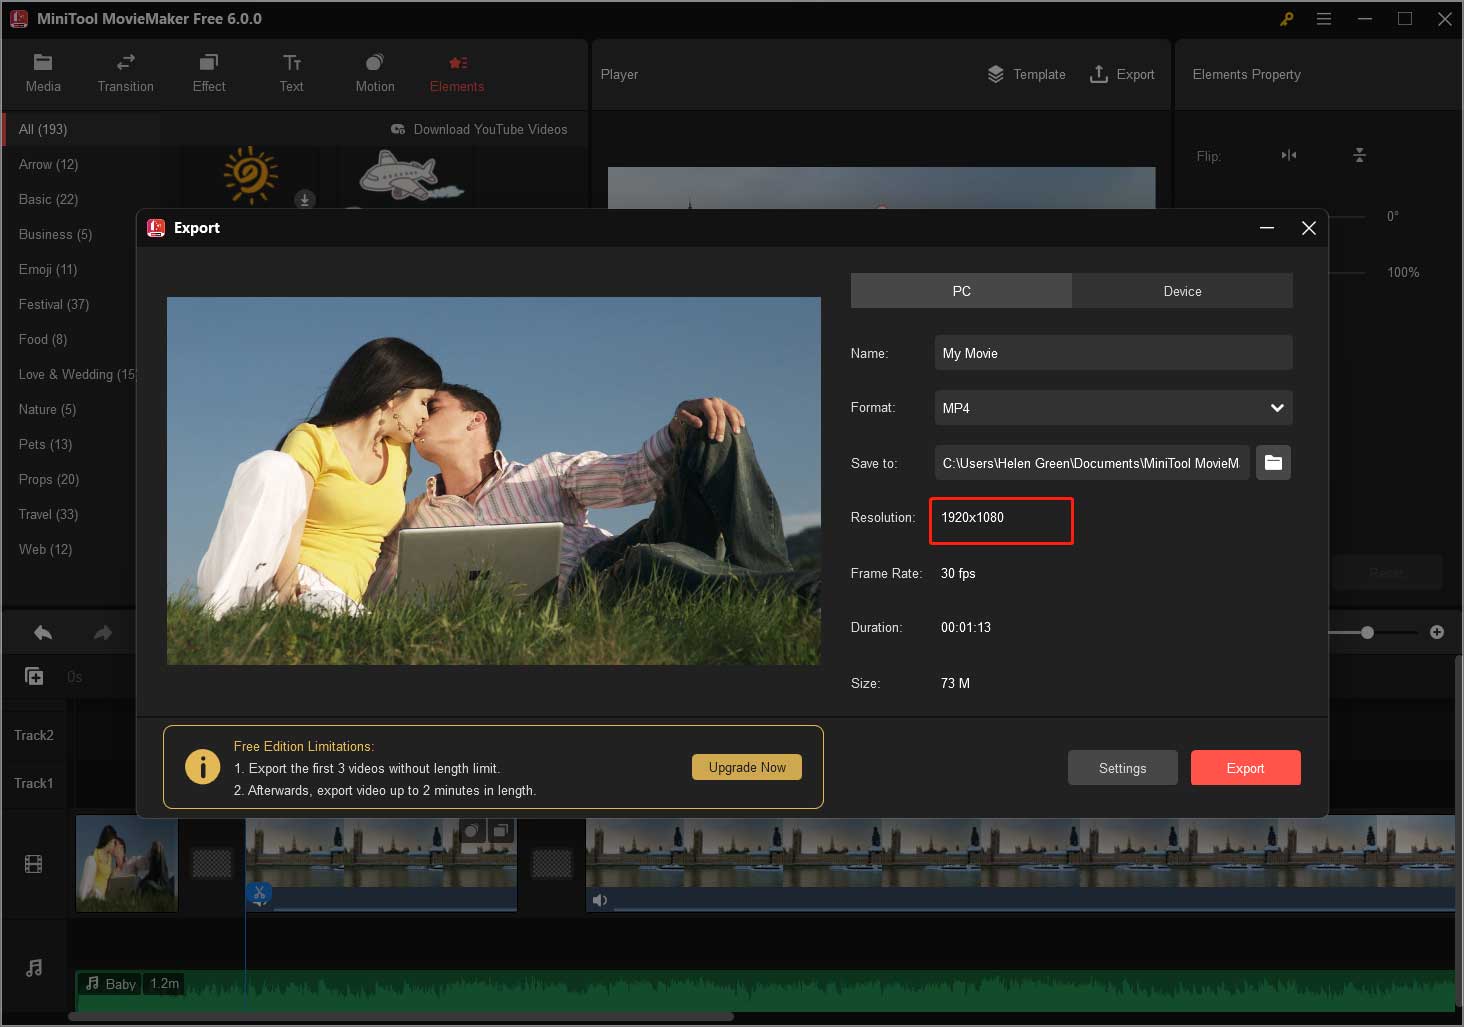
Finally, you have successfully created a wonderful 1080p video!
1080i vs 1080p: Verdict
In conclusion, 1080p is generally the preferred choice for its superior visual quality and compatibility with modern display technologies. Its progressive scanning method ensures a smoother and more detailed image, particularly for fast-paced content. However, if you encounter content or broadcasts in 1080i, your display device will handle the conversion to progressive scanning to ensure compatibility. While 1080i may have been more prevalent in the past, it is gradually being phased out in favor of 1080p.
Related Articles
- 720p vs 1080p: Difference Between 720p and 1080p Resolution
- 8 Best Free 1080p Video Players to Play Full HD Videos
- The Evolution of 4K Encoders and Decoders: Revolutionizing Video Streaming
- Hulu 4K: Elevating Your Streaming Experience with High-Quality Content
- 4K vs 5K: Exploring the Differences and Choosing the Right Monitor
About The Author

Position: Columnist
Helen is a tech writer with over 10 years of experience. She specializes in creating easy-to-follow guides for video editing, media file conversion, and computer performance. Helen doesn't just write—she tests every software herself and listens to feedback from users and experts. Her goal is to make complex programs simple so that everyone can solve their tech problems with confidence.
User Comments :