How to Rotate Video in Premiere Pro
This part gives detailed steps to rotate video in Premiere Pro. Now, let’s get started!
Step 1. Download and Install Premiere Pro
You need to go to the official website to download Adobe Premiere Pro and install it on your computer. Then launch it.
Step 2. Create a New Project
After running Premiere Pro, you need to click the File tab at the top menu bar and click the New option to create a new project.
Step 3. Import a Video
You should click on File again, choose the Import option to choose a video you want to rotate, and click Open to import it. Then the video will appear in the Project panel. You need to drag and drop it onto the timeline.
Step 4. Rotate Your Video
Click on the video on the timeline to highlight it, click the Effects Controls tab, open the Motion dropdown, and you can see the Rotation option. Then you can click the number next to Rotation and enter the degree you desired.
Tips: You can also flip a video in Premiere Pro. Click the Effects tab in the Project panel and expand the Distort dropdown to double-click on Transform. Then untick the Uniform Scale checkbox. If you want to flip a video vertically, you need to change the value of Scale Height to -100. Or change the Scale Width value to -100 if you want to flip a video horizontally.
Step 5. Export Your Video
After making other editions, you can click on File and move to Export to export your video.
An Alternative to Premiere Pro for Rotating Video
Though Premiere Pro has more editing features that can make your video better, it is not suitable for beginners and its free trial only allows you to use it for 30 days for free. If you want to learn how to use it and use it further, you need to pay for its pricing plan. Alternatively, you can choose a free video editor like MiniTool MovieMaker to rotate and edit videos.
MiniTool MovieMaker helps you to turn horizontal video into vertical video and enables you to rotate a video to 90, 180, 270, and other degrees you need. Like Premiere Pro, it can also flip a video vertically and horizontally. Compared with Premiere Pro, MiniTool is more suitable for beginners with its intuitive interface and simple operation. Here are detailed steps to rotate a video with MiniTool MovieMaker.
Step 1. Click the below download button to download and install MiniTool MovieMaker on your computer.
MiniTool MovieMakerClick to Download100%Clean & Safe
Step 2. Run MiniTool MovieMaker and click New Project to enter the main interface. Click the Import Media Files area to upload a video that needs to rotate and directly drag and drop it onto the timeline.
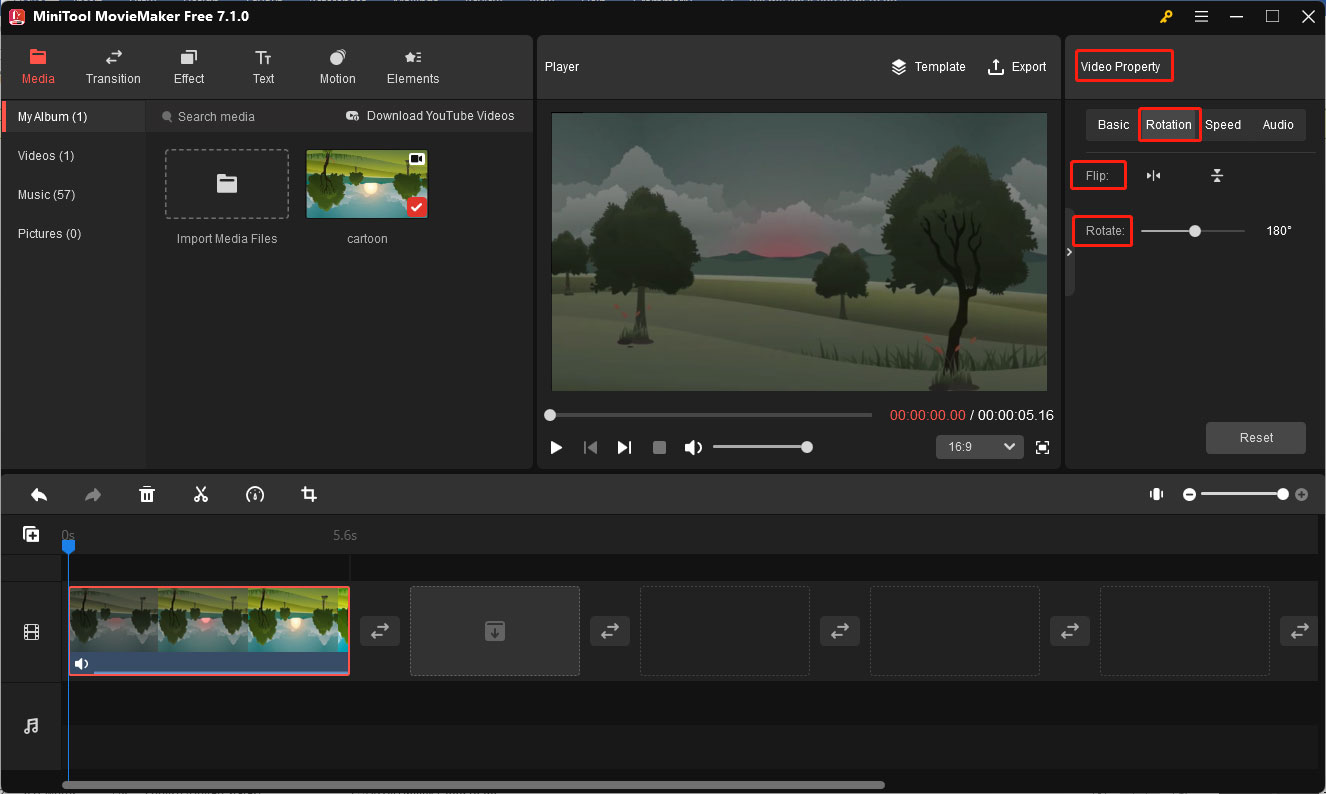
Step 3. Go to the Video Property section, click the Rotation tab, and drag the Rotate slider to rotate the video. Also, you can click the option Flip Vertical or Flip Horizontal to flip a video. You can preview the changes in the Player section.

Step 4. Click the Export icon in the Player section, personalize the output parameters like format, resolution, codec, bitrate, and others, and click the Export button.
You may also like:
- How to Rotate a Video in Windows Effectively [Detailed Guidance]
- A Guidance on How to Make Color Correction in Premiere Pro
- Can Sony Vegas Rotate Video? Here Are 2 Ways You Can Try
Conclusion
How does Premiere Pro rotate video? The above has shown you how to rotate video in Premiere Pro and an additional tip for flipping a video in Premiere Pro. Moreover, you can also try MiniTool MovieMaker to rotate or flip a video.


User Comments :