Color correction is the process of adjusting the exposure, brightness, white balance, and contrast of the video to redefine it. Premiere Pro is a professional video editor that offers some useful features and color correction effects to make color correction. How to use Adobe Premiere Pro color correction features? The following content will show you guidance on how to make color corrections in Premiere Pro.
How to Make Color Correction in Premiere Pro
If you don’t know how to use color correction in Premiere Pro, you can follow the below detailed steps.
Step 1. Download and install Adobe Premiere Pro
You need to go to the Adobe website to download Premiere Pro and install it on your computer.
Step 2. Import Your Video to Premiere Pro
After launching Premiere Pro, you need to import the video first. Click the Import Media to Start option to upload the video you want make color correction and directly drag and drop the video to the timeline.
Step 3. Enable Color Correction Workspace
Click the Window tab on the top menu bar, move to Workspace, and click on the Color option. Or you can go to Window and choose the Lumetri Color tab.
Step 3. Adjust the Color Settings in the Lumetri Color Tab
You can find there are many different Lumetri scopes on the left side including Basic Correction, Creative, Curve, Color Wheels & Match, HSL Secondary, and Vignette. You can adjust the white balance, exposure, contrast, highlights, shadows, saturations, whites, and blacks in the Basic Correction part. Moreover, you can adjust color using RBG and hue saturation curves in the Curves part. There are many features waiting for you to explore.
Step 4. Export Your Video
After finishing color correction in Premiere Pro, you can click the File tab, go to Export, and choose Media. Later, you can personalize the output parameters in the Export Settings window and click on the Export button to save your video.
Tips: Premiere Pro also has an auto color correction feature. You just need to place the playhead in the location where you want to make color corrections and click on the Auto button under the Basic Correction part.
A Good Alternative Way to Make Color Correction
Adobe Premiere Pro only gives you 30 days to use it for free. Once the free trial ends, you need to purchase it. MiniTool MovieMaker is a good alternative way to make color correction for free. It is a free and easy-to-use video editor that is suitable for beginners. Unlike Premiere Pro, you can master MiniTool MovieMaker easily.
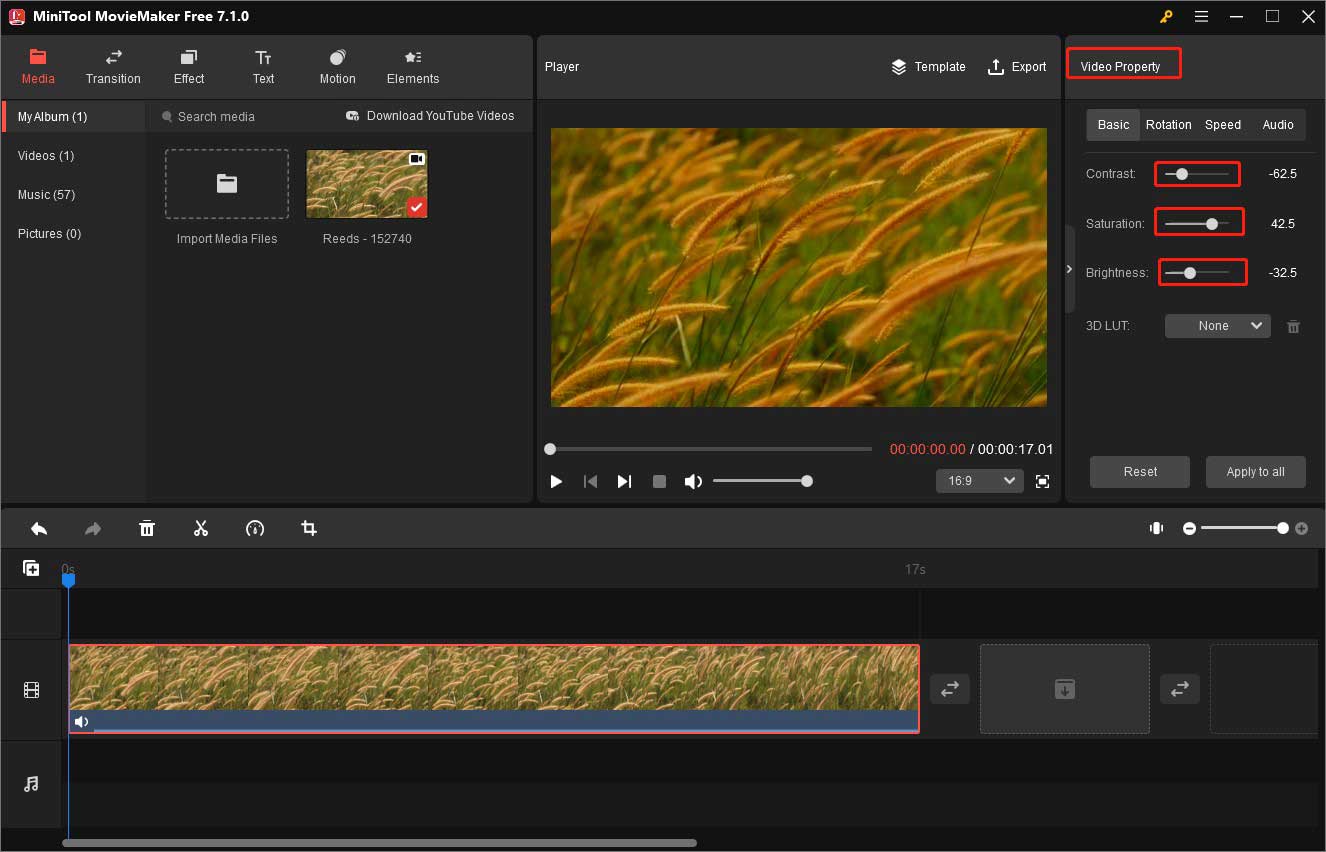
MiniTool MovieMaker enables you to make color corrections by adjusting the contrast, saturation, and brightness. Moreover, you can apply 3D LUTs to change color. Here’s how:
Step 1. Get the installation package of MiniTool MovieMaker by clicking the below download button and install it on your desktop.
MiniTool MovieMakerClick to Download100%Clean & Safe
Step 2. Run MiniTool MovieMaker, click the Import Media Files area to upload a video from your computer, and directly drag and drop it to the timeline.
Step 3. Go to the Video Properties section and drag the Contrast/Saturation/brightness slider to make the color correction.

Or you can expand the 3D LUTs dropdown to choose one and click on it to apply it to the video clip
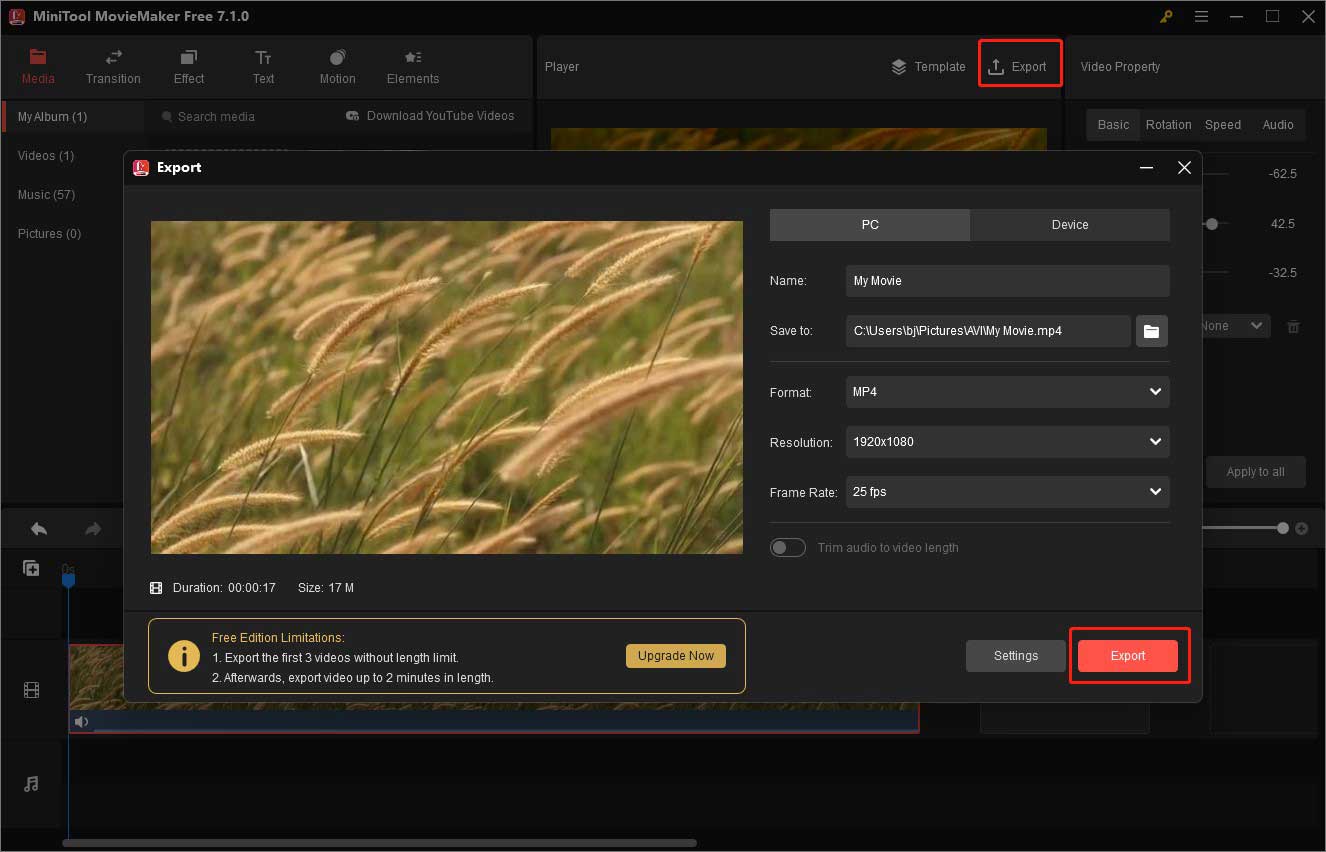
Step 4. After finishing editing, you can click the Export icon in the Player section and choose the video format, final destination, resolution, and other output parameters. Then click on the Export button.

You may also like:
Can Camtasia Speed Up Video? Here’s a Step-by-Step Guidance
A Guidance on How to Make a Slideshow on Mac Easily
Conclusion
Premiere Pro can help you make color corrections for your video. How to make color correction in Premiere Pro? After reading this post, you must have mastered the method. Alternatively, you can try MiniTool MovieMaker to make color corrections.


![How to Edit Webex Recording on PC [Step-by-Step Guide]](https://images.minitool.com/moviemaker.minitool.com/images/uploads/2023/10/edit-webex-recording-thumbnail.jpg)

User Comments :