With the help of photo slideshow software, it’s easy and simple to make a windows 10 slideshow with pictures and music. If you desire to find the best free slideshow maker for Windows 10, MiniTool MovieMaker is the best choice. What are the best Windows 10 slideshow makers? Let’s look at the following part.
Top 3 Windows 10 Slideshow Makers
1. MiniTool MovieMaker
MiniTool MovieMaker is the best free photo slideshow software for Windows 10, enabling you to create stunning slideshows with pictures and background music. It’s very easy to learn and use, so everyone can make beautiful slideshows with it. If you do not have any experience or skills, you can also make photo slideshows with its pre-designed Hollywood-style video templates.
Originally, MiniTool MovieMaker is a free video editor without watermarks, designed for making videos from pictures and music. Besides making various videos, like family videos, music videos, it’s capable of creating GIFs from video clips and images. What’s more, it enables you to edit the audio in the video with ease, such as removing audio from video, extracting extract audio from MP4, etc.
Main features:
- It’s 100% free, clean, no ads, no buddle, no watermarks.
- It supports video to GIF, GIF to video, AVI to GIF, etc.
- It can add music to video and GIF.
- It can fade in and fade out audio.
- It can trim, combine, split, rotate GIF and video.
- It can apply video transitions and effects to video.
- It can put different styles of text to video and GIF.
- It can slow down or speed up video and GIF.
- It offers a variety of video transitions and effects.
2. Adobe Spark
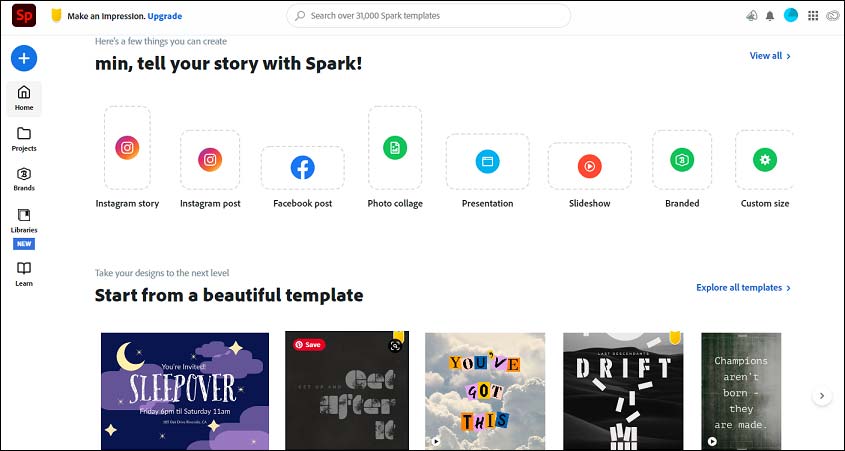
Adobe Spark is also a prime choice for the best Windows 10 slideshow app. It’s easy to use and offers simple-to-understand navigation menus, letting you easily create unique slideshows with music and images, requiring no design skills. And it’s available on both desktop and online. Besides, it gives pre-designed images and graphics, so you can add them to your beautiful slideshows.
3. Icecream Slideshow Maker
It’s a professional and free Windows 10 slideshow app, enabling you to create good-looking slideshows with images and music. It offers more than 20 transitions effects, allows you to add animated text, and lets you burn slideshows to DVD. And it gives 4K slideshow support.
How to Make a Slideshow on Windows 10?
Now, you’ve learned these Windows 10 slideshow makers, but how to make a slideshow on Windows 10 with them? This part will provide you with clear how-to guides.
Solution 1 – MiniTool MovieMaker
As the best free slideshow maker for Windows 10, MiniTool MovieMaker offers you two options to create a photo slideshow. How to make a slideshow with music on Windows 10 in MiniTool MovieMaker? Please continue to check out the post.
Option 1 – Make a Windows 10 Slideshow Without Templates
Step 1. Launch MiniTool MovieMaker.
- Tap the button below to download and install it.
- Launch it and close its pop-up window.
MiniTool MovieMakerClick to Download100%Clean & Safe
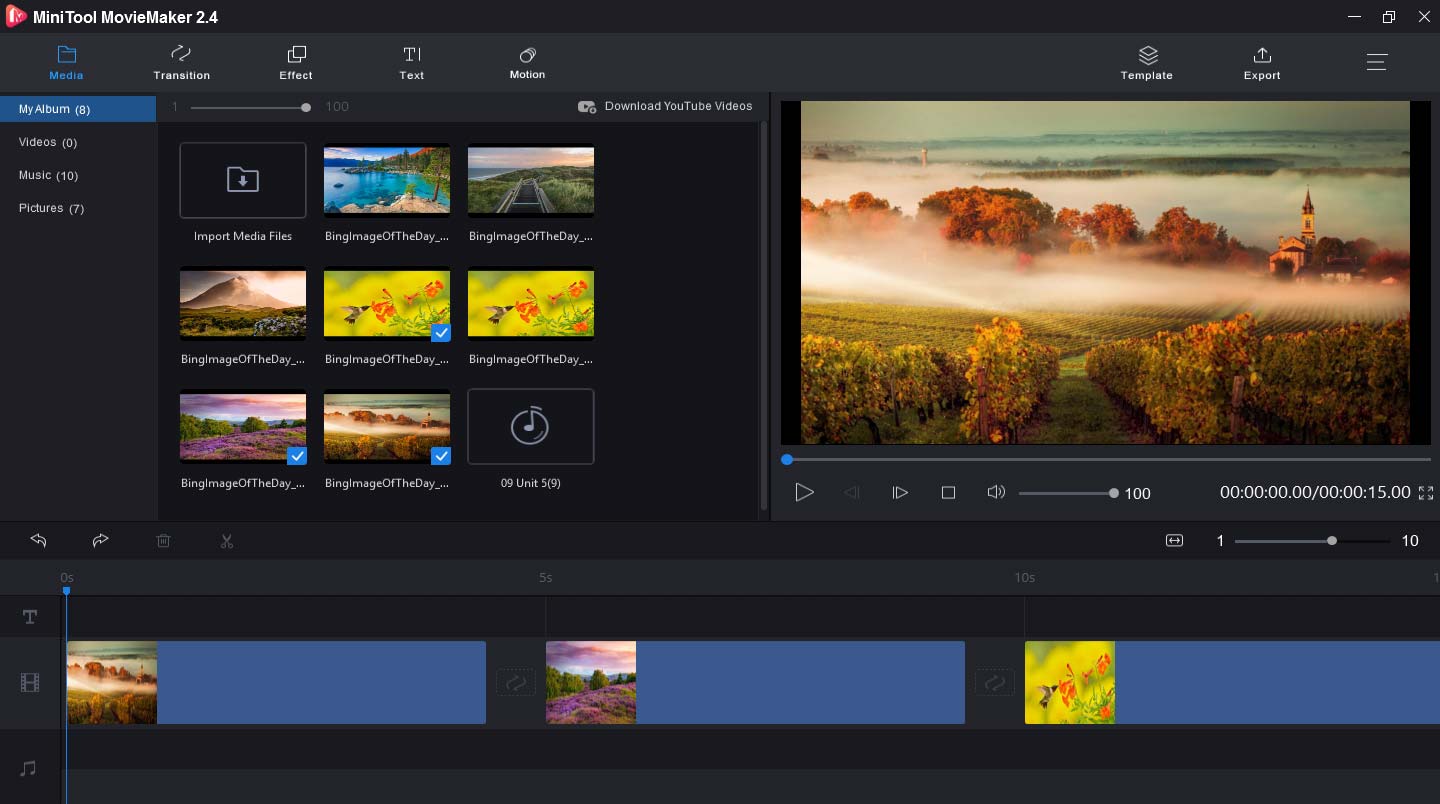
Step 2. Upload your pictures.
- Click the Import Media Files.
- Locate the files, choose the images, and click Open.
Step 3. Create your Slideshow.
- Click the + button or drag and drop the picture to the timeline.
- Click the Zoom to Fit Timelineto adjust all clips to fit the timeline.
Step 4. Change the picture order if necessary.
- Choose a clip and drag it to a new location in the timeline.
- Right-click the unwanted clip, select Delete to remove it from the timeline.
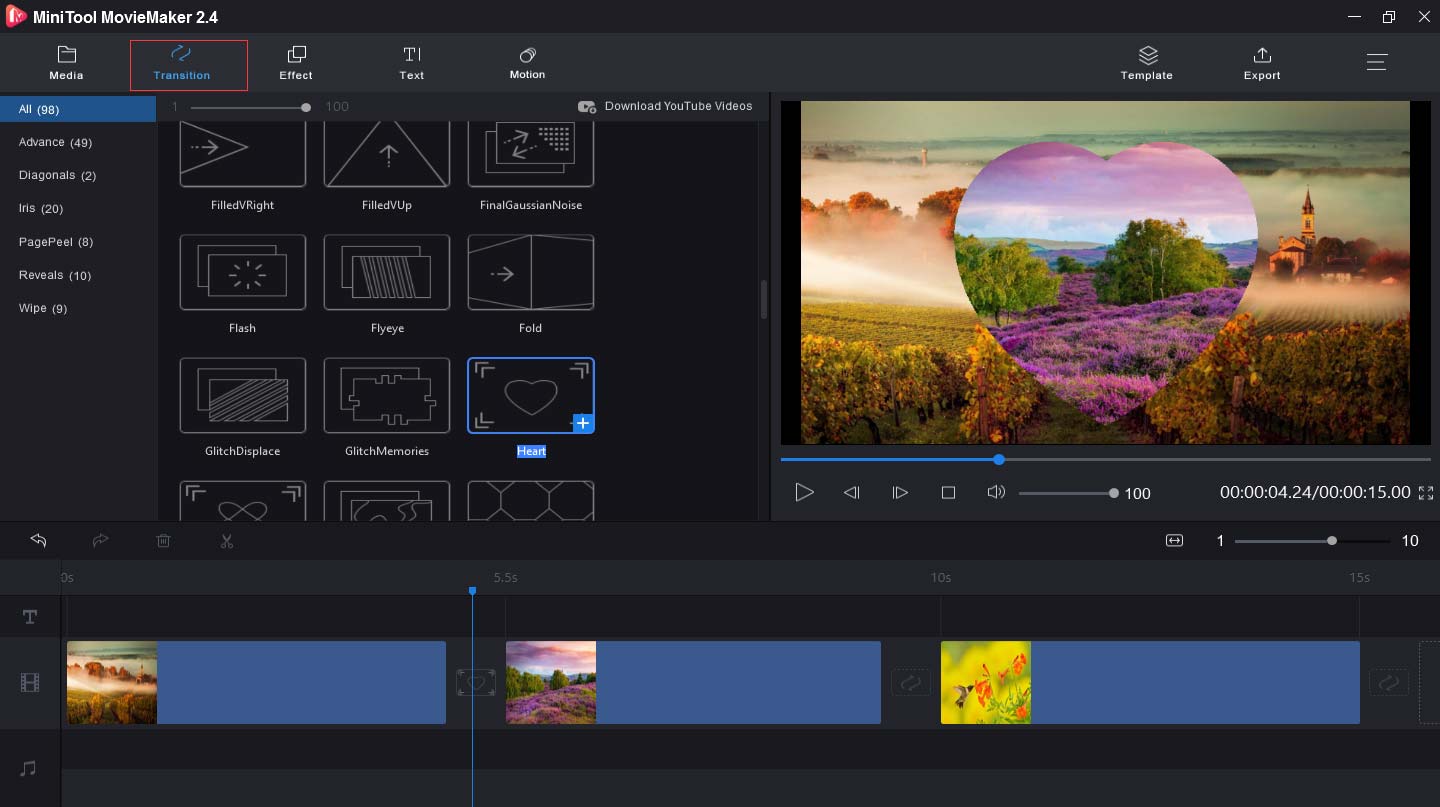
Step 5. Apply video transitions to the slideshow.
- Click the Transition, scroll down the mouse, and find the transition you like.
- Hit the + icon and drag it between two clips.
Step 6. Add effects to slideshow.
- Click Effect and locate the effect you want to apply.
- Click + to apply the effect.
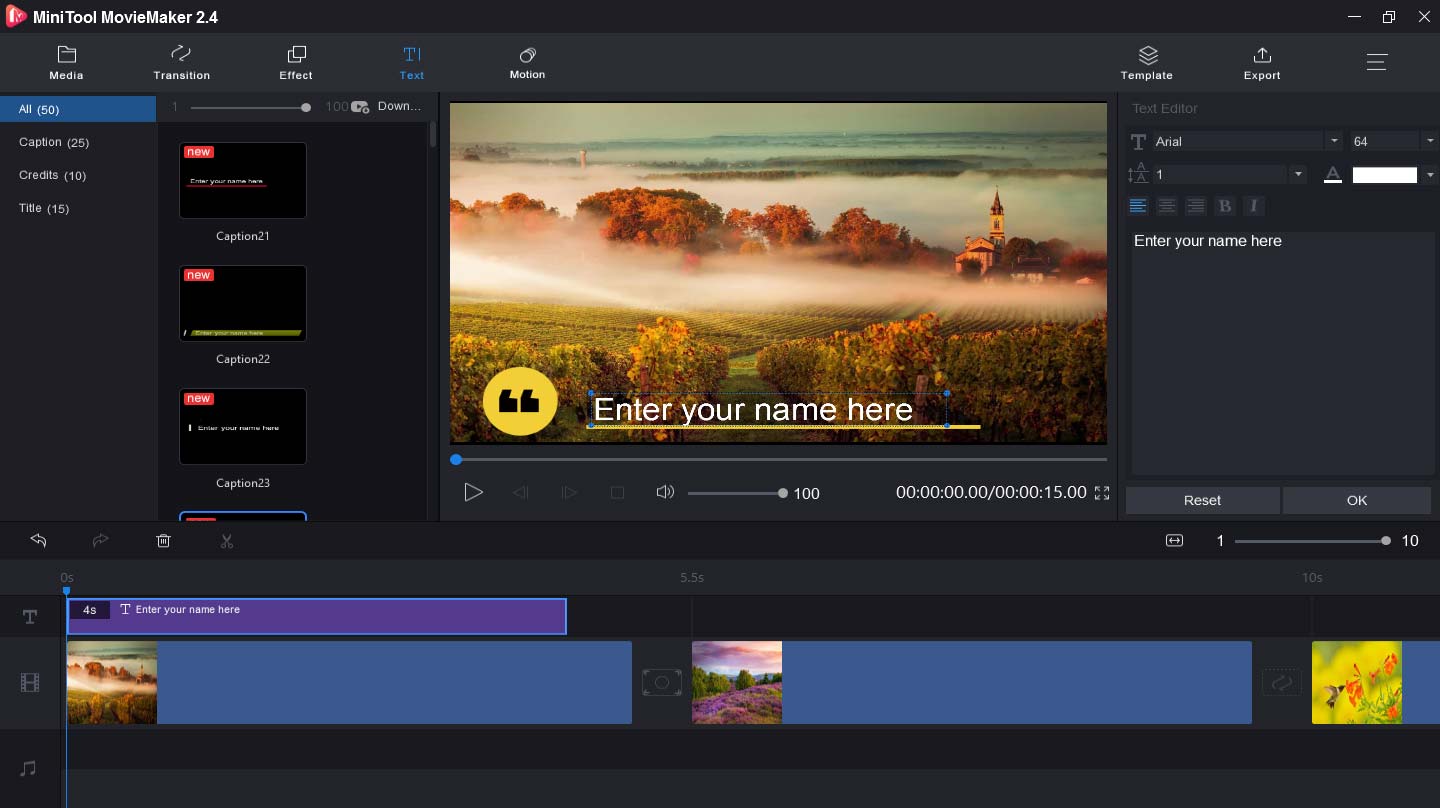
Step 7. Add text to the slideshow.
- Select Text in the upper left corner of the screen.
- Choose a caption, credit, or title style, and click +.
- Delete the sample text and type yours.
- Adjust the size, color, font, and position of the text.
Step 8. Add music to the slideshow.
- Tap the Import Media Files again to upload your background music.
- Drag and drop it to the timeline.
Step 9. Export and save your slideshow.
- Hit the Export to get the output window.
- Name the slideshow and choose the folder.
- Click Export to save your photo slideshow.
Option 2 – Make a Windows 10 Slideshow with Templates
MiniTool MovieMaker provides several templates about travel, love, family and friends, and festival. You can choose one and start your creation. Here’s how to make a slideshow with music on Windows 10 with MiniTool MovieMaker’s templates.
Step 1. Install and run MiniTool MovieMaker.
MiniTool MovieMakerClick to Download100%Clean & Safe
Step 2. Close the pop-up window and get its interface.
Step 3. Click Template on the left side of Export.
Step 4. Find the template you like and tap Next.
Step 5. Import your pictures to create the slideshow.
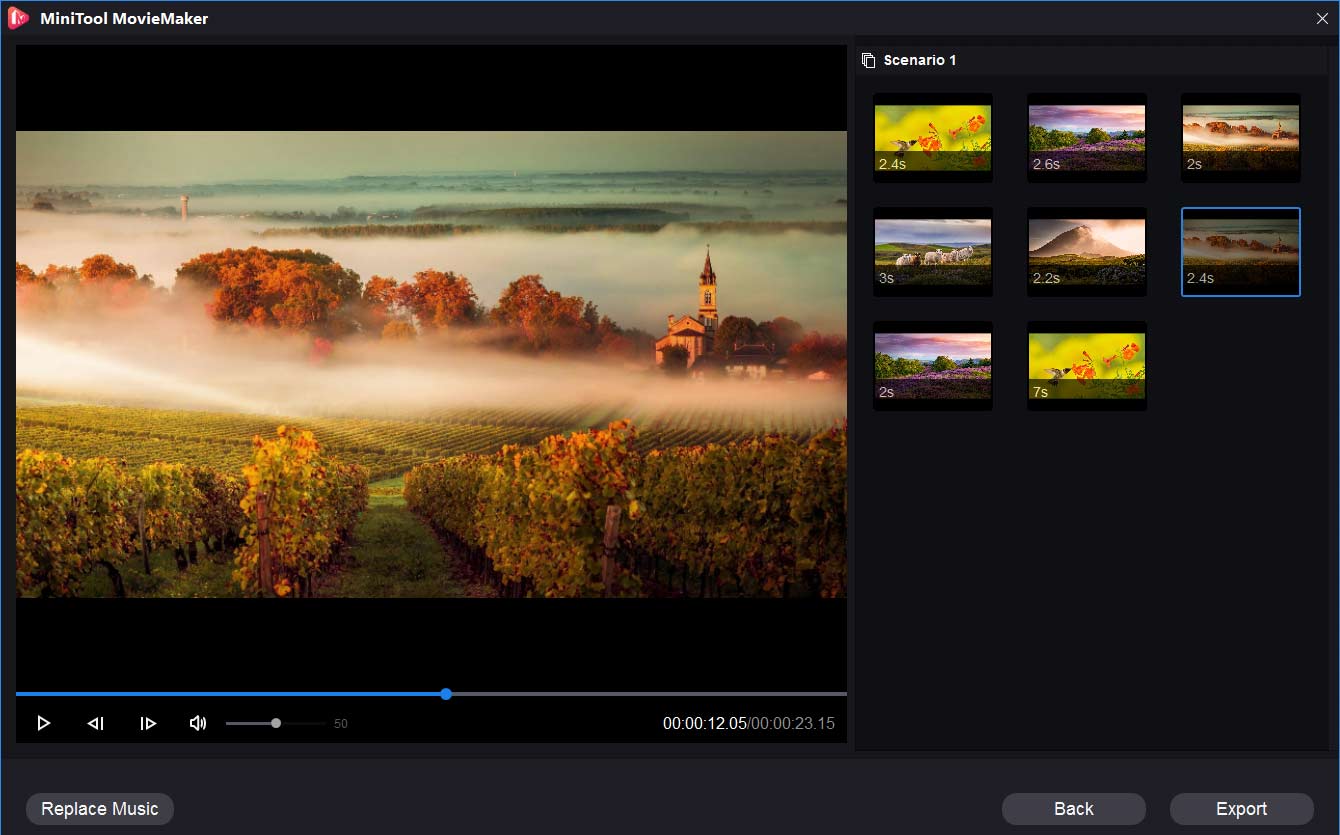
Step 6. Click Replace Music, choose a clip or click Add music to upload your music.
Step 7. Click the OK to add music.
Step 8. Preview the slideshow.
Step 9. Select Export to save the slideshow on your PC.
MiniTool MovieMaker makes it easy to create a slideshow with pictures and music. Click to tweet
Solution 2 – Adobe Spark
How to make a slideshow on Windows 10 with Adobe Spark? How to make a slideshow with music on Windows 10 in minutes? Here’s how to make a slideshow on Windows 10 with Adobe Spark online.
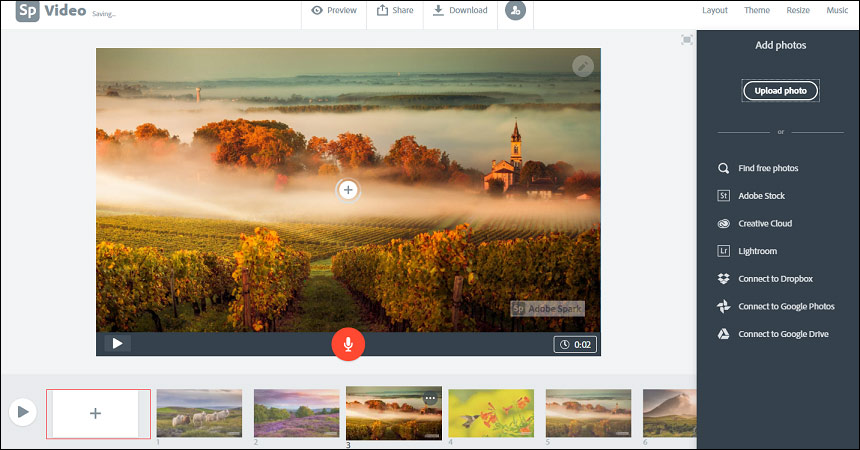
Step 1. Start a new project.
- Go to the Adobe Spark website and log in, and choose
- Choose a template and click Pick this one, or select Start from scratch.
- Read the tips and then close the pop-up window.
- Click big + to open an editing page.
Step 2. Upload media files.
- Click + and select Upload Photo to import photos from your local storage.
- Or select Adobe Stock, Creative Cloud, Lightroom, Dropbox, Google Photos, and Google Drive to add images.
- Select Find free photos to search for photos using keywords.
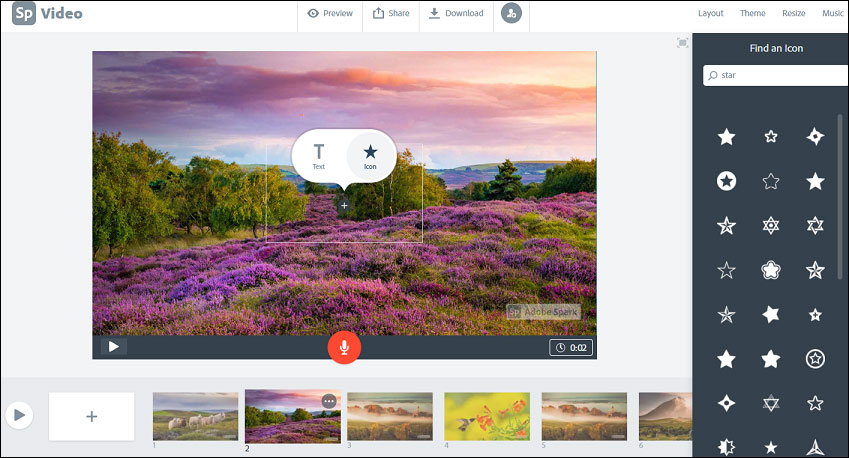
Step 3. Customize the slideshow.
- Change the picture order: Choose the photo and move it to a new location in the timeline.
- Add music: Select Music, choose a clip or select Add my music to find and apply your music.
- Add recordings: Click the red button and start to talk.
- Choose a theme: Click Theme, chose one for different colors, fonts, and transition styles.
- Select a Layout: Click Layout, choose a layout from Fullscreen, Split screen, Caption, and Title.
- Add icon: Hit + on the center of the slideshow, choose the icon, enter the keyword, find and apply the icon.
Step 4. Publish and share the slideshow.
- Click Preview to watch your slideshow.
- Select Share or Download to share or save the slideshow.
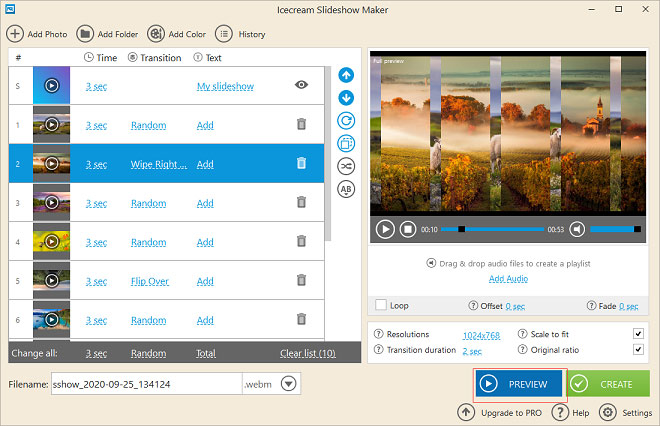
Solution 3 – Icecream Slideshow Maker
Here’s how to make a slideshow with music on Windows 10 with Icecream Slideshow Maker.
Step 1. Run this Windows 10 slideshow app.
- Download and install Icecream Slideshow Maker.
- Launch this program to start making a photo slideshow with music.
Step 2. Import media files.
- Click the Add Folder to upload all pictures of a folder.
- Hit the Add Photo to browse and add the target images.
- Drag and drop images to the editing window.
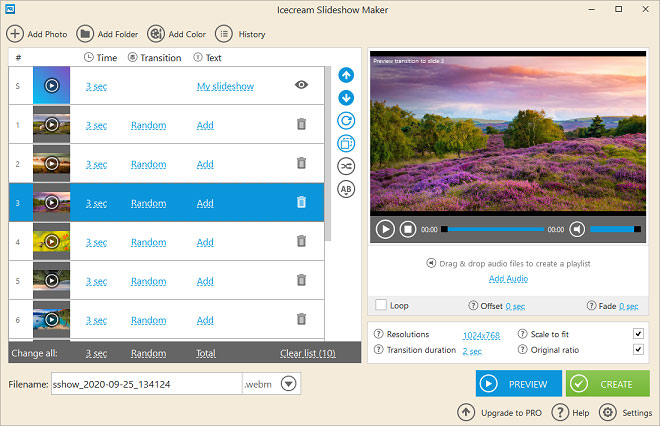
Step 3. Edit the Slideshow.
- Edit the start slide or a single picture: Click My slideshow or Add, change the background color, put text, apply an effect, and adjust the text position, etc.
- Rearrange pictures: Drag and drop the photo or use the Up/Down buttons.
- Rotate photos: Select the picture you want to rotate, and click the Rotate Photo
- Add transitions: Click the default transition Random, choose other transitions or None.
- Add background music: Click add audio to upload your music or directly drag and drop audio files to the program.
Step 4. Create slideshow.
- Click the default resolution 1024 x 768 to set the output slideshow resolution for Instagram and others.
- Choose a format: MP4, AVI, MOV, WebM.
- Hit the Preview button to preview the slideshow.
- Click Create to make the slideshow.
Also read: Facebook slideshow
Bonus – How to View a Slideshow on Windows 10
Method 1 – File Explorer
Here’re the steps:
Step 1. Click the File Explorer button to open it.
Step 2. Navigate to the folder saving your pictures.
Step 3. Choose a picture and click it.
Step 4. Click Picture Tools > Slideshow.
Method 2 – Photos App
Step 1. Double click a photo to open the Photos App.
Step 2. Right-click the picture and select Slideshow.
Bottom Line
This post gives you 3 Windows 10 slideshow apps and detailed information about how to make a slideshow on Windows 10. With the steps above, you can easily learn how to make a slideshow with music on Windows 10. Have a try!
If you have any questions or want to share other wonderful Windows 10 slideshow apps, you can leave them below or contact us via [email protected].
Windows 10 Slideshow FAQ
- Play the slideshow.
- Right-click the center of the screen.
- A menu bar appears, and select the Settings.
- Select Advanced Features in the drop-down menu.
- Move the Slideshow Speed button to accelerate the slideshow.
- Click OK to apply the changes.
- Launch Media Player.
- Tap on the Start and then select Windows Media Player.
- Click the Create Playlist and name it.
- Choose and add pictures to the playlist.
- Click Save to save these images.
- Double click the playlist to play your slideshow.
- Create a new Microsoft PowerPoint presentation.
- Name the presentation and open it.
- Click Insert > Photo Album > New Photo Album.
- Choose the File/Disk to upload target photos.
- Go to Transitions, choose one and apply it.
- Click Slide Sorter to rearrange the photo order.
- Add music to the slideshow and save it.
- In the Start Menu Search, type and click Control Panel.
- Select the Power Options and click the Change plan settings.
- Double click Change advanced power settings.
- Select Desktop background settings.
- Double click the Slide Show.
- Choose Pause or Available to enable/disable the desktop background slideshow.
About The Author

Position: Columnist
Cora is a tech writer specializing in digital media workflows, with over six years of hands-on experience in video post-production, media transcoding, and screen capture. Her writing is always clear and practical. Cora also produces in-depth software reviews for users across skill levels to help them find the right tool and enjoy video editing.
User Comments :