Want to convert MP3 to AVI with image sequences? This post provides a quick review of these two media formats and reliable Windows video editor apps, such as MiniTool MovieMaker and Clideo, to help you accomplish this task.
What Are MP3 and AVI Files
Before exploring the best way to convert MP3 to AVI with image, let’s first quickly review the two media formats.
What Is MP3
MP3 is a popular audio format, generally used for storing and playing music and other audio recordings on computers and portable devices.
One of the most important characteristics of MP3 files is that they use lossy compression. Simply put, MP3 encoders analyze the original sound file and permanently remove portions of the data that are unlikely to be audible to the human ear.
As a result, the file size will be greatly reduced with minimal loss of sound quality, making it easier to store and transmit music.
What Is AVI
Developed by Microsoft, AVI is a multimedia container format similar to MP4 and MOV, used to store audio and video data together for synchronized playback.
AVI is codec-independent, meaning it works with various codecs to compress video and audio data. Popular codecs include XviD, DivX, and MJPEG for video and MP3, PCM, and AAC for audio.
While AVI is a native video format for Windows, it’s also widely accepted by other operating systems and popular devices.

Why Convert MP3 to AVI with Image
After understanding the MP3 and AVI formats, we can conclude that MP3 is an audio-only file format, while AVI can contain both sound and visual elements.
Why do you need to convert MP3 to AVI with image? Generally speaking, there are two primary reasons.
1. Enrich Your Content
Sometimes, you might feel a bit plain when sending a pure MP3 file to friends. To fix this issue, the simplest solution is to convert your MP3 audio file into an AVI video file by pairing it with a static image or multiple pictures. In this way, you can easily make your sharing more attractive.
2. Meet YouTube and Other Social Media Requirements
Platforms like YouTube, TikTok, and Facebook are video-oriented, and they do not support audio-only files for uploads and sharing. This is also one of the most common reasons for converting audio to video formats.
You can use a free video converter to change an audio file into a video format. However, the final output is a blank screen with sound, with no visual content.
Instead, turning your audio into an engaging video makes a big difference. You can create a compelling video by adding an image and your logos or making a dynamic photo slideshow with audio.
So, how do you convert MP3 to AVI with image? Let’s continue.
How to Convert MP3 to AVI with Image on Windows
Let’s walk through the easiest method to convert MP3 to video with image clips using MiniTool MovieMaker, a reliable photo to video maker.
MiniTool MovieMaker is an easy-to-use and feature-rich video editor designed for everyone (especially for beginners and intermediate users) to empower them to make professional videos.
Key Features of MiniTool MovieMaker
1. User-Friendly Interface
This simple video editor features an intuitive user interface, allowing users of all levels to navigate effortlessly. With its drag-and-drop functionality, you can easily import your footage and arrange the clips’ order seamlessly.
2. Essential Editing Tools
As one of the best free video editing software, MiniTool MovieMaker provides core tools to help you edit and enhance your footage. Trim video length, split a video into parts, crop video dimensions, merge multiple clips, rotate or flip videos, and adjust playback speed.
Additionally, this application offers some basic color adjustment tools and lets you control the tone of your video by changing saturation, brightness, and contrast, as well as applying 3D LUT effects.
3. Rich Media Library
Furthermore, MiniTool MovieMaker can effectively enhance your content with a vast collection of transitions, filters, stickers, overlays, frames, and motion effects. It also enables you to add animated title cards, captions, and end credits to give your video a more professional look.
4. No Watermark
Best of all, MiniTool MovieMaker is a video editor without watermark. It won’t leave a brand logo on your final result, ensuring a clean and professional video.
5. High-Quality Export
MiniTool MovieMaker allows you to save the final video in AVI, MP4, MKV, and other popular video formats. It also lets you control the video resolution, frame rate, quality, and bitrate for the perfect output.
Steps to Convert MP3 to AVI with Image
Now let’s see how to transform your MP3 audio into an AVI video with images using MiniTool MovieMaker.
Step 1: Download and Install
Click the button below to download the MP3 to AVI video converter and install it on your PC.
MiniTool MovieMakerClick to Download100%Clean & Safe
Step 2: Set the Aspect Ratio
When you launch the software, confirm the aspect ratio of your project. The default setting is 16:9. Don’t change it if you need to create a video for YouTube or make a landscape video. If your video is made for TikTok or YouTube Shorts, set the aspect ratio to 9:16.
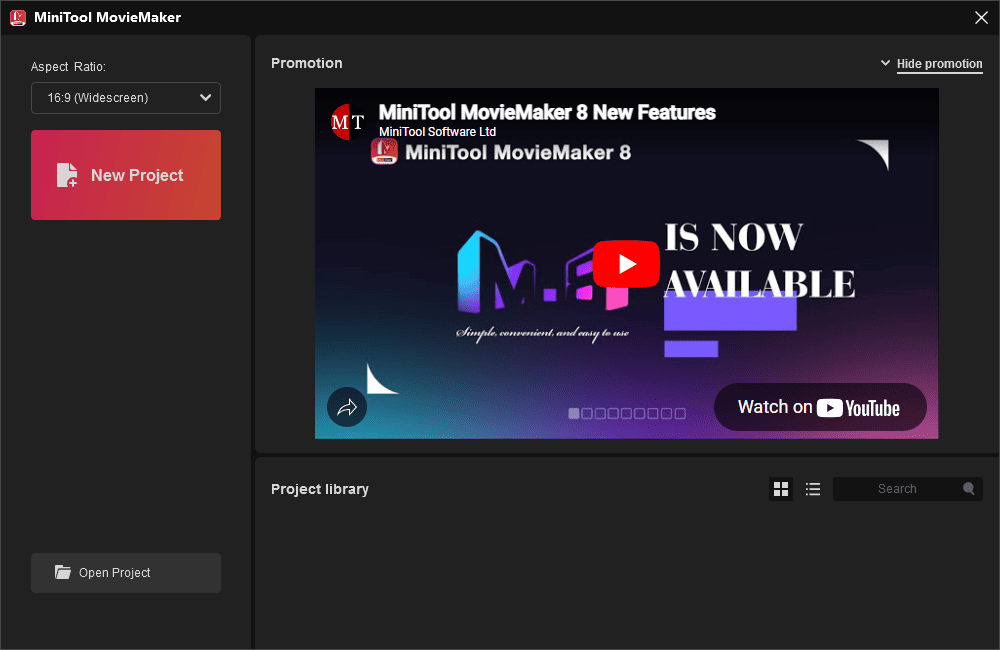
Then, click the New Project button to access the main interface.
Step 3: Import Your Media Files
Click the Import Media Files button to upload your MP3 file and image(s).
If you need to turn an MP3 file into an AVI video with a static image, add your media to the timeline. Copy the image and paste it multiple times to match the duration of your MP3 file.
If you want to create a photo slideshow with MP3, add all your images to the timeline and edit them as needed.
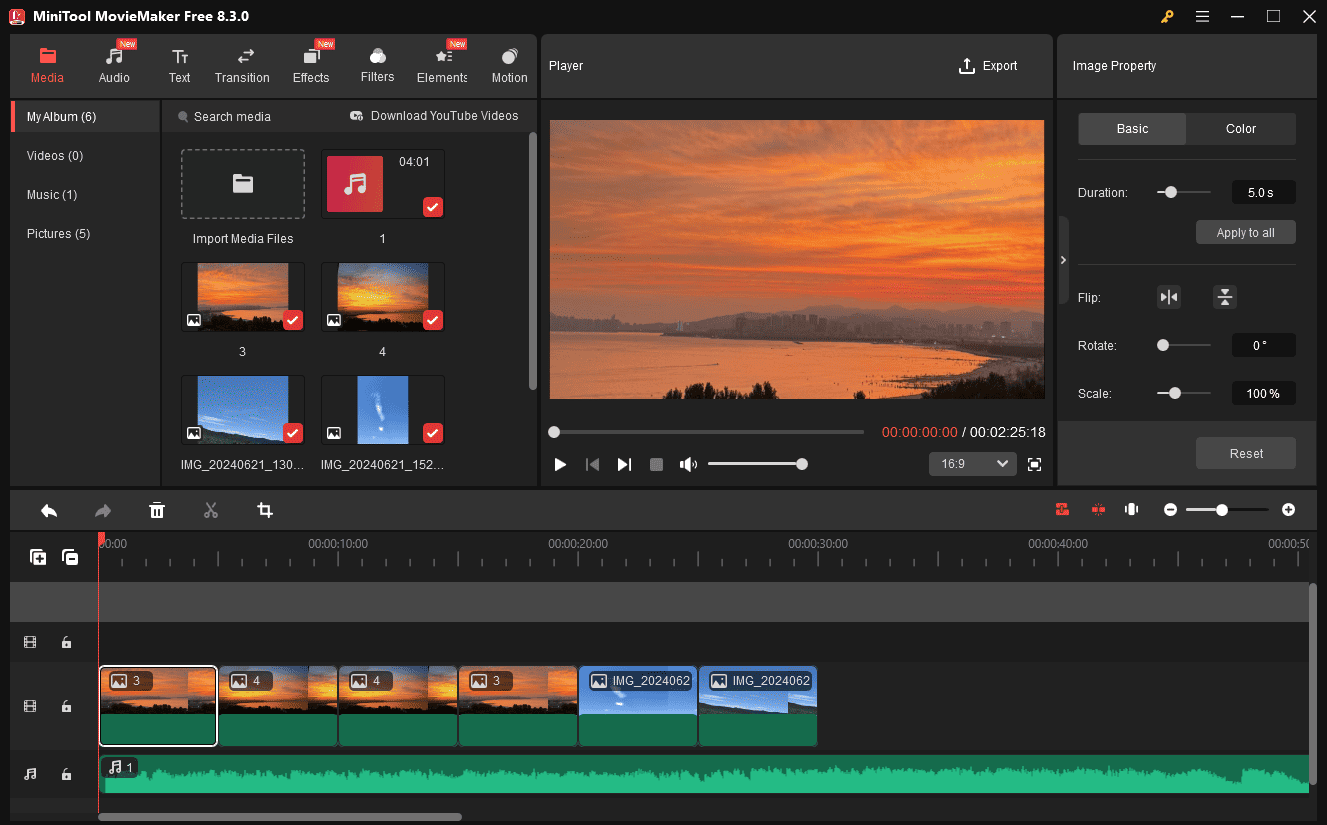
Step 4: Edit Image Property
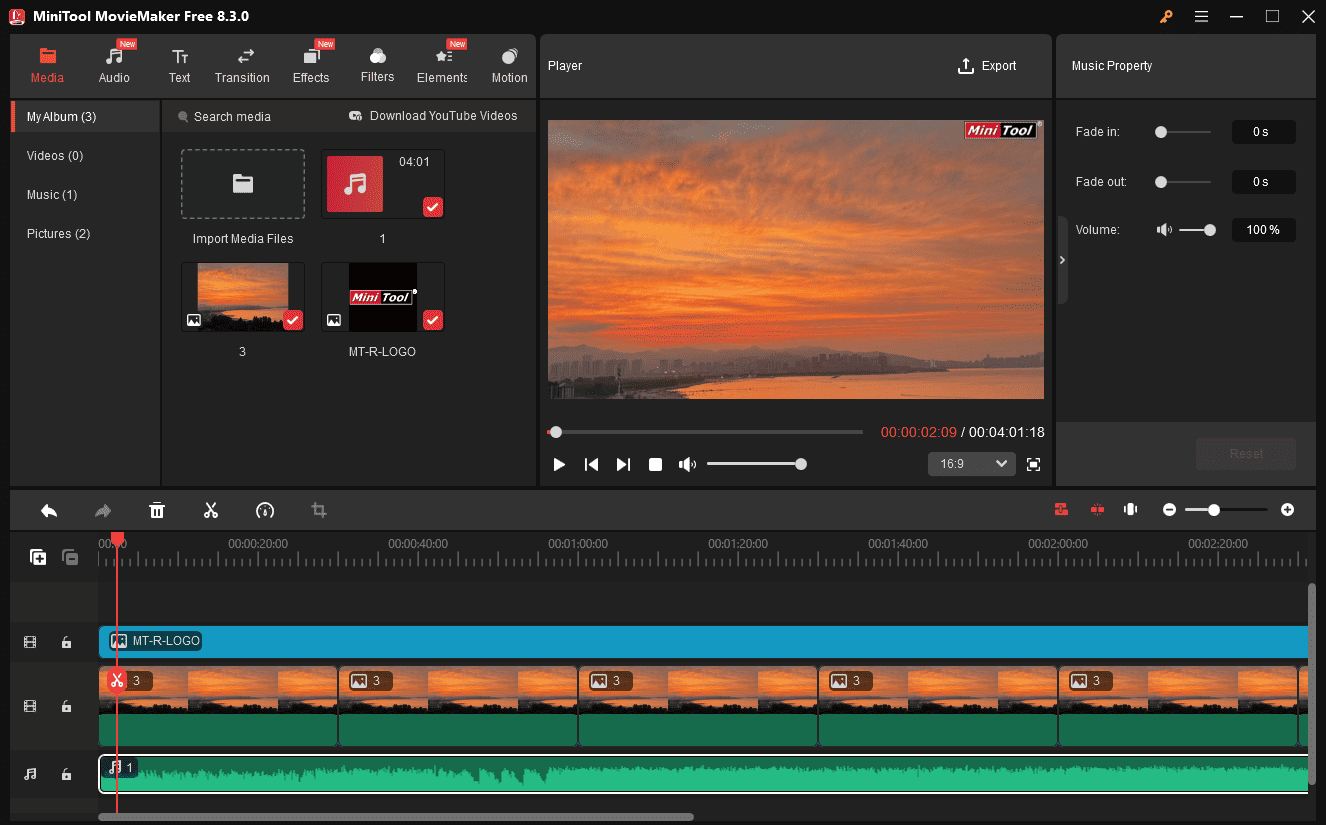
Select the image you want to edit on the timeline to enable the Image Property window.
Under the Basic tab, you can adjust the duration of the image up to 30 seconds. Click the Apply to All button to set all images on the timeline to the same duration. Besides, you can flip, rotate, and scale the image as needed.
If necessary, go to the Color tab to modify the clip’s color by changing Contrast, Saturation, and Brightness.
Step 5: Crop the Image
You can crop an image to remove unwanted portions and highlight the key element or change the dimensions.
First, select the image and click the Crop icon. Then, select a ratio from the Ratio dropdown list and drag the handles to adjust the crop area. Finally, click OK to confirm.
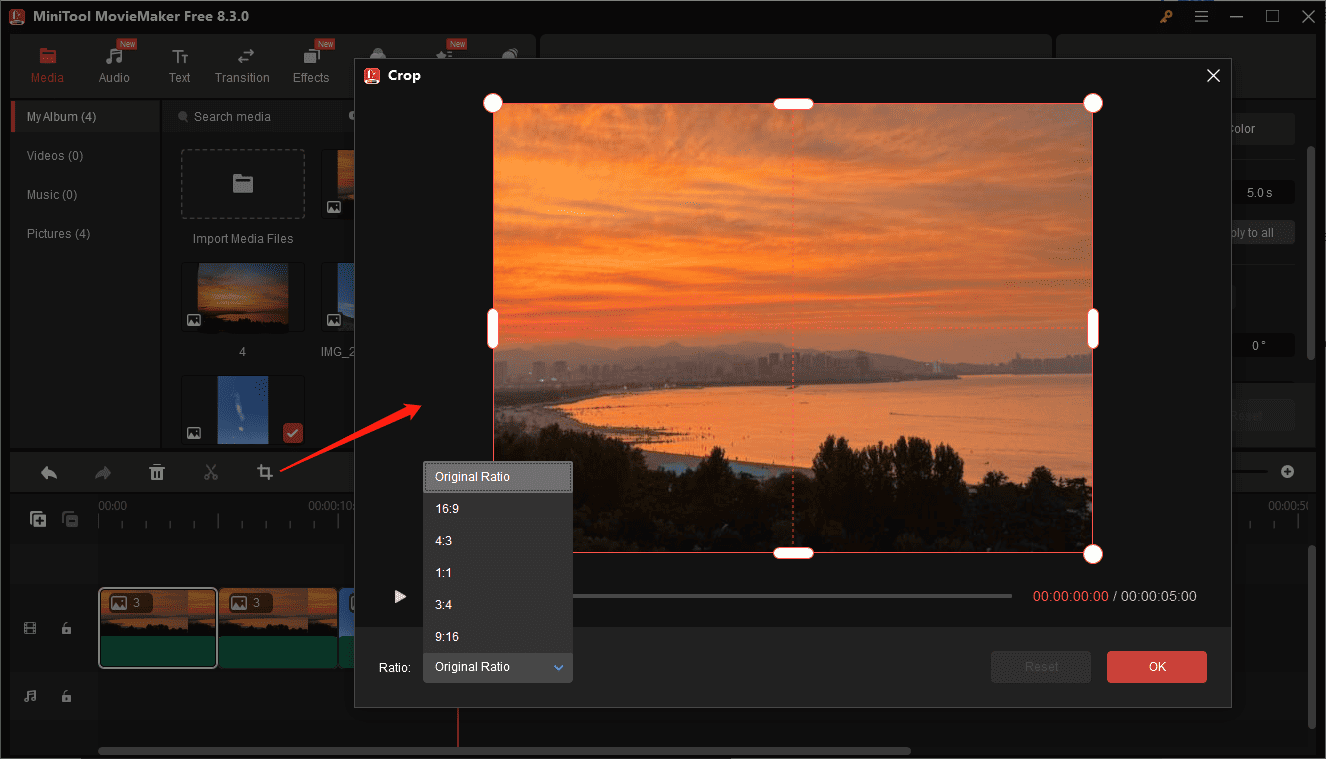
After that, if your image still has black bars, zoom in on the image slightly to remove them.
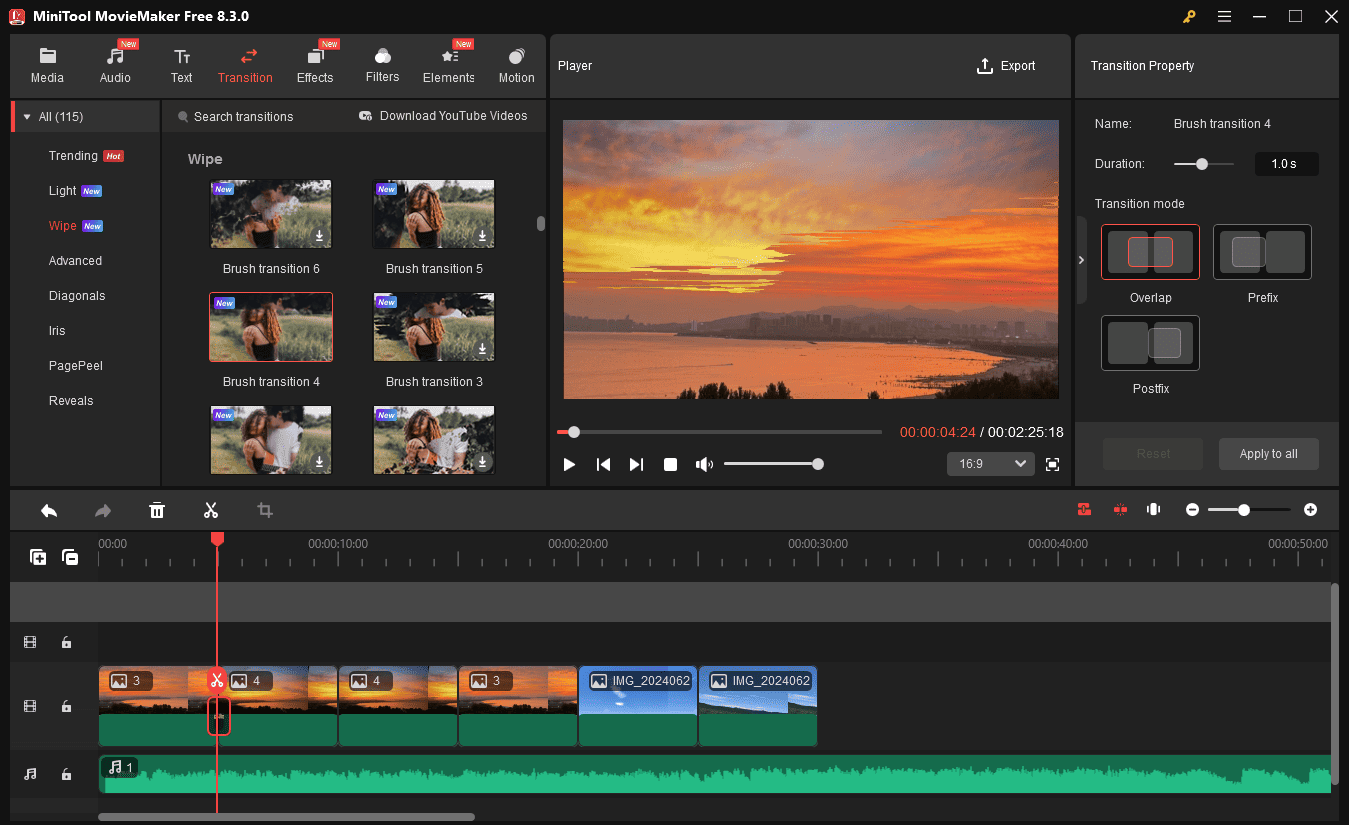
Step 6: Apply Transitions
You can add a transition to the gap between two images to make one scene smoothly move to the next.
Go to Transitions in the top menu and hover over any thumbnail to preview its effect. Download the desired one and drag it between the two target clips. Next, customize the transition effect by adjusting the duration and model in the property panel on the right.
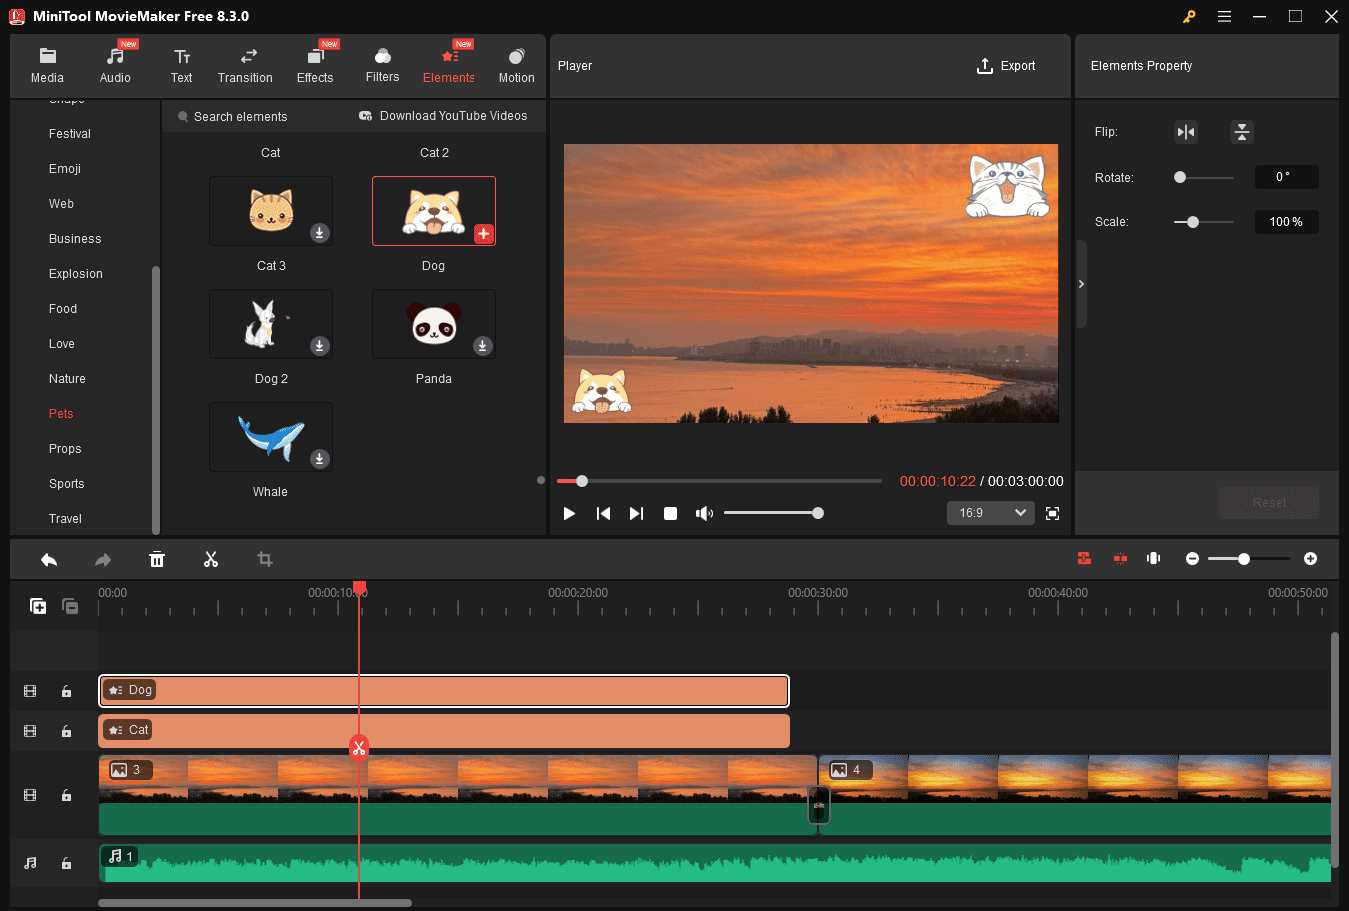
Step 7: Add Elements
You can add animated elements to spice up your images or insert your logo to add a personal touch.
Go to Elements in the top menu bar, browse the built-in element library, and download the stickers you like. Then, click the + icon at the bottom of a sticker to add it to the timeline. Next, edit its duration by dragging the edges of the layer on the timeline, and adjust its position and size on the frame.
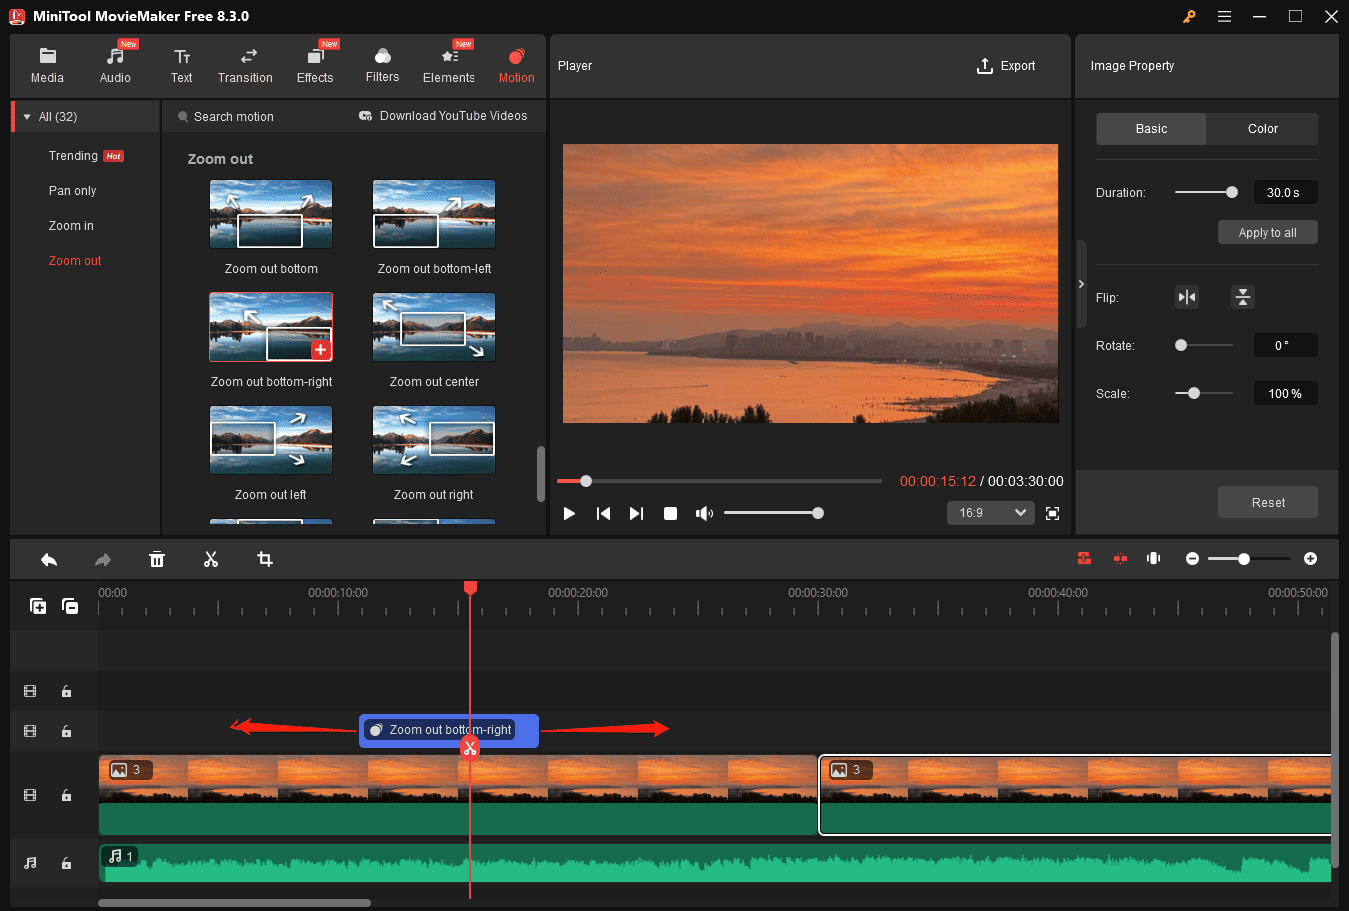
Step 8: Add Motion Effects
MiniTool MovieMaker includes various pan and zoom effects to simulate camera movements. You can use these effects to make your photo slideshow more dynamic.
Go to Motion, browse the resource library, and preview any effect by hovering over the thumbnail. Click the + icon at the bottom of the target effect to add it to the timeline, and move the edges of its track on the timeline to control its duration.
Step 9: Save Your AVI Video
Click the Export button in the upper right corner to open the Export window. Next, expand the Format menu and choose AVI from the dropdown list.

Next, you can change the resolution and frame rate, or click Settings for more options. Finally, click the Export button to start rendering your video.
How to Convert MP3 to AVI with Image Online
If you desire to convert MP3 to AVI with image online, Clideo is a good option. Whether you want to create a single-image music video or a slideshow with music, it can meet your needs.
Step 1: Upload Your Image
Navigate to the Clideo website, expand the All tools option, and click the Merge video option. Then, click the Choose files button to upload your photo(s).
Step 2: Upload Your MP3 File
After the image is loaded, click the Add audio button in the lower right corner to add your MP3 music.
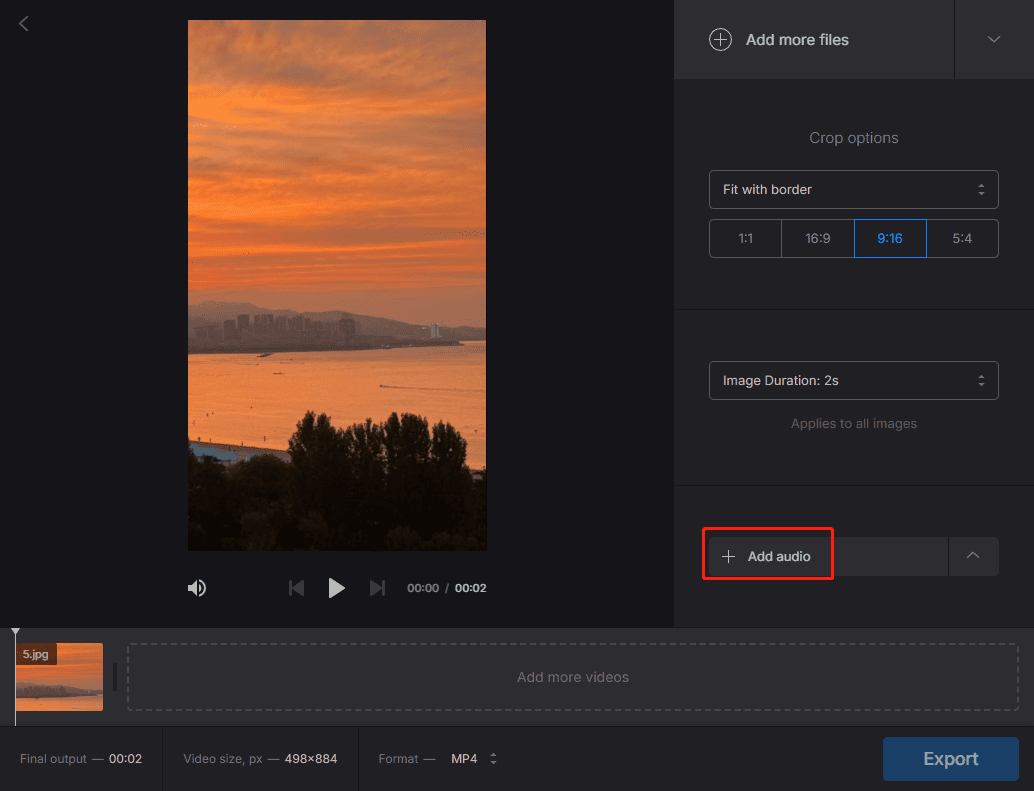
Step 3: Edit the Image
You can crop the image or adjust the aspect ratio in the right panel. If you add multiple pictures and want to make a slideshow, you can check the Crossfade option to add a transition between any two clips.
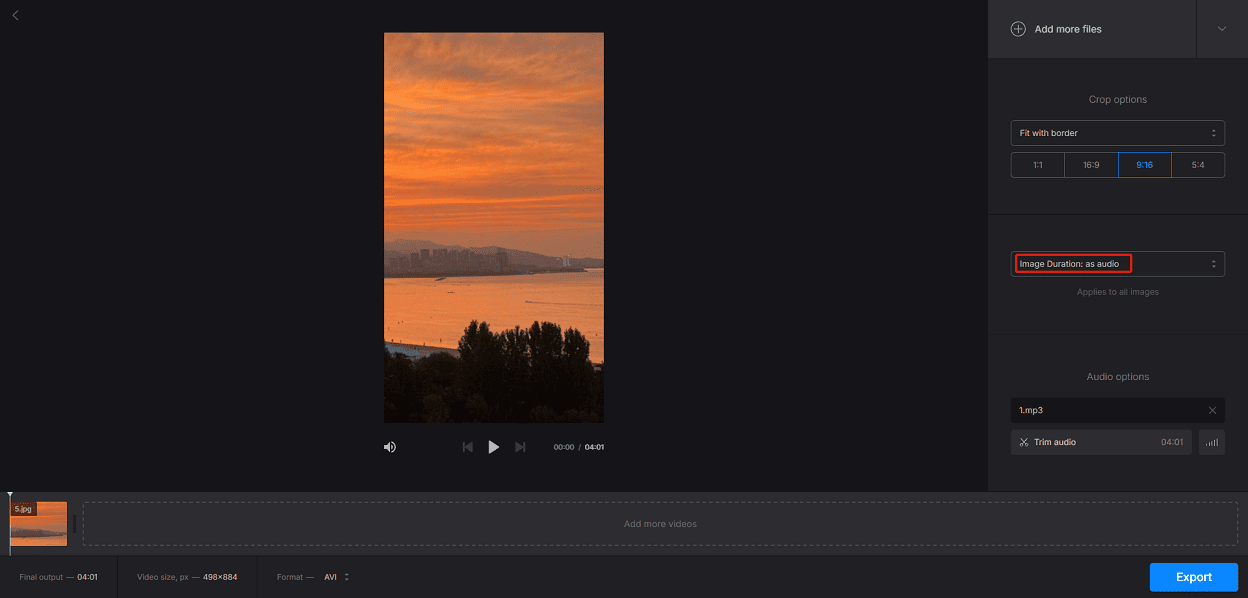
Step 4: Set the Image Duration
For a single image, set its duration to the audio length directly. For multiple images, set durations accordingly or add more images to fit the audio length. Besides, you can trim the MP3 file to make it shorter.
Step 4: Save the Project
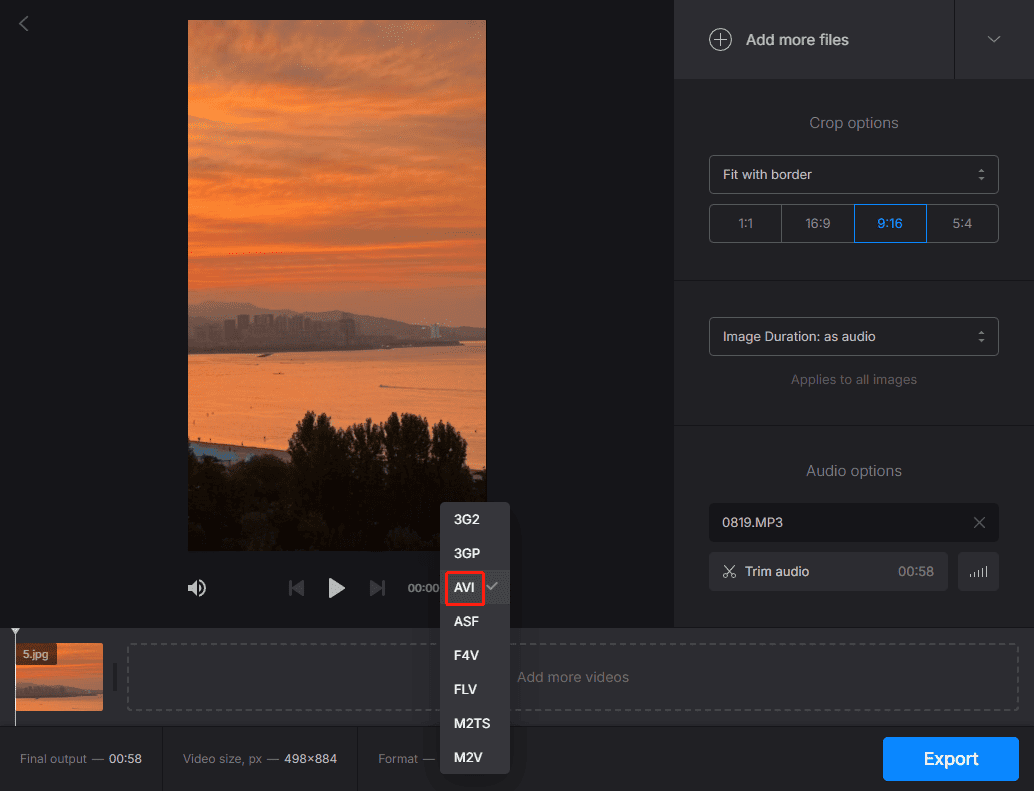
Open the Format dropdown list and select AVI. Next, click the Export button to convert your MP3 to AVI with an image online. Once done, download the AVI file to your PC.

How to Extract MP3 from AVI Video
Sometimes, when you watch a movie saved in the AVI format, you may want to isolate the music and save it as a separate file to listen to on your phone or in your car.
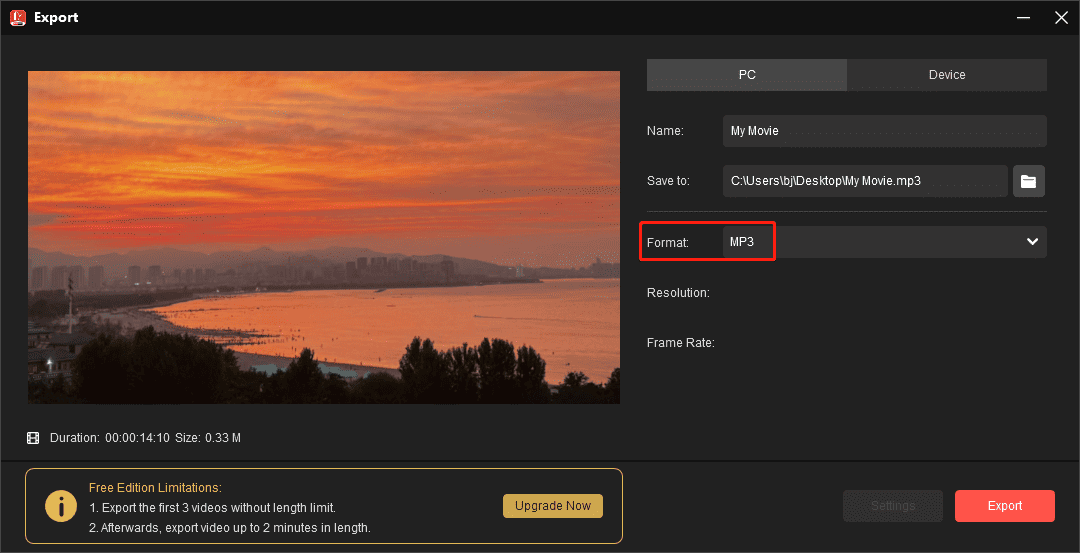
So, how to convert AVI to MP3? To finish this task, you can also use MiniTool MovieMaker – when exporting, set MP3 as the output format.
MiniTool MovieMakerClick to Download100%Clean & Safe
In addition, MiniTool Video Converter is a fantastic choice. It’s a free video and audio converter that allows you to separate audio from a wide range of video formats, giving you a high-quality audio file in just a few clicks.
Here’s how to extract audio from an AVI file and save it as an MP3 using MiniTool Video Converter.
Step 1: Get the AVI to MP3 Converter
This process begins by downloading and installing MiniTool Video Converter on your PC. Click the button below and complete the installation.
MiniTool Video ConverterClick to Download100%Clean & Safe
Step 2: Add Your AVI File
After launching the software, you’ll be directed to the Conver Video tab by default. Click the Add or drag files here to start the conversion area to add your AVI video.
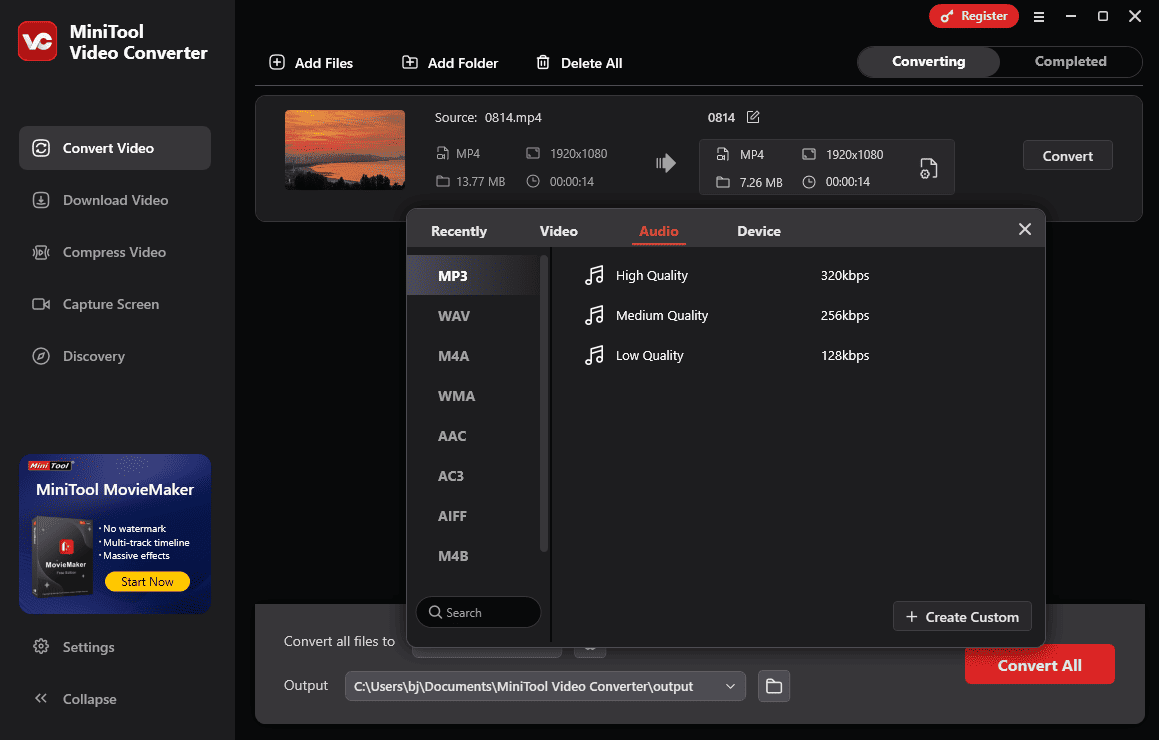
Step 3. Set Output Format to MP3
Click the Settings icon, and a pop-up window opens immediately. Go to the Audio tab and select MP3 on the left sidebar. Then, click the desired MP3 profile on the right panel.
Step 4: Start the AVI to MP3 Conversion
You’ll then return to the main interface. Click the Output bar at the bottom to select a folder to save your MP3 file. Finally, click the Convert button to enable the conversion task.
Final Thoughts
It’s not difficult to convert MP3 to AVI with image, right? This post provides step-by-step instructions for converting your MP3 audio into an AVI video with a static image or a series of images.
The process is straightforward. You can now follow the steps above to turn your MP3 into an AVI video with ease. Finally, if you have any problems while using MiniTool MovieMaker or MiniTool Video Converter, don’t hesitate to get in touch with us via [email protected] for instance help.
About The Author

Position: Columnist
Cora is a tech writer specializing in digital media workflows, with over six years of hands-on experience in video post-production, media transcoding, and screen capture. Her writing is always clear and practical. Cora also produces in-depth software reviews for users across skill levels to help them find the right tool and enjoy video editing.
User Comments :