You try to capture still images from a video that you’re interested in, but find some of your screenshots are blurry. How do you take high-quality pictures from a video? You can convert a video to image sequence and choose your favorite pictures. Read this post to learn how to do this.
An image sequence is a series of still images called frames. Each image is numbered sequentially and the images are often stored in one folder. You can extract all frames from a video, conversely, you can convert frames into a video.
So how to convert video to image sequence and image sequence to video? Let’s dive into this post now! (If you want to split your video before converting video to frames, try MiniTool MovieMaker to split the video into multiple clips.)

Part 1. How to Convert Video to Image Sequence
Try the following video to images converters to convert video to image sequence without losing quality.
Here’s the quick video guide:
Convert Video to Image Sequence with VLC
VLC is a free but feature-rich media player for Windows, macOS, Linux, Android, and iOS. It can be used to play media files, stream online videos, download streaming videos, convert videos & audio files as well as extract images from a video.
It supports most video formats, so you convert any videos to image sequences for free with no ads, no watermarks, and no spyware.
Take the following steps to convert video to image sequence.
Step 1. Open VLC after installing it on your computer.
Step 2. Click Tools in the top menu bar and choose Preferences from the drop-down menu. Click Input / Codecs and go to the File section. Click Browse… to select a folder to save the image sequence. Then select the option All to show all settings at the bottom of the Preferences window.
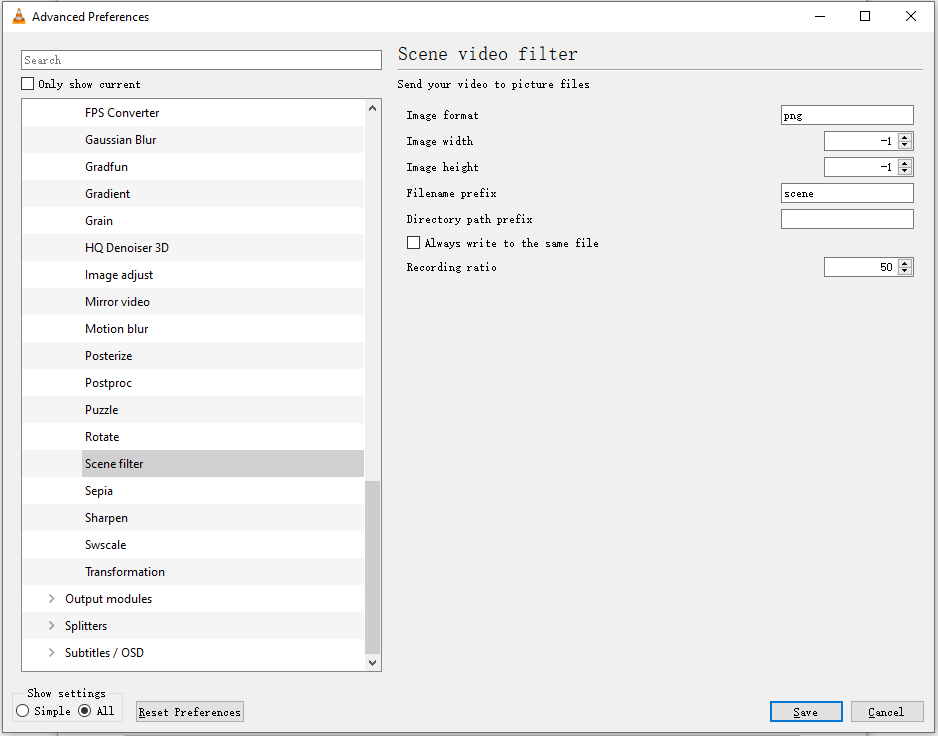
Step 3. Navigate to Video > Filters and click Scene filter.
Step 4. Set the image format, image width, image height, edit the filename prefix, and adjust the recording ratio. Click the Save button to apply the changes.
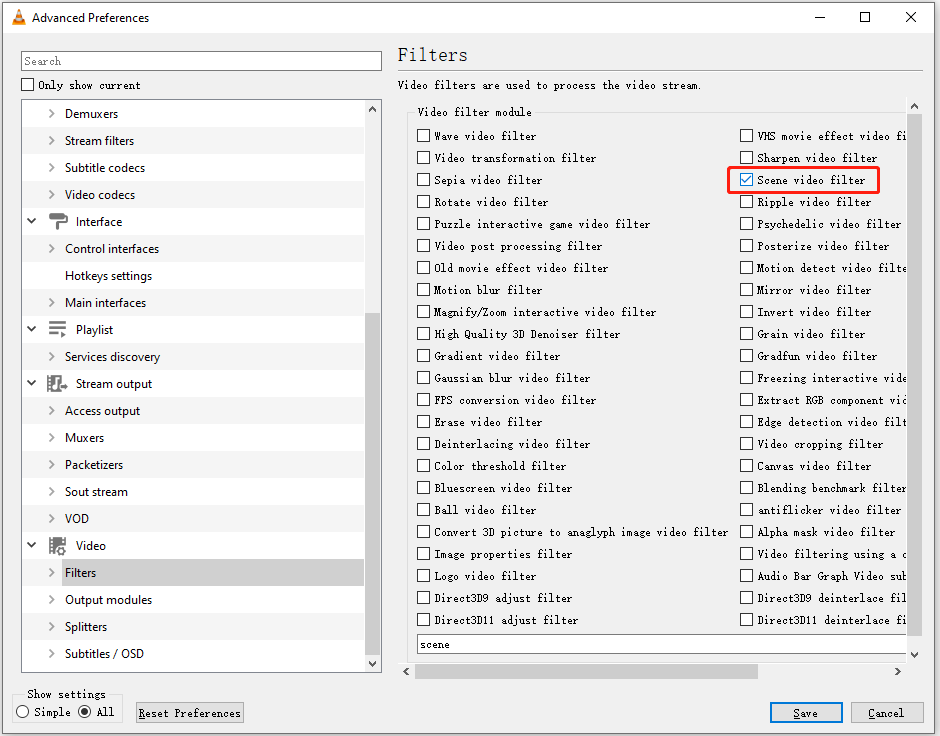
Step 5. Head to Tools > Preferences and open the Advanced Preferences window.
Step 6. Expand Video and click Filters. Select the option Scene video filter and click Save.
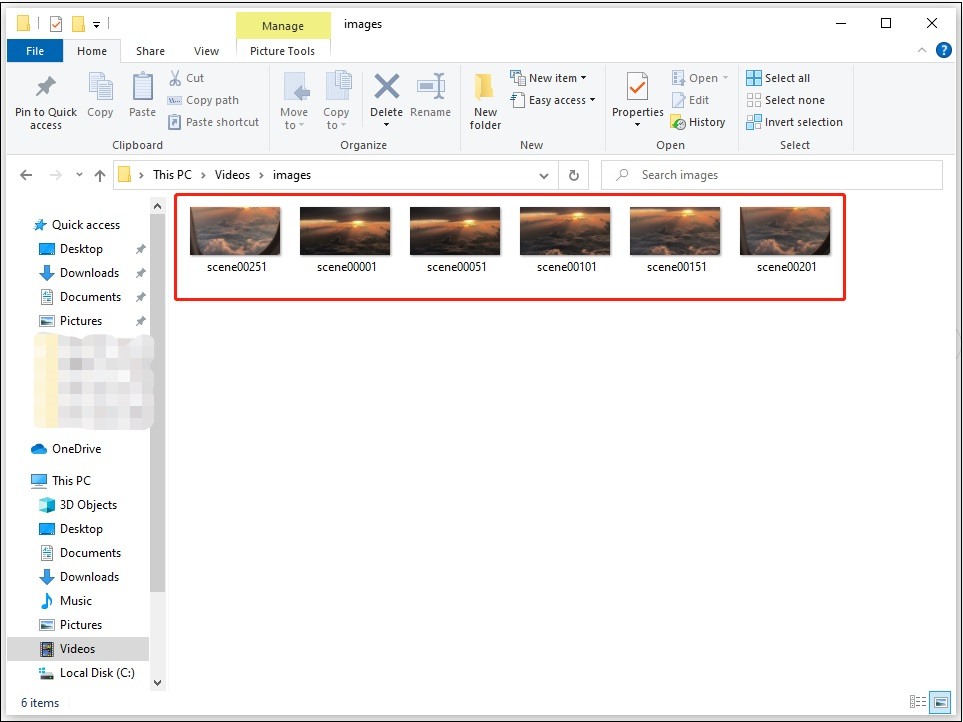
Step 7. Now, you can play the video that you want to convert into image sequence. Click Media > Open File… to open the desired video file. When the video is finished, open the save folder and you will see the images numbered sequentially.
Convert Video to Image Sequence with Photoshop
Photoshop is the best raster graphics editor loaded with tons of features. It supports importing image formats like JPEG, PSD, PSE, PNG, TIFF, GIF, and video formats MOV, AVI, and MPEG-4. If your video can’t be imported to Photoshop, try the best free video converter – MiniTool Video Converter to convert the video to MP4.
This software mainly focuses on photo editing, which enables you to remove objects from a photo, blur the background of a photo, add text to an image, blend images to create a composite, etc. In addition to photo editing, it can also edit a GIF and convert a video to image sequence and a GIF.
Let’s take a look at how to convert video to frames using Photoshop.
Step 1. Open the Photoshop app and import the video you want to extract frames.
Step 2. Click the File button in the top-left corner of the window and choose Export > Render Video.
Step 3. In the Render Video window, select a folder to save the extracted frames and change the option Adobe Media Encoder to Photoshop Image Sequence.
Step 4. Then you can change the output format, image size and set the frame range.
Step 5. When you are done, hit the Render button to export the image sequence. After the process is finished, open the destination folder and check the exported images.
![[Guides] How to Crop a Photo in Photoshop and Photoshop Element?](https://images.minitool.com/moviemaker.minitool.com/images/uploads/2022/11/crop-photo-in-photoshop-thumbnail.png)
Convert Video to Image Sequence with FFmpeg
FFmpeg is a versatile command-line tool designed to convert and edit videos & audio files. You can use it to change the video format, add effects to videos, edit videos by trimming and merging, upscale/downscale videos, extract frames from videos, and so on.
If you are familiar with FFmpeg, then converting a video to image sequence is just a piece of cake for you, and if not, you’d better use VLC or Photoshop.
Here’s how to convert video to image sequence using FFmpeg.
Step 1. Download FFmpeg from its official website: http://ffmpeg.org/download.html. Then add it to Windows.
Step 2. Click the search icon on the taskbar and type “command prompt”. Click Open to open the Command Prompt app.
Step 3. Enter the following command and hit the Enter key.
ffmpeg -i videofile.mpg -r 1 image-%04d.png
- -i is the input file with path
- -r is the frames to capture and reverse how you want it to work.
- 1 means that the command will save a frame every second. Replace 1 by 0.5 will save frame every 2 seconds, replace 1 by 2 will save 5 seconds, etc.
- .png is the file extension of images that you extract from a video. You can change .png to .jpeg, .tiff, .bmp and other image file extension.
Convert Video to Image Sequence with KMPlayer
Like VLC, KMPlayer is also designed for video playback. It plays videos in various formats such as AVI, MPEG, TS, MKV, MP4, MOV, 3GP, FLV without stuttering and losing quality. KMPlayer is free and powerful with a simple interface. There are many excellent options available in this player.
With it, you can capture still images from a video, control video speed from 0.25x to 4x, play a video in the background, stream YouTube videos, and more. The Capture function allows you to convert video to JPG, PNG, BMP and extract frames with or without subtitles.
This amazing video player is available for Windows, Android, and iOS.
Below are the steps to capture frames from a video with KMPlayer.
Step 1. Download KMPlayer from the website: https://www.kmplayer.com/home. Then follow the on-screen instructions to install it on your computer.
Step 2. Open the KMPlayer app and right-click on the screen to select the Quick Open File… option. Or press Ctrl + O to open the target video.
Step 3. Pause the video and right-click on it. From the popup menu, select Capture > Advanced Capture.
Step 4. In the Advanced Capture window, click Open to change the save path according to your needs. Then change the image format, image quality, image size, and set the numbers/frames to capture if you like. If you want to capture images with external subtitles, go to the When Capturing section and tick the box before Include external subtitles.
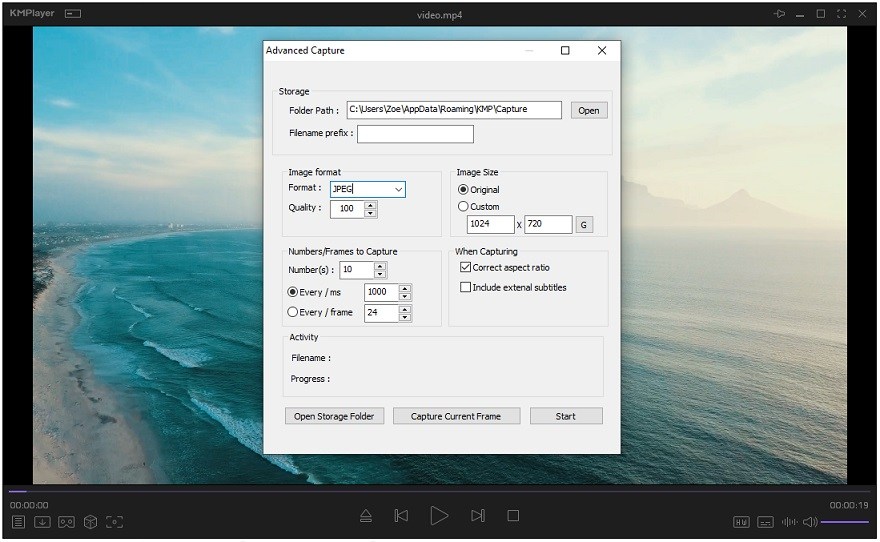
Step 5. After adjusting the advanced capture settings, click Start. Once done, click Open Storage Folder to find these captured frames.
Convert Video to Image Sequence with EZgif
For those who don’t want to install any software on computers, online video to image sequence converters will satisfy your needs. EZgif is one of the best video to images converters.
It’s capable of converting video to JPG, PNG. This converter supports importing videos in MP4, WebM, AVI, MPEG, FLV, MOV, 3GP, etc., and uploading a video by pasting its URL. Note that the maximum file size you can upload is 100 MB.
EZgif also lets you resize, reverse, crop, cut, merge, rotate videos, convert video to GIF, turn GIF into sprite sheet and so on.
Here’s how to convert image to sequence online with EZgif.
Step 1. Go to the EZgif website: https://ezgif.com.
Step 2. Click Video to GIF and choose Video to JPG or Video to PNG.
Step 3. Click Choose File to upload the video that you want to convert to images and tap Upload video!
Step 4. After importing the video, select the image size and frames per second. Then click the Convert to JPG! button.
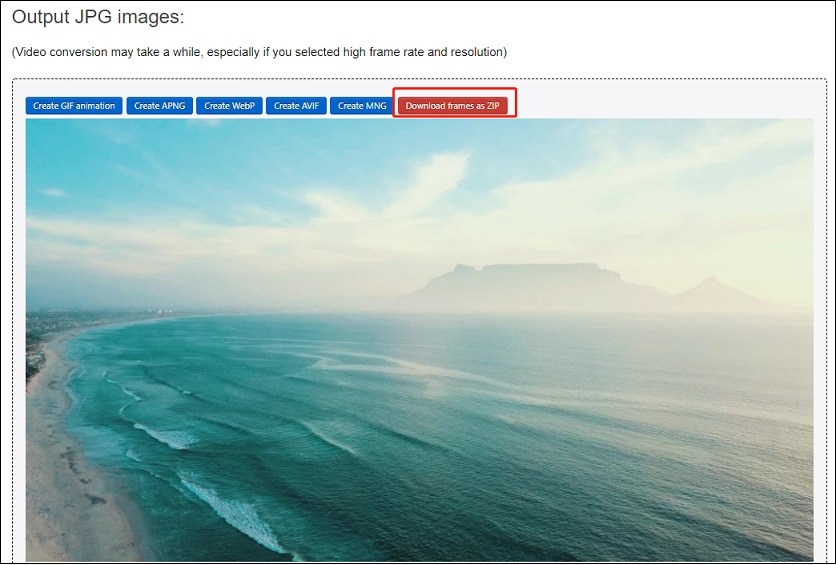
Step 5. When the conversion completes, click Download frames as ZIP to save the output images. Unzip the file and you will see the images extracted from your video.
Convert Video to Image Sequence with Online Converter
Online Converter is another tool to convert video to frames online for free. It can finish conversions like MP4 to JPG, M4V to JPG, AVI to JPG, MP4 to Webp, and MP4 to GIF.
It’s an all-in-one converter that can be used to convert and edit videos, audio files, images, eBooks, and documents. The upload file size is limited to 200 MB.
This website is easy to navigate and use. In just a few steps, you can easily complete the conversion.
Here’s how:
Step 1. Visit the Online Converter website: https://www.onlineconverter.com.
Step 2. Under Free Online Conversion Services, click Image Converter.
Step 3. Scroll down this web page until you see the Video to JPG option. Choose Video to JPG.
Step 4. Click Choose File and select the desired video to upload. Check the Options box and you can cut the video, adjust the frame size and quality. Click Convert to go on.
Step 5. Once the conversion is done, click Download Now to save the output images. Images will be saved as a ZIP file, so you need to unzip the file before viewing the images.
Part 2. How to Convert Image Sequence to Video with MiniTool MovieMaker
After learning how to convert video to image sequence, some of you may wonder how to make a video from image sequence. Don’t worry, this part will teach you how to convert image sequence to video step by step with MiniTool MovieMaker.
MiniTool MovieMaker is a video editor developed by MiniTool. It’s also can function as a photo video maker that creates a video from photos with effects, transitions, and music. Besides that, MiniTool MovieMaker gives you options to change the video format, make a GIF, and quickly make a slideshow with movie templates.
Follow the step-by-step guide to convert image sequence to video.
Step 1. Download and install MiniTool MovieMaker. Launch it.
MiniTool MovieMakerClick to Download100%Clean & Safe
Step 2. Click Import Media Files to import the image sequence. Then choose the first image, press the Shift key and then choose the last image to select all.
Step 3. Drag and drop these images to the timeline and choose one image to open the editing window.
Step 4. In the editing window, drag the slider to change the duration of the photo and check Apply duration to all images. Click the OK button.
Step 5. Click the Playback button to view these images. Then click Export.
Step 6. Now, you can rename the file, choose a new save folder, and select the desired video format. Click Export to export the video.

Conclusion
On the whole, desktop video to image sequence converter is better than online converter because it’s more stable, without file size limit.
If you have any questions when using MiniTool MovieMaker, please contact us via [email protected] or leave a comment below!
User Comments :