Premiere Pro is a well-known Adobe video editor used for creating stunning videos and movies. This program provides almost all the features and tools you may need. After editing, you’d like to export the video. However, sometimes you realize that the rendering is very slow.
What can you do to reduce the rendering time in Premiere Pro? How to render faster in Premiere Pro? Here’re 7 tips.
Trick 1: Use Previews
In Premiere Pro, previews are optimized for playback. To speed up rendering, you can also use previews in the export mode. Here’s how to set up previews in Premiere Pro.
Click on Sequence > Sequence Settings and set the Editing Mode as Custom. Then go to the Video Previews section, choose the preview file format and codec, and click OK to save changes.
To achieve good editing performance and the best export quality, choose a high-quality codec for your previews like Apple ProRes. QuickTime is recommended for the preview file format.
Trick 2: Use Hardware Encoding
Premiere Pro supports many video formats for output like H.264 and HEVC (H.265). The two formats are widely accepted by many devices and platforms. If you want to export video in H.264 or HEVC from Premiere Pro, you’d better use hardware encoding to accelerate the rendering. Premiere Pro hardware acceleration requirements.
In the Export Settings dialog, scroll down to the Encoding Settings section and select Hardware Encoding for Performance.
Trick 3: Set CBR Setting for Bitrate Encoding
Bitrate refers to the amount of information per second in video. The higher the bitrate, the better the video quality will be, but also the longer the export time will be.
After enabling hardware encoding in Export Settings, continue to scroll down to Bitrate Settings. In Premiere Pro, there’re two settings for Bitrate Encoding, CBR and VBR. To speed up rendering in Premiere Pro, just choose CBR and adjust the number of target bitrates.
CBR means the entire video keeps a consistent bit rate, making the video quick to load and easy to play.

Trick 4: Delete Media Cache
Another way to get Premiere Pro to render faster is to clear the media cache files in Premiere Pro. Click on Edit at the top menu bar and select Preference > Media Cache. Click Delete next to Remove Media Cache Files, tick Delete all media cache files from the system option, and click OK.
Trick 5: Increase Memory Allocation
To fix slow rendering in Premiere Pro, you can also increase memory allowance to fix the problem. Click on Edit > Preferences > Memory and change the value of RAM reserved for other applications into a smaller number to allocate more available RAM for Premiere Pro.
Trick 6: Turn on GPU Acceleration
To render video faster in Premiere Pro, you can enable GPU Acceleration. To do this, click on File > Project Settings > General, and under the Video Renderer and Playback section, set Renderer to Mercury Playback Engine GPU Acceleration.
![How to Fix the DaVinci Resolve Media Offline Issue [Full Guide]](https://images.minitool.com/moviemaker.minitool.com/images/uploads/2023/03/davinci-resolve-media-offline-thumbnail.jpg)
Trick 7: Export Video from Premiere Pro with Media Encoder
Another tip for faster rendering in Premiere Pro is to export videos with Adobe Media Encoder. If you’ve installed Media Encoder, you can directly export video from Premiere Pro with it.
In the Export Settings dialog, click Queue instead of Export, and Media Encoder will launch automatically. Make sure your Premiere Pro and Media Encoder are in the same version.
An Adobe Premiere Pro Alternative for Beginners
MiniTool MovieMaker is one of the best Adobe Premiere Pro alternatives for beginners because of its easy operability, rich features, and well-organized interface.
MiniTool MovieMakerClick to Download100%Clean & Safe
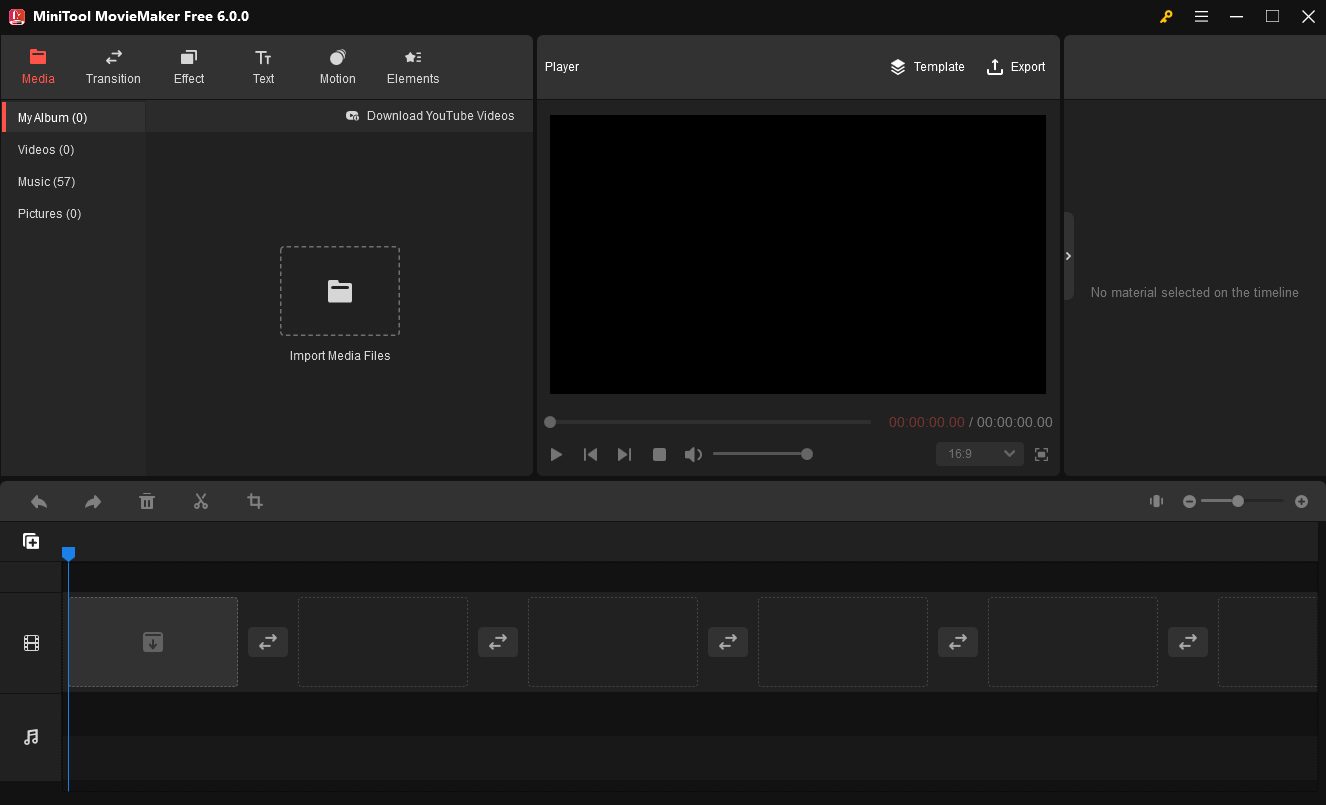
MiniTool MovieMaker allows users to crop, split, trim, and rotate videos, level up videos with filters, transitions, motion effects, text, and animated stickers, and adjust the video playback speed to create slow motion or fast motion effects.
What’s more, MiniTool MovieMaker supports exporting videos up to 1080p without watermarks.
Final Thoughts
If you’re still wondering how to render faster in Premiere Pro, just try these 7 methods to reduce export times. The rendering speed of Premiere Pro does not only depend on some settings inside the application itself but also your current hardware.
You can try these ways and get the most out of your hardware to speed up rendering in Premiere Pro. In addition to the above tips, you can also reduce the number of effects during editing and change playback resolution to make Premiere Pro render faster.
About The Author

Position: Columnist
Cora is a tech writer specializing in digital media workflows, with over six years of hands-on experience in video post-production, media transcoding, and screen capture. Her writing is always clear and practical. Cora also produces in-depth software reviews for users across skill levels to help them find the right tool and enjoy video editing.
User Comments :