In this post, you’ll learn how to add timestamps to a video using two excellent video editing software applications. Use these two tools to easily add unique timestamps to your video clips.
Timestamps tell you when a video or photo was taken. Many digital cameras can add a date or time stamp when shooting a video or taking a photo, but sometimes you might forget to enable date and time stamps in your camera. That’s okay because you can still add a timestamp to the video you’ve taken. Read on and learn how to add timestamps to a video on your PC.
How to Add Timestamps to a Video in MiniTool MovieMaker
MiniTool MovieMaker is a photo video maker designed for users of any level to create high-quality videos from images, video clips, and music. It supports the most popular media file formats and offers a variety of features to help share your stories through videos.
In this application, you’re able to crop, split, rotate, flip, and trim video, adjust video playback speed, reverse video, correct the clip’s color, add music or sound effects to the video, add text, apply transitions, effects, filters, and motion effects, decorate your footage with animated stickers, and change the video aspect ratio.
In addition to the great editing capabilities, MiniTool MovieMaker has many other benefits. It features a simple and user-friendly interface, does not add watermarks to videos, exports 16:9 MP4 videos up to 4K resolution for free, trims audio to video length when exporting, etc.
Now, let’s see how to add timestamps to a video using MiniTool MovieMaker.
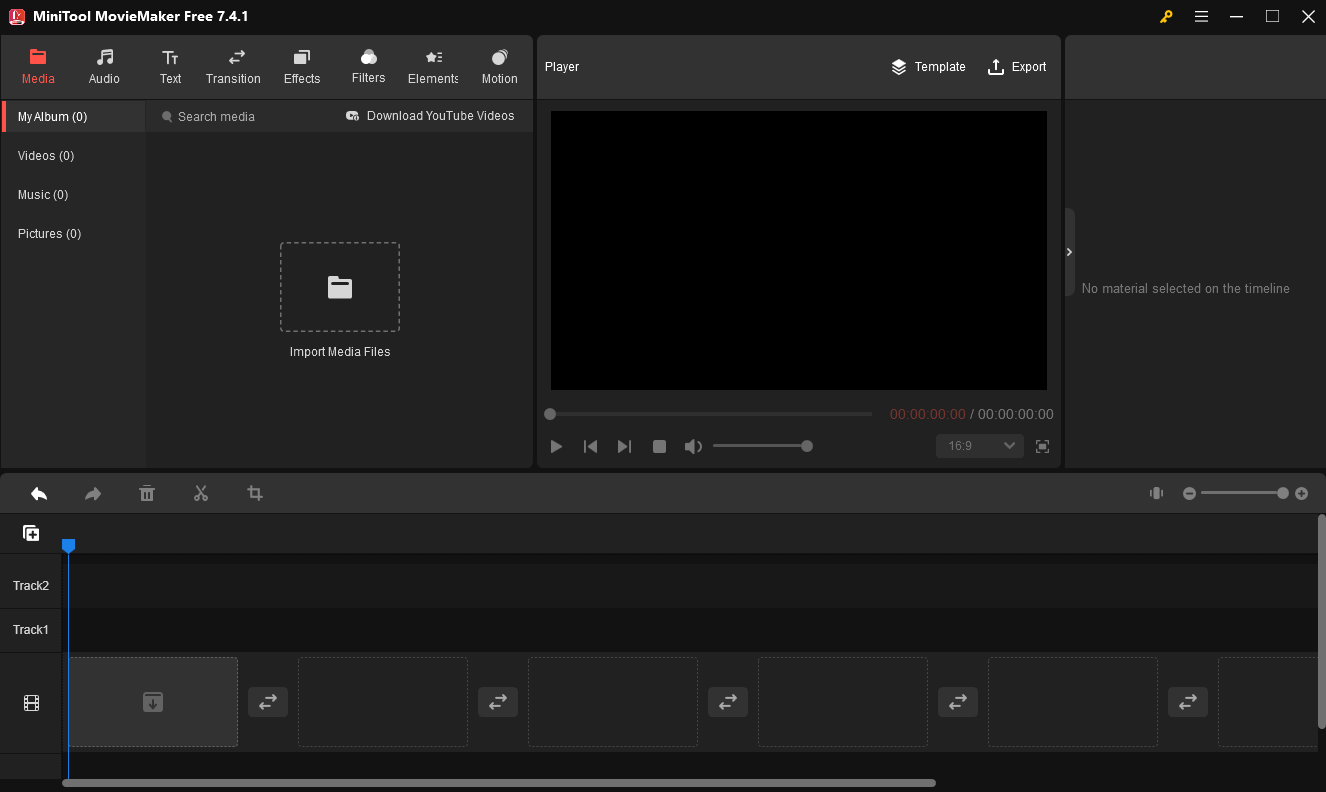
Step 1. Click the button below to download MiniTool MovieMaker. Complete installation, open this video editor, and close the promotion window to access the app’s main interface.
MiniTool MovieMakerClick to Download100%Clean & Safe
Step 2. Click the Import Media Files button under the Media tab to open the File Explorer, browse for your target video, and open it into MiniTool MovieMaker. Then, click the + at the bottom of the clip or drag it to the timeline.
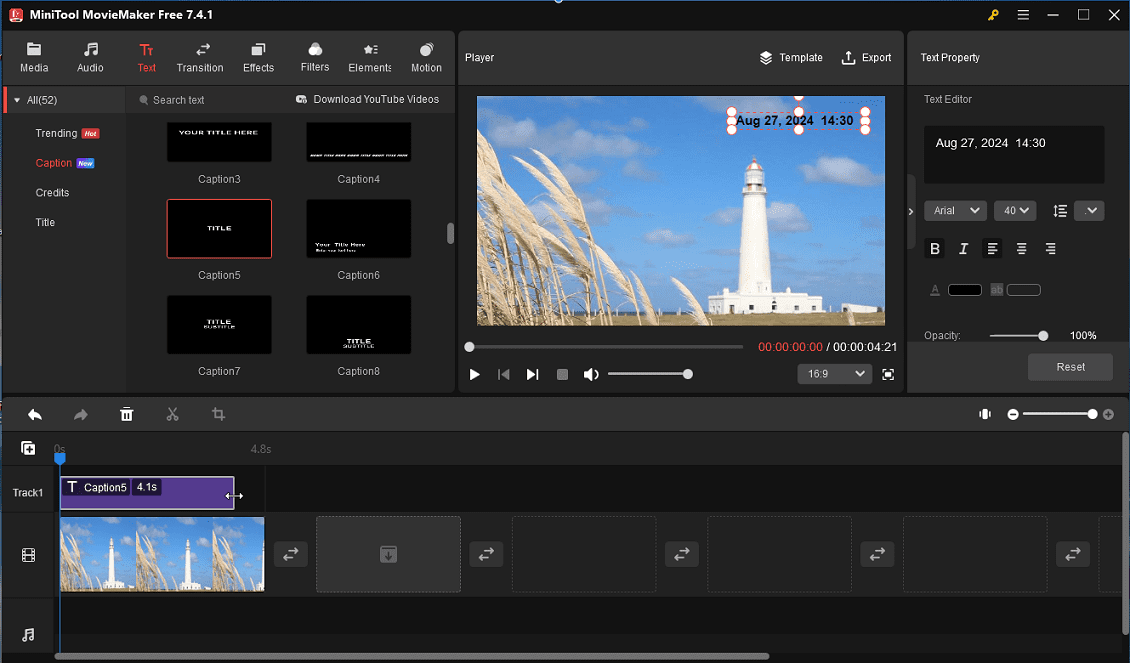
Step 3. Go to Text at the top menu bar, select Caption on the left sidebar, browse these text templates, and download one. Then, click the + icon at the bottom of the text template to add it to the timeline.
Go to Text Editor where you can enter your text and edit the font, size, color, alignment, and more. You can move the text on the video player wherever you want; drag the edges of the text track on the timeline to adjust its duration.
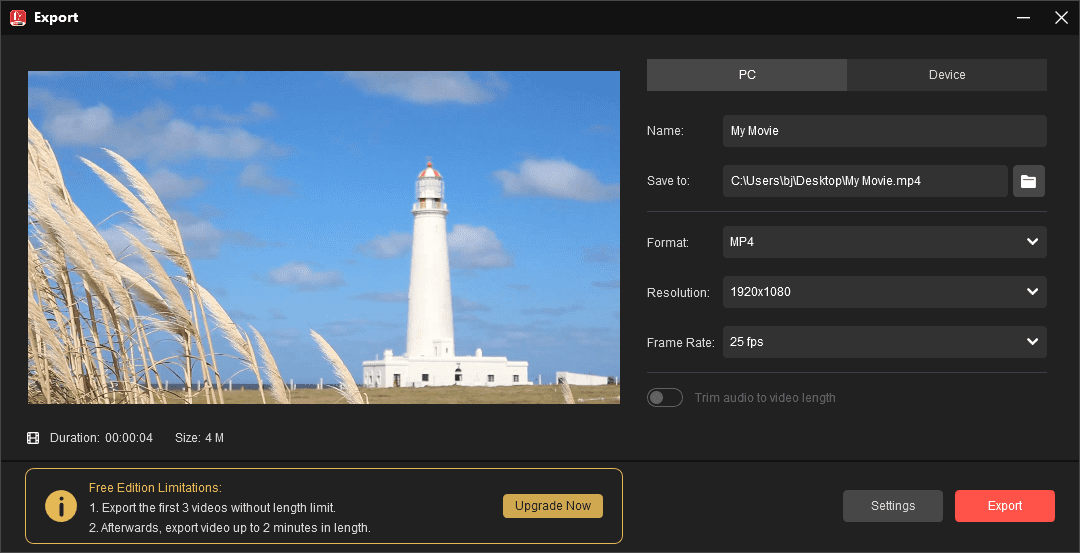
Step 4. Once done, click Export in the upper right corner to open the export window where you can configure the destination folder, output format, resolution, frame rate, and other settings. Finally, click the Export button to start processing your video.
How to Add Timestamps to a Video in Microsoft Clipchamp
Clipchamp is Windows 11’s built-in video editor and can also be accessed on Windows 10 via the Microsoft Store. This program provides many tools and effects to enhance your footage, such as text, transitions, filters, etc.
Clipchamp does not add a watermark to your videos, but it only allows you to select a resolution when exporting, and only supports MP4 format output. Additionally, 4K video export is only available to Premium subscribers.
Follow the steps below to learn how to add timestamps to MP4 video.
Step 1. Launch Microsoft Clipchamp on your desktop or go to the website in your browser.
Step 2. Sign in with your account and click the Create a new video button at the top to enter the editing page.
Step 3. Open the Import media drop-down list and choose from Browse files, OneDrive, Google Drive, Dropbox, and Xbox to import your video.
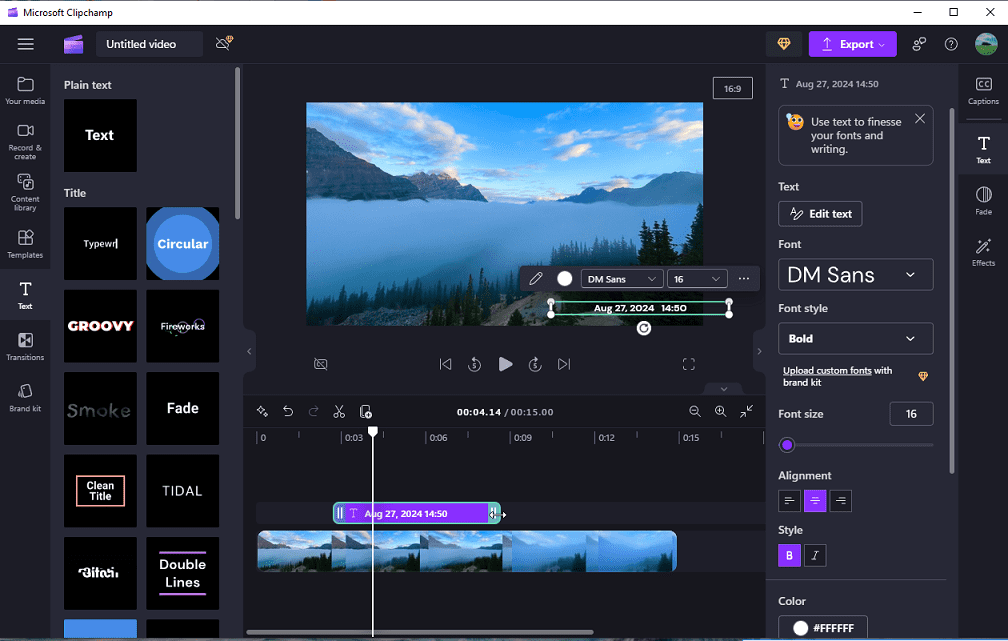
Step 4. Drag your video to the timeline. Click the T icon on the left sidebar and choose a text style for your timestamp.
Step 5. On the video player, replace the example text with your text, and edit the text font, size, color, and more. Also, you can adjust the position of the text on your video frame by dragging. To make the text duration match your video, select the text track on the timeline and drag the edges of the text track outward.
Step 6. To export the video, click the Export button in the top right corner, choose a resolution from 480p, 720p, and 1080p if you’re a free user, and Clipchamp will render an MP4 file for you.

Conclusion
As you can see, this post provides you with two ways to add timestamps to video. MiniTool MovieMaker and Microsoft Clipchamp are great tools for adding personalized timestamps to videos you’ve captured. Now, it’s your turn. Follow the steps above to create a timestamp for your video.
Finally, if you encounter problems creating videos with MiniTool MovieMaker, please contact us via [email protected].
Also read:
About The Author

Position: Columnist
Cora is a tech writer specializing in digital media workflows, with over six years of hands-on experience in video post-production, media transcoding, and screen capture. Her writing is always clear and practical. Cora also produces in-depth software reviews for users across skill levels to help them find the right tool and enjoy video editing.
User Comments :