

There are 6 methods to fix DaVinci Resolve playback lagging issue, including lower playback resolution, enable render cache, use optimized media files, change timeline resolution, disable color grades, and upgrade DaVinci Resolve to Studio. Besides, you can rely on an alternative video editor.
Tip: The following content is updated based on testing DaVinci Resolve 21.
Although DaVinci Resolve is a powerful video editing application (combined with color grading, color correction, visual effects, and audio post-production), there are still some problems when editing in DaVinci Resolve like choppy/lagging playback or media offline.
Why is my DaVinci Resolve playback lagging?
- High resolution media
- Color grading
- Uncompressed video clips
- Heavy fusion effects
- Overloaded hardware like GPU and RAM
- Slow drive speeds
Lagging playback is a common issue in DaVinci Resolve, and many people want to know how to fix playback lag in DaVinci Resolve and get smooth playback. In this guide, you’ll learn 6 ways.
Preview Solutions & Best Applications
| Solutions | Difficulty | Performance Gain | Best for situations |
| Lower playback resolution | Easy | High | Slow timeline playback |
| Render Cache | Easy | Medium | Effects-heavy projects |
| Optimized Media | Medium | High | Large 4K/8K footage |
| Lower timeline resolution | Easy | High | High-resolution editing |
| Disable Color/Fusion | Easy | Medium | Heavy grading |
| Studio Version | Paid | Very high | H.264/H.265 acceleration |
#1 Lower Playback Resolution to Fix DaVinci Resolve Lagging Playback
By default, the timeline proxy resolution is set to Full. If you want to enjoy smooth playback in DaVinci Resolve while editing, it’s useful to reduce the playback resolution. This only affects the playback and it won’t affect the final render quality.
1. Open a project in DaVinci Resolve.
2. Click on the Playback menu at the top.
3. Choose Timeline Playback Resolution and select Half or Quarter to reduce the playback resolution.
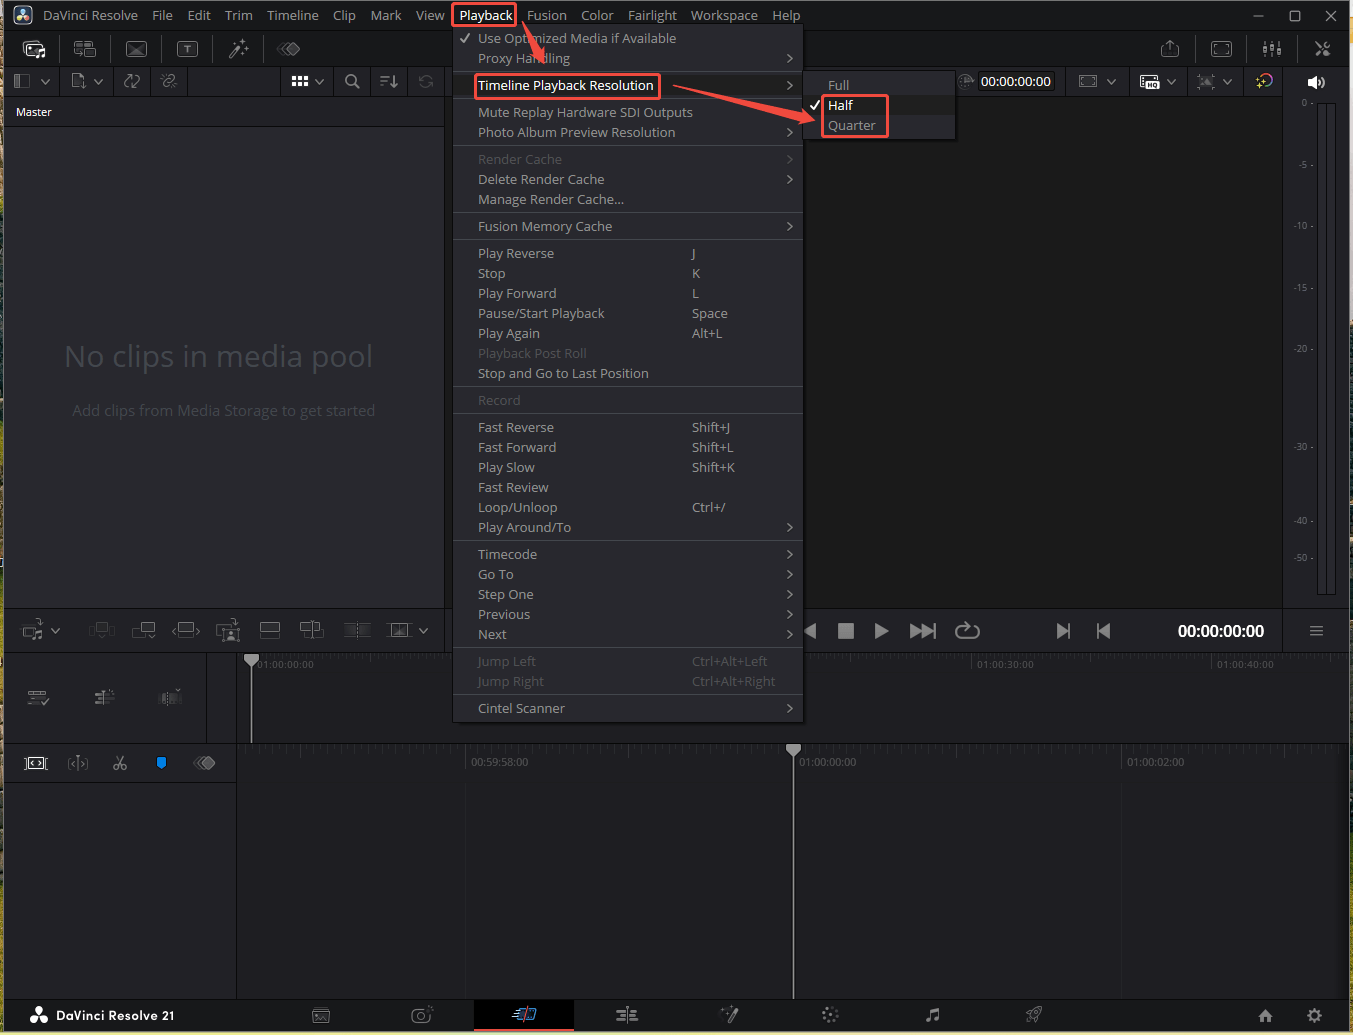
This will dramatically speed up your playback in DaVinci Resolve.
#2 Enable Render Cache to Resolve DaVinci Resolve Playback Lagging
If lowering playback resolution isn’t enough, Render Cache is the next setting worth enabling because it pre-renders complex effects. Therefore, DaVinci Resolve doesn’t need to calculate them during playback, reducing CPU/GPU workload. According to Blackmagic Design, optimized media and render cache are designed to improve timeline playback performance.
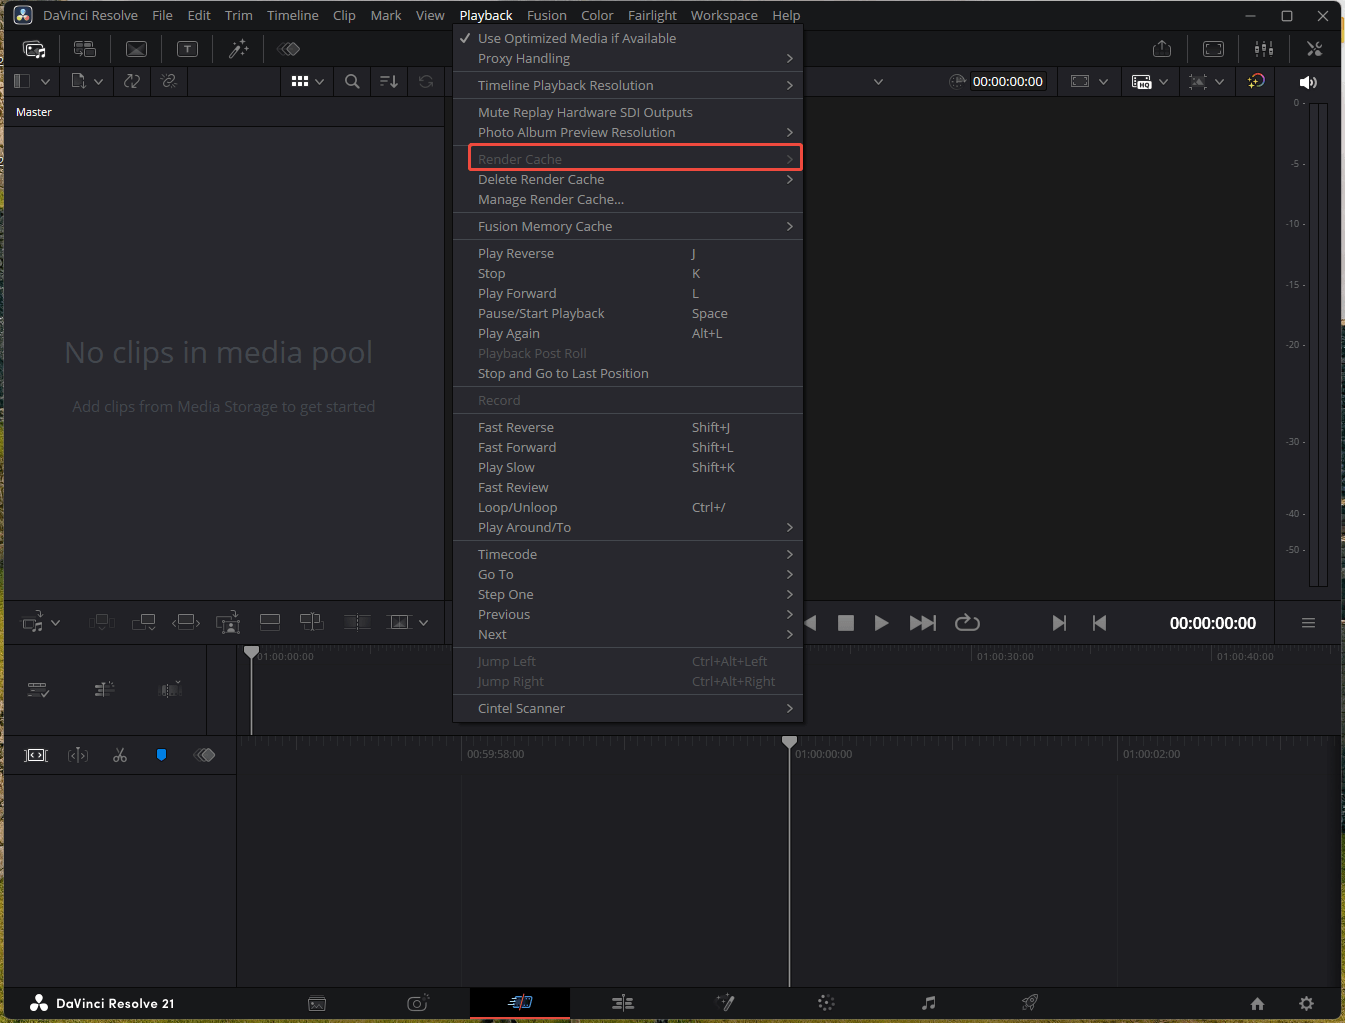
1. Click on Playback.
2. Select Render Cache.
3. Then you’ll see 3 options, None, Smart, and User. Smart is recommended and this option lets Davinci Resolve automatically select which clip to be cached.

#3: Use Optimized Media Files to Fix DaVinci Resolve Lagging During Playback
If you are using large high-resolution footage, the most effective way to fix the issue is to use optimized media while editing. Introduced by Blackmagic, an optimized file is a smaller copy file transcoded by the large original video.
1. Go to your Media Pool.
2. Find the video you want to create an optimized file for.
3. Right-click on it and select Generate Optimized Media or Generate Proxy Media.
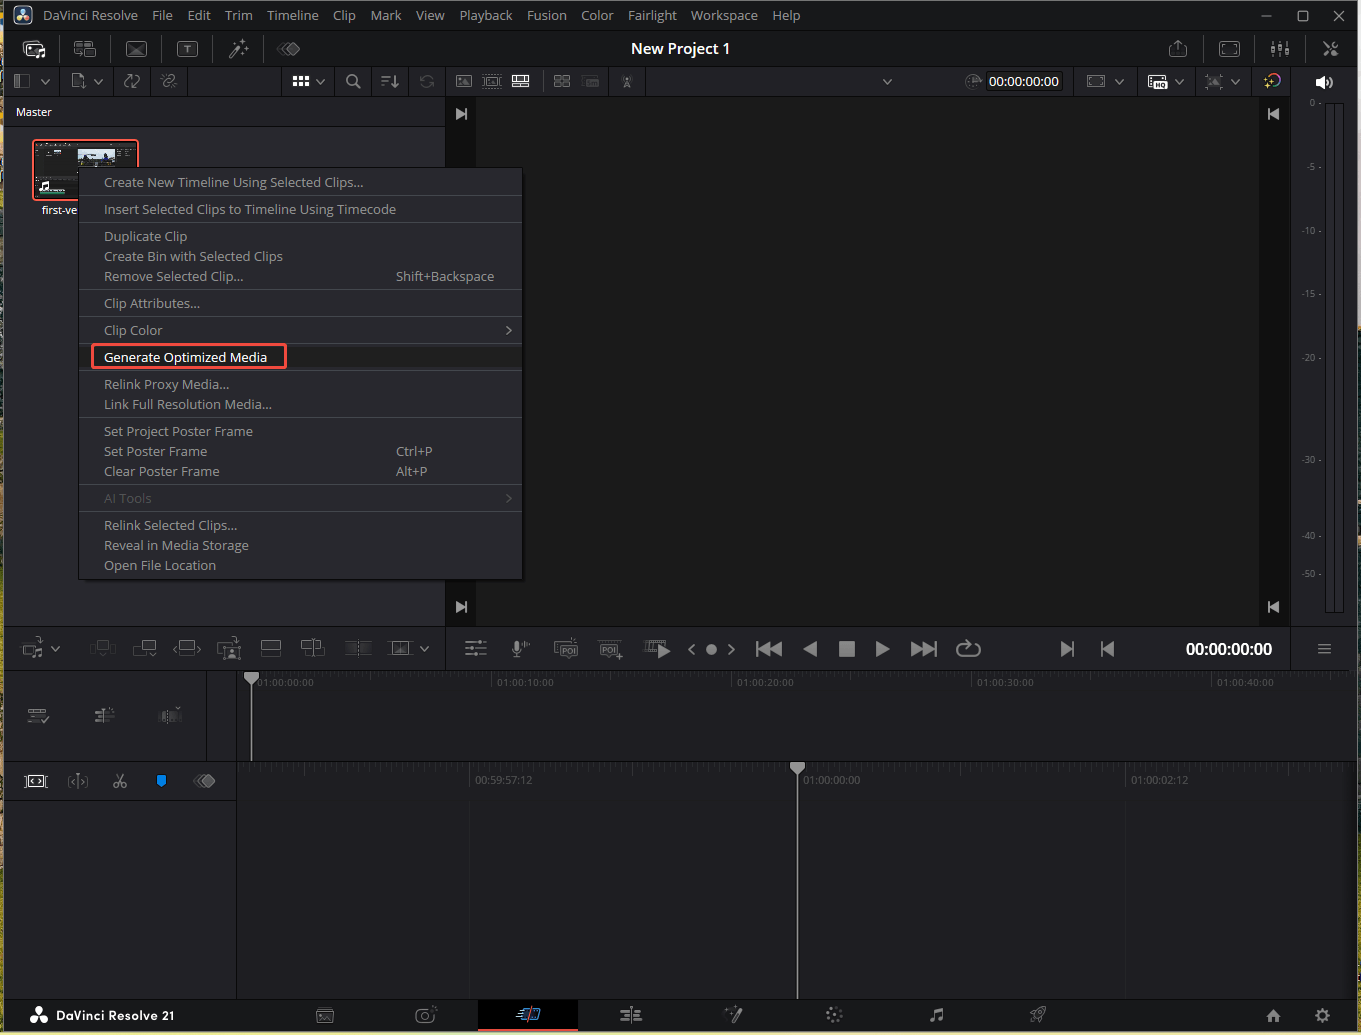
This process will take some time, depending on your video file size.
#4 Change Timeline Resolution to Solve Playback Lagging DaVinci Resolve Problem
DaVinci Resolve can work with high-resolution footage like 4K UHD and higher. While editing, you are recommended to cut down the timeline resolution like a 1080p timeline to speed up your system and avoid choppy playback.
How to reduce playback lag in DaVinci Resolve by lowering the timeline resolution?
1. Click on the gear icon at the bottom right corner to open the Project Settings window.
2. Go to the Master Settings tab.
3. Expand the Timeline resolution menu and select 1920×1080 HD if you’re working with 4K, 6K, or footage with higher resolution.
4. Click Save to apply the changes.
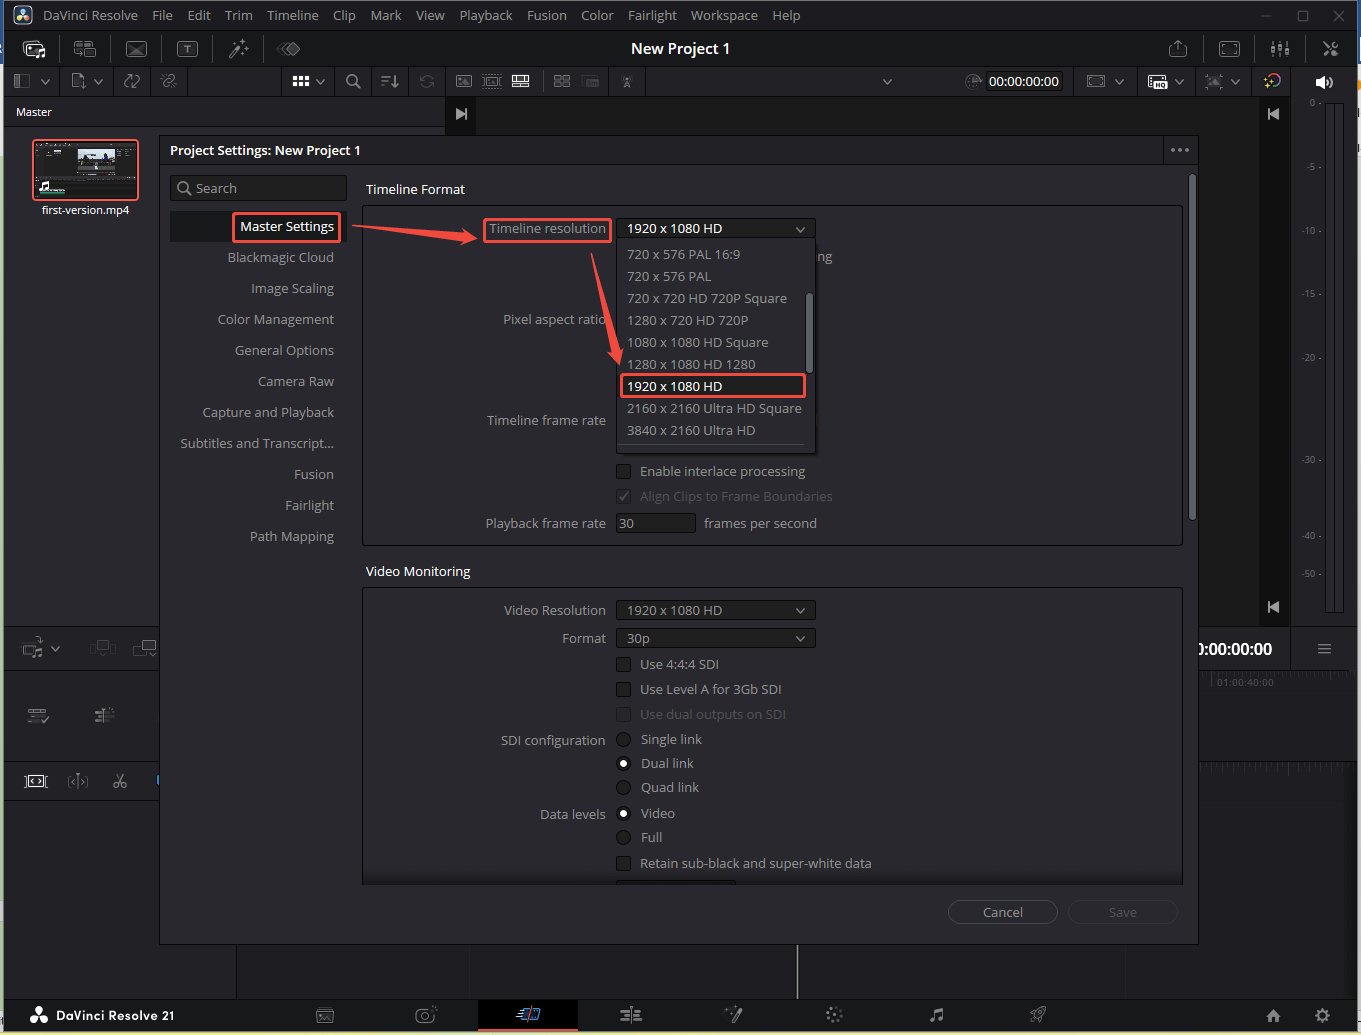
Also, you can adjust the timeline resolution in the Media Pool.
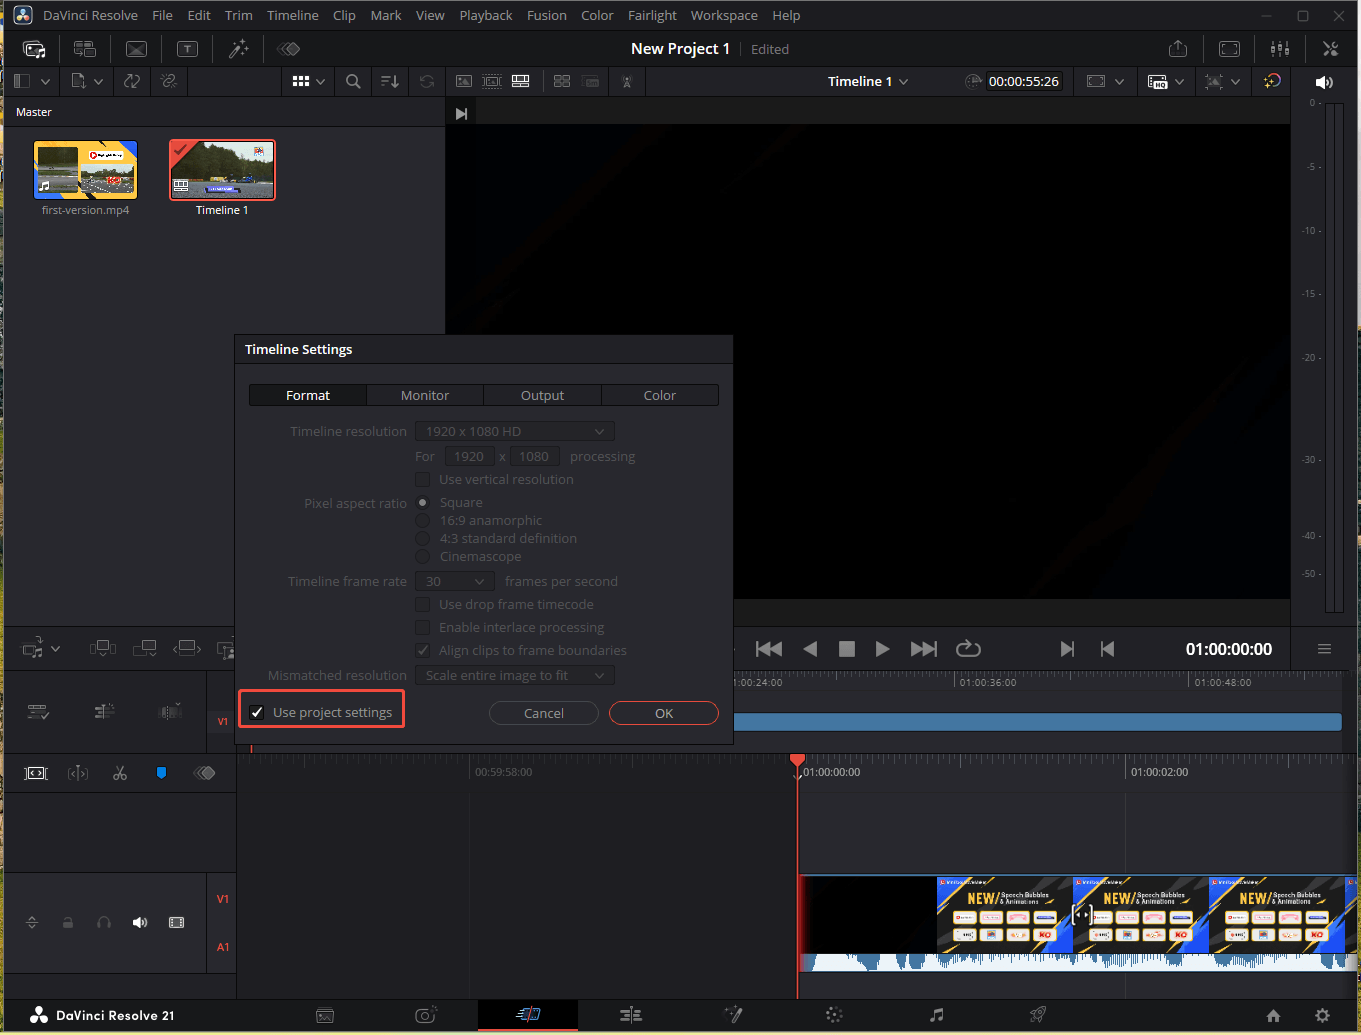
1. Right-click on the timeline in the Media Pool and Timeline Settings.
2. Check on the box Use Project Settings.
3. Choose a resolution and click OK.
#5 Disable Color Grades to Deal with DaVinci Resolve Video Playback Lagging
Color grading and OFX effects require intensive real-time GPU and CPU processing. DaVinci Resolve must recalculate millions of pixels for every frame, which can reduce playback FPS. When this happens, Blackmagic recommends to disable color grades to regain smooth playback. Then, if you need to watch your video in its final context, just enable color grading again.
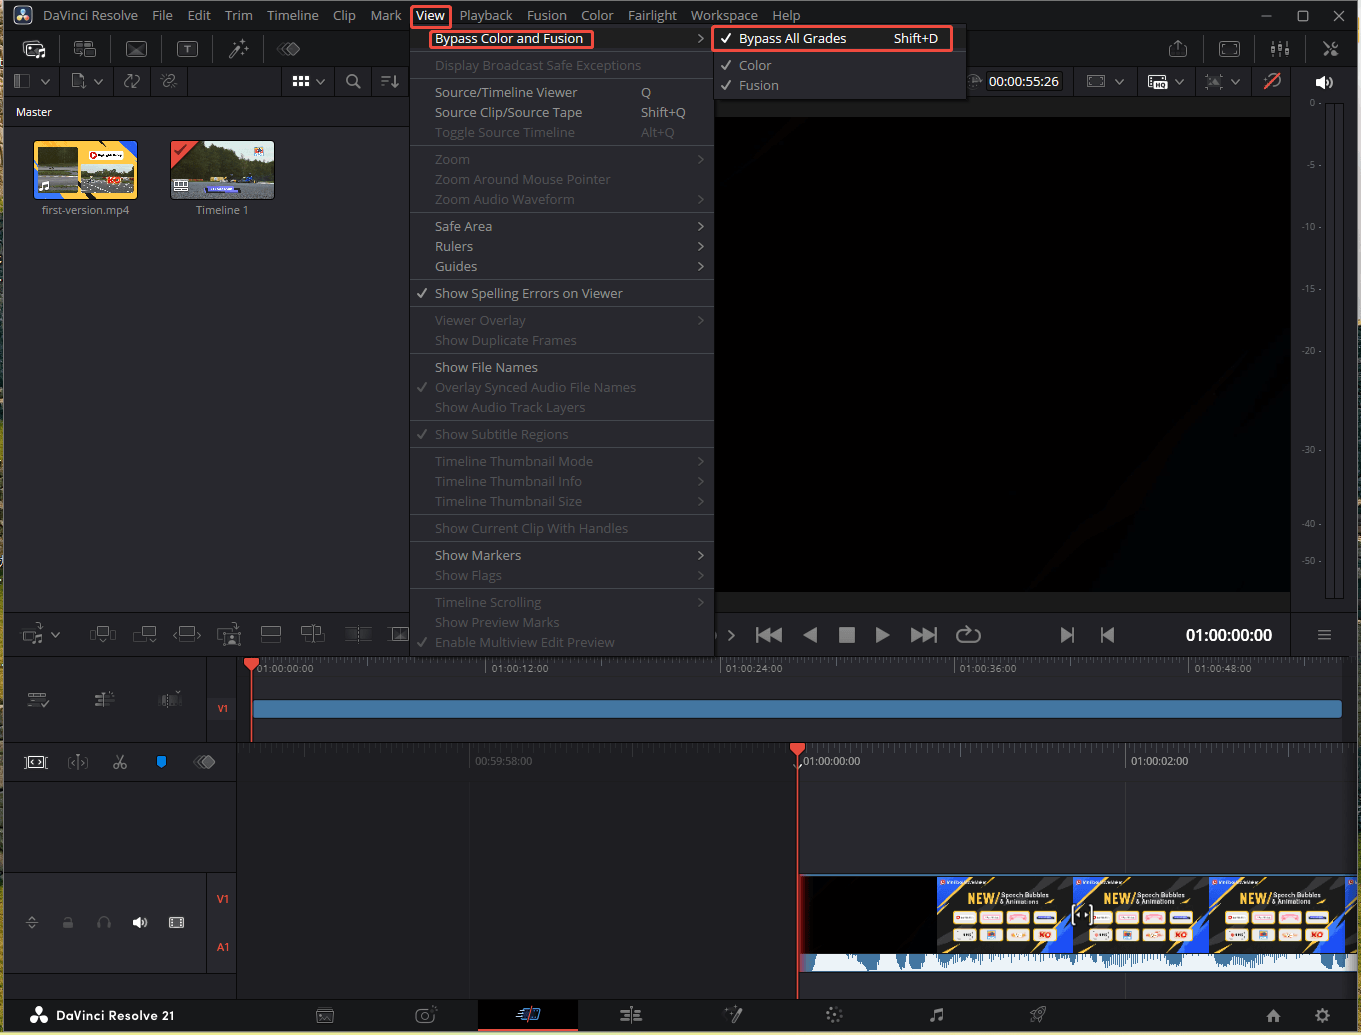
1. Click View from the top menu.
2. Select Bypass Color and Fusion and check all the 3 options: Bypass All Grades, Color, and Fusion.
#6 DaVinci Resolve Playback Lag Fix: Upgrade DaVinci Resolve to Studio
DaVinci Resolve has two versions, a free version and a paid Studio version. The two versions both support GPU acceleration, but the Studio version supports hardware-accelerated decoding and encoding of formats, such as H.264 and H.265, which can greatly speed up editing and rendering and enhance playback performance.
If you always experience lagging playback in the free version of DaVinci Resolve, you can consider upgrading to the Studio version.
For more editing settings, please check the DaVinci Resolve official user manual.
DaVinci Resolve Hardware Requirements to Avoid Playback Lag
For heavy effects or 4K video editing, you should prepare your PC with these standards:
- GPU: at least 8GB VRAM; RTX 4070 or higher for NVIDIA graphics card.
- RAM: at least 32GB; 64GB is recommended for using Fusion, color grading, or 4K timelines.
- Disk space: NVMe SSDs is minimum.
- CPU: Multi-core processors such as AMD Ryzen and Intel Core.
For more details, please refer to DaVinci Resolve official hareware specs.
A DaVinci Resolve Alternative for Editing Videos
If you need an alternative to DaVinci Resolve for creating videos, you can try MiniTool MovieMaker, especially if you’re new to video editing and on a budget. It’s an easy-to-use video editor with a multitrack editing feature and many tools, such as transitions, filters, stickers, and more to help you create high-quality videos.
MiniTool MovieMakerClick to Download100%Clean & Safe
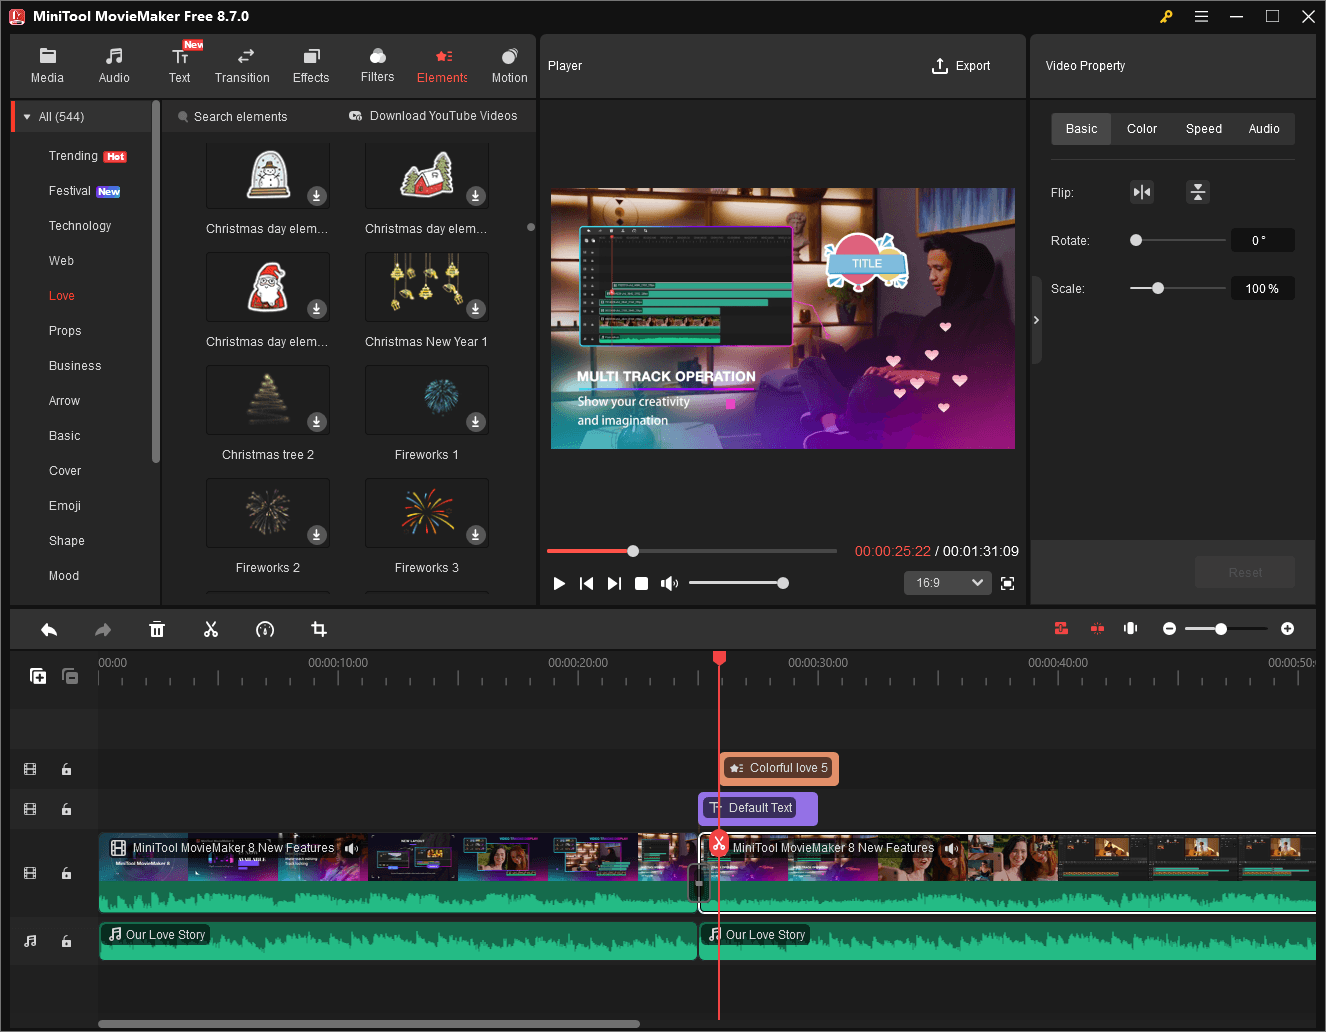
With MiniTool MovieMaker, you can quickly make videos for YouTube, Facebook, Instagram, TikTok, and more social media platforms, and it lets you export videos in 1080P or 4K without watermarks.
Conclusion
That’s all about the 6 ways to solve the DaVinci Resolve playback lagging issue. Hope they can stop your DaVinci Resolve from lagging and bring you smooth playback.
People Also Ask
1. Go to DaVinci Resolve > Preferences > Memory and GPU.
2. Under the GPU Configuration section, uncheck the Auto option behind the GPU processing mode and expand the option list to select CUDA (for NVIDIA) or Metal (for Mac).
3. Uncheck the Auto option for GPU selection and manually select your GPU.
1. Click on the Project Settings icon (cog) at the lower right section of the software and select Master Settings.
2. Change the Timeline Frame Rate to make it match your video’s frame rate.
Besides, ensure that the keyboard shortcuts (e.g. the L key) aren’t speed up the playback.
2. Select Proxy Handling from the drop-down list.
3. Then, choose Prefer Proxies.
About The Author

Position: Columnist
Helen is a tech writer with over 10 years of experience. She specializes in creating easy-to-follow guides for video editing, media file conversion, and computer performance. Helen doesn't just write—she tests every software herself and listens to feedback from users and experts. Her goal is to make complex programs simple so that everyone can solve their tech problems with confidence.
User Comments :