Adobe Premiere Pro is a professional and advanced video editing application, but occasionally it also faces some problems like media pending, laggy playback, export error code 3, etc.
Sometimes, Premiere Pro won’t play videos, can’t preview the video footage, can’t play video in the timeline, or audio is playing but no video. This might be due to accumulated media cache files, hardware glitches, outdated video card drivers, etc. Try the following 7 ways to fix video not playing in Premiere Pro.
Method 1: Restart Your Computer
The first fix for video not playing in Adobe Premiere Pro is to restart your computer. This can help troubleshoot hardware or video driver failures that may be causing video playback issues in Premiere Pro.
After restarting, open your Premiere Pro program and import that video again to check if this application can play it smoothly.
Method 2: Reset Premiere Pro
The second fix for video not playing in Premiere Pro is to reset the program’s preferences, a common way to troubleshoot issues in Premiere Pro. This will also undo most of your customized settings and return to the factory defaults.
To reset preferences in Premiere Pro, press Alt on Windows or Options on Mac when launching Premiere Pro, and click OK in the pop-up window to reset your preferences. Close and restart Premiere Pro to see if the video playback issue is resolved.

Method 3: Play or Edit the Video in Another Program
When Premiere Pro won’t play your videos properly, you can use another video player to troubleshoot video corruption issues. If the video can be played in another program, it shows that there’s no problem with the video itself. On the contrary, that’s probably because your video is corrupted.
If you need to repair the video to fix the playback issue in Premiere Pro, you can try MiniTool Video Repair. This program can repair damaged MP4, MOV, M4V, and F4V videos as well as videos from GoPro, Sony, Canon, DJI Drones, and more.
Alternatively, if you want to play and edit the video with another application, you can try MiniTool MovieMaker. It supports importing multiple video file types like MP4, MPG, WMV, MOV, MKV, FLV, AVI, and more.
MiniTool MovieMakerClick to Download100%Clean & Safe
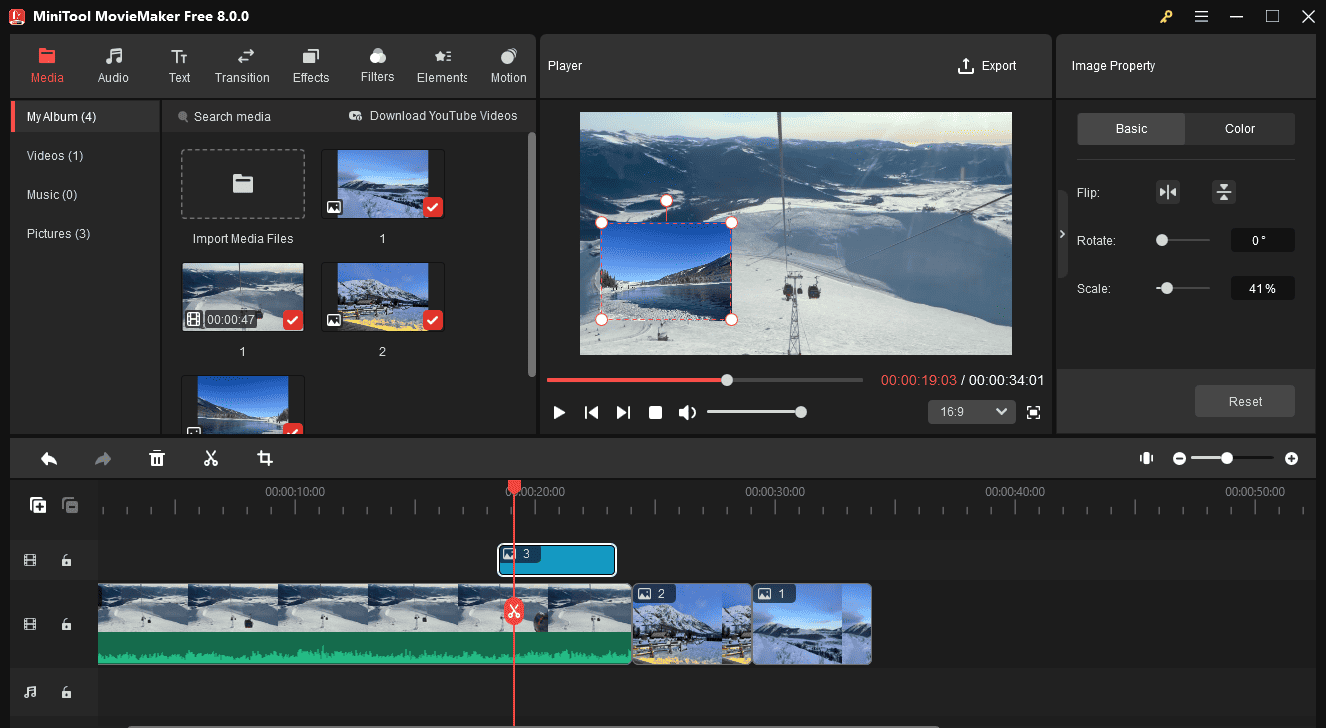
MiniTool MovieMaker not only helps you preview your footage but also can edit and enhance your videos/pictures. It can crop, trim, split, rotate, and reverse videos, decorate videos with text and stickers, and enhance videos with transitions, filters, motion effects, and more.
Additionally, with multitrack editing support, MiniTool MovieMaker gives you more opportunities to unleash your creativity. It lets you add up to 9 tracks for layering video clips, images, text, animated elements, effects, filters, etc., and 2 audio tracks for voices, songs, and sound effects to enrich and enhance the final visual effect.
Method 4: Clear Media Cache Files
If your computer has accumulated too much media cache data or has corrupted cache files, it might be the reason Premiere Pro won’t play videos. Try clearing media cache files to fix video not playing in Adobe Premiere Pro.
To delete the media cache, click on Edit at the top menu bar and choose Preferences and Media Cache. Click Delete next to Remove Media Cache Files, switch to Delete all media cache files from the system, and click OK. Then, restart Premiere Pro and play the video again.
Method 5: Update Video Driver
Also, you can update the video card driver to fix the video not playing in Premiere Pro problem. Open the Device Manager, double-click on Display adapters, and then update the AMD/Nvidia/Intel HD drivers.
Method 6: Change the Audio Hardware Settings
When Premiere Pro won’t play your videos, you can change the audio hardware settings to fix the problem. Although it sounds a little strange, this way does help.
To configure audio hardware settings in Premiere Pro, click on Edit > Preferences > Audio Hardware, and choose the desired driver. On Mac, click Preferences > Audio Hardware, and select CoreAudio in the Device Class menu.
Method 7: Change the Render Settings
To watch videos smoothly in Premiere Pro, you can also change the render settings. Click on File > Project Settings > General, and set your Renderer to Mercury Playback Engine Software Only.

Conclusion
When you can’t preview the footage in Premiere Pro, try the above 7 methods to fix the video not playing in Premiere Pro problem. Hope you can enjoy smooth video playback in this application.
About The Author

Position: Columnist
Cora is a tech writer specializing in digital media workflows, with over six years of hands-on experience in video post-production, media transcoding, and screen capture. Her writing is always clear and practical. Cora also produces in-depth software reviews for users across skill levels to help them find the right tool and enjoy video editing.
User Comments :