Employee onboarding serves as the first step for new employees to truly understand the company’s culture, values, and organizational structure. While most companies rely on PowerPoint presentations to convey information, this traditional approach is increasingly showing signs of becoming outdated. Without dynamic and interactive content, new hires are prone to distraction and disengagement, fostering a passive sense of alienation that ultimately leads to high turnover rates. To avoid this situation, it’s best to create onboarding videos with diverse content that both attracts new employees and keeps them engaged.
How to create an onboarding video for new hires? Before we dive in, let’s first understand what onboarding videos are. Keep reading.
What Are Onboarding Videos
Onboarding videos are typically short videos used to welcome new employees. They aim to introduce company culture, values, and other corporate information, helping new hires gain a basic understanding of the company as quickly as possible.
Unlike lengthy written manuals or tedious PowerPoint presentations, onboarding videos adopt a more personalized, easier-to-understand, and more engaging format that captures employees’ attention and effectively introduces the company.

4 Main Types of Onboarding Video
Here are 4 types of onboarding videos you can take as a reference.
#1. Company Culture Videos
It’s really important for new hires to learn about the company culture. Company culture videos primarily showcase the company’s values and daily work atmosphere, team-building activities, and company traditions, allowing new employees to genuinely experience the team they are about to join.
#2. Welcome Videos
Welcome videos can create a memorable first step in the onboarding experience. If company leaders at all levels take the time to personally record videos welcoming new employees, it will make them feel valued. These videos showcase the leadership team’s approachable image and the company’s warm atmosphere, making new employees more inclined to stay with the company.
#3. Training Videos
Training videos can be divided into two main parts: Job training and safety training. Job training videos primarily showcase daily work tasks and position requirements. These videos are efficient, customizable, and engaging, helping ensure all new employees possess the skills and knowledge needed to perform their roles effectively.
Safety training is often rather tedious. But, videos for safety training can make boring, text-heavy compliance topics more engaging. They help workers understand safety protocols, rules, and legal requirements through animations, real-world case studies, and concise explanations.
#4. Team Introduction Video
Team introduction videos allow employees to get to know their colleagues from day one, ensuring they never feel isolated when they need help. These videos help new employees match names to faces, making them feel more comfortable asking for help and becoming acquainted with team dynamics ahead of time.
Why Create Onboarding Videos
As we mentioned earlier, onboarding videos are more engaging for new employees than traditional PowerPoint presentations. Here, I’ve summarized the advantages of onboarding videos. Read on for more information.
For the Company
- Accessibility: Videos can be enhanced with features such as subtitles and transcripts to accommodate the accessibility needs of diverse employees.
- Save Costs and Time: A single video can complete all new employee onboarding training, significantly saving both costs and time.
- Scalability: Once the video is completed, it can be used for an unlimited number of new employee onboarding sessions. Should any updates be required, they can also be directly edited into the video.
For New Employees
- Enhance the Desire to Learn: Videos are more engaging and capture attention, making new employees more willing to learn about the company.
- Enhance Engagement and Connection: Video makes companies more human and helps build stronger emotional connections.
- Remember Information Better: When information is given in video format, it is easier to remember. New staff can learn at their own pace and watch videos multiple times.
How to Create Onboarding Videos
Now that you have a basic understanding of onboarding videos, we’ll explore how to create an onboarding video for new hires. Making a great employee onboarding video entails more than just shooting footage and adding a few slides. To ensure that your video is interesting and serves your company’s goals, you must prepare carefully, have clear objectives, and use the correct resources.
How to make an onboarding video? Below are the fundamental steps for producing an onboarding video—feel free to incorporate your own creative ideas. Keep reading for more.
Step 1. Define the Goals
Before beginning production of the onboarding training video, it is essential to clearly define the business objectives the training aims to achieve. For example: helping employees understand the company culture, familiarize themselves with the organizational structure, showcase the company’s positive atmosphere, introduce the company’s business goals, and so on. The more specific your goal is, the easier it will be to generate videos that match requirements.
Step 2. Create Scripts
A well-written script serves as the foundation for your onboarding video, ensuring that your message is communicated clearly and effectively. First, consider your video audience and tailor your script and tone accordingly. Plus, the script should also match the video format, be engaging and concise, and avoid using technical jargon.
Step 3. Prepare Footage
Film and collect the source videos you need. It is best to use professional photography equipment for filming to ensure high-definition video quality. Pay attention to lighting and the environment during filming. Well-lit videos with clear audio significantly enhance the professionalism of onboarding content and ensure viewers can easily follow along.
Here are some professional photography equipment recommendations:
- Panasonic Lumix GH7
- Fujifilm X-H2S
- Sony ZV-E1
- Sony ZV-E10
- Sony Alpha a6400
- GoPro HERO9 Black
- GoPro HERO12 Black
- GoPro HERO13 Black
- Canon G7X Mark III
- Canon EOS 90D
- Nikon Z30
Step 4. Edit Video
The footage you’ve shot may be somewhat disjointed, so it’s best to consolidate it and polish it up. In that case, you need a professional video editor to help you with that. Here, I highly recommend a free video editor – MiniTool MovieMaker. I’ve used it many times and it never disappoints me.
MiniTool MovieMaker is an all-in-one and powerful video editing program that features various functions. It can edit your videos by trimming, cropping, splitting, reversing, rotating, speeding up, and more. Plus, you can adjust the video color, like saturation, contrast, etc., which makes your videos more appealing. This application supports a wide range of formats, including but not limited to MP4, MOV, MKV, AVI, MPG, FLV, MP3, AAC, M4A, and more. So, you don’t have to worry about format incompatibility.
More than that, MiniTool MovieMaker supports advanced editing, including multi-track editing, 4K editing, photo collage, video text overlay, copy and paste on timeline, etc. Furthermore, this free download video editor comes with a resource library packed with trendy stickers, effects, transitions, motions, and more. Simply add these materials to create engaging and professional onboarding videos for new employees.
Now, you can follow the instructions below to edit the onboarding video.
1. Download and Install MiniTool MovieMaker
Click the download button below to download this program and install it on your computer by following the setup instructions.
MiniTool MovieMakerClick to Download100%Clean & Safe
2. Import the Onboarding Video
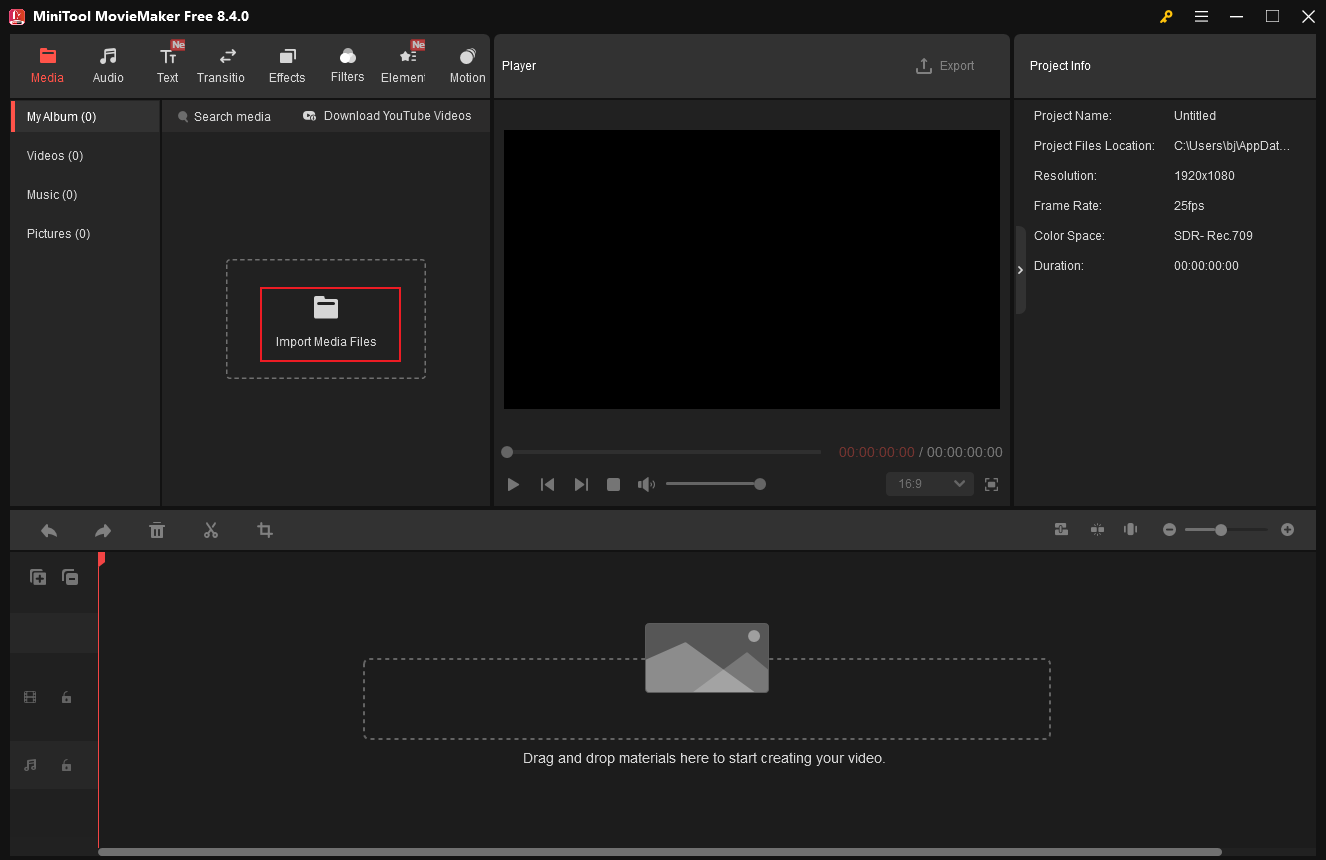
Launch MiniTool MovieMaker and click on the New Project tab to enter the main editing page. Then, click on the Import Media Files option to import all the videos you prepared before.
3. Complete Basic Editing
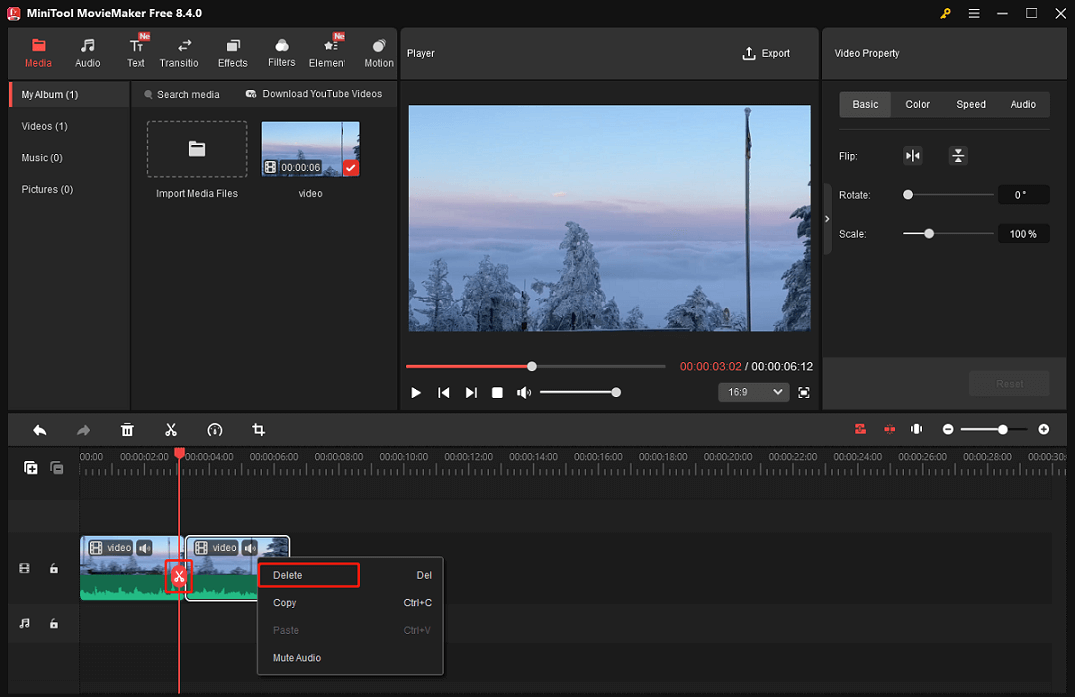
Drag and drop the added video to the timeline.
Drag the red playhead to the desired position, then click the Split icon to divide the video into two parts so you can extract and remove clips. Continue doing this until all of the unwanted video segments are separated. Next, right-click on the undesirable clip and click Delete.
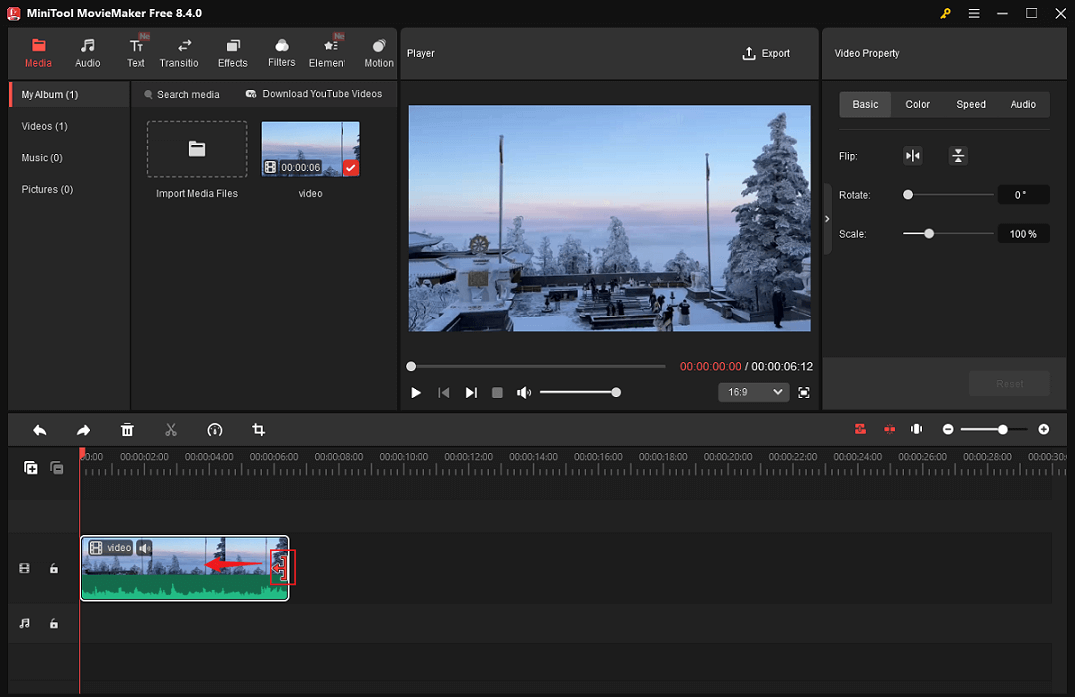
Hover the mouse cursor over one of the two edges of the video layer until the Trim icon shows up, then drag it inward to remove the undesired part.
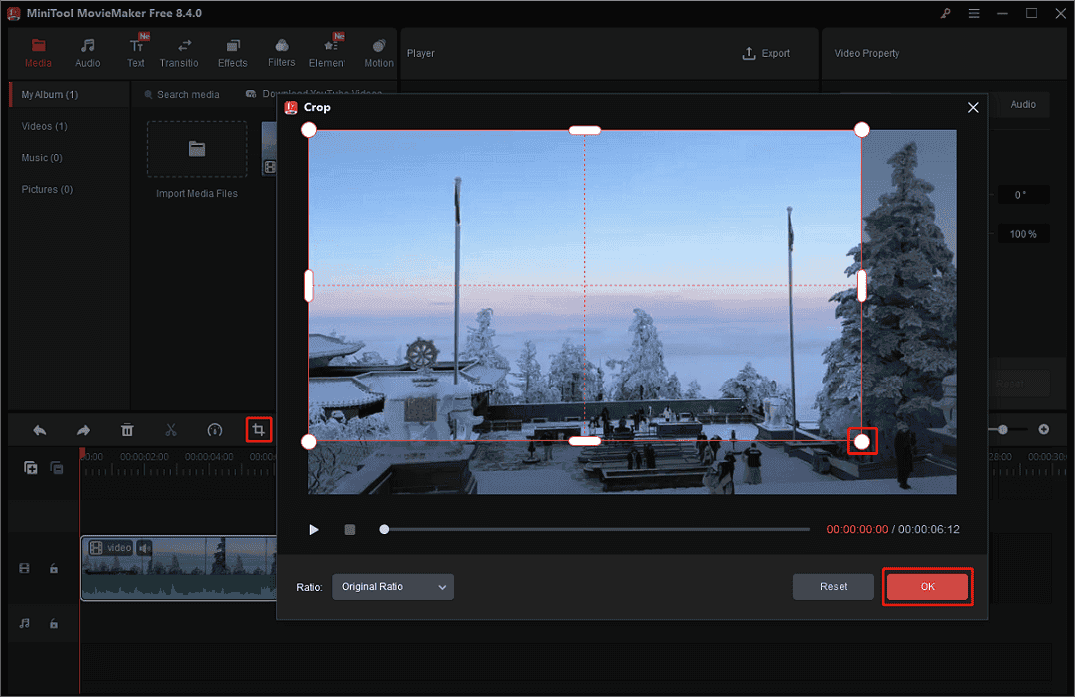
Crop Video
Click on the target video clip on the timeline and click the Crop icon in the toolbar above to access the Crop window. Then, drag the cropping handles inwards to crop the video. After that, click OK to save the changes.
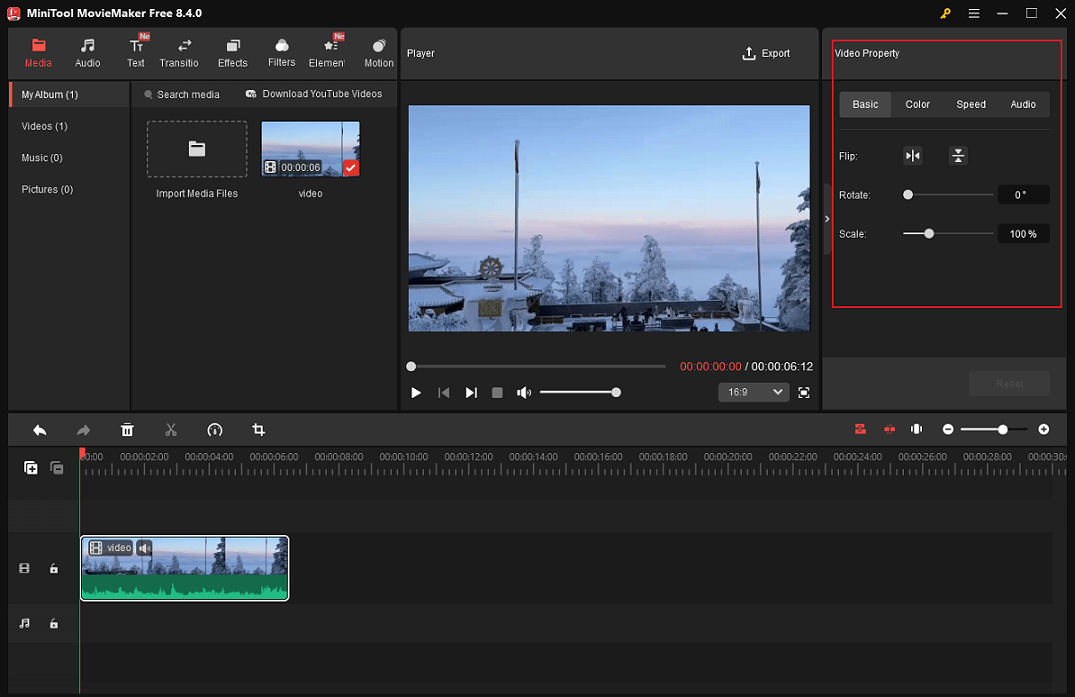
4. Adjust Video Property
Click the video on the timeline. In the top right Video Property section, you can flip, scale, and rotate video. Plus, you can change the video contrast, saturation, and brightness. Speed up or slow down the video, change the audio volume, or fade in/ out the audio based on your needs.
5. Make the Onboarding Video More Interesting
Incorporating elements such as music, stickers, and transition effects into onboarding videos can more effectively capture employees’ attention.
Add Music to the Video
Music can evoke human emotions. It’s best to add some upbeat music that fits the style to the video. MiniTool MovieMaker has an audio library that comes with music of various styles. Or, you can add your own collection from the local folder.
- Add music from the Audio library: Go to the Audio section to download the music you prefer. Then, add it to the audio track and trim the audio based on your needs.
- Add music from the local folder: Click the Import Media Files option in the Media section to add music from your local folder.
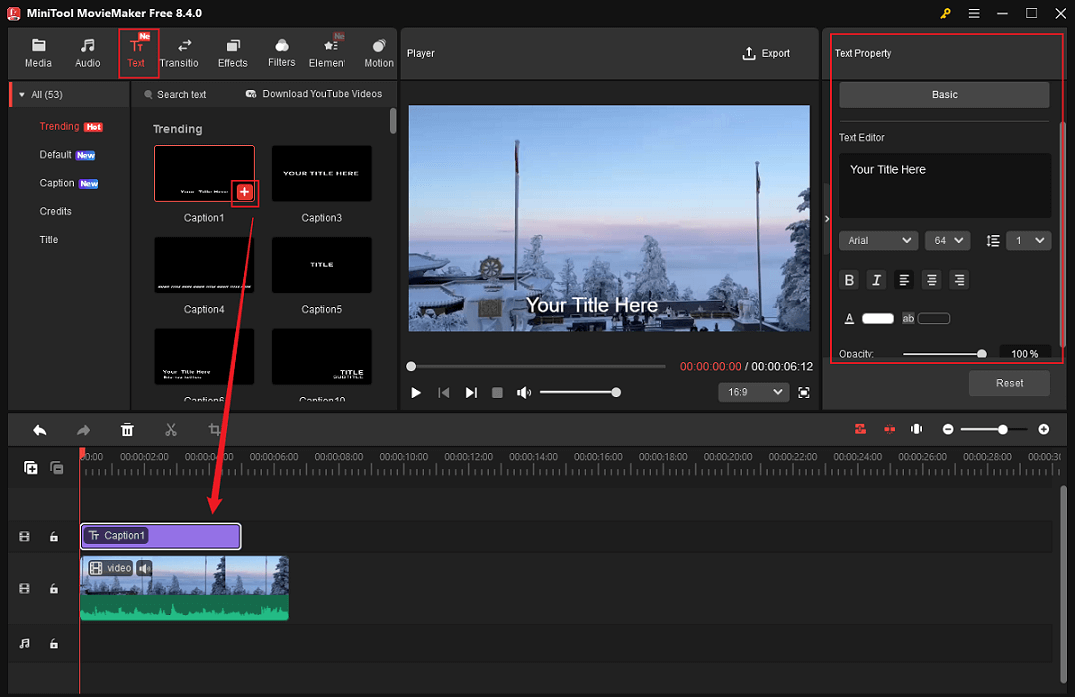
Add Text Overlay
To help viewers clearly understand the video content, add text to important information within the video. Go to the Text section, select your preferred text style, and click the plus icon to add it to the video. Then drag the edges of the text layer on the timeline to adjust its display duration. In the top right Text Property window, input text and customize parameters like font and size.
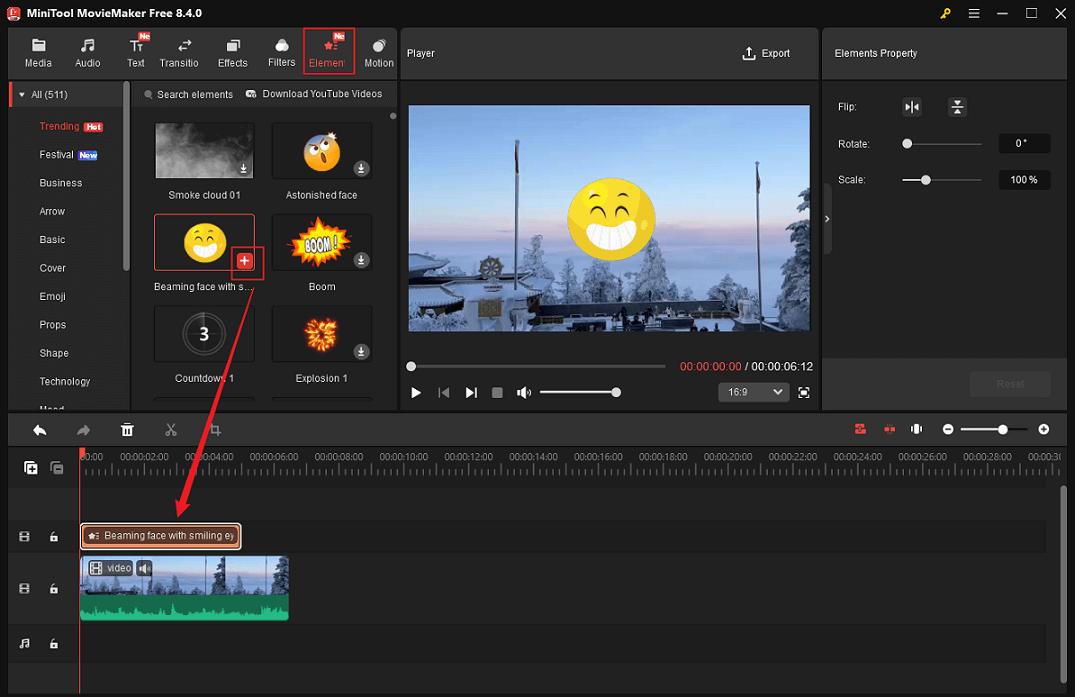
Add Stickers
Go to the Elements section, download the desired stickers, and add them to the video. Drag the stickers on the timeline to change their duration in the video.
More than that, you can add transitions, effects, and filters to the video if you want.
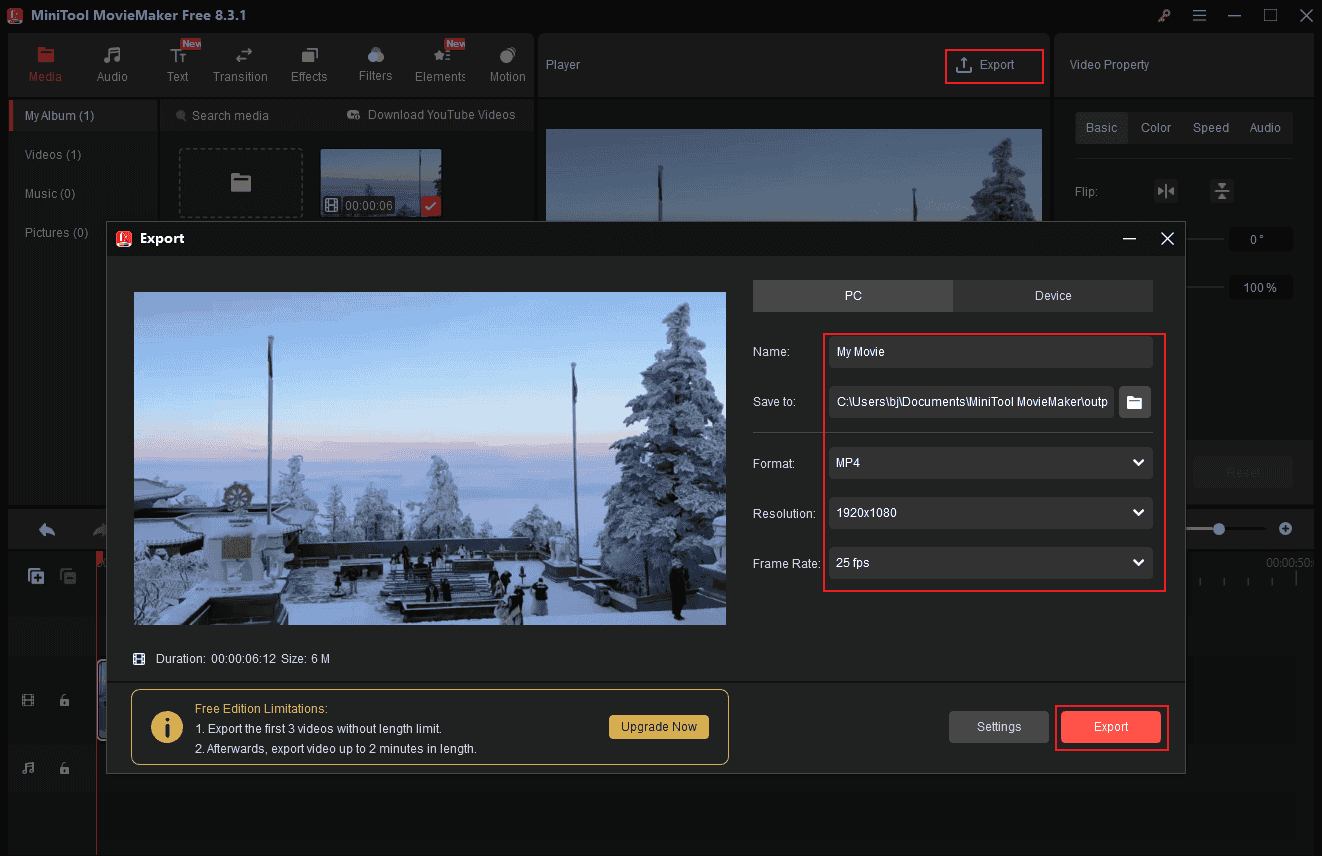
6. Export the Video
Click the Export icon at the top right of the Player window to access the Export window. Then, you can rename the onboarding video, select an output destination, and configure the output format, resolution, and frame rate. After that, click the Export button to export the video.
Once the exporting process completes, click the Find Target button to locate your onboarding video in the local folder.
Furthermore, MiniTool MovieMaker can function as a video compressor, audio extractor, video/audio combiner, file converter, subtitle adder, media player, photo to video maker, and more. Click the download button below to explore more of the application!
MiniTool MovieMakerClick to Download100%Clean & Safe

Read this post to learn how to create onboarding videos!Click to Tweet
In Summary
Onboarding videos not only enhance the appeal of training but also improve employee retention rates, strengthen a sense of belonging, and ensure new hires get up to speed quickly, thereby delivering a superior onboarding experience.
This post introduces what onboarding videos are, typical types of onboarding videos, and their benefits for the company and new employees. To create onboarding videos with ease, you can follow the four steps mentioned above: Goal setting, scriptwriting, footage preparation, and video polishing with video editor without watermark – MiniTool MovieMaker. Hope this article can help you a lot!
You can contact us via [email protected] if you have any questions about using MiniTool MovieMaker. Also, you can send me messages directly on Twitter, and I’ll help you as soon as I can.
User Comments :