Adding frames to photos is an effective way to highlight subjects and improve visual appeal across digital platforms. This post shares 3 effective methods to add frames to photos, including Canva, CapCut, and the best video editor - MiniTool MovieMaker. Read this article and choose your desired photo frame editor.
Frames serve as a versatile design feature that helps highlight your visuals and define the spacing between your image and surrounding elements. By adding frames to photos, you can create contrast with backgrounds, textures, or colors, giving your layout a more polished structure. They not only enhance the overall composition but also guide the viewer’s focus to key parts of your photos.
Next, let’s learn how to add frames to photos.
3 Best Methods to Add Frames to Photos
In the following section, we will walk you through 3 practical photo frame editors to help you easily add frames to photos, including MiniTool MovieMaker, Canva, and CapCut.
Method 1: MiniTool MovieMaker
MiniTool MovieMaker is an all-in-one free video editor designed for Windows users. In addition to being a video creation application, it also works as a simple photo editor, and most of the tools and features can be applied to your images.
MiniTool MovieMaker supports importing multiple photo formats, including PNG, JPG, JPEG, GIF, BMP, ICO, and TIF, giving you the flexibility to organize and create video from images without format limitations. With support for exporting GIFs, MiniTool MovieMaker makes editing photos available.
When it comes to frames, MiniTool MovieMaker offers a wide collection of options—from decorative styles like floral frames to thematic presets such as birthday frames. Additionally, it allows you to create photo collages using the photo book overlay effect, which helps combine multiple images into a polished layout.
Overall, MiniTool MovieMaker stands out with its abundant frame effects and intuitive workflow, making it easy for beginners and experienced users to add frames to photos with just a few steps.
Method 2: Canva
Canva is considered one of the best photo editors thanks to its comprehensive editing tools and intuitive interface. Beyond basic editing features such as cropping and rotating photos, Canva also provides advanced editing functionalities like adding a watermark to photos, sharpening images, adjusting colors, and applying various visual effects.
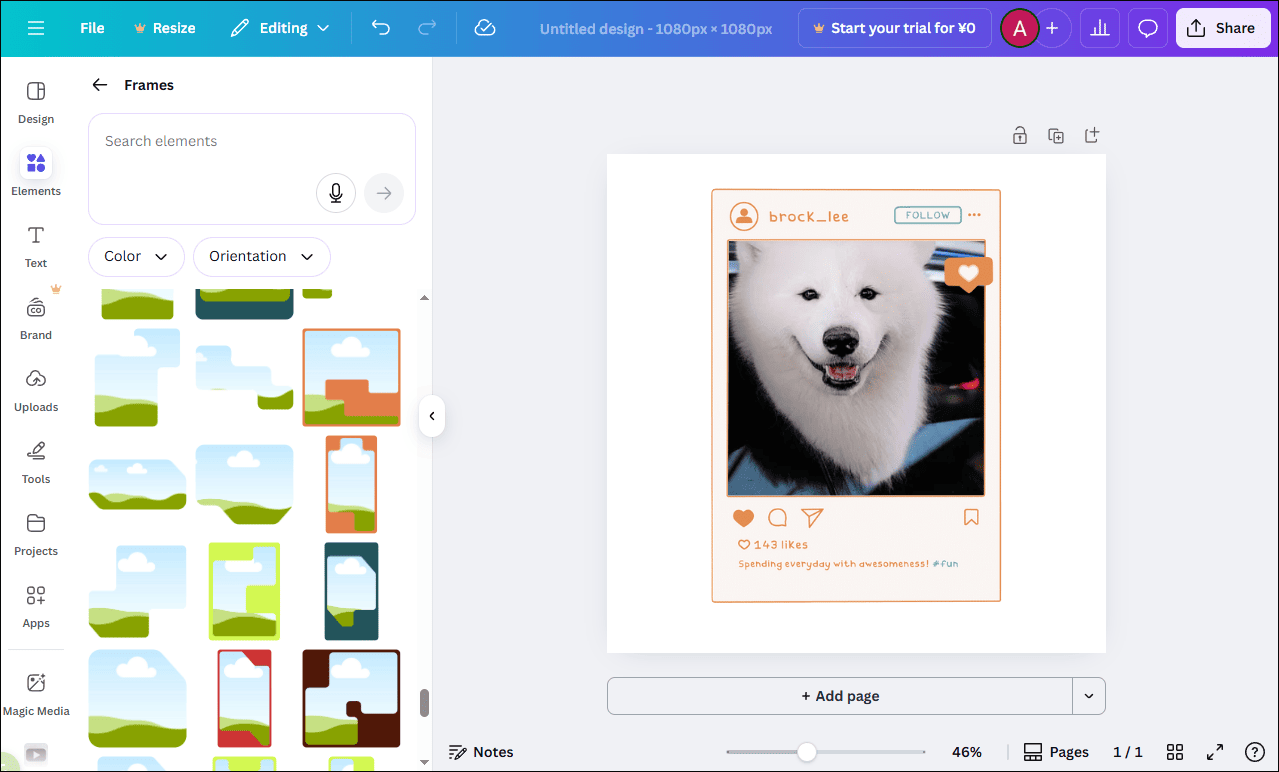
Canva offers a wide range of photo frame effects for users to explore. Whether you prefer simple geometric borders or decorative frames such as floral designs, you can apply them to your photos. The platform also includes practical layout frames that help you build clean and well-structured designs with ease. Moreover, Canva automatically adjusts and crops your images to fit the selected frame, ensuring that the final result looks balanced and visually appealing.
Method 3: CapCut
CapCut is well-known as the best video editor without watermark, but the desktop version does not support exporting image files. So, when it comes to adding photo frames, the web-based CapCut version that integrates video editing and image design comes in handy.
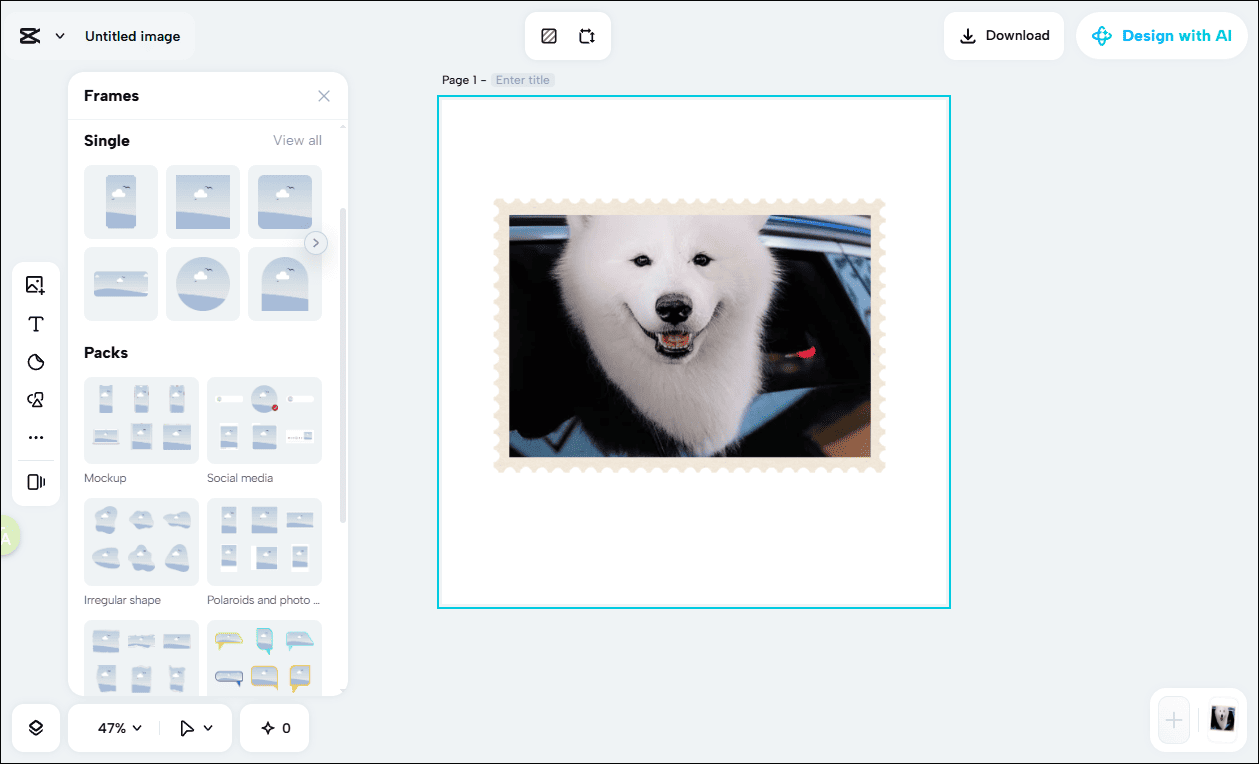
CapCut provides a massive collection of frame templates suited for different styles and purposes. For instance, the mockup frames add a clean and refined touch to the original photos. It also supports adding Polaroid frames to your photos, increasing the charm of the pictures. The layout frames permit you to arrange the pictures, showing multiple moments in one captivating frame.
Beyond frames, CapCut also works as a capable photo editor. It enables you to remove the background of images, add shapes and stickers for fun, and more. All in all, CapCut is a reliable option for you to add photo frames or edit photos with ease.
With these three powerful editors, it is effortless to add frames to photos. Since MiniTool MovieMaker offers one of the most streamlined workflows and the richest frame options, it serves as an ideal starting point for beginners. In the next section, we’ll take MiniTool MovieMaker as an example and walk you through the concrete steps to add frames to photos.
How to Add Frames to Photos Using MiniTool MovieMaker
Here are the detailed steps on how to add frames to photos using MiniTool MovieMaker.
Step 1: Download and Install
Click the button below to start downloading MiniTool MovieMaker. Then, follow the on-screen instructions to complete the installation on your computer.
MiniTool MovieMakerClick to Download100%Clean & Safe
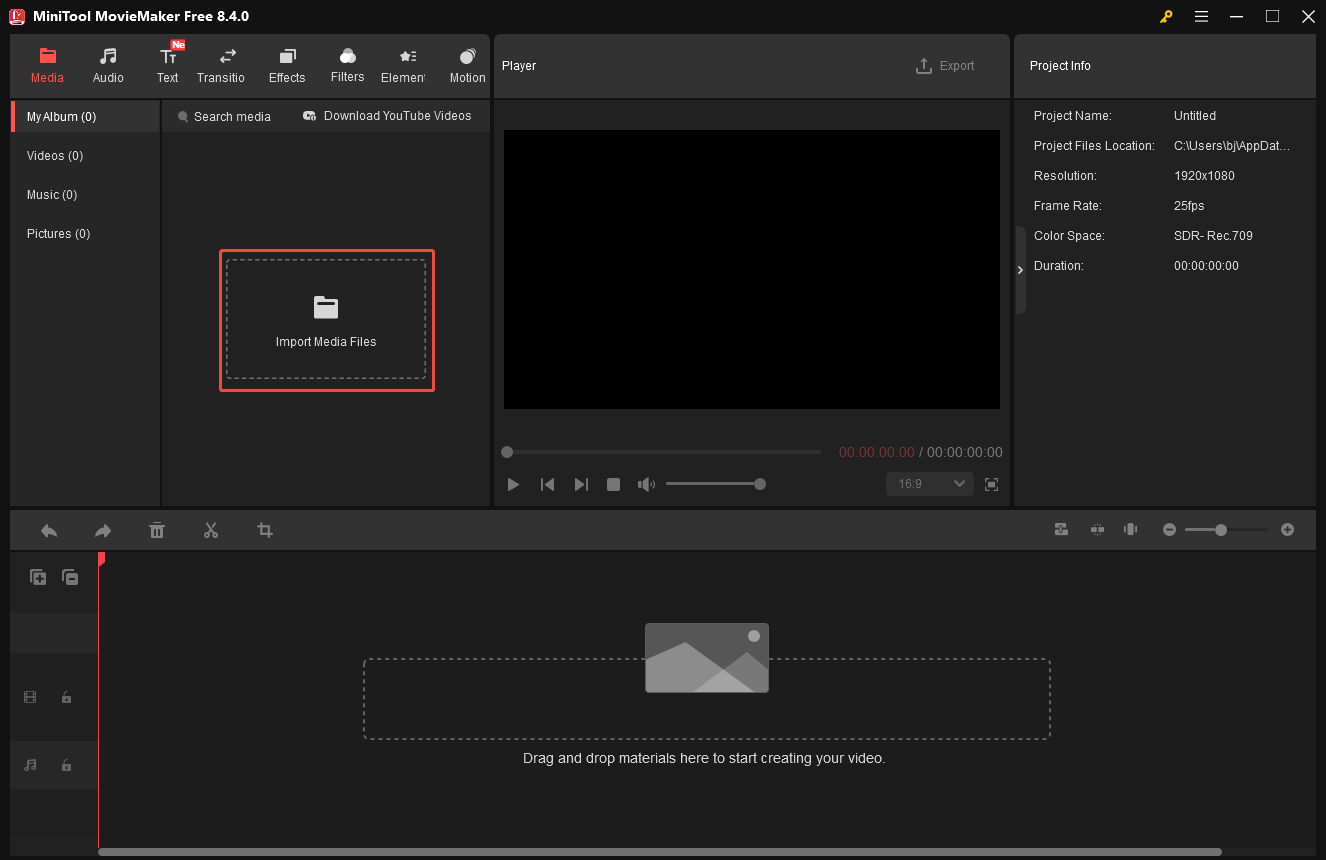
Step 2: Import Your Photos
Open MiniTool MovieMaker and close the pop-up project window to enter the main editing interface. Next, click on Import Media Files to upload your photos. After importing photos, you can click the Plus icon on the image to add it to the timeline or directly drag the photo to the timeline.
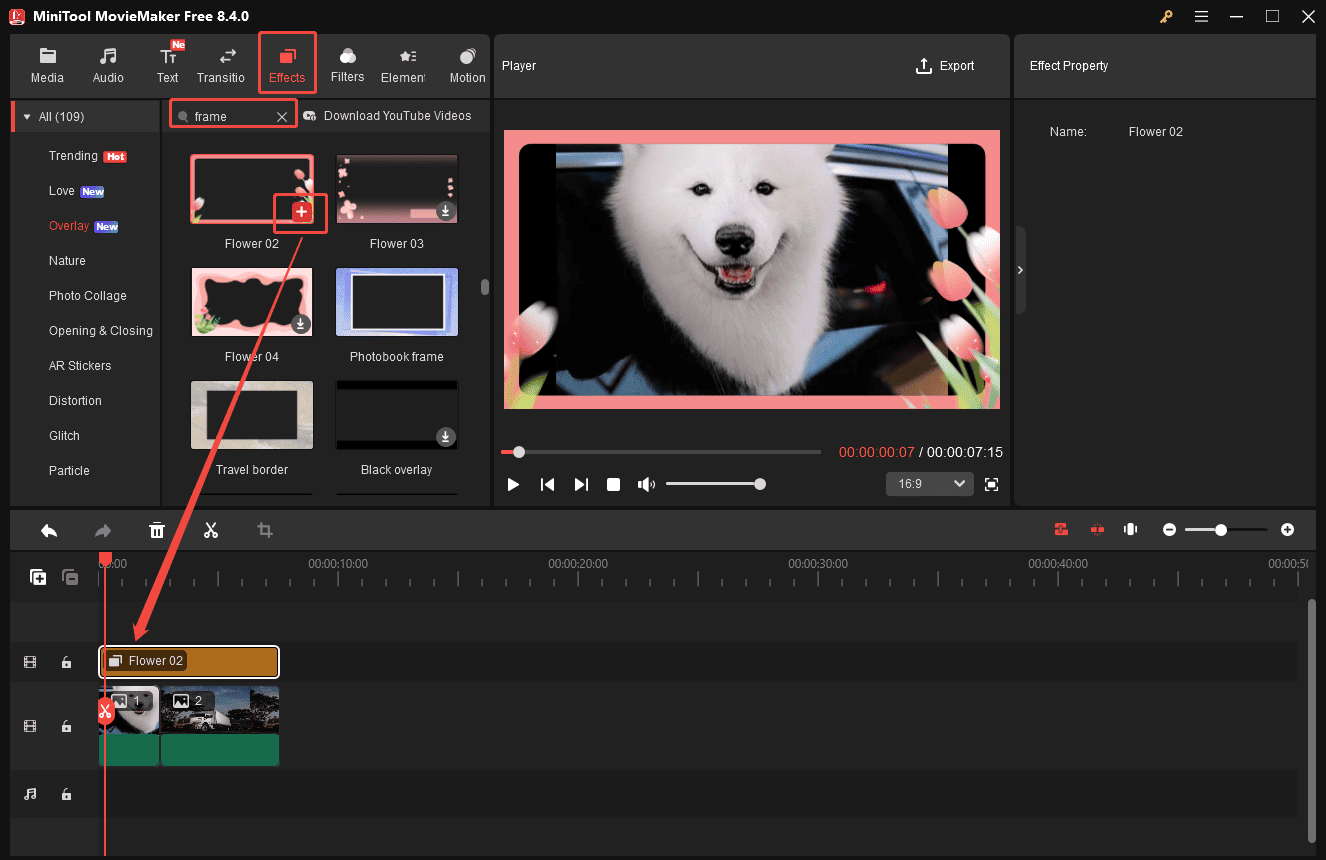
Step 3: Add Frames to Photos
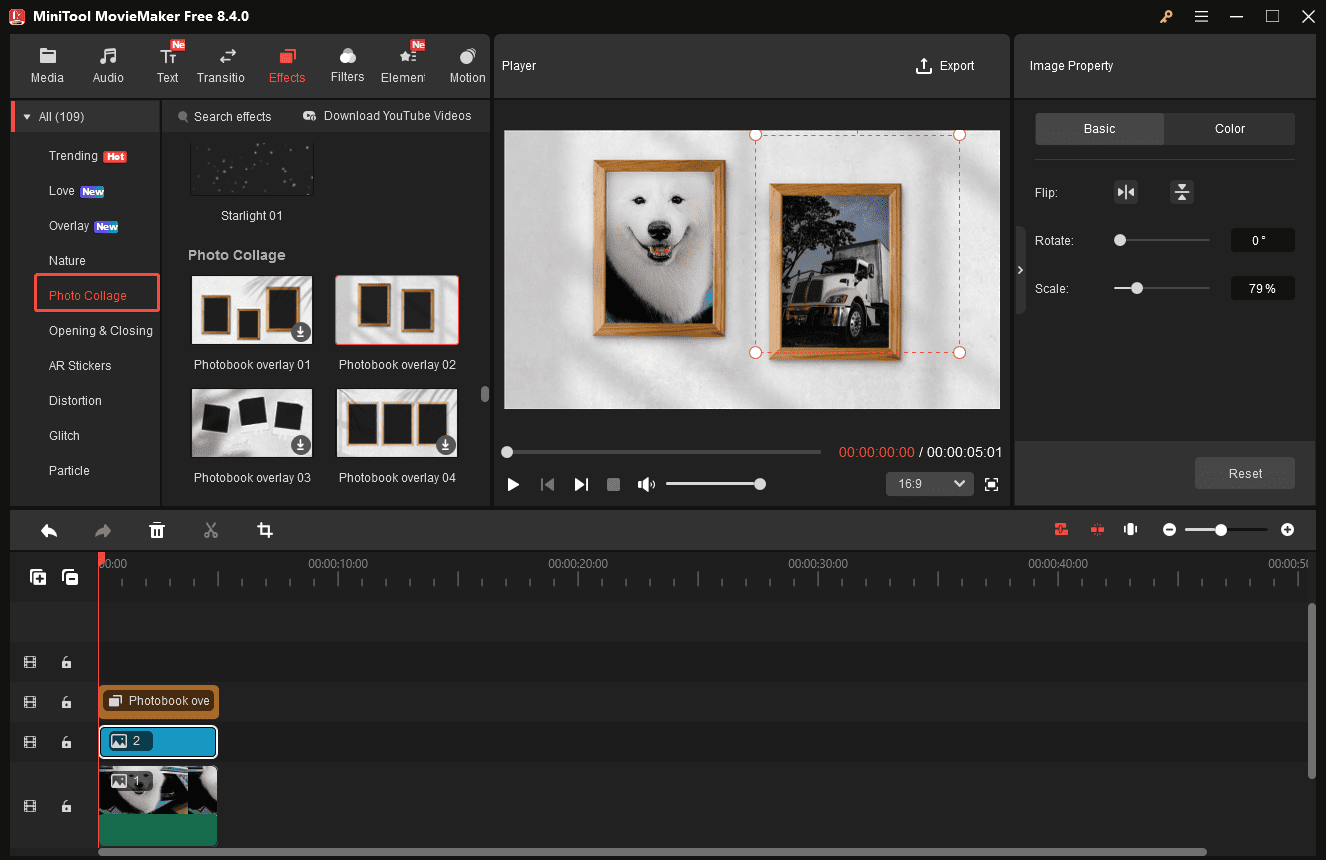
Click the Effects tab at the top of the menu. Next, you can type frame in the search bar to find photo frame effects available. Or, scrolling down to the Overlay and Photo Collage category is another way to find the appropriate photo frame effect.
Hover your mouse cursor over the desired photo frame effect to preview the complete animation. If you are satisfied with the effect, click the Download icon in the right corner. Next, click the Plus icon to add it to the timeline. Also, you can see the final effects on the Player window.
If you want to make a photo collage, click the Photo Collage category and select the preferred template. It is necessary to drag and resize the photos to adjust their location and size to fit the frame.
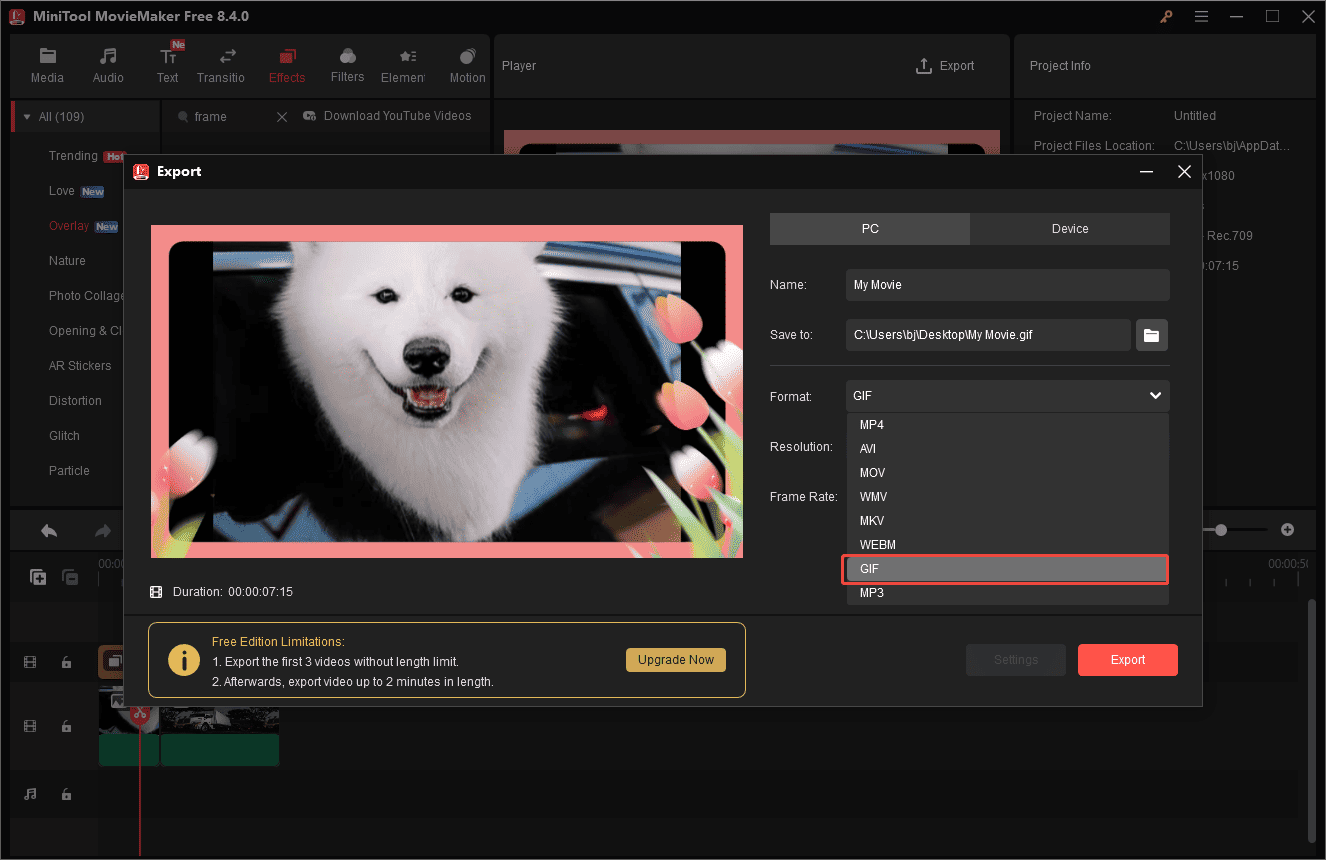
Step 4: Export the Final Photo
Click the Export button at the top of the menu to access the Export Settings window. Select output format as GIF and customize the photo name and download location. Once all settings are down, click the Export icon at the bottom to download it to your computer.
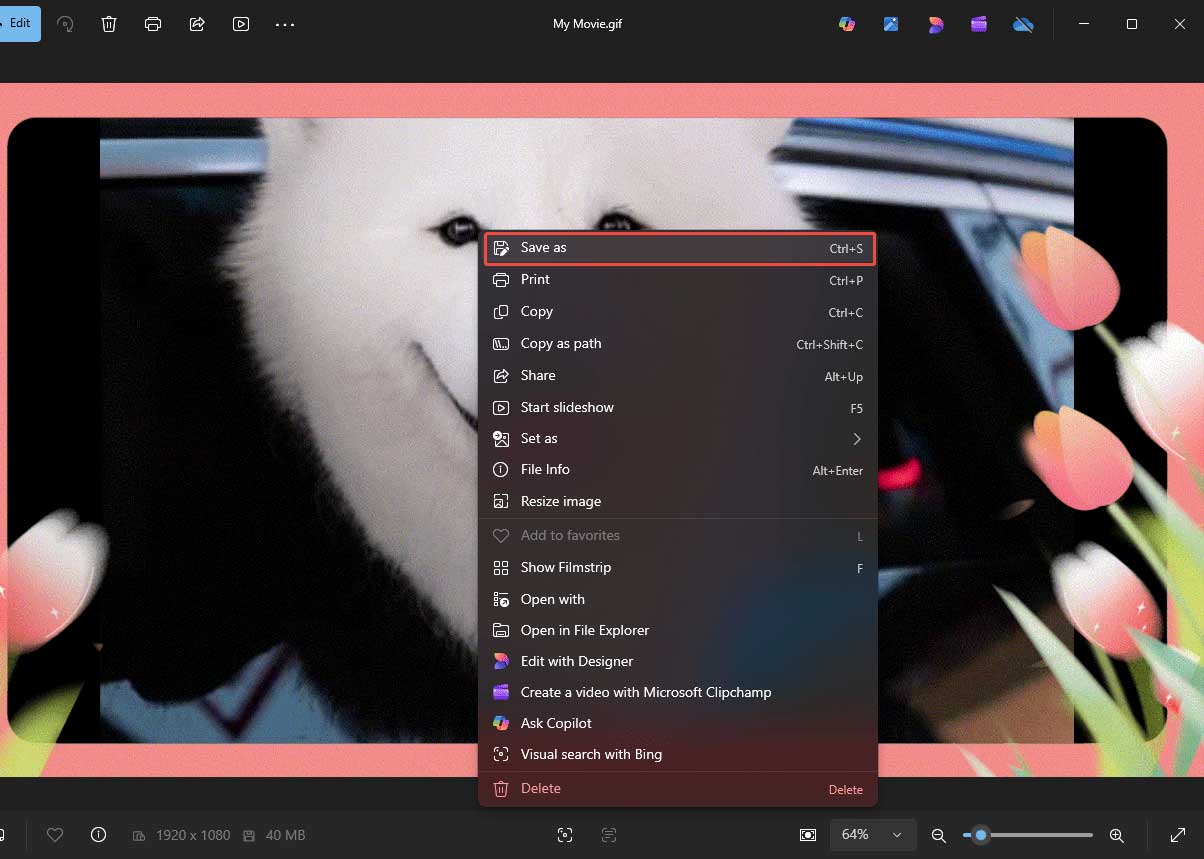
Step 5: Convert the File Format
To better display and use the photo, you need to convert the GIF format to PNG or JPG photo formats. Click Find Target to locate the exported file. Right-click the file and choose Photos to open it. After the image opens, right-click it again to select Save as to change the file format.
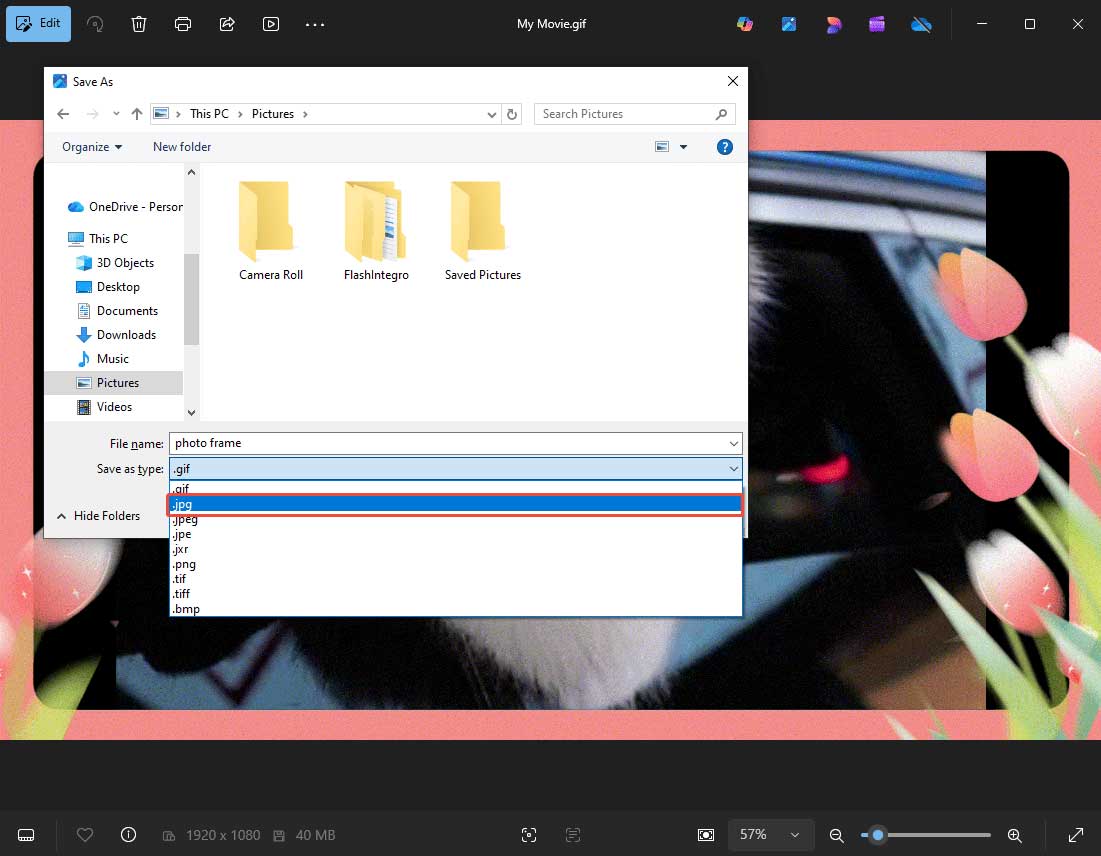
Then, expand the Save as type dropdown list to select your desired photo format and save the file.
Conclusion
Adding frames to photos is an effective way to enhance your visuals, highlight important details, and create more polished designs. This article introduces 3 effective tools to add frames to photos with ease. You can choose the tool that best suits your needs and design preferences to create stunning and engaging images.
Hope this article can be helpful. Besides, if you have any suggestions or problems when using MiniTool MovieMaker, please do not hesitate to contact us at [email protected].
About The Author

Position: Columnist
Alice is a tech writer at MiniTool, specializing in tutorials and guides on video editing and screen recording. She stays up to date with the latest tools and techniques to ensure her content is accurate and easy to follow. By combining hands-on testing with continuous learning, Alice aims to help readers solve tech problems efficiently.
User Comments :