Today, adding watermarks to your work has become increasingly important. It can effectively protect your content from being stolen and it’s also a way to promote your brand. How to make a watermark to protect your work? This post gives you multiple ways to explore, including how to use video editing software like MiniTool MovieMaker to create text watermarks for video.
More and more people would like to share their work on social networks, such as YouTube, Instagram, and Twitter, etc. However, the work including videos or images will be stolen by others to post on social media platforms of others without permission.
Therefore, the most effective and useful way to avoid this situation is for creators to create watermarks for their work. Meanwhile, the watermark cannot be simply removed.
In the post, you will learn how to make a watermark for video, photo, word, and PDF, which plays a role in lowering the risk of being stolen.
Part 1. How to Make a Watermark for Video
A video watermark can be a logo or text. Part one will tell you how to create a logo and text watermark for your video. Follow the steps below to add a watermark to your video.
Create a Logo for Video
You can easily create your own watermark online free in Canva. Canva is a superb online design tool that lets you create a logo, poster, thumbnail and Facebook cover, etc. More importantly, it’s free to use. Below, you will understand how to use Canva to create a logo. Here you go!
Step 1. Head to Canva and log in with your Google account.
Step 2. Enter “logo” in the search bar and you will see all of the free logo templates listed here.
Step 3. Click on the wanted logo template and you will be taken to the editing page.
Step 4. On this page, you can replace the existing text with your brand name, and change the font type, color, and size.
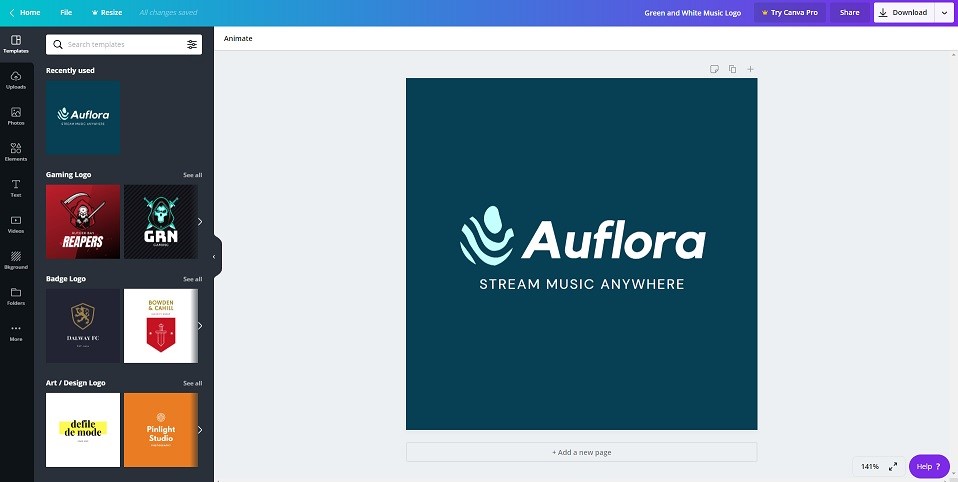
Step 5. After that, press the Download button to save the created logo. If the logo is too large, you can cut out the unnecessary part of the logo by using an image cropper.
After creating a logo, the next step is to add a logo to video. Here’s a quick guide:
Step 1. Open Format Factory after installing it on your PC.
Step 2. Click on Video and choose the desired output format.
Step 3. Then upload the video that you want to add a logo.
Step 4. Choose Output Settings and then tap on Watermark in the lower right corner of the window.
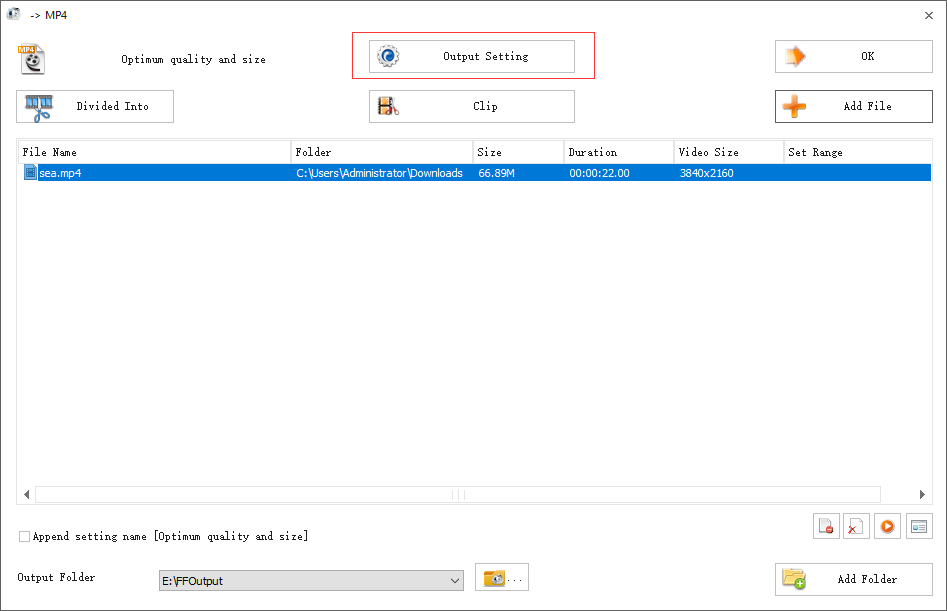
Step 5. Press Add pictures to import the logo and move it to the top right corner. Here you can resize the logo and make it transparent.
Step 6. When you’re done, click on OK to return to the Output window.
Step 7. Then click the OK button, choose the video and start the conversion.
Step 8. After a while, you can check the watermarked video by clicking the folder icon.
Create Text Watermark for Video
If creating a logo for video is a bit complexed for you, you can also consider making a text watermark for your video which can easily be done by utilizing video editing software like MiniTool MovieMaker. MiniTool MovieMaker is equipped with various editing features such as reverse, speed up, slow down, split, and trim. All of these are conducive to adding a watermark to video.
Here are steps on how to make a watermark for video with MiniTool MovieMaker.
Step 1. Open MiniTool MovieMaker
Download and install MiniTool MovieMaker on your computer. Run it and close the promotion window to enter the main interface.
MiniTool MovieMakerClick to Download100%Clean & Safe
Step 2. Import your Video
You should click on Import Media Files to add your video to the Media library first. Then drag the video to the timeline or choose the video and click the + to add the video to the timeline.
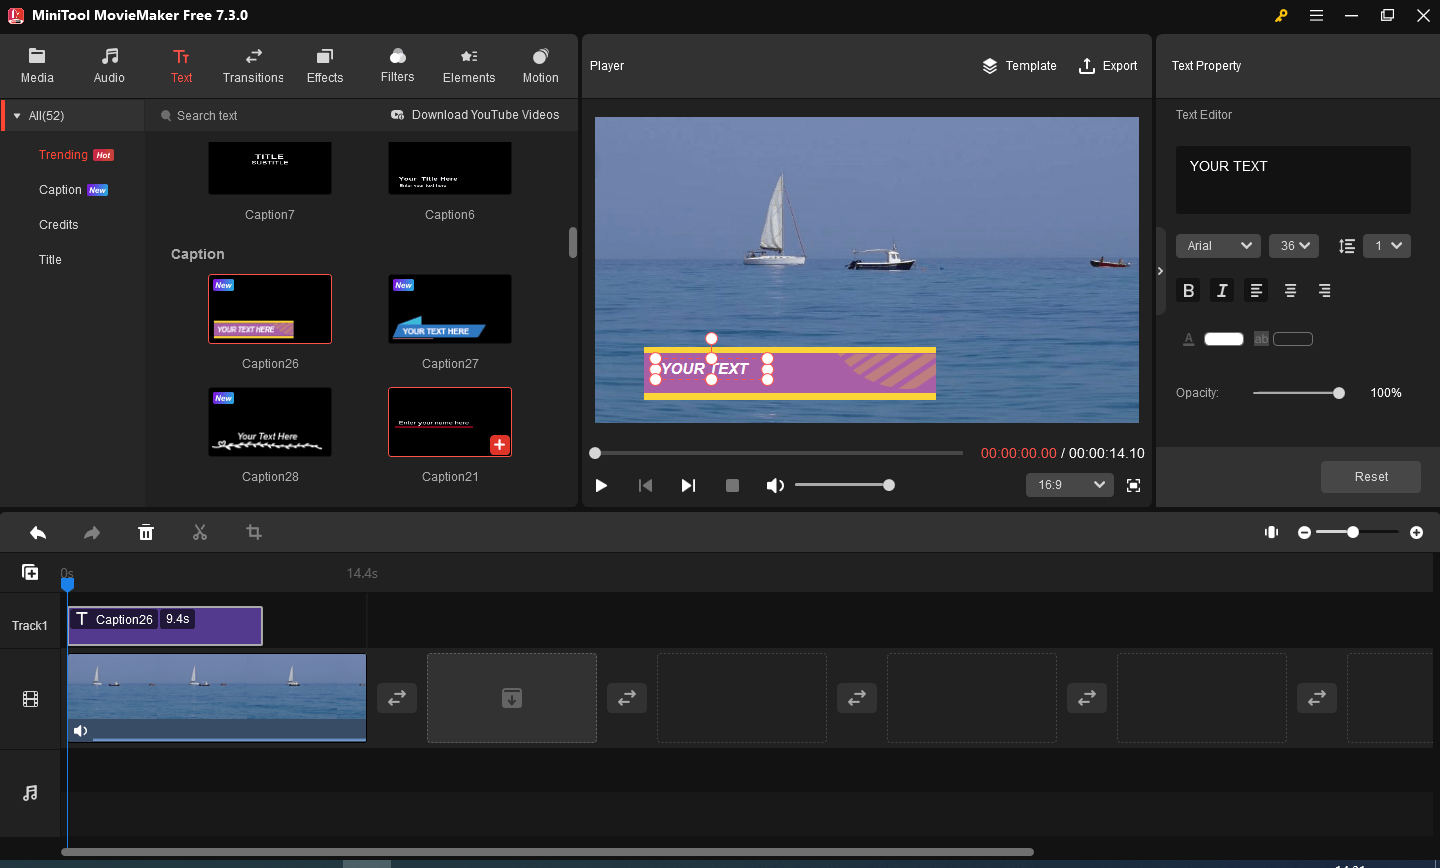
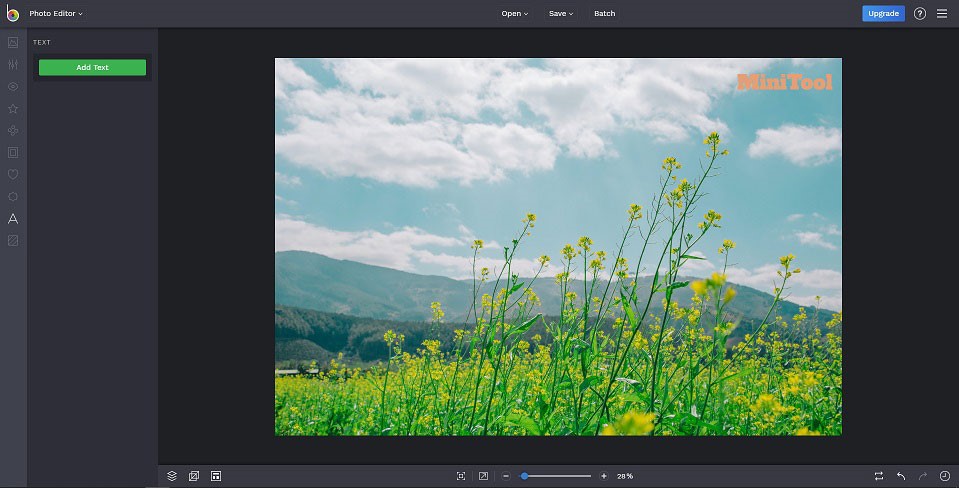
Step 3. Create a Text Watermark
How to create a watermark? Click the Text in the menu bar. Then tap on Caption to select one text template you like, click the Download icon in the bottom right corner of the caption, and click + to add the template to the text track. After that, you can edit the text in the Text Editor area.
Edit your text watermark: Go to Text Property, here you can change the color, size, font, bold, italics, and opacity of your text watermark.
Adjust the duration of text watermark: You can drag the start and end of the text track to change the duration of text watermark.
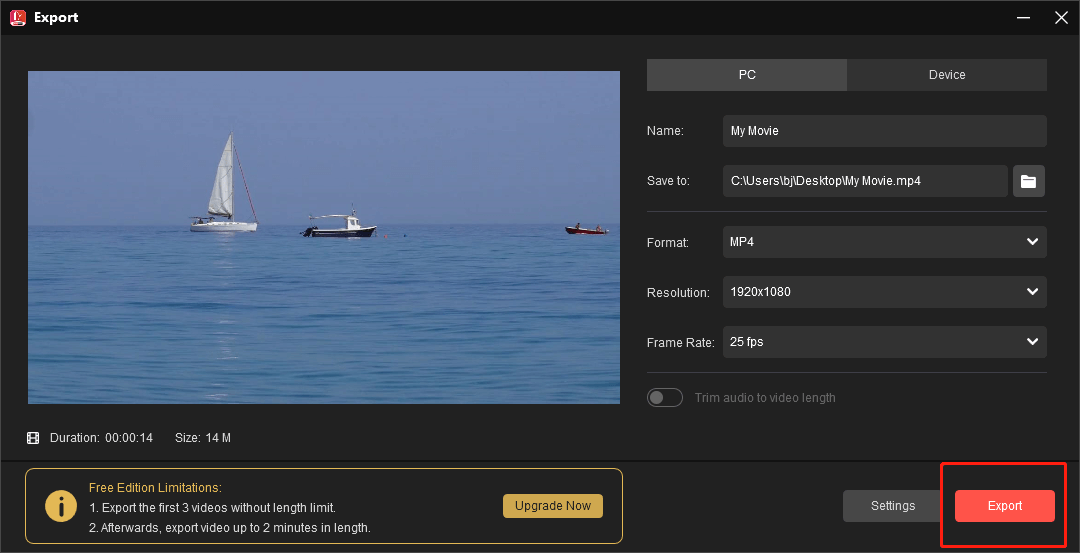
Step 4. Export the Watermarked Video.
Click the Export button above the Player window. Then it will pop up an Export window. Here you can name your video, specify the output folder, change the output format and adjust the resolution and frame rate of the video.
Click the Settings button, and the Settings window appears. Here you can adjust the quality, encoder, resolution, bitrate, and frame rate of your video. Finally click the OK button.
Hit the Export button after adjusting all the output settings of your watermarked video.
Main Features:
- Watermark-free, no ads, no bundles, and no viruses.
- Offering movie templates, titles, credits, and captions.
- Packed with video merger, video cutter, video splitter and other editing tools.
- Providing motion effects, filters, and transitions.
- Automatically save your project files.
- Video in any popular format can be opened and edited.
Add Watermark to Video on YouTube
What if you want to create a watermark for YouTube videos after uploading it? Don’t worry, the following are the steps on how to add watermark to videos on YouTube. Before that, make sure the watermark is PNG or GIF format, 150 x 150 pixels and no more than 1 MB.
Step 1. Go to YouTube and log in to your account.
Step 2. Click on your profile picture after entering the YouTube homepage. From the drop-down menu, choose the YouTube Studio option.
Step 3. Go to Settings > Channel and tap on Branding.
Step 4. Click CHOOSE IMAGE to upload the watermark.
Step 5. Then select the wanted display time option and save changes. Later, this watermark will be displayed on all your YouTube videos.


Part 2. How to Make a Watermark for Photo
For photographers, the second part will offer you a detailed guide on how to make a watermark for photos. You are allowed to create your own watermark online free.
Create a Watermark for Photo in Photoshop
Professional photographers like using Photoshop to retouch photos as well as watermark photos. If you don’t know how to make a watermark in Photoshop, follow the steps below to learn how to watermark your photos.
Step 1. Open the Photoshop that you’ve installed on your computer.
Step 2. Find the photo you want to watermark and open it with Photoshop.
Step 3. Then drag and drop the created logo on the photo.
Step 4. Choose the logo, adjust its file size, and place it to the right location.
Step 5. Select the first tool in the left panel to insert the logo into the photo.
Step 6. Go to File > Save for Web to save the watermarked photo.
Create a Watermark for Photo Online
Want to watermark photos online free? BeFunky can help you out. It’s a free watermark app. By using it, you can create your own watermark online free, pixelate photos, add logo to photo, make photo collages, unblur photos, etc.
Here’s how to create a watermark for your photos.
Step 1. Open your browser and visit the BeFunky website.
Step 2. On its homepage, click on Get Started and choose the Edit a Photo option to continue.
Step 3. Tap on Open > Computer to import the photo.
Step 4. Select the text tool in the left panel and enter the text like “brand name”. Then you can choose your favored font type, size, color, etc. Or upload the created logo and overlay the photo with the logo.
Step 5. After that, move the text to the desired location of this photo.
Step 6. Eventually, save this watermarked photo to your computer.
Part 3. How to Make a Watermark in Word
To protect your documents from being stolen, this part will show you how to add watermark in word step by step. Let’s see:
Step 1. Open your document and go to the Design tab.
Step 2. Then you will find the Watermark tool is in the Page Background section.
Step 3. Click on it and select the desired built-in watermark from the drop-down menu. Or choose the Custom Watermark option to type the text you want to use.
Step 4. Then save the watermarked document.
If you need to make a text watermark in Word using new fonts, then you can read this post: The Complete Guide on How to Add Fonts to Word.

Part 4. How to Make a Watermark in PDF
You can create a watermark for video, photo and Word. Also, you are able to watermark your PDFs. How to add a watermark to PDF? Below are the detailed steps on how to watermark PDF.
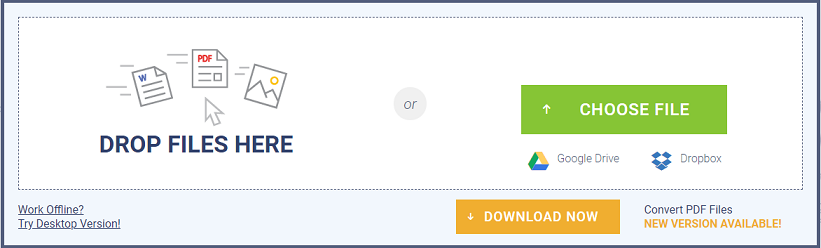
Step 1. Go to the Soda PDF website and choose the Add watermark to PDF tool.
Step 2. Upload the PDF file that you desire to put a watermark on by clicking CHOOSE FILE, Google Drive or Dropbox
Step 3. Type the text you want to use or upload the created logo from your computer.
Step 4. Choose the whole PDF or serval pages to display the watermark.
Step 5. Then change the appearance of the watermark like opacity and location.
Step 6. In the end, press the ADD WATERMARK button to start watermarking your PDF.
You can also read a relative post on how to free convert PDF to JPG on Windows 10 easily.
Part 5. 5 Best Free Watermark Makers
After learning how to create a watermark for video, photo, Word and PDF, here offers you 5 best free watermark makers. They can help you create your own watermark online free.
- Canva
- BeFunky
- PhotoMarks
- Fotor
- PickyMonkry

Conclusion
In general, creating a watermark is conducive to protect creator’s work from tort. This post shows you how to make a watermark for video, photo, Word, and PDF. Hope it will be beneficial to you!
If you have any suggestion about this post, please contact us via [email protected].
How to Make a Watermark FAQ
2. Find your favorite logo template.
3. Enter your brand name.
4. Download the watermark.
2. The logo will be transparent in a few seconds.
3. Download the transparent logo from the internet.
2. Open the photo and choose the tool.
3. Create a text watermark.
4. Then save the watermarked photo.
User Comments :