This post from MiniTool’s free movie maker will guide you through how to create rain effects in DaVinci Resolve using particles.
Rain during shooting is not ideal, even if it is your wish. Working with an expensive camera in the wet is not a good thing and planning to film when it’s raining is really quite difficult to predict, just take a look at the weather forecast to see how difficult it is. So what is the solution for a rainy day in your video or film? The solution is to make your own rain effects in DaVinci Resolve and we are going to show you the steps to make rain or raindrop effects.
DaVinci Resolve Rain Effect Guide
Using particles to make rain effects in DaVinci Resolve is a customizable method to match the scene. The following are the steps that you will need to follow to create this effect.
- Put the footage on the timeline and add a Fusion composition over it.
- Choose the Fusion composition and head over to the Fusion page.
- To set the size of the composition to the size of the timeline, add a Background node.
- Apply a pEmitter and pRender node. Merge them together over the Background node.
- In the pRender node, pre-generate 100 frames.
- Adjust the Region in pEmitter to a Rectangle. Modify the Width and Height so that it extends beyond the frame.
- Modify the pEmitter Style to Bitmap.
- Use a Polygon to create a raindrop. Enlarge the border width and the soft edge to give it body. Decrease to level to blend it and connect it to the pEmitter node.
- Increase the Velocity in pEmitter to make the raindrops move and adjust the Angle to -90 degrees or any other downward angle to make the drops fall.
- Increase the number to 100 to get more raindrops and then the lifespan so that they do not fade away too quickly.
- Apply a pTurbulance node and raise the X strength to generate some variation in movement.
- Set the Alpha on the Background node to 0 in order to make it transparent.
You’re done! View the result on the edit page.
Bonus Tip: A Great Way to Add Weather Effects to Your Videos
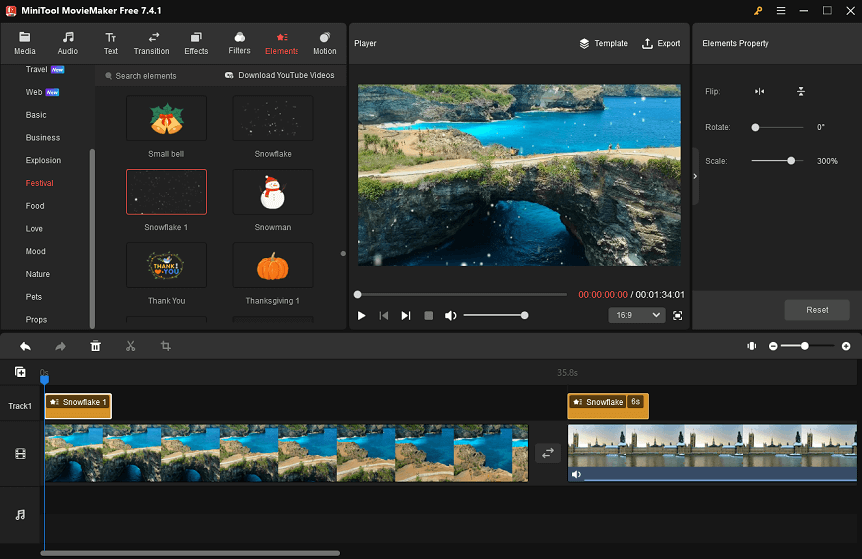
MiniTool MovieMaker is one of the best free video editors with an intuitive user interface and creative video effects. There are a number of weather elements that you can add to your video projects, such as animated falling snowflakes, clouds, or sun stickers.
MiniTool MovieMakerClick to Download100%Clean & Safe
Other features of MiniTool MovieMaker you might like:
- Has different types of movie templates.
- Delivers rich music and sound effects.
- Comes with editable captions, titles, and credits.
- Includes transitions suitable for various scenarios.
- Provides an array of special effects.
- Contains numerous gorgeous filters.
- Equipped with popular motions.
- Split video, trim video, or crop video.
- Horizontally or vertically flip your video.
- Rotate your video from 0° to 360°.
- Change the video playback speed.
- Reverse the clip if needed.
- Manually do color corrections.
- Apply a 3D LUT to a video.
- …
Conclusion
You should know how to create rain effects in DaVinci Resolve using particles after reading the above step-by-step guide. If you would like to add other kinds of weather effects to your footage, you can give MiniTool MovieMaker a try.
You may also be interested in:
User Comments :