It’s easy to create a video that plays in reverse on Premiere Pro, a professional video editing application. This post from MiniTool MovieMaker will show you how to reverse a clip in Premiere and an alternative way to reverse your video.
Reversing video is a full-fledged special effect with a wide variety of uses. If you reverse a video, a rewind effect will be applied to the video and it will play backward. This interesting video effect can create a very unique feeling for the audience.
Recently, people love watching videos in reverse and many video editing apps like CapCut and some social media apps like TikTok and Snapchat have the reverse video effect.
Adobe Premiere Pro is an industry-leading video editor and provides almost all tools and features like video transitions, speed adjustment, and reversing videos. Many people are wondering how to reverse a clip in Premiere. Here’s a step-by-step guide for you to turn video backward in Premiere Pro.
How to Reverse a Clip in Premiere Pro
How to reverse a video in Premiere Pro? Follow the steps below.
Step 1. Open Adobe Premiere Pro on your computer.
Step 2. Click File > New Project to create a new project and click File > Import to import your video. Then, drag it to the timeline. Premiere Pro supports importing a wide variety of video formats like MP4, MOV, MPG, and more.
Step 3. Select your video on the timeline, right-click on it, and choose Speed/Duration from the list.
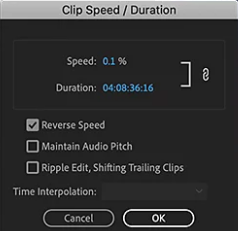
Step 4. In the Clip Speed/Duration pop-up window, check the option of Reverse Speed. You can change how fast or slow your footage to run by adjusting the clip’s playback speed. Click OK to apply the change.

Step 5. Export your video from Premiere Pro and share it to video-sharing platforms like YouTube or TikTok.
Use a Premiere Pro Alternative to Reverse Videos
It’s simple and quick to make a clip reverse in Premiere Pro. But this video editor isn’t free to use. If you purchase Premiere Pro just for reversing short videos, it’s not a good deal. You can try a free video editor like MiniTool MovieMaker to reverse your videos.
MiniTool MovieMaker, a feature-rich video editing application, is a great alternative to Adobe Premiere Pro for beginners. This app lets you crop, trim, split, rotate, reverse videos, add transitions, apply filters, add titles/captions/credits, choose an aspect ratio for the video project, and more.
Here’s how to reverse a video with MiniTool MovieMaker.
Step 1. Download and install MiniTool MovieMaker on your PC. Open this software and close the pop-up window.
MiniTool MovieMakerClick to Download100%Clean & Safe
Step 2. Click Import Media Files to upload your video and drag it to the timeline.
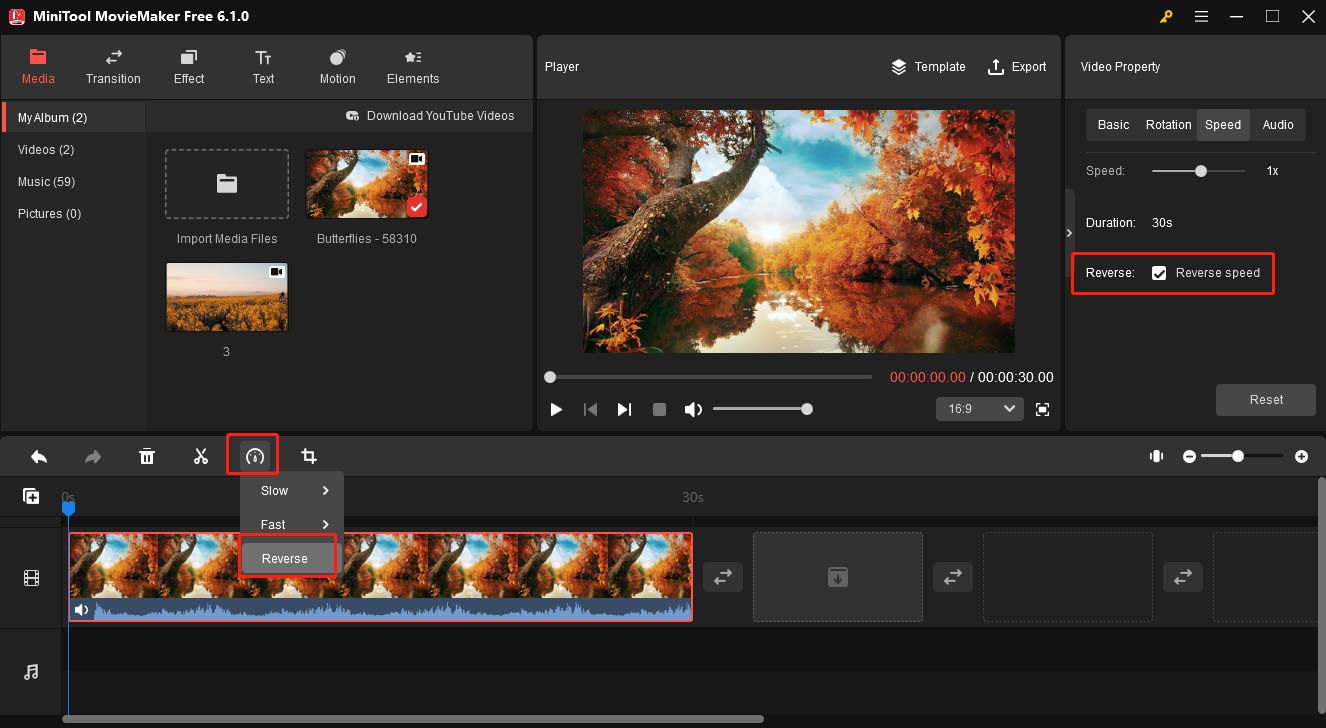
Step 3. Select the clip on the timeline to highlight it. Go to the Speed tab in the Video Property section and check the Reverse speed option. Alternatively, click the Speed button above the timeline, and select Reverse.

Step 4. Tap Export at the top right, make your settings, and click Export to save the video to your PC.
Conclusion
Not that you’ve learned how to reverse a clip in Premiere, just follow the above steps to add the reverse video effect to impress your viewers. Alternatively, you can try other video reverser programs to reverse video on your computer.


![[10 Ways] How to Fix Adobe Premiere Pro Playback Lagging Issue](https://images.minitool.com/moviemaker.minitool.com/images/uploads/2023/03/premiere-pro-playback-lag-thumbnail.jpg)


User Comments :