How to Add Transitions in CapCut
If you’re new to video editing, CapCut is a popular video editing tool among content creators. This tool is an all-in-one editing app with a variety of features, including transitions, to spice up your videos.
Video transitions are visual effects that occur when you switch from one clip to another. They can help you create smooth and seamless changes between scenes, making your videos more dynamic and engaging.
The following are the step-by-step instructions on how to add transitions on CapCut:
Step 1. Open the CapCut app on your phone and tap on New project to create a new project. Then, select the photos and videos you want to add to your projects.
Step 2. On the timeline, tap on the white line icon between two video clips where you want to add a transition. A transition menu will pop up at the bottom of the screen.
Step 3. Swipe left or right to browse through different categories of transition effects. Tap on the one you like and it will be applied to the clip.
Step 4. If you want to apply the same transition to all your clips, you can do so by tapping on the Apply to all button.
Step 5. To preview the transition, tap on the play button at the top of the screen. If you are satisfied with the transition, save the video to your device.
If you find there’s a watermark on the final video, refer to this post to remove it: How to Remove CapCut Watermark from Videos.
Tips and Tricks for Adding Transitions in Capcut
Now that you know how to add transitions to a video in Capcut, here are some tips and tricks that can help you make your transitions look better and more natural:
- Choose the right transition for your video.
- Avoid using too many transitions as it might make your video look cluttered.
- Make sure the transition speed matches the pace of your video.
- Apply the same transitions to all clips.
Add Transitions to Your Videos with a CapCut Alternative
If you’re looking for a CapCut alternative to add transitions to your videos, you have many options to choose from. Among them, MiniTool MovieMaker is an excellent one, a free and feature-rich video editor. This tool comes with a wide variety of transitions that are organized into different categories, like Light, Wipe, Advanced, Iris, PagePeel, etc.
Apart from transitions, it also provides access to other helpful resources, including effects, filters, music tracks, motion effects, and animated stickers. Moreover, it allows you to trim, split, crop, reverse, flip, rotate your videos, adjust video aspect ratio, speed up/slow down videos, and more.
Here’s how to add transitions to video clips using MiniTool MovieMaker:
Step 1. Download and install MiniTool MovieMaker. Once done, open it and close the promotion window.
MiniTool MovieMakerClick to Download100%Clean & Safe
Step 2. Click on Import Media Files to import your video clips. Then, drag and drop the imported videos onto the timeline.
Step 3. On the Timeline, select the clip to which you want to add the transition next.
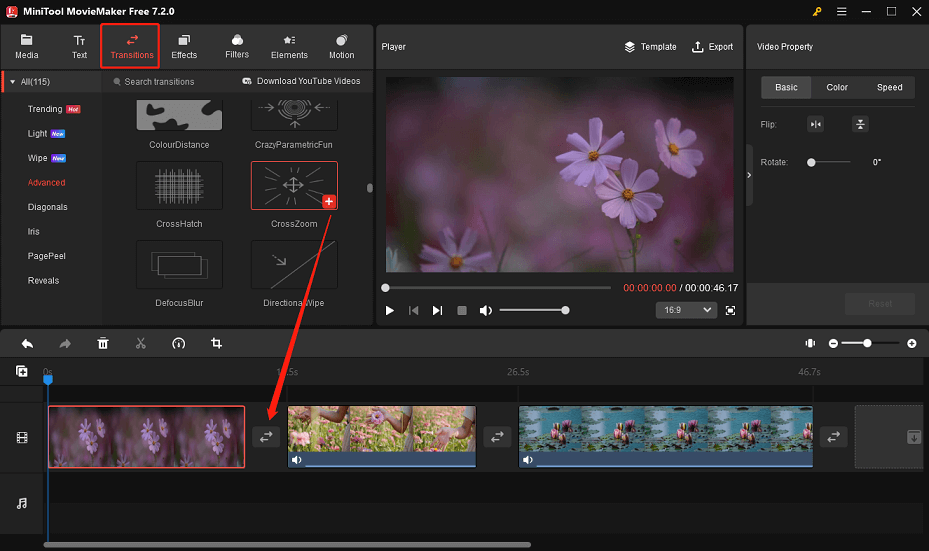
Step 4. Go to the Transition tab, select the desired transition, and click the + icon on it to add it.

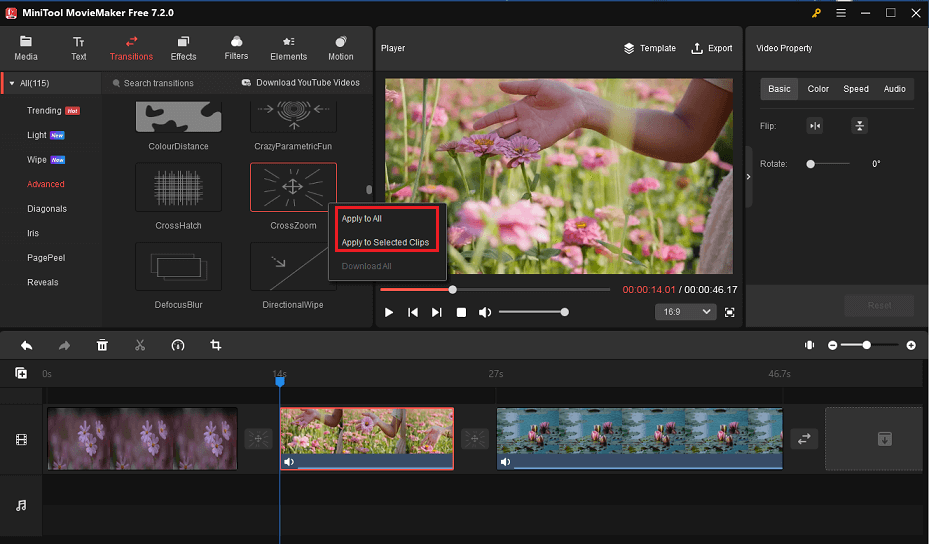
Step 5. You can also add the transition to all clips or selected clips by right-clicking the transition and choosing the corresponding option.

Step 6. Click the Export button to save the video to your device.
Wrapping up
In conclusion, adding transitions in CapCut is a simple process that can greatly enhance the quality of your videos. Just follow these steps to apply seamless transitions to your videos.


User Comments :