Do you want to create camcorder effect for videos? Luckily, this post will give you 3 video editing software applications to help you add a camcorder effect overlay to video.
How to Create Camcorder Effect in MiniTool MovieMaker
MiniTool MovieMaker is an easy-to-use and watermark-free video editor designed for everyone to create videos from images, video clips, and background music. This video creation tool provides many tools and effects to level up your footage.
In MiniTool MovieMaker, you can trim, split, crop, reverse, rotate, and flip videos, change the video aspect ratio, add transitions, apply filters, and add title cards, captions, and end credits. In addition, it allows you to add a camcorder vintage effect to videos. Here’s how.
Step 1. Click the button below to download MiniTool MovieMaker.
MiniTool MovieMakerClick to Download100%Clean & Safe
Step 2. Launch this video editor after the installation and close the promotion window to enter the app’s main interface.
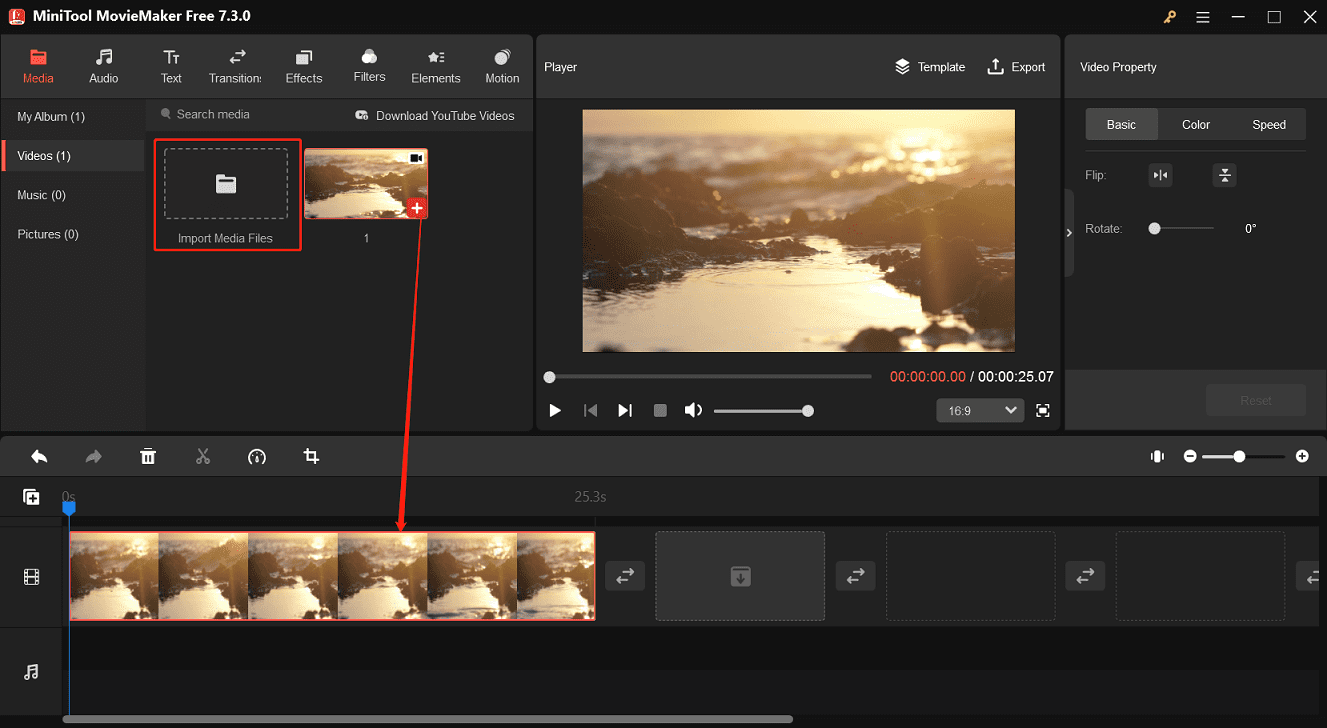
Step 3. Click the Import Media Files button to import video from your PC and then add it to the timeline by clicking the + icon at the bottom of the clip.
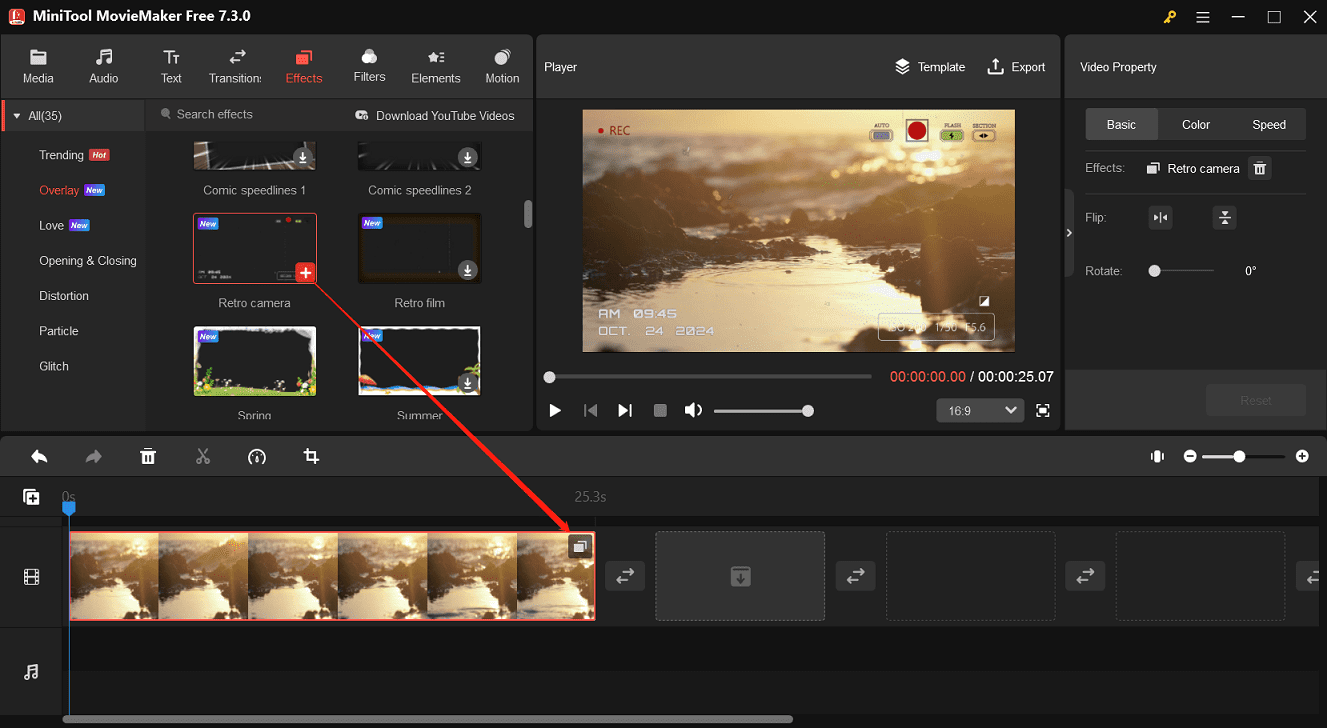
Step 4. Go to Effects on the top menu bar and select Overlay on the left sidebar. Find the Retro camera overlay and download it. Then, click the + icon to add this overlay to your video.
Step 5. You can continue to edit the video by adding filters, effects, color adjustment, and more. To export the video, click the Export button, complete the output settings, and click Export to start processing the video.
How to Create Camcorder Effect in CapCut
CapCut is a popular video editor due to its user-friendly interface, simple operation, and rich features. It lets you trim videos, change video speed, animate video clips, stabilize shaky videos, add captions, apply filters, transitions, etc. To help you create fancy videos, CapCut has a huge Effects library with a variety of effects to elevate your footage like a camcorder effect. Follow the steps below to create camcorder effect for video in CapCut.
Step 1. Download and install CapCut on your PC. Then, please open it and log in with your account.
Step 2. Click the + Create project button on the top to create a new project and enter the main interface of the app.
Step 3. Click the + Import button to open File Explorer and open your video. Then, drag it to the timeline.
Step 4. To add the camcorder effect, go to Effects, expand the Video effects menu, and select Vlog. Then, you’ll find 3 camcorder effects. Download these effects and choose the one you like best.
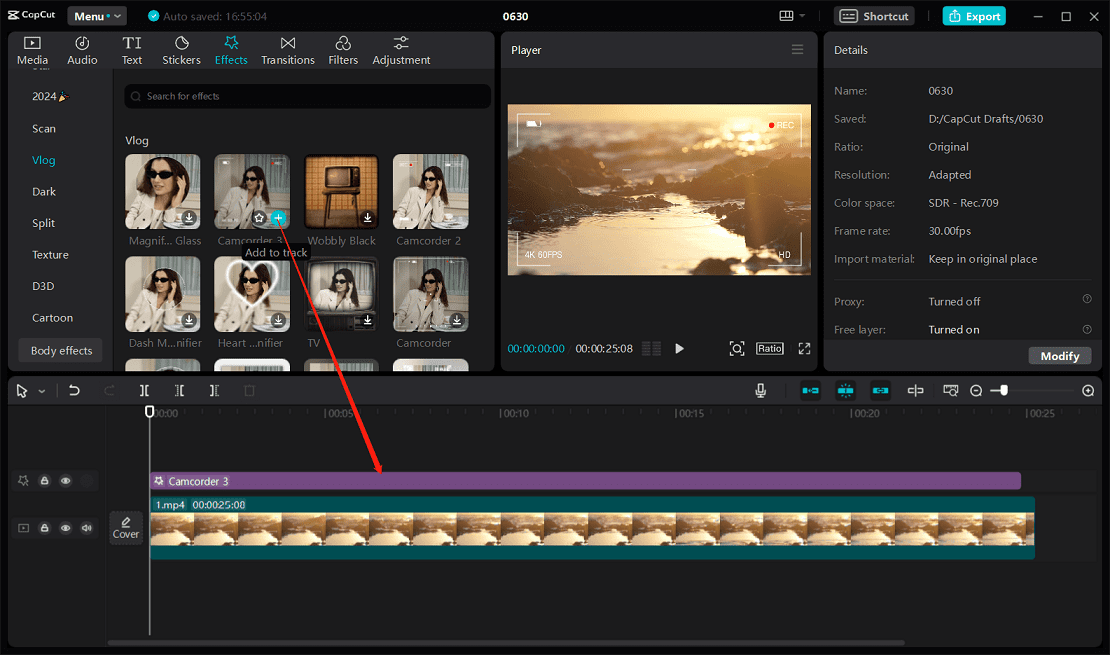
Step 5. CapCut does not apply effects to the entire clip, so you need to adjust the duration of the effect to match your video. Put the mouse cursor over the end point of the effect on the timeline until you see a double-headed arrow, and then drag the arrow to extend it.
Step 6. If you’re satisfied with the results, click Export in the upper right corner. Customize the export settings to export the video.
How to Create Camcorder Effect in FlexClip
FlexClip is an online video editor that provides a variety of tools, effects, and stickers to help you create amazing videos. If you want to add a camcorder effect overlay to videos in your browser, FlexClip is a great option. However, it adds watermarks to videos for users with free accounts.
Step 1. Visit the FlexClip website and log in with your account.
Step 2. Click the Create a Video button in the upper left corner and choose an aspect ratio for the video.
Step 3. Import your video and add it to the timeline. Go to Elements on the left menu, search for “camcorder”, and select the correct camcorder overlay for your video.
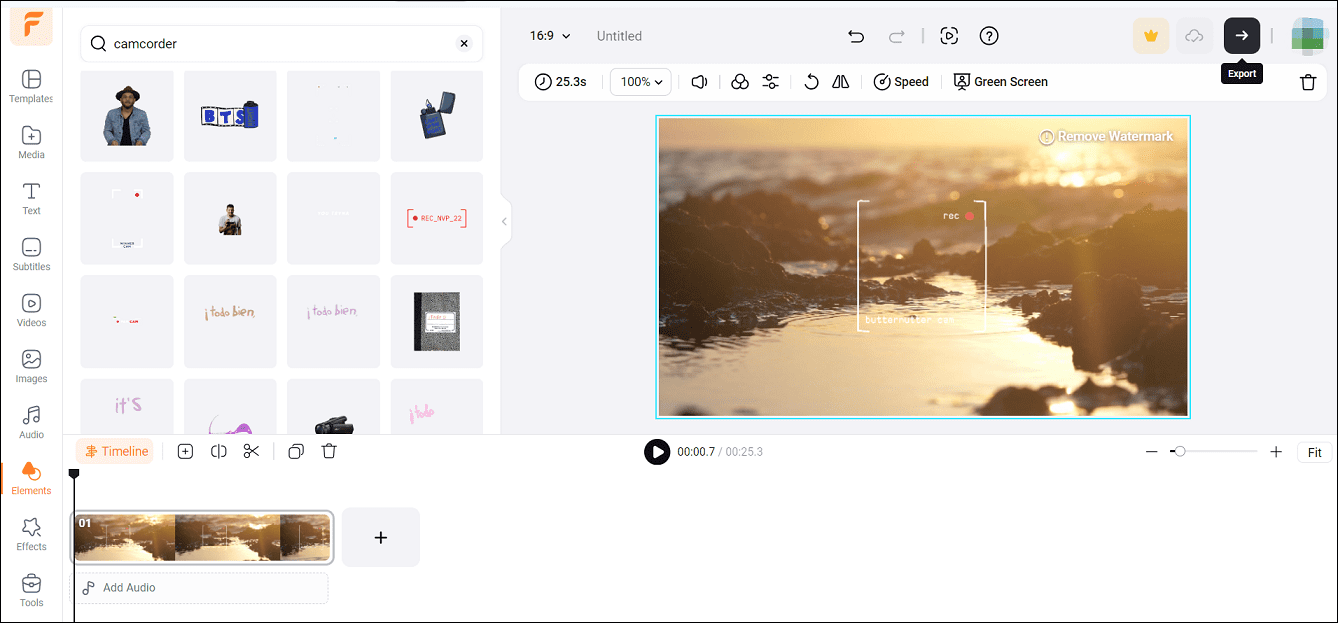
Step 4. Click the Export (arrow) button to export your video.
Conclusion
This post gives you 3 simple ways to create camcorder effect for your videos. Choose one method and add this effect to your video.


![How to Create a Bokeh Effect to Your Video [Solved]](https://images.minitool.com/moviemaker.minitool.com/images/uploads/2023/12/video-bokeh-effect-thumbnail.jpg)

User Comments :