Making a how-to video is a great way to showcase the advantages of a product or service. Wondering how to make a how-to video? Check this post and it will be much easier to create a compelling instructional video. Let’s get started!
How to Make a How-to Video?
Step 1. Write a Script
1. Choose a topic
The purpose of a good how-to video is to guide the audience to accomplish something. First, select the topics to be covered by the video, for example, “how to record the screen on a Windows computer”. This kind of hands-on video is usually easier to stand out and attract the attention of the audience.
2. Write down the specific steps
Now that you have the topic in mind, it’s time to write down what you need to include in your how-to video. Create a new Word document and list the methods that will be used in the video, the software to be used for each method, and the corresponding steps.
Step 2. Record a How-to Video
When everything is ready, you can choose to shoot or record your how-to video. Considering the simplicity of shooting a video, here will focus on how to record a how-to video based on the script written by myself.
Therefore, here we have to mention MiniTool Video Converter. It is a completely free screen recorder for Windows 10 that enables you to capture part of your screen or the entire screen. And you can decide whether to record audio from the system or microphone, or both.
Here’s how to record a how-to video with MiniTool Video Converter.
1. Launch MiniTool Video Converter
Download MiniTool Video Converter from the official site and get it installed on your Windows. After the installation is complete, double-click it to enter the main interface, and then click anywhere within the Click to record screen area.
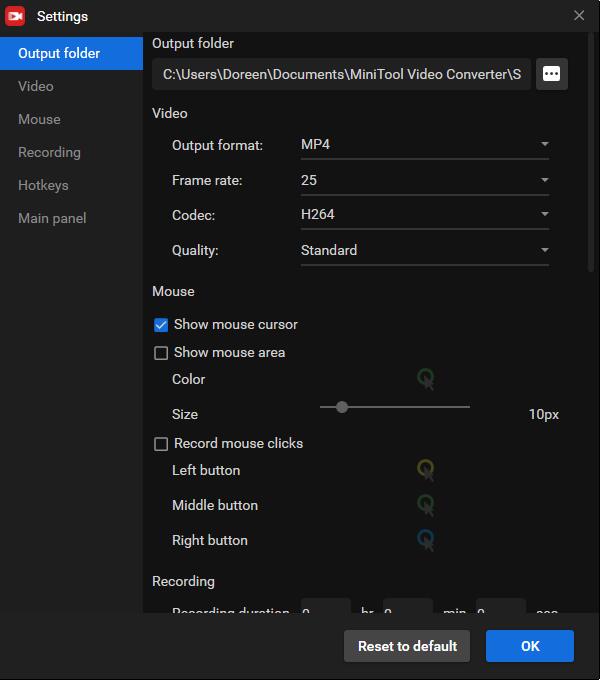
2. Set up parameters
Open the Full screen dropdown list to select the area to be recorded, and determine whether to record sound from the system or microphone. Click the gear icon at the upper right to change the output folder, output format, video frame rate, video codec, video quality, and much more.
3. Start the recording
Press the red Record icon or F6 to start capturing the screen. Now you can follow your script. After completing a method, press F9 to pause recording. When you are ready to record method 2, press F9 to resume recording. After finishing all the methods, press F6 to stop recording.
4. Check the recorded video
Then the how-to video you record will appear on the list. You can right-click on it to preview, delete, rename the recorded video, and check the folder where it is located.
Step 3. Edit the How-to Video
When it comes to editing the recorded how-to video, MiniTool MovieMaker is the best option. It is a free and safe video editor that provides you with all the editing tools you need. Even better, it can process a wide range of image, audio, and video formats.
With this freeware, you can easily add transitions, effects, motions, texts, as well as music to video, split/trim video, rotate/flip video, reverse video, change video speed, etc. In addition, it even enables you to save your how-to video in MP4, AVI, MOV, WMV, F4V, MKV, TS, 3GP, MPEG-2, WEBM, GIF, and MP3.
Follow the steps below to edit your how-to video with MiniTool MovieMaker.
1. Run MiniTool MovieMaker
Download MiniTool MovieMaker by clicking the button below and install it on your Windows. Launch the program and close the pop-up window to enter the main interface. Click the Import Media Files button to import the recorded video. And then drag and drop it onto the timeline.
MiniTool MovieMakerClick to Download100%Clean & Safe
2. Edit the recorded video
- Cut video: Move the marker to the beginning of the segment you want to delete and click the scissor icon to select Quick Split, and then move it to the end of the segment you want to delete and click the scissor icon to select Quick Split. Right-click the clip you want to remove and select Delete.
- Trim video: Hover your mouse over any edge of the video clip to get the trim icon, and then drag the icon forward or backward to trim the unwanted frames.
- Change video speed: Highlight the video on the timeline and click the fan icon to select the Slow or Fast option.
- Add music: Click the Music option under Media, and then import your music file or use any of the built-in music tracks.
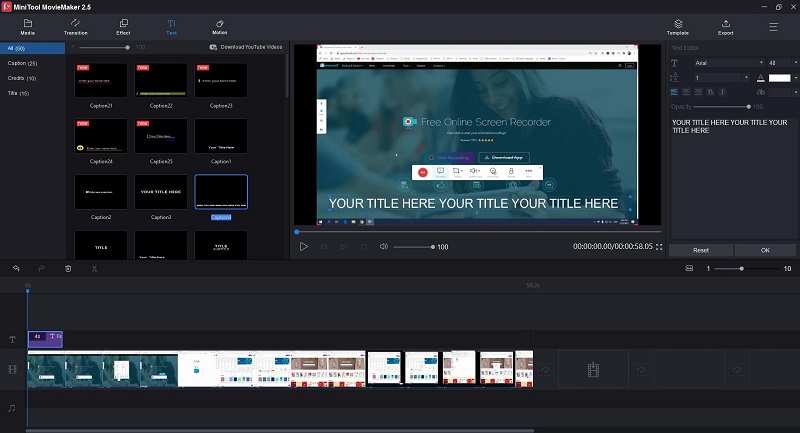
- Add text: Click the Text tab, choose your desired caption style, and then click + to add it to the text track. Next, enter your text and click OK.
3. Export the how-to video
After editing, tap on Export to open the export window. Here you can rename the video, change the video format, specify the destination folder, and adjust the video resolution. Once you’re done, click on Export to save the final how-to video.
Here’s how to make a how-to video. Share it with all of you!Click to tweet
Best Software for Making How-to Videos
Actually, in addition to the method mentioned above, there is an easier way to make a how-to video – using a program that provides screen recording and video editing functions at the same time, most of which are paid.
WeVideo
WeVideo is an online video editor that is compatible with Chromebook, Android, iPhone, Mac, and Windows. It offers over 1 million pieces of stock media in the Business plan, including videos, images, and music tracks, which are commercially licensed and free for use.
Besides, if you upgrade your subscription plan to Unlimited, you are able to record your whole screen or individual windows, and capture your screen and webcam at the same time. You can also add voiceovers, transitions, effects, slow motion, and more to your how-to video.
Features:
- Create square, vertical and horizontal videos
- Crop, green screen, voiceover, and slow motion
- Record screen and webcam together
- Unlimited use of over 1 million pieces of commercially licensed media
- 720p HD and 4K Ultra HD resolutions
Also read: How to Add Voiceover to Video
Camtasia
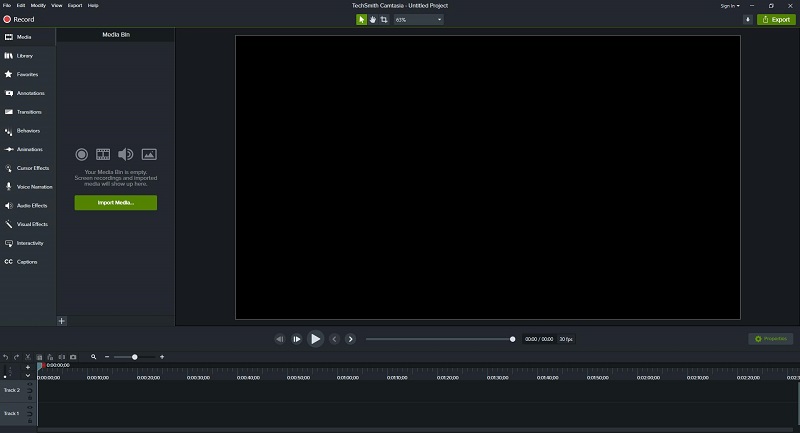
Camtasia is one of the best screen recorder and video editors, which makes it simple to record and create professional-looking how-to videos on Windows and Mac. Whether you have experience or this is your first time making a how-to video, it will give you everything you need.
With it, you can record anything on your computer screen – websites, software, video calls, gameplays, etc. And drag and drop texts, transitions, effects, and more onto the recording. To make your video more immersive, you can add your own music or choose a track from its music library.
Features:
- Pre-built video templates
- Record anything on your computer screen
- Record and edit your audio clips
- A library of royalty-free music and sound effects
- Turn your presentation into a video
ScreenFlow
ScreenFlow is an all-in-one screen recording and video editing program. When it comes to screen recording, you can designate the area of the screen you want to capture and capture footage from a webcam. Besides, it also supports multiscreen recording and iOS recording.
Meanwhile, there is a built-in stock media library with access to over 500,000 unique media clips and enables you to add transitions, text animations, video animations, freehand annotations, multi-channel audio, animate graphics, and logos to recorded videos.
Features:
- Record your iPhone or iPad screen
- A library of over 500,000 images, audio tracks, and video clips
- Powerful video editing tools
- Closed caption support
- Numerous animations and motions graphics
- Create animated GIFs and APNGs from any video project
Related article: How to Make a Boomerang Video
Free Cam
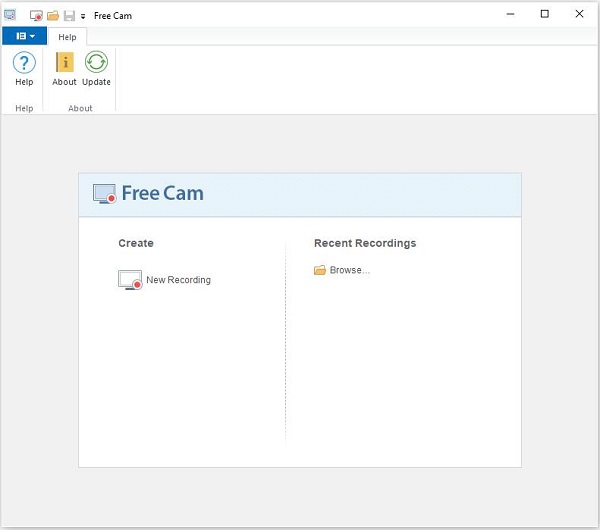
Free Cam is a multifunctional program that allows you to record your screen and fine-tune the recorded videos. You can record your entire screen, a selected area of the screen, or a single window. To make your how-to video more informative, you can choose to record a voice-over.
After recording your screen, you can cut out unnecessary fragments of the video. If there is any noise, you can remove it from the entire clip at ease. Additionally, you can also adjust the volume, add fade in/out effects, or mute the sound in selected parts of the video.
Features:
- No watermarks, time limits, or ads
- Select a recording area
- Record your voiceover and system sounds
- Highlight your mouse
- Cut out unnecessary fragments of the video
- Remove background noise
- Polish your audio

Bottom Line
Have you mastered how to make a how-to video after checking this post? Not as difficult as you think, right? If this post is useful for you, share it with your friends or family.
If you have any problems or suggestions when using MiniTool software, please let us know via [email protected] or share them in the comments section below.
User Comments :