Adobe Premiere Pro is a professional video editing application with both basic and advanced features, such as trimming, cutting, transitions, motion tracking, and more. This video editor is powerful enough but a little difficult for beginners. Splitting and trimming videos are two common features in almost all video editors.
This post provides an Adobe Premiere Pro tutorial on how to split and trim videos for beginners.
Many people wonder about the differences between splitting, trimming, and cutting videos. Trimming is the process of removing either part of the beginning or end of a video clip. Now, image if you want to select out the middle portion of a video to delete it or edit it, you need to split or cut the video into several segments.

How to Split a Clip in Premiere Pro
If you want to remove sections of a video or add effects to specific moments to enhance your video, just split it. Here’s how to split a clip in Premiere Pro.
Step 1. Launch Adobe Premiere Pro and click on New Project or go to File > New > Project… to create a new project. Then, give it a name and choose a destination.
Step 2. Click Desktop or other options on the left side to browse for your videos. Toggle on Create new sequence and select the video you want to edit. It will be automatically added to the timeline.
Step 3. To split a video, click on the Razor tool on the left pane of the timeline, and click on the position where you want to create a cut. Repeat this step to split a video into many cuts.
Alternatively, you can cut a video in Premiere Pro using the playhead and keyboard shortcuts. Move the playhead to the target place where you want to split, and press Ctrl + K on Windows or Command + K on Mac to split the clip.
Step 4. After splitting your video into several cuts, you can delete any one of them or add transitions or other effects. After editing, click on Export, choose H.264 in the Format list, and click Export to export your video in MP4.

How to Trim Video in Premiere Pro
Sometimes, if you record a video tutorial and want to delete unnecessary beginning or end parts of the video to make it more coherent, you need to trim it. Here’s how to trim a video in Premiere Pro.
Step 1. Open Premiere Pro and add your video to the timeline.
Step 2. The quickest way is to click the video on the timeline and drag the ends of the clip towards the center to trim the video.
To make precise trim adjustments, double-click on the end of the clip to enter the Trim mode. Drag on the video images in the Program Monitor or click on the buttons at the bottom to trim the video.
Step 3. After trimming the video, you can continue to edit it or follow above step 4 to export the video.
![[6 Methods] How to Fix Adobe Premiere Pro Media Pending Error](https://images.minitool.com/moviemaker.minitool.com/images/uploads/2023/03/premiere-pro-media-pending-thumbnail.jpg)
How to Split and Trim Videos in MiniTool MovieMaker
MiniTool MovieMaker is one of the best alternatives to Adobe Premiere Pro for beginners to edit videos. This application lets users trim, split, crop, rotate videos, apply transitions, filters, motion effects to the video, change video aspect ratio, add text or stickers, and more.
MiniTool MovieMaker is simple to use and can export videos up to 1080p without watermarks. Follow the steps below to learn how to split and trim videos inside this program.
MiniTool MovieMakerClick to Download100%Clean & Safe
Step 1. Download and install MiniTool MovieMaker on your PC. Launch it and close the promotion window, and click Import Media Files to add your video.
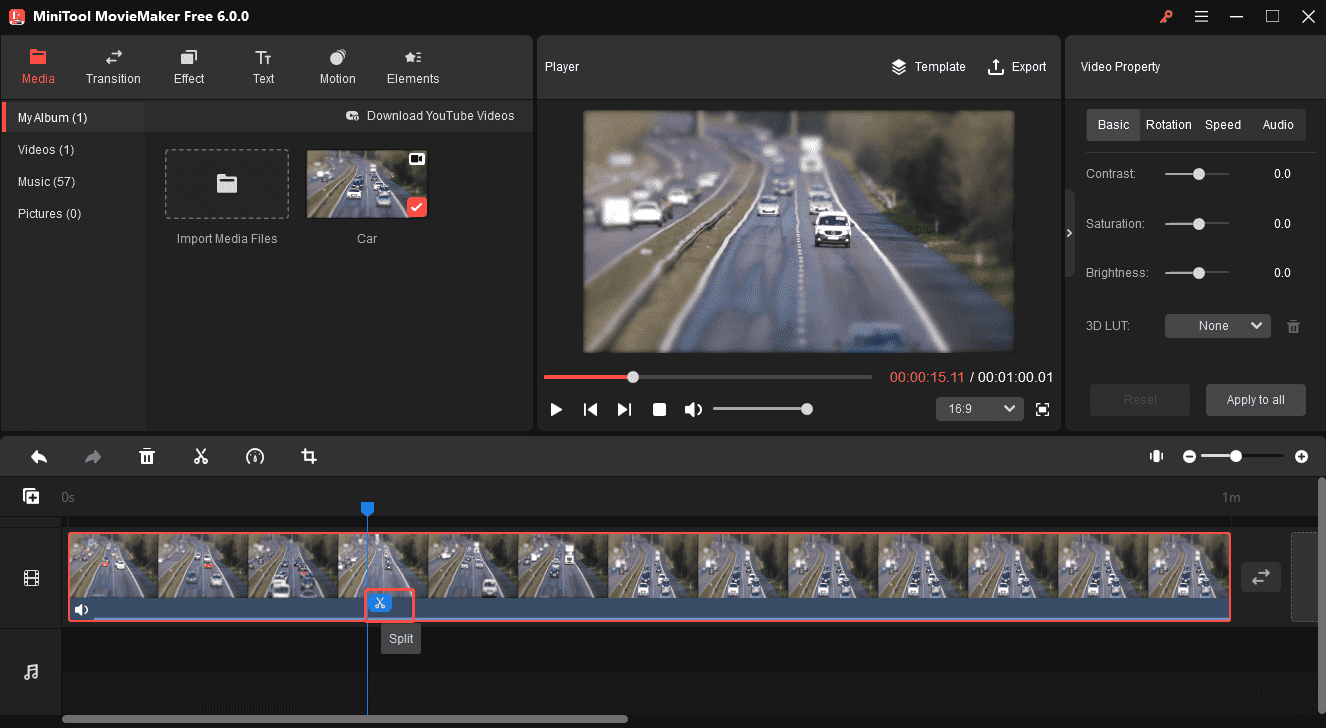
Step 2. Drag your video to the timeline. You can quickly trim and split the video on the timeline. Click the clip and drag either end of the video towards the center to trim it. Move the playhead to the place where you want to create a cut, and click the Split (Scissor) icon to split it into two pieces.
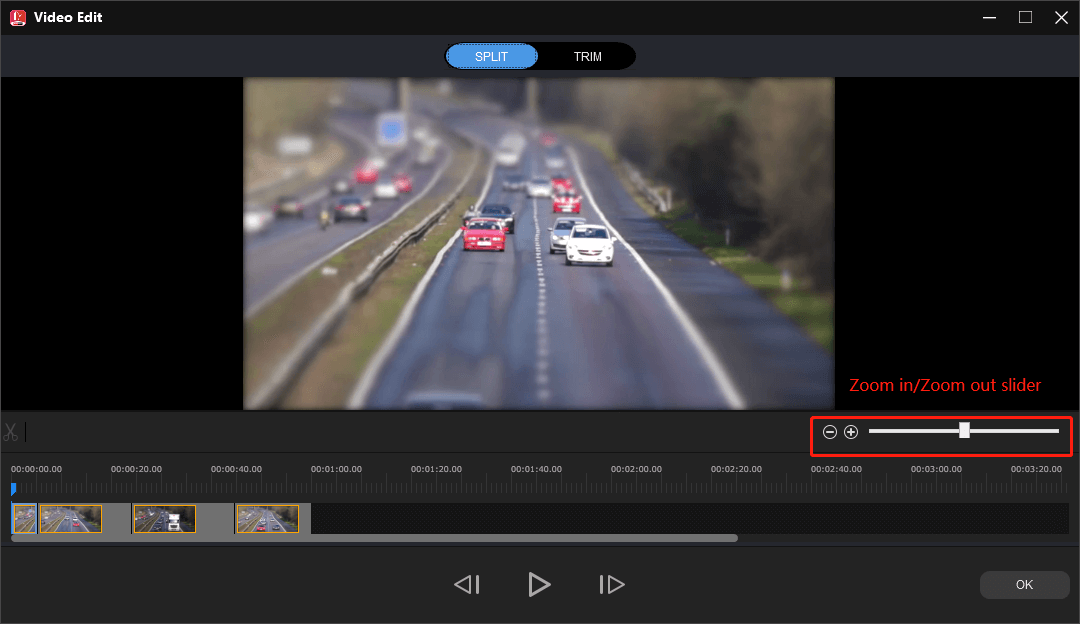
Step 3. To trim and split the video more precisely, select the clip on the timeline and click the Scissor icon above the timeline and choose Full Split. Use the Zoom in/Zoom out slider to locate each frame more accurately.
To split a video, drag the playhead to the target place, and click the Scissor icon. Click OK to save changes.
Step 4. To export your video, click on Export at the top of the player. Choose the video format and destination folder and click Export.
Conclusion
If you’re wondering how to split clips in Premiere Pro, just follow the above steps to quickly cut and trim your videos. If you think that Premiere Pro is expensive for you, you can try MiniTool MovieMaker, a free and simple video editor for everyone.
About The Author

Position: Columnist
Cora is a tech writer specializing in digital media workflows, with over six years of hands-on experience in video post-production, media transcoding, and screen capture. Her writing is always clear and practical. Cora also produces in-depth software reviews for users across skill levels to help them find the right tool and enjoy video editing.
User Comments :