This post explains how to edit video on HP laptops using MiniTool MovieMaker and Microsoft Clipchamp. Select MiniTool MovieMaker for free 4K exports. Try Microsoft Clipchamp for quick edits without installing software on Windows 11.
How to Choose Video Editing Software for an HP Laptop
Picking the right video editor for your HP laptop ensures a smooth workflow. Here’s what to consider:
- Check compatibility: Ensure the software works with your Windows version and hardware. For basic or mid-range HP laptops, use lightweight tools like MiniTool MovieMaker. For high-end models, consider professional software like Adobe Premiere Pro.
- Match your skill level: Beginners and intermediates can use MiniTool MovieMaker. Professionals may prefer Adobe Premiere Pro.
- Match your needs: For simple edits (trimming, cropping, adding text), use basic apps. For advanced features (3D effects, multi-cam editing), choose professional tools.
- Support multiple formats: Pick an editor that handles a wide range of video formats.
Choose wisely based on your skills, project needs, and your laptop’s capabilities to create videos efficiently! In the following parts, I’ll show you how to edit videos on an HP using MiniTool MovieMaker and Microsoft Clipchamp.
| Software | MiniTool MovieMaker | Microsoft Clipchamp |
| HP Performance Requirement | Low | Medium |
| Price | Free + Ultimate | Free + Premium |
| No Watermark | Yes | Yes |
| Multi-track | Yes | Yes |
| Best HP Use Case | Daily editing, vlogs, family videos. | Need auto-captions, cloud sync. |
How to Edit Video on HP Laptop with MiniTool MovieMaker
Fast Track:
- Install MiniTool MovieMaker on your HP.
- Import the target video files.
- Trim, crop, and change video speed.
- Add title/credits/captions and music.
- Export the video.
MiniTool MovieMaker is a video editor without watermark suitable for all skill levels. Its clean interface makes navigation easy for beginners. Key features include:
- Editing tools: Trim, crop, reverse, flip, rotate, and add text, filters, transitions, effects, motion, and audio.
- Customizable output: Adjust format, resolution, bitrate, encoder, and frame rate.
- Multi-track editing: Separate tracks for images, music, sound, titles, extra video clips, and effects—allowing independent editing of each element.
- Group Clips: Combine elements from the main and sub-tracks to edit them as a single unit.
Now, click the button below to download and install MiniTool MovieMaker on your HP laptop and start editing your video with me.
MiniTool MovieMakerClick to Download100%Clean & Safe
Step 1. Go to the main user interface
After installation, open MiniTool MovieMaker and close the project window to enter its main user interface.
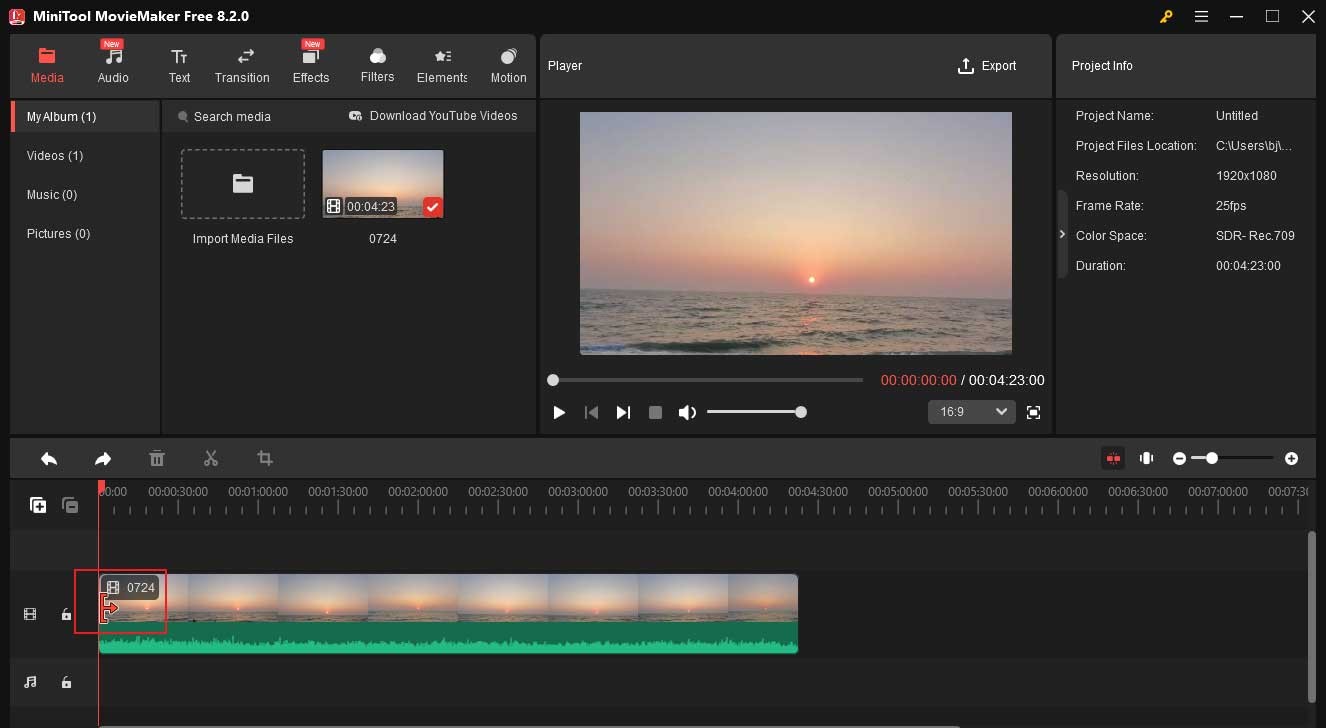
Step 2. Import the target video
Click the Import Media Files button to add the target video to the software.
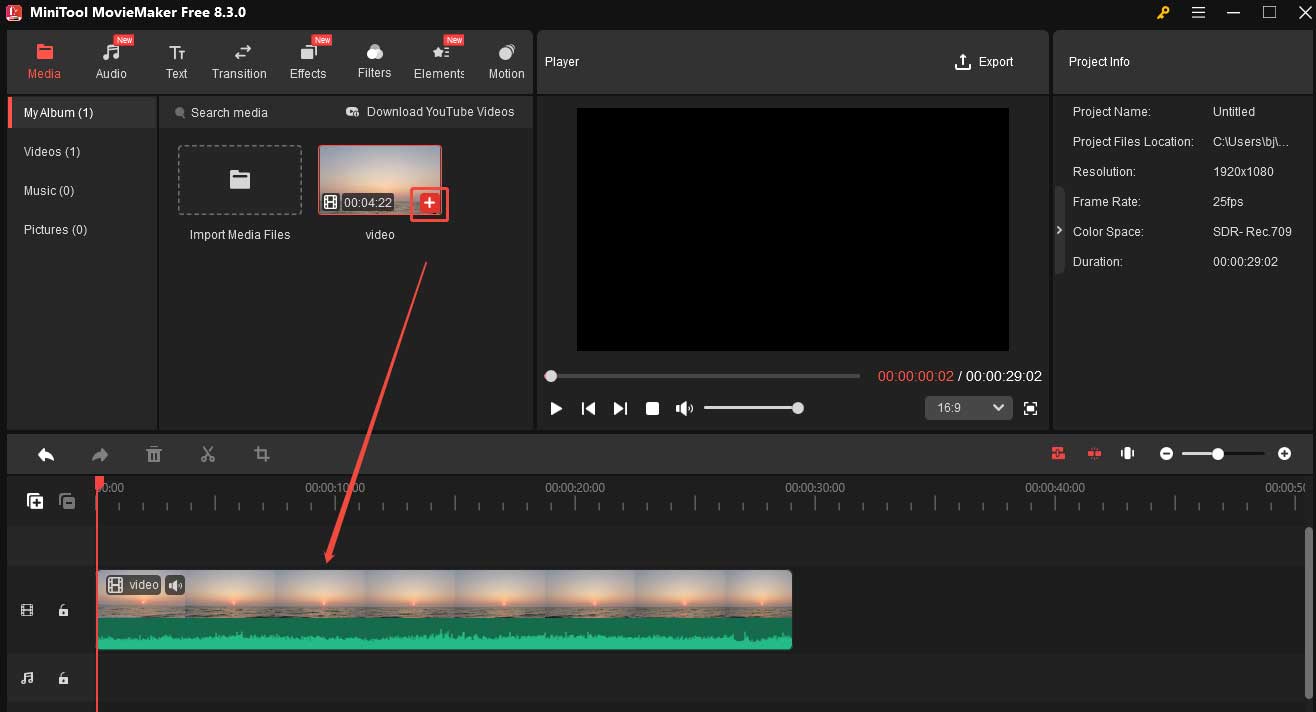
Step 3. Add the video to the timeline
Click the + icon on the video thumbnail to add it to the timeline. You can also directly drag and drop the video to the timeline.
Step 4. Start editing the video
When you add the video to the timeline, the Group Clips feature will be activated by default. You can also disable this feature by clicking the Group Clips icon on the timeline toolbar. Then, you can start to edit your video.
#Trim the Video
Trimming a video allows you to remove unnecessary parts, enhancing storytelling and making the video more engaging. MiniTool MovieMaker offers 2 methods.
Option 1. Use the Arrow
This method can help you quickly trim the beginning/end part.
- Hover your mouse over the start/end point of the video, and then you will see an arrow.
- Drag the arrow to the right/left to trim your video.
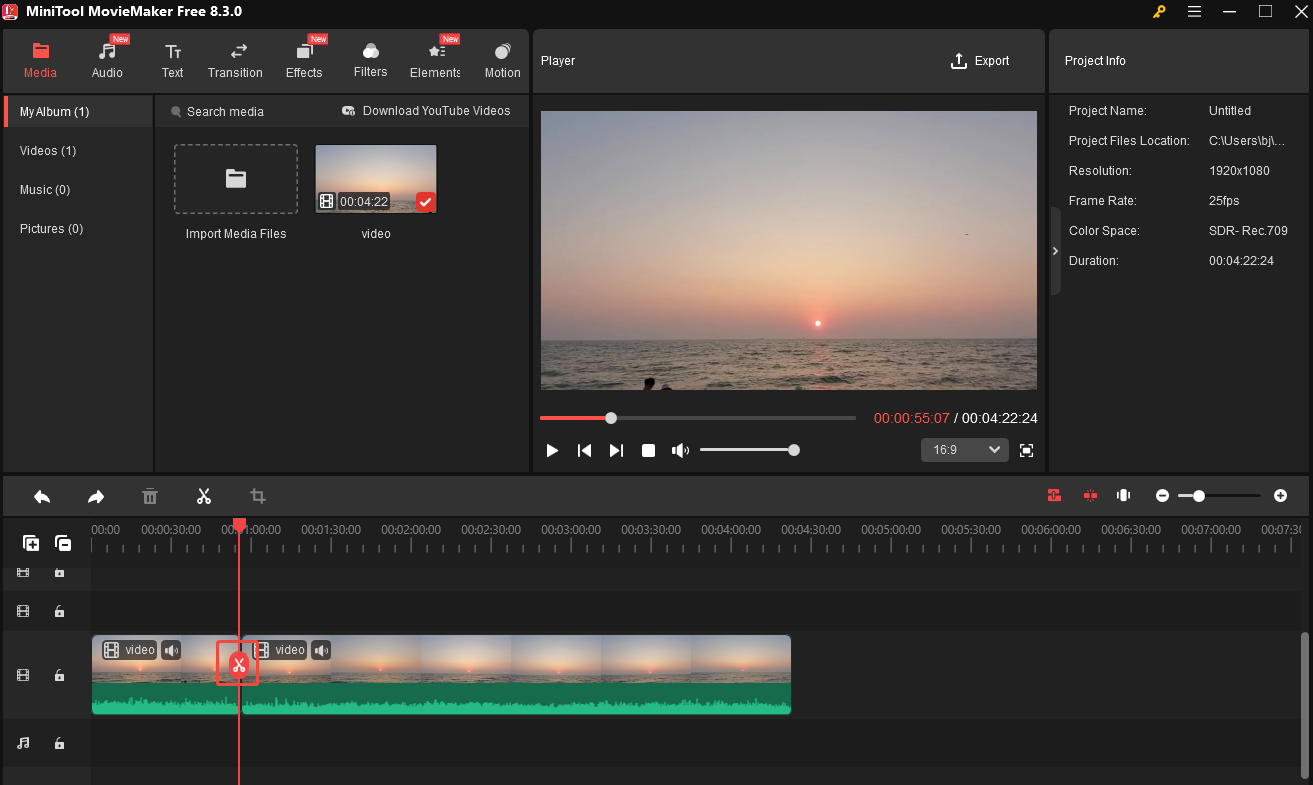
Option 2. Use the Scissors
If you are unsatisfied with the middle part of your video, you can use the scissors to cut it.
- Move the playhead to the beginning of the section you want to remove and click the scissors icon.
- Then, move the playhead to the end of the section you want to remove and click the scissors icon.
- Right-click the unwanted part and choose Delete from the list to remove it.
- Repeat the above steps to cut all your unwanted parts.
#Crop the Video
If you want to change the aspect ratio of a video or focus on a specific subject, you can crop it. Here are 2 options.
Option 1. Use the Preset Aspect Ratio
- Expand the Aspect Ratio option at the bottom-right corner of the Player section.
- Choose a preset aspect ratio you like from the list.

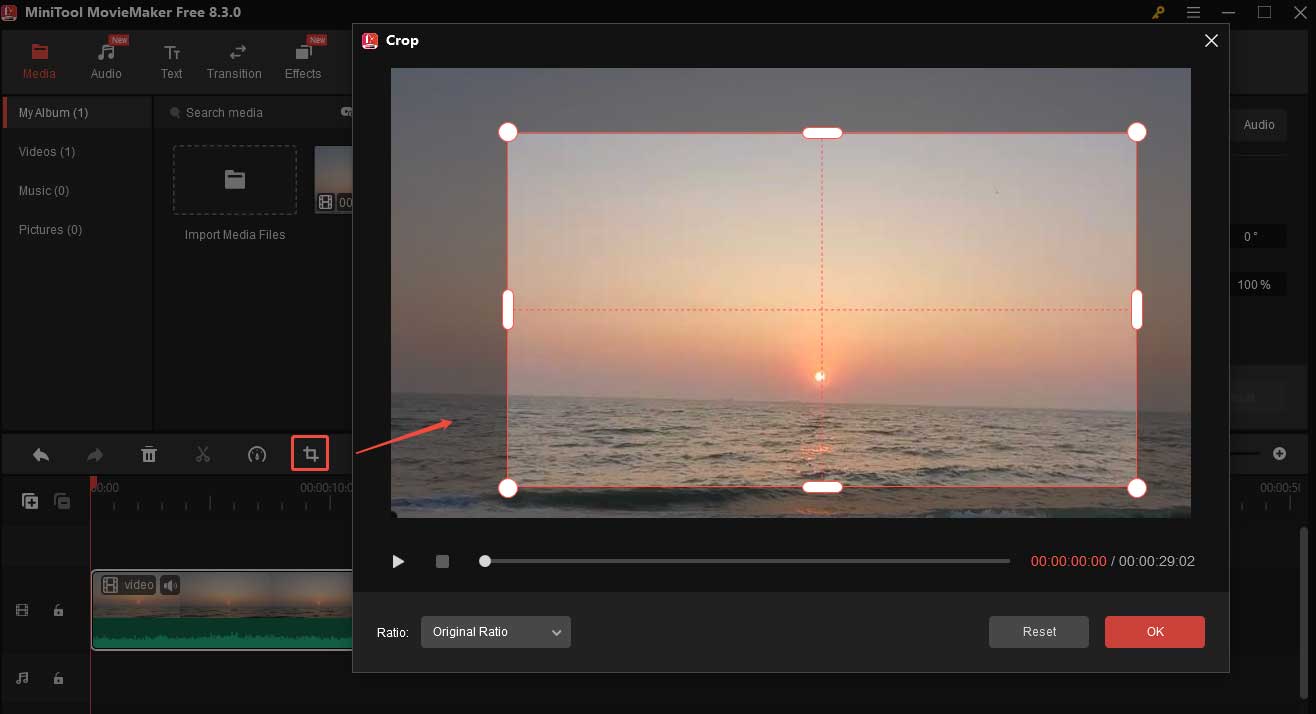
Option 2. Customize the Aspect Ratio
- Click the crop icon on the timeline toolbar.
- In the Crop window, drag the cropping handles.
- Once satisfied, click OK.
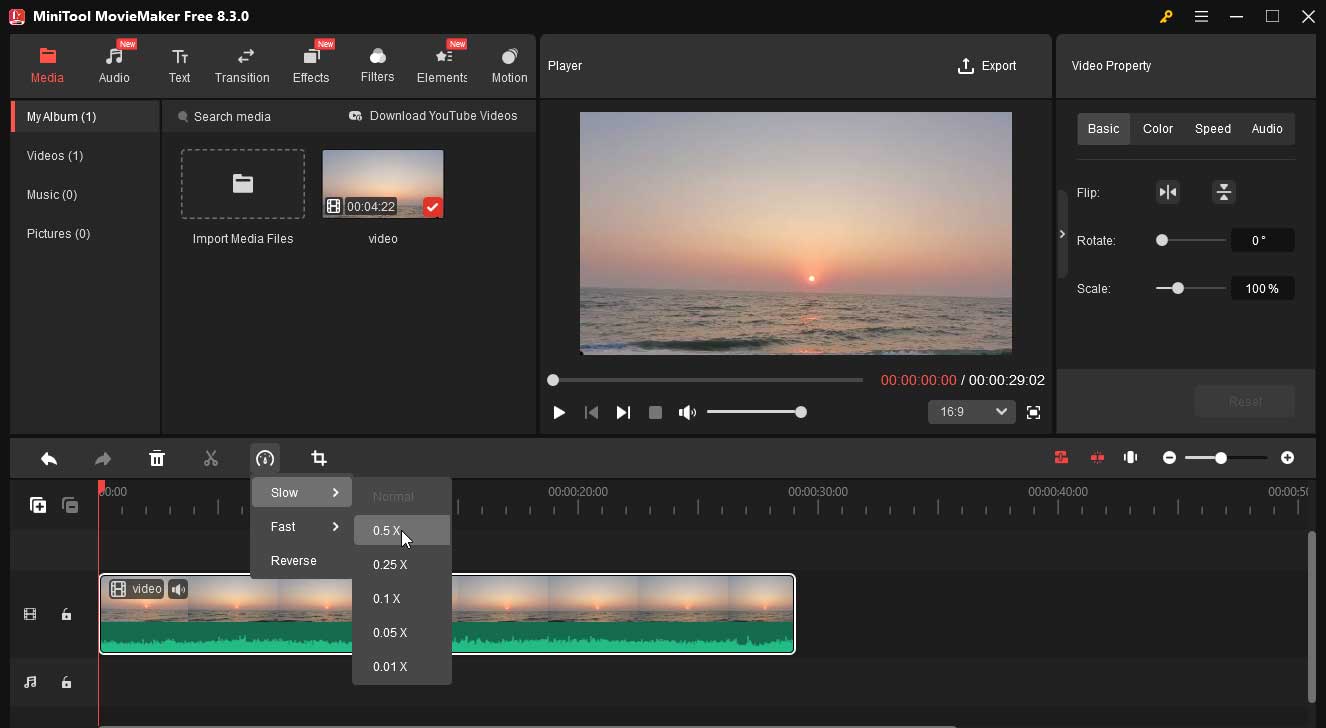
#Change the Video Speed
MiniTool MovieMaker also allows you to make your video faster or slower.
- Click the Speed icon on the timeline toolbar.
- Choose Slow and select a speed from the list to make your video slower. Accordingly, the video length will be longer. You can also choose Fast and then select a speed to make your video faster and shorter.
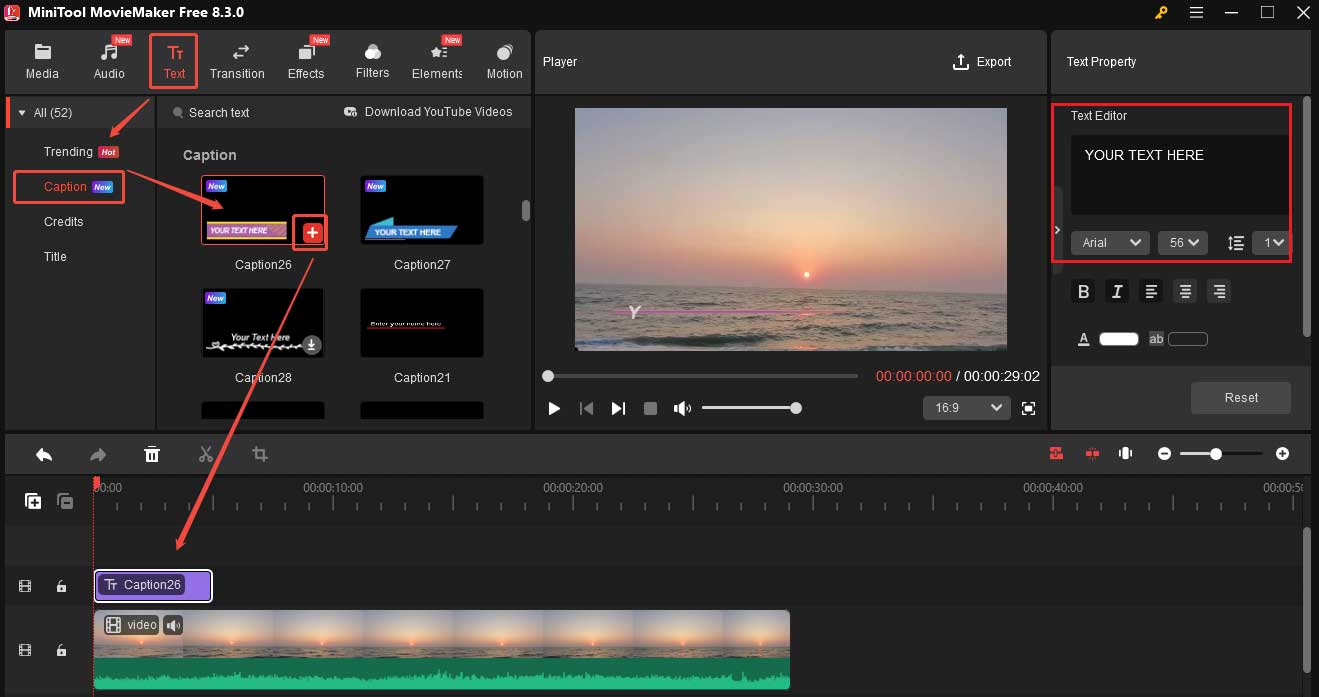
#Add Subtitles to the Video
Adding subtitles to a video boosts accessibility, enabling deaf or hard-of-hearing viewers, as well as those in noisy environments, to understand the content.
- Position the playhead where you want the subtitles to begin.
- Click Text and choose Caption.
- Click the + icon on your desired caption mode to add it to the timeline.
- Go to the Text Editor to enter and edit your subtitles.
- Hover your mouse over the end of the subtitle box on the timeline to change the duration of the subtitles.
- Drag the subtitles box in the preview window to adjust its position.
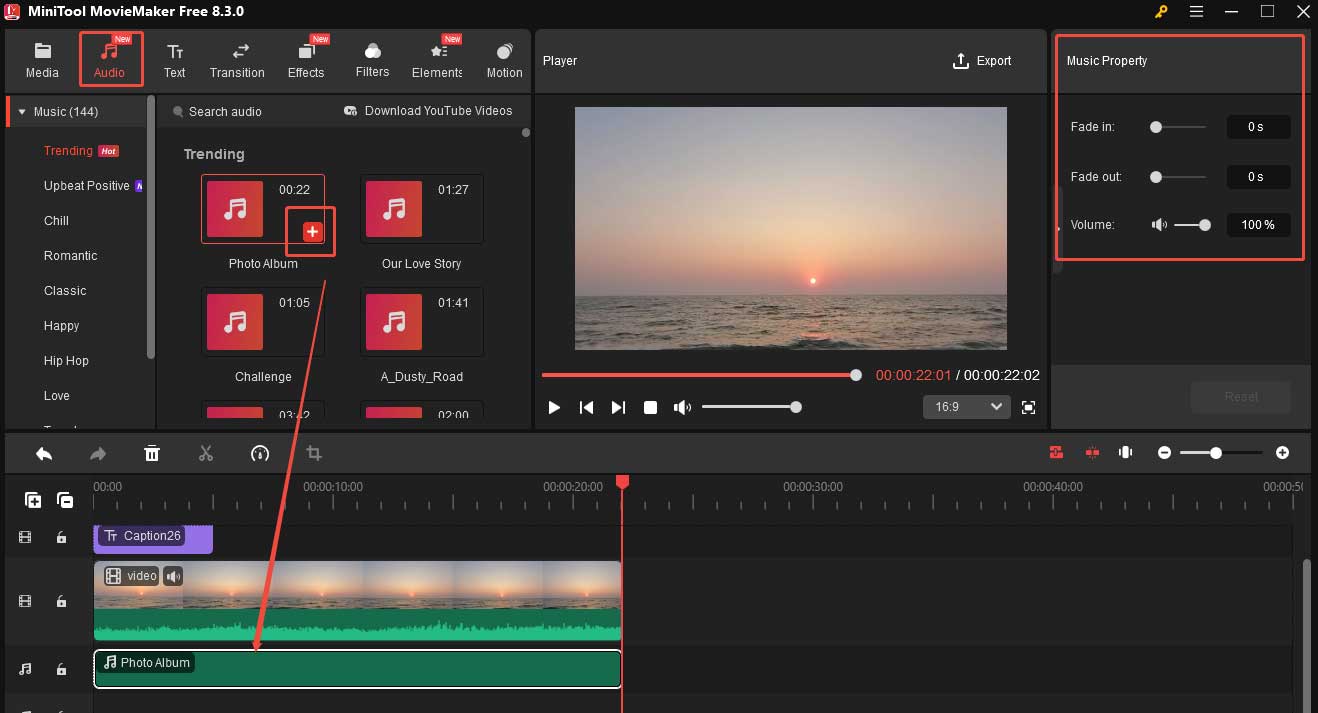
#Add Background Music to the Video
Adding proper background music to a video can set the mood and keep viewers engaged, improving the video’s quality.
- Click Audio on the top menu, choose your desired music, and add it to the timeline.
- Then go to the Music Property window to edit it. Here, you can apply the fade-in or fade-out effect and adjust the volume.
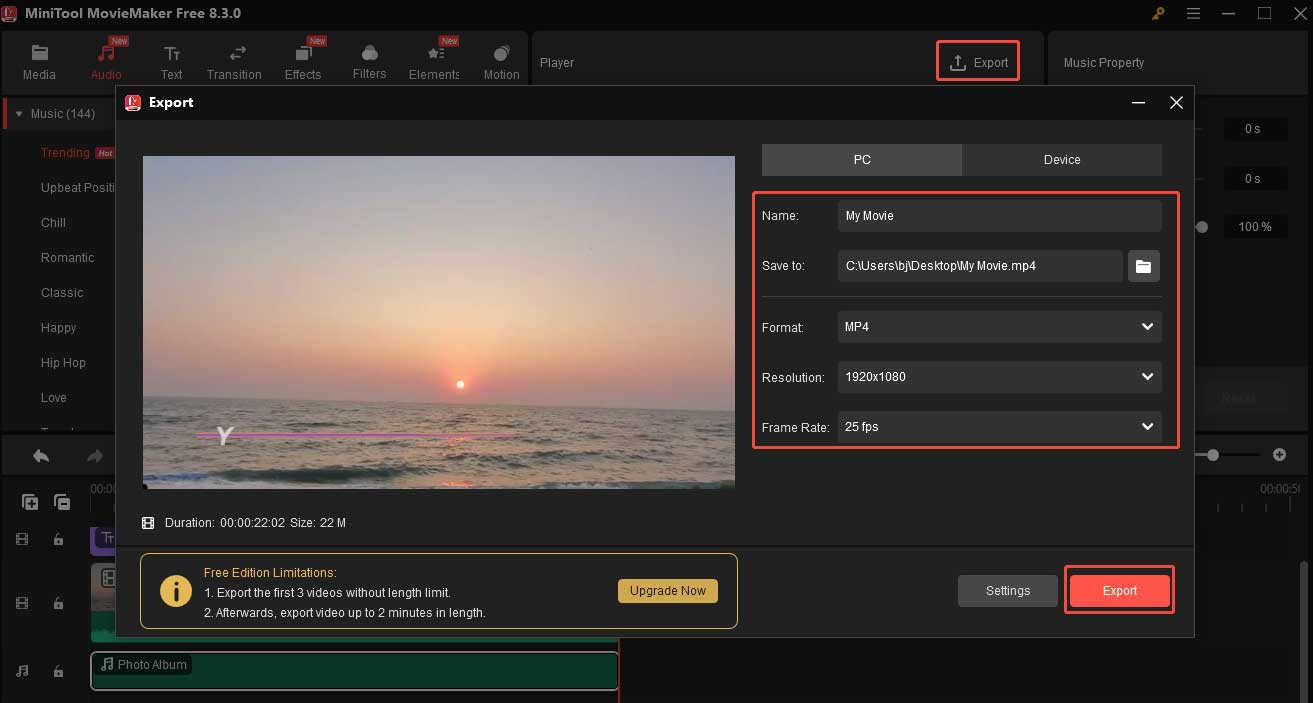
Step 5. Export the Video
- Click Export at the top-right corner.
- In the Export window, you can customize the video name, destination folder, format, etc.
- Finally, click the red Export button to save the video on your device.
See, it’s easy to make a wonderful video on your HP laptop using MiniTool MovieMaker.
MovieMaker by MiniTool is an inexpensive, easy-to-use video editing program. It includes a fair number of effects and gives you easy ways to join your clips, add transitions, and overlay objects and text.https://www.pcmag.com/reviews/minitool-moviemaker
How to Edit Video on HP Laptop with Clipchamp
- Launch Microsoft Clipchamp and import videos.
- Trim, crop, rotate, and change speed.
- Save and export the video.
Clipchamp is a powerful yet user-friendly video editing platform developed by Microsoft. It is available both online and offline, offering a seamless editing experience across devices. The desktop version is pre-installed on most Windows 11 PC and downloadable for Windows 10. It offers an intuitive interface that simplifies video creation, allowing you to cut video, add effects, etc., with ease.
Step 1. Open Clipchamp
Many Windows 11 PCs have Clipchamp preinstalled. If so, just launch this software on your PC. If not, download and install it first.
Step 2. Import the Video
Click the Create a new video button. In the next window, click the Import media button to load the video you want to edit on your HP laptop.

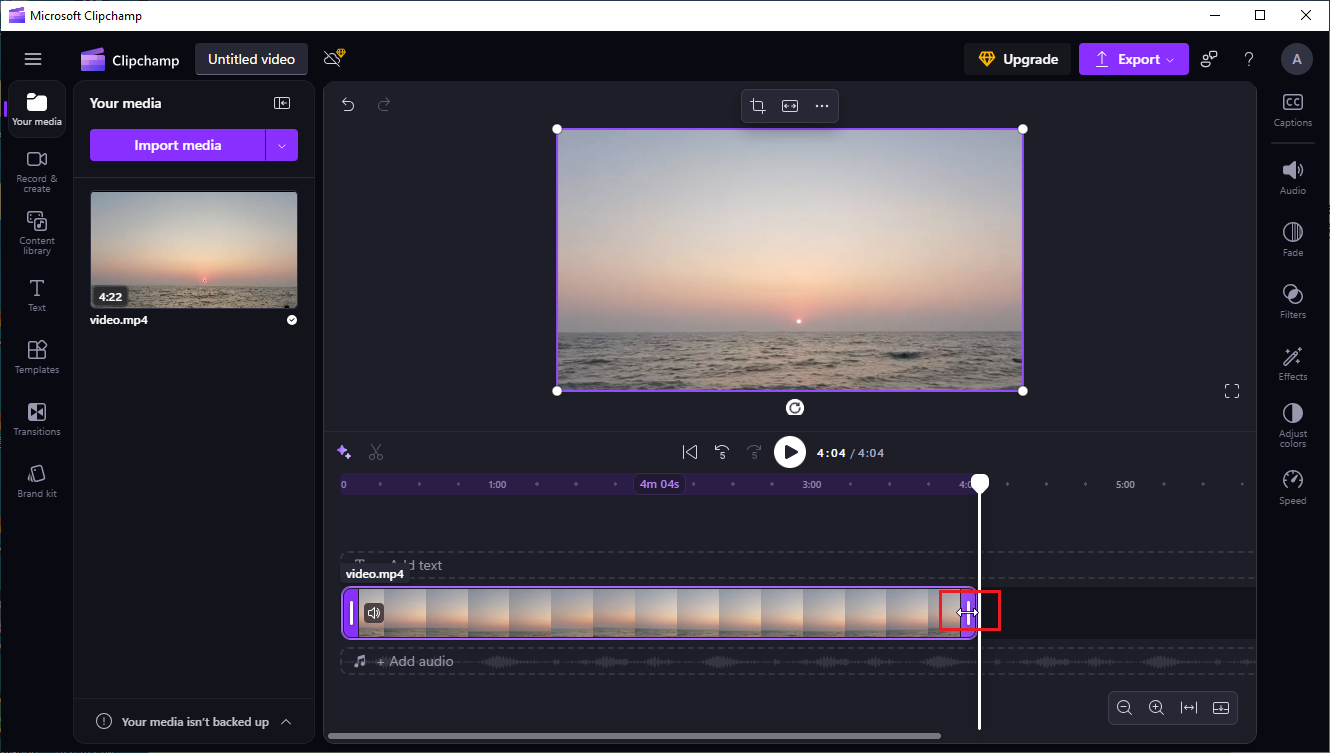
Step 3. Add the video to the Timeline
After importing, click the + icon to add the video to the timeline. You can also drag and drop it to the timeline.
Step 4. Start editing the video
#Trim the Video
- Hover over the start/end of the video until you see a double-headed arrow.
- Then, move the arrow to the right/left.
#Crop the Video
- Click the Crop button on the floating toolbar above the video.
- Then you will see cropping handles appear on the sides, top, and bottom of your video. Drag the handles to crop your video.
- Once finished, click the Done icon.

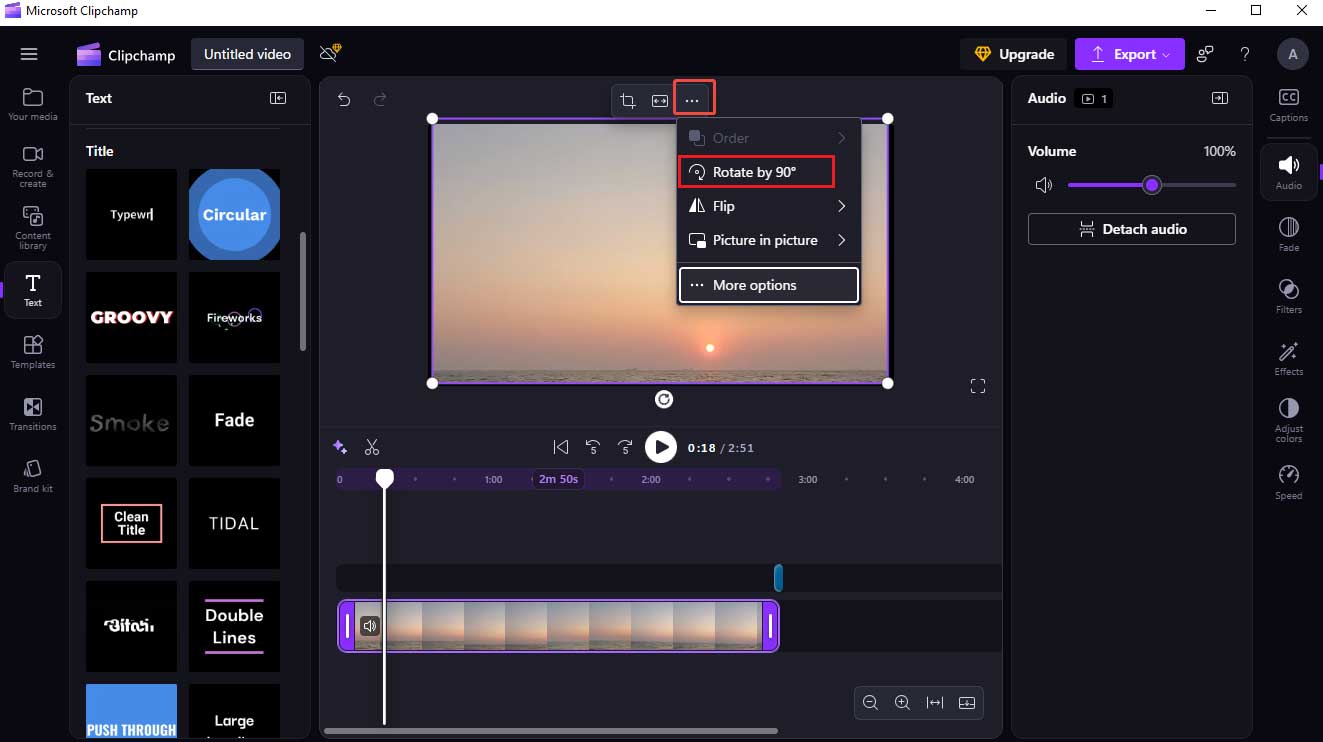
#Rotate the Video
- Click the More icon on the floating toolbar above the video.
- Select the Rotate by 90° button to rotate your video.
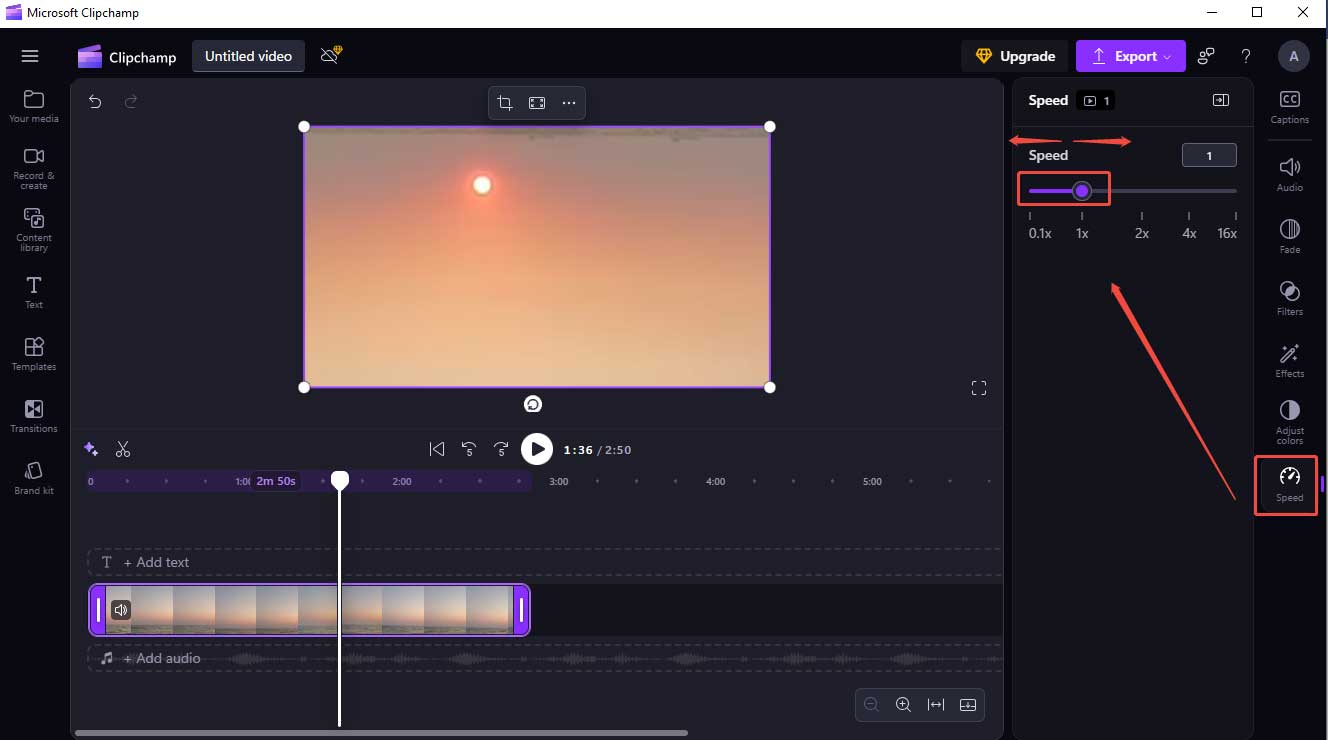
#Change the Video Speed
- Click the Speed icon on the right sidebar.
- Move the slider to the right to make the video faster or to the left to make the video slower.
Step 5. Export the Video
- Click Export and select a resolution for your video. Then, Clipchamp will start exporting your video.
- When it’s done, click the Save to your computer icon to save the video.
In short, Clipchamp is a handy video editor for an HP laptop.
Clipchamp Free is surprisingly generous, letting you work on projects up to 1080p, have access to what they call ‘AI editing tools’ for audio and video, grant you the ability to record your computer’s screen, webcam, and audio, and all without any watermark anywhere, which is pretty cool.https://www.techradar.com/reviews/clipchamp-review

Conclusion
Editing a video on an HP laptop is easy once you have the right tool. This post offers 3 easy and feature-rich video editors with detailed instructions to help you create a wonderful video. Next time, when you are asked: Can you edit videos on HP laptop? You can confidently answer “YES”!
Finally, if you encounter any issues while using MiniTool MovieMaker, please feel free to contact us via [email protected]. You can also contact me directly via Twitter.
How to Edit Video on HP FAQ
2. Import the target clips.
3. Trim and arrange them.
4. Add text, transitions, and audio.
5. Save the project and export the video.
About The Author

Position: Columnist
Cora is a tech writer specializing in digital media workflows, with over six years of hands-on experience in video post-production, media transcoding, and screen capture. Her writing is always clear and practical. Cora also produces in-depth software reviews for users across skill levels to help them find the right tool and enjoy video editing.
User Comments :