This post explains how to edit a voice recording using MiniTool MovieMaker. Upload the voice recording, trim the beginning/end of a recording, delete a mistake in the middle, adjust the volume level, add fade-in / fade-out effects, and change the recording speed. Finally, save the recording as an MP3 file.
With the help of recording apps and devices, it is easy to record our voice, audio, and various sounds. However, errors will occasionally occur during the recording process. For example, there are inevitable pauses when recording narration. This is why it is necessary to edit these recordings before sharing them in a professional setting. So, how to edit a voice recording?
In this post, we’ll introduce the best voice recording editor – MiniTool MovieMaker and walk you through the step-by-step process of editing your voice recordings.
How to Edit a Voice Recording
Fast Track:
- Install MiniTool MovieMaker.
- Import the voice recording.
- Remove unwanted sections, adjust volume, and change speed.
- Save the voice recording as an MP3 file.
MiniTool MovieMaker is an easy-to-use video editor without a watermark, designed for everyone to create video from images in minutes. It also allows you to trim unwanted parts, split clips for precise editing, decrease the volume, adjust playback speed, and play audio in reverse.
Step 1: Download and Install
Click the button below to download MiniTool MovieMaker and install it on your computer.
MiniTool MovieMakerClick to Download100%Clean & Safe
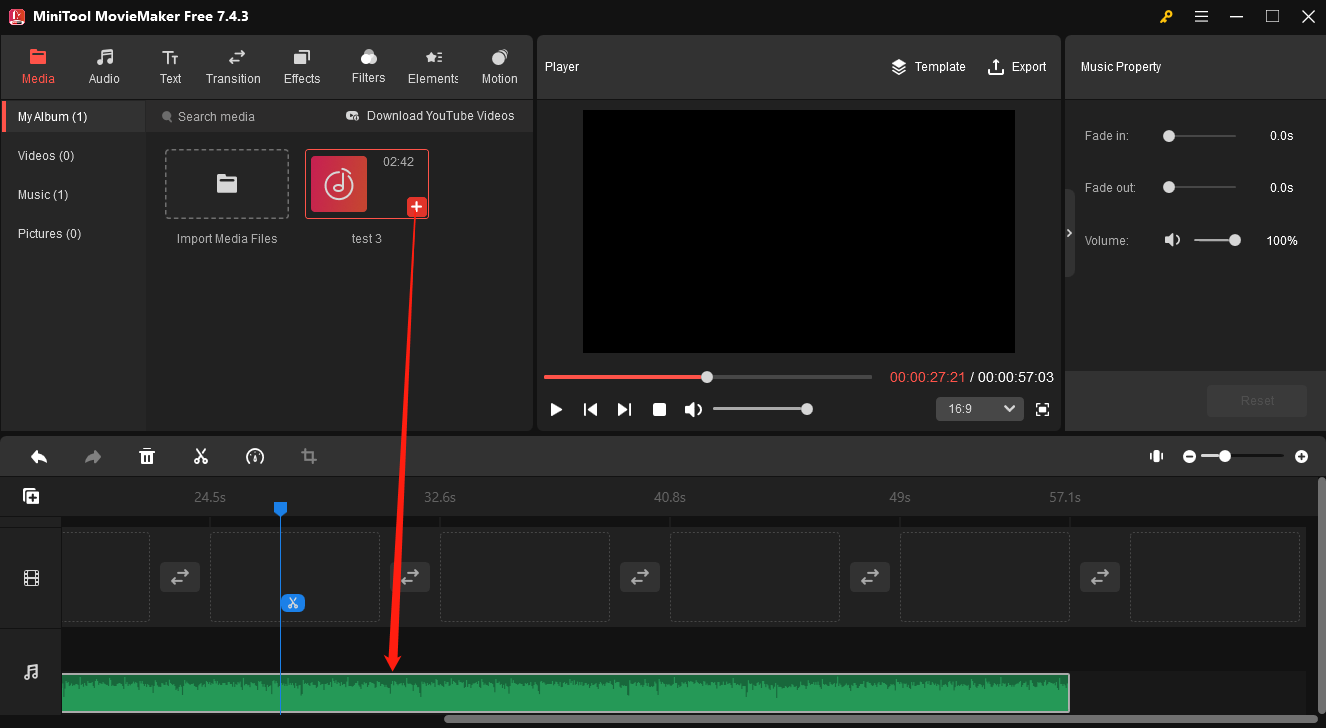
Step 2: Import the Voice Recording
Launch this application and close the promotion window to enter the main user interface. Under the default Media tab, click the Import Media Files button to open File Explorer and import your voice recording. Then, click the + icon on the thumbnail or drag and drop it to the timeline.
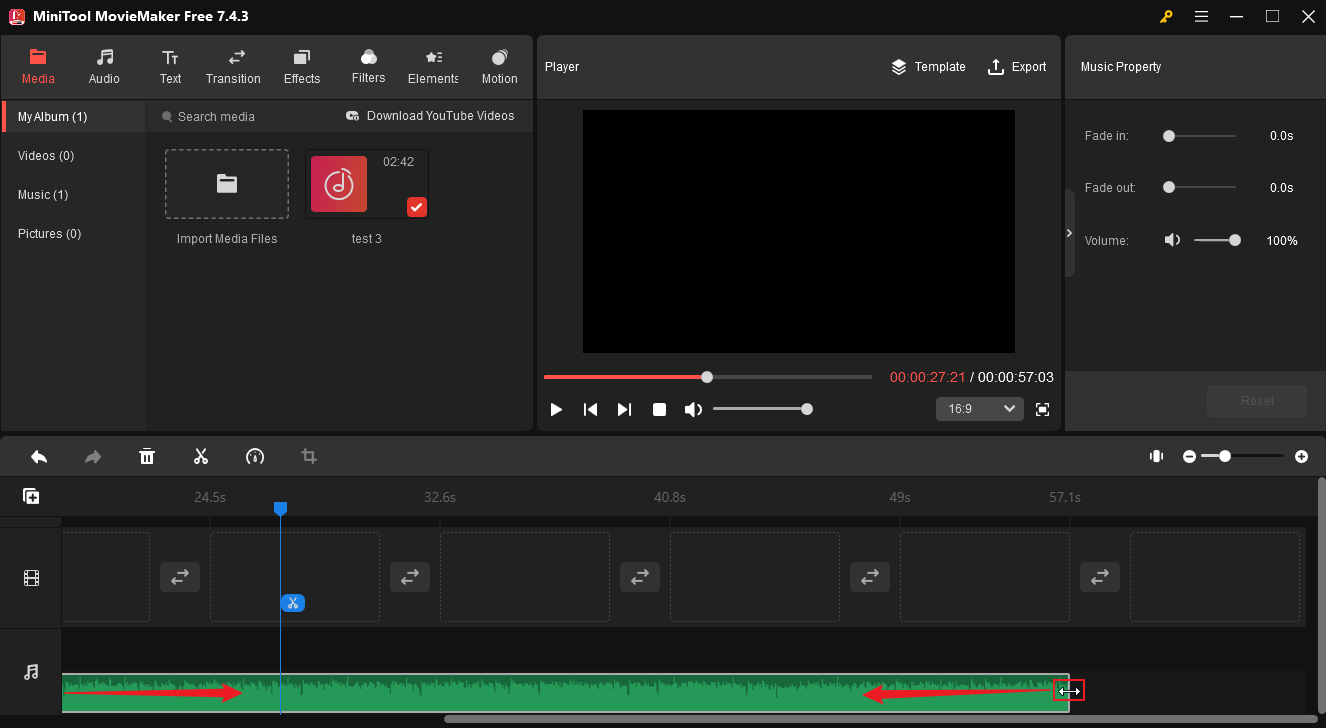
Step 3: Trim the Voice Recording
Select the target audio clip on the timeline, hover your mouse cursor over the start or end point of the clip, and you will see a double-headed arrow appear. Click and drag the arrow to eliminate unwanted portions at the beginning or end of the clip.
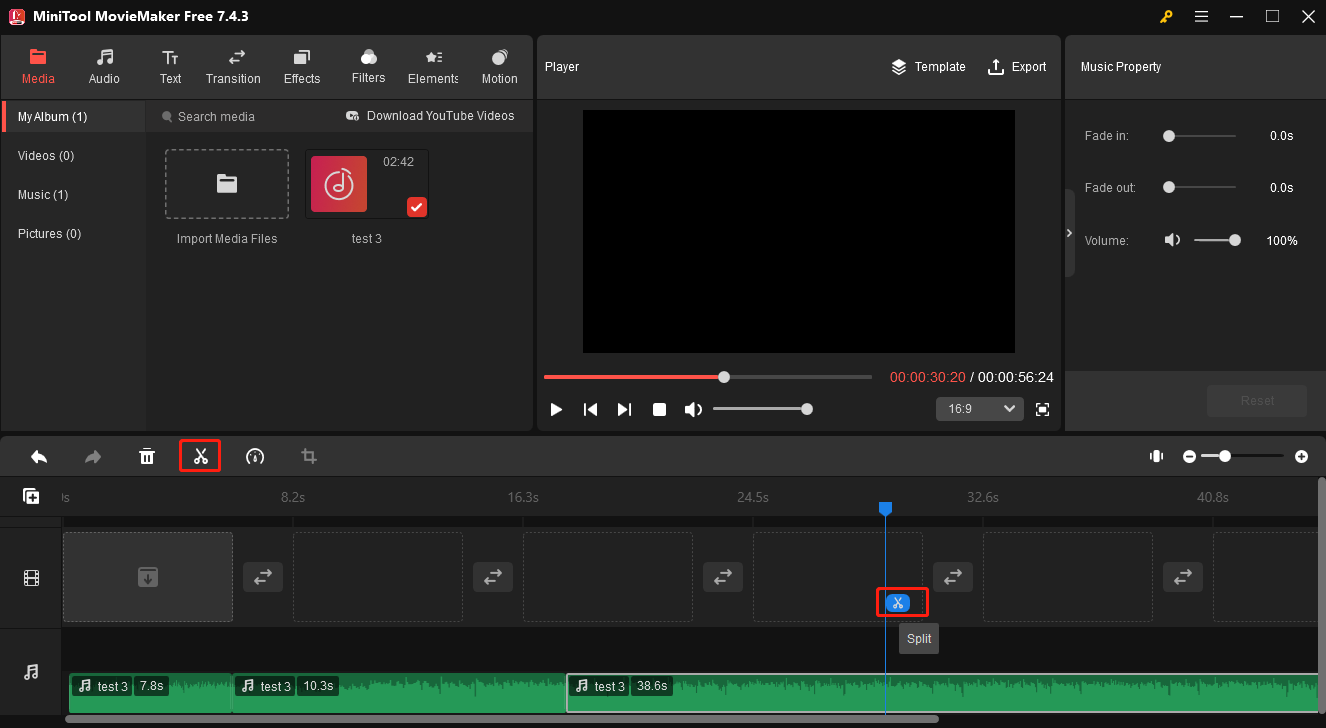
Step 4: Split the Voice Recording
Move the playhead to the first position where you want to split and click the Split icon on the playhead or timeline toolbar. Next, drag the playhead to another point and click the Split icon. Repeat this step until the recording is split into as many segments as you need.
Step 5: Edit Music Property
Click the audio clip on the timeline to activate Music Property. Then, you can drag these sliders to apply fade-in/out effects and adjust the volume.
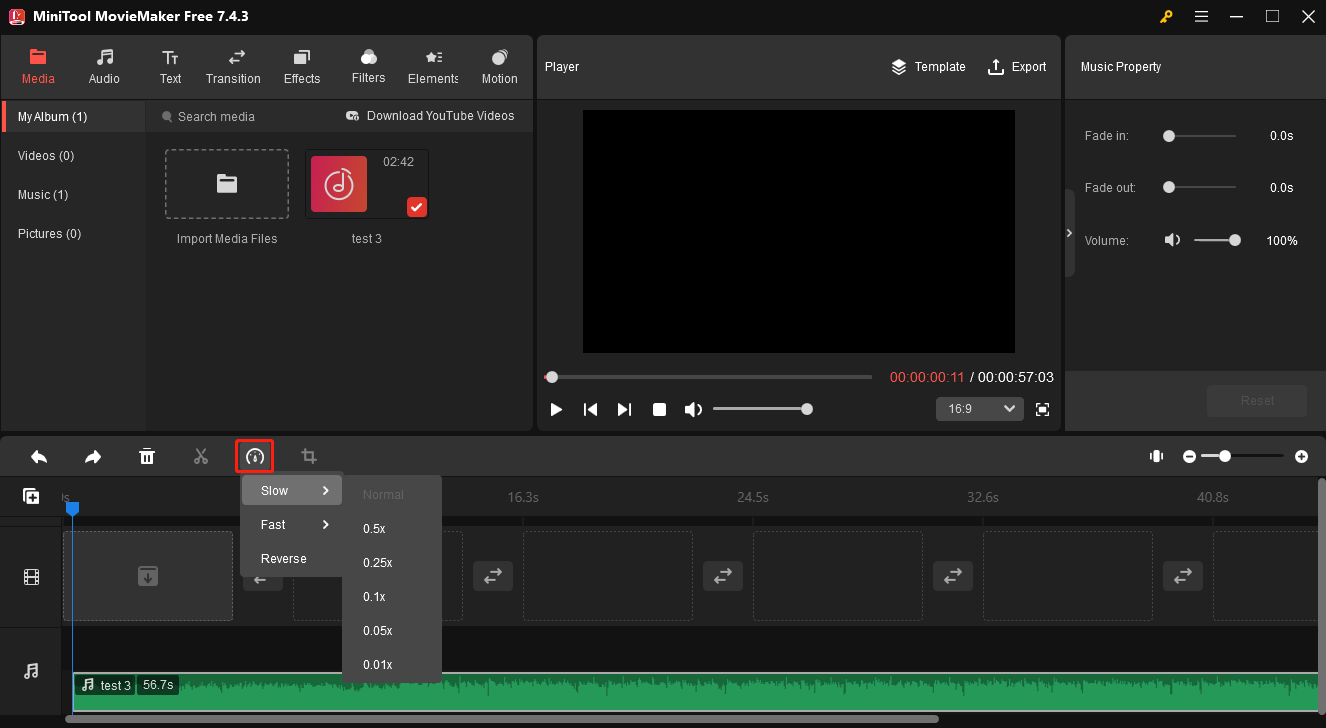
Step 6: Adjust the Audio Speed
Choose the clip on the timeline and click the Speed icon on the timeline toolbar. Then, select Slow or Fast and pick a value to decrease or increase the speed.
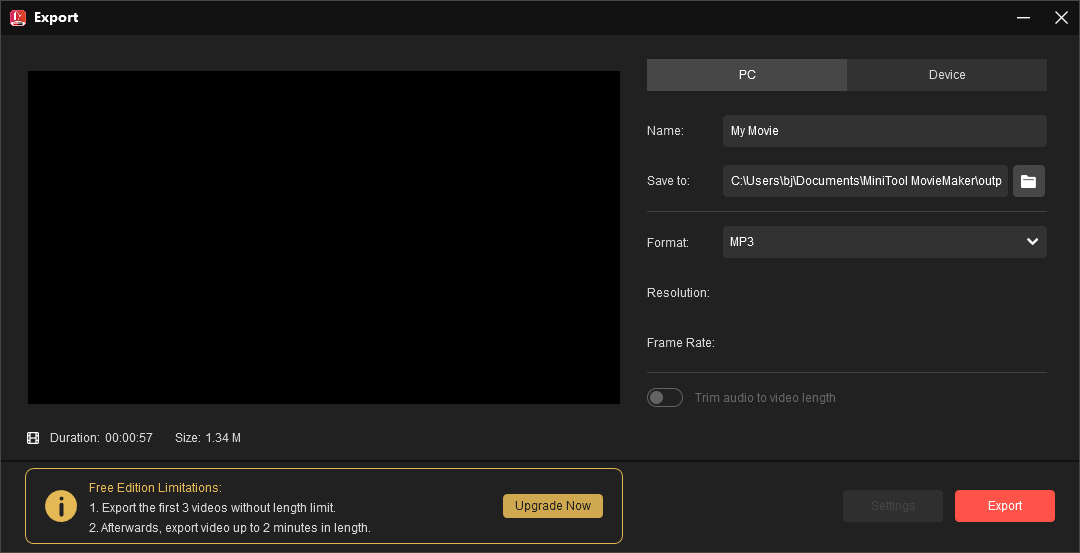
Step 7: Export the Audio File
Once done, click the Export option in the upper right corner to open the export settings window. Open the Format drop-down list and select MP3. Then, give the file a name and browse for a destination folder, and click the Export button to start exporting the edited voice recording.
MiniTool Video ConverterClick to Download100%Clean & Safe
Conclusion
MiniTool MovieMaker is a great solution for editing voice recordings, and this post explains how to edit a voice recording with this useful tool. You can follow the steps above to polish your audio recording on a computer. Finally, if you encounter problems creating videos with MiniTool MovieMaker, don’t hesitate to contact us via [email protected].
How to Edit a Voice Recording FAQ
2. Tap the More button and then select Trim.
3. Move the yellow trim handles to select the portion you wish to keep or remove.
4. Tap Trim to keep the section, or tap Delete to delete the section.
5. Tap Apply and Done.
About The Author

Position: Columnist
Cora is a tech writer specializing in digital media workflows, with over six years of hands-on experience in video post-production, media transcoding, and screen capture. Her writing is always clear and practical. Cora also produces in-depth software reviews for users across skill levels to help them find the right tool and enjoy video editing.
User Comments :