With the popularity of video editing and sharing among the public, more and more people try to create and customize videos. Final Cut Pro and Premiere are two brilliant and professional video editing software that almost can meet all needs to edit videos. Adobe Premiere vs Final Cut Pro, this question arouses extensive attention and stirs up a heated debate.
To help you figure out this question, this post will illustrate the major differences between them. And if you are looking for a simple video editing application, MiniTool MovieMaker should be your first resort.
A Brief Introduction of Final Cut Pro VS Premiere
According to Wikipedia, Final Cut Pro is a series of non-linear video editing software. The most recent version is Final Cut Pro X 10.4.8. As one of Apple’s most professional video editing software, it provides comprehensive editing features for users who desire a video editing tool more powerful than iMovie and other professionals who create videos.
Advantages:
- It provides a magnetic and trackless timeline.
- It has comprehensive editing functions.
- It supports 360-degree footage and HDR.
- It gives a fast running speed.
- It comes with multi-cam support, iPad Sidecar, and MacBook Touch Bar support.
Adobe Premiere Pro is a timeline-based video editing software developed by the Adobe Systems, and the current version is Adobe Premiere Pro CC 14.3.2 satisfying all needs of pro video editors.
Advantages:
- It has a clear and flexible interface.
- It offers versatile and well-organized editing tools.
- It supports multiple file formats.
- It gives immersive Virtual Reality (VR) Support.
- It has excellent stabilization and unlimited multi-cam angles.
The above content gives you general knowledge about Final Cut Pro and Adobe Premiere. Before comparing the two video editing applications, let’s look at the table about the major differences between them.
| Software | Final Cut Pro | Premiere |
| Price | One-time price of $299.99 | Annual fee $239.88 |
| Compatibility | macOS | Windows and macOS |
| Level | Professional | Professional |
| Offline Editing | Support | No |
| Regular Updates | No | Yes |
| Additional Applications | No | Yes (Adobe After Effect) |
Final Cut Pro VS Premiere
From the above, we can draw this conclusion that Final Cut Pro and Adobe Premiere are both mighty video editing software. When it comes to Final Cut Pro vs Premiere, which one do you prefer and why? Who is the winner? Or is Premiere pro worth the money? Sometimes, you may be troubled with these problems.
To help you find the answer and understand the differences between Adobe Premiere and Final Cut Pro, this post will compare them from the following aspects.
Final Cut Pro vs Premiere – Pricing
When talking about Final Cut Pro vs Adobe Premiere, subscription fees should be the first issue to consider seriously. Money does matter.
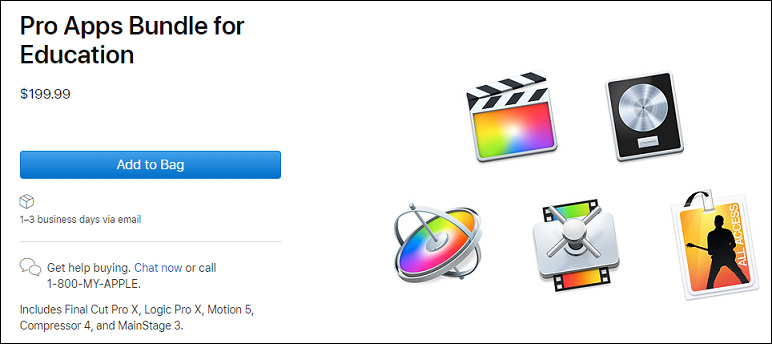
At present, Final Cut Pro offers a one-time price of $299.99, and the valid period is 6 years. Compared with the old Final Cut price $999, the current price is more favorable and acceptable, and it includes updated pricing. Thankfully, it offers a special pro apps bundle for education, only costing $199.99. And it gives a 30-day free trial.

Adobe Premiere Pro, the single app needs $239.88 annually, Premiere Pro + all Adobe creative apps need $599.88 annually. For individuals, Adobe Premiere Pro costs $20.99/m, and After Effects $20.99/m. And it costs $31.49/m on a bi-monthly basis.
If you subscribe to the Creative Cloud suite, besides all Adobe programs, you can get 100GB of cloud storage for syncing media. Besides, it offers a 7-day free trial.
Final Cut Pro vs Premiere – Platform and System Requirements
Final Cut Pro is available on macOS 10.14.6 or later and only for desktop. It recommends 4GB for RAM, 8GB for 4K editing, 3D titles, and 360° video editing, 1GB of VRAM for 4K editing, 3D titles, and 360° video editing, and 3.8GB of available disk space.
Adobe Premiere Pro is compatible with Windows and macOS. The minimum system requirements are Microsoft Windows 10 (64-bit) version 1803 or later and macOS v10.13 or later. Premiere Rush is the alternative to iPhone and Android and it costs $9.99/m.
Also read: Top 6 Alternatives to Final Cut Pro for Windows in (2020)
Final Cut Pro vs Adobe Premiere – Support Formats
Final Cut Pro supports 23 video formats, 8 audio formats, 9 image formats, and 6 container formats. If you want to learn more detailed information, you can go to media formats supported in Final Cut Pro. And it supports HEVC code, 4k Video cameras, Canon, Sony, RED, and ARRI native formats.
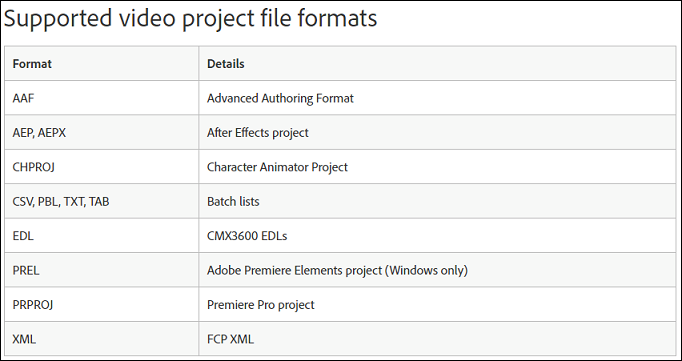
As for Adobe Premiere Pro, the maximum frame size to upload still images and videos is 256 megapixels, with a maximum dimension of 32,768 pixels in either direction. It supports the most popular video, audio, and photo formats. What’s more, it also enables you to work with a range of native camera formats, such as Sony, RED, CinemaDNG, Canon XF and RAW, etc.

Final Cut Pro vs Adobe Premiere – Timeline
Final Cut Pro offers a trackless timeline. Compared with the traditional timeline, it’s easier-to-use and gives several editing advantages including Music, Effects, Auditions, Dialog, Titles, and more. And it can automatically delete wrong-done clips and also allows you to cycle various video clips.
Adobe Premiere has a traditional but flexible timeline with tracks. With items in the timeline, you can adjust endpoint, create layers of videos and audio, apply effects, and more. And the timeline can provide many tools, such as the usual ripple, roll, razor, slip, and slide tools. The configurable UI makes you undock all panels. Besides, you are permitted to show or hide thumbnails, waveforms, keyframes, and FX badges.
Final Cut Pro vs Adobe Premiere – Video Editing
Final Cut Pro comes with comprehensive editing features. The magnetic timeline is used to advanced metadata for faster and easier editing. And it can rearrange the layout of the timeline, edit multicamera projects, automatically transform projects, import and edit 360° equirectangular videos, etc. Moreover, it includes many effects, 100+ video transitions, many color and text tools. And it’s also perfect for audio editing.
Adobe Premiere is packed with similar tools to edit videos. For example, you can add text in Premiere. It offers powerful color grading tools to adjust video color, transitions and effects, and trimming tools. Undoubtedly, it can add graphics, mix audio, change the duration and speed, support multi-camera editing, and more.
Best Alternative for Final Cut and Premiere
Final Cut Pro and Adobe Premiere are powerful video editing applications, but they may be a little complex. It will take some time to learn how to use them especially if you were a new beginner. If you want to find an alternative for Final Cut Pro and Adobe Premiere, MiniTool MovieMaker, simple and easy-to-use video editing software, should be the best choice.

Introduction of MiniTool MovieMaker
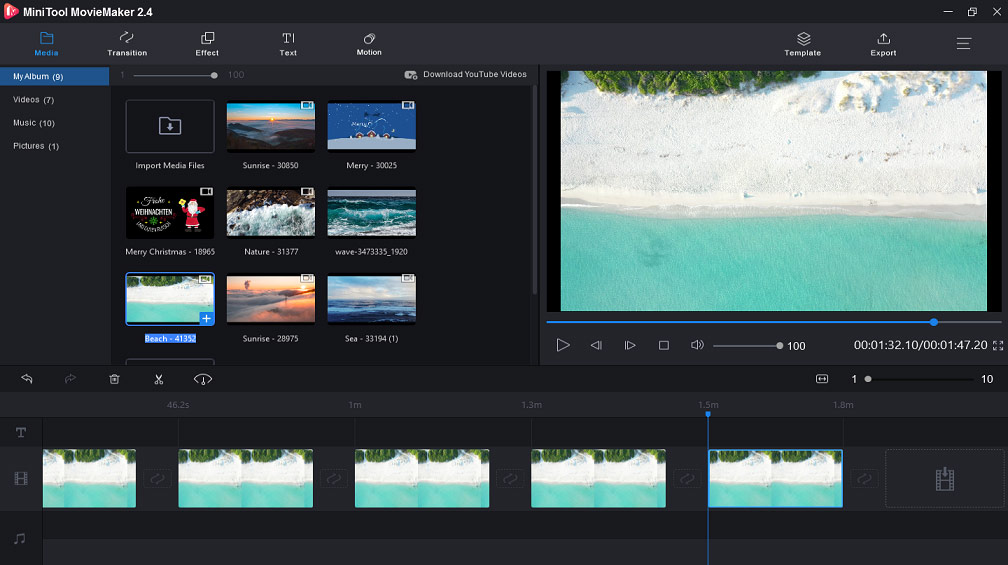
MiniTool MovieMaker, developed by MiniTool, is a 100% free, simple, clean, no bundle, and no watermark video editing application for Windows. First of all, it is a video maker and editor. It supports the most popular video, audio, and photo formats. Everyone can use it to create videos with images, video clips, and music. It is very simple to operate. If you desire to make creative videos, you must try it even though you don’t have any experience or skills.
It provides many features to customize your videos. With it, you can rotate, trim, split, merge, slow down or speed up videos, flip videos, etc. Except for the basic features, it can also add music to videos, add titles and subtitles to videos, and apply video transitions and effects to videos.
Secondly, it’s also a GIF maker. It allows you to convert twitter video, Facebook videos to GIF, AVI to GIF, and images to GIF. Similarly, it also can rotate GIF, reverse GIF, control the GIF speed, add music to GIF, put text to GIF, split, combine, trim GIF, and more. Besides, it can convert GIF to video.
What’s more, it’s also a photo slideshow maker to make slideshows with pictures and music. And it’s also an audio editor. It can remove audio from video, extract audio from video, merge MP3 files, trim audio, and more.
How to Edit Video Clips in MiniTool MovieMaker
Now, let’s learn how to edit video clips in MiniTool MovieMaker.
Step 1. Download and install MiniTool MovieMaker.
MiniTool MovieMakerClick to Download100%Clean & Safe
Step 2. Open it, close the pop-up window, and enter its interface.
Step 3. Click the Import Media Files to upload your desired files.
Step 4. Drag and drop the clip to the timeline.
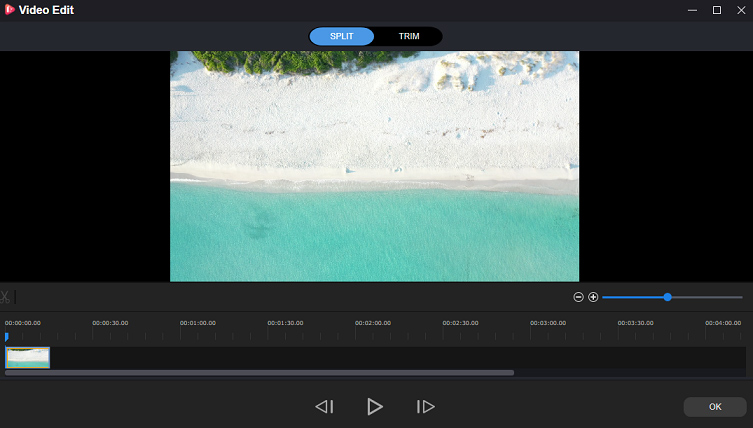
Step 5. Split and trim video: Click the scissor icon and choose Full Split to split and trim the video.

Step 6. Add transitions: Click Transition, choose and click + to apply it.
Step 7. Add music: Find the target music in the media library, click + to add it to video.
Step 8. Click Export to save the video after your optimization.
Bottom Line
To sum up, this post shows the major differences between Final Cut Pro vs Premiere from 5 aspects: pricing, platforms and system requirements, supported formats, timeline, and video editing. Besides, this post introduces an alternative to Final Cut Pro and Premiere, MiniTool MovieMaker, the best free video editing applications for a green hand.
After reading this post, what’s your answer to Adobe Premiere vs Final Cut Pro or is Premiere pro worth the money? Do you have any questions about today’s topic? You can share your comments below or contact us via [email protected].
Final Cut Pro VS Premiere FAQ
Yes. Final Cut Pro X offers transitions and allows you to apply them to videos.
- Click the Tools and choose the Select Tool.
- Select the video clip and then choose the Edit > Add to add the default transition.
- Click the Transition on the top of the screen.
- Find and apply the target transition to change the transition
- Install and open Final Cut Pro X.
- Click the Window > Go To > and choose Titles and Generators.
- Tap on the Solids under the Generators.
- Drag and drop the Whites thumbnail in the timeline.
- Select the Generator Inspector panel and choose Bright White under Color.
- Launch Adobe Premiere on your computer.
- Choose Window > Workspaces > Audio to get the Media Browser panel.
- Choose Window > Media Browser to find the desired background music.
- Select the audio and click the Import to add it to the Project panel.
- Choose Window > Project to select the imported audio, and drag it to the timeline.


User Comments :