Do you want to make a DVD photo slideshow and share it with your family and friends? How to do this? The post gives you step-by-step instructions on how to create a DVD slideshow on Windows and Mac.
There are many reasons for making a DVD photo slideshow, such as you want to play your wedding photo slideshow on TV with a DVD player. How to make a DVD photo slideshow with music? This post will guide you through the process of creating a DVD slideshow.
Part 1. How to Make a DVD Photo Slideshow on Windows
To make a DVD photo slideshow, the first thing you need to do is make a photo slideshow. Then burn this photo slideshow to DVD on Windows.
Make a Photo Slideshow on Windows 10
Here are two photo slideshow makers: Microsoft Photos and MiniTool MovieMaker.
Microsoft Photos
Microsoft Photos is the Windows’ built-in photo viewer, photo editor, and video editor. You can use it to view photos, edit photos, edit videos, and create a video with photos and music. The Photos app has 3D effects, filters, Ken Burns effects, and lets you add text, music, title card to your photo video.
Here’s how to make a Photo slideshow using the Photos app.
Step 1. Click the search icon and enter “Photos” in the search field. Then open the Photos app.
Step 2. Tap on Video Editor in the top menu bar. Click New video project to create a new project and name your video. Click OK.
Step 3. Click the + Add and select the From this PC option from the drop-down menu. Choose the photos you need and click OK.
Step 4. Drag and drop these photos into the Storyboard.
Step 5. Change the order of the photos.
Step 6. Now, you can edit these photos.
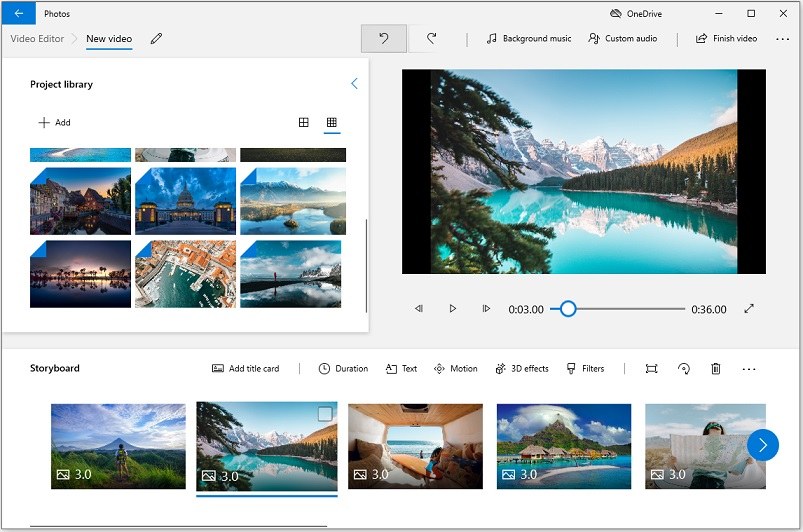
- Change duration: Right-click on the photo that you want to change its duration. Then set the duration of the photo. To change the duration of all photos, you need to press the Ctrl key to choose these photos and click the Duration button.
- Rotate: Select a photo and press “Ctrl + R” or click the rotate icon to change its orientation.
- Add text: Choose the photo you want to add text and click on Text. Type your text in the box, select an animated style, layout and click the Done button to save the changes.
- Add Ken Burns effects: Click Motion and select a suitable Ken Burns effect for your photo.
- Apply filter: Choose the target photo, click Filters. Then select a filter you’d like to use.
- Add music: Click Background music to choose a song from its built-in music library. If you want to add your audio file, click on Custom audio. Then click + Add audio file to add the music. Adjust the length of the audio file. After that, click Done.
Step 7. When you’re finished, click Finish video in the top right corner and select the desired video quality. Press the Export button to export the photo slideshow.
MiniTool MovieMaker
If you want to make further edits to your photo slideshow, try MiniTool MovieMaker. It’s a watermark-free photo video maker for Windows. It has all the needed editing functions such as split, cut, trim, reverse, etc. Like the Photos app, this one also offers filters, Ken Burns effects, and animated text templates.
Besides that, MiniTool MovieMaker provides you with a variety of transitions and gives you the option to adjust the brightness, saturation, and contrast of photos and videos.
Bellow’s the step-by-step guide on how to make a slideshow with pictures and music.
Step 1. Download and install MiniTool MovieMaker. Then run it.
MiniTool MovieMakerClick to Download100%Clean & Safe
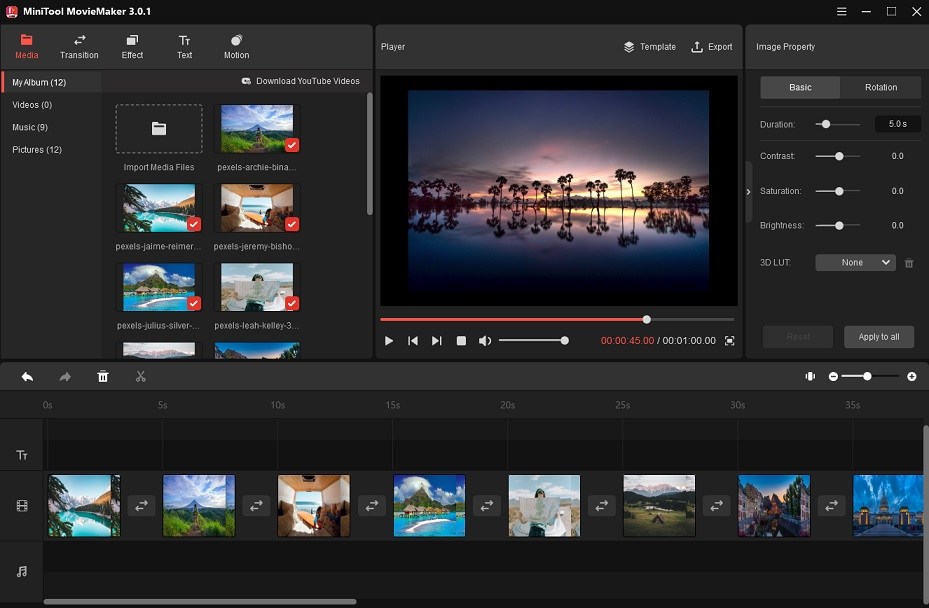
Step 2. Close the popup window and tap on Import Media Files to load your photos.
Step 3. Press “Ctrl + A” to select all the imported photos and drag and drop them into the timeline.
Step 4. Drag a photo over another to change the order.
Step 5. After rearranging the order of the photos, you can adjust the photo’s duration. Choose a photo and go to the Image Property section. Drag the duration slider to change the duration. If you need to extend or shorten the duration of all the photos, click Apply to all.
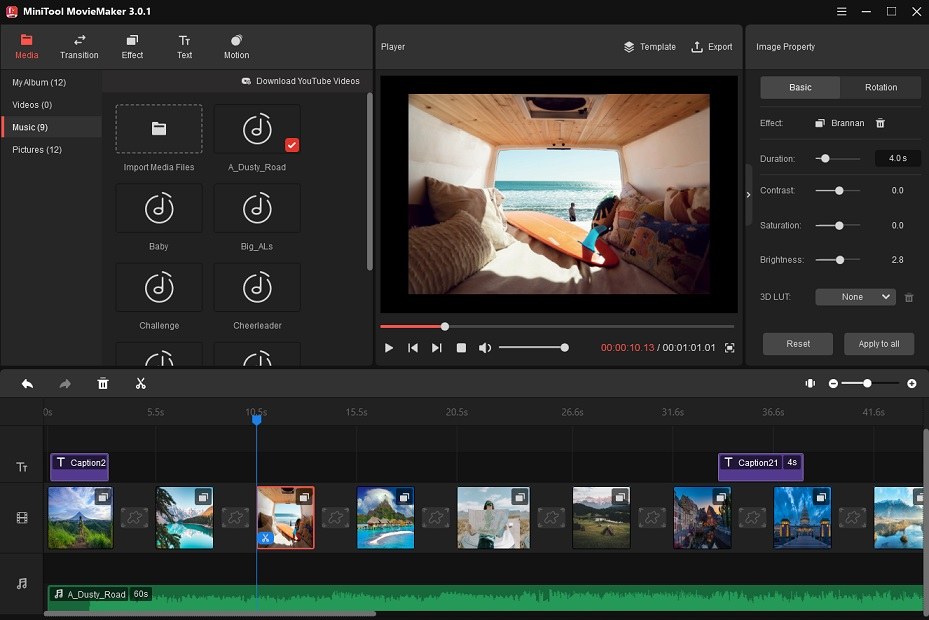
Step 6. Then you can edit these photos as required, such as apply effects, zoom in/out photos, add transitions, add animated text and add background music.
- Add transitions: Click Transition and drag the desired transition between the two photos.
- Apply effect: Click Effect and drag the effect you like over the target photo. Or right-click the effect and select Apply to all to apply this effect to all the photos.
- Do color correction: Choose the photo needed to do color correction. In the Image Property pane, adjust the photo’s saturation, brightness, and contrast.
- Add text: Click Text, add the text template, and enter the text. Change the text’s color, font type, size, and position according to your needs.
- Rotate: Choose the photo you want to rotate, switch to the Rotation tab and you can rotate the photo by any certain angle.
- Add music: Tap on Music and import the song you want to add. Click the + to add the song to the timeline.
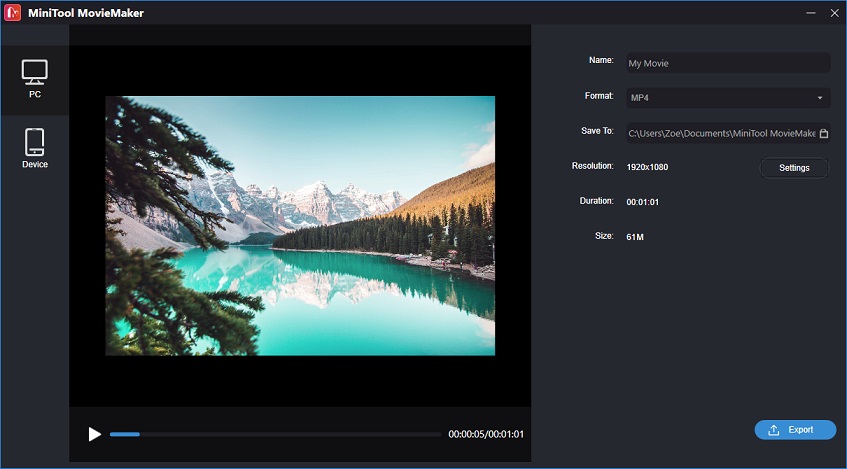
Step 7. Click Export to adjust the output settings. Hit the Export button to save the photo slideshow.
Burn Slideshow to DVD on Windows 10
Now, you’ve learned how to make a photo slideshow. Next, I will teach you how to burn the photo slideshow to DVD on Windows 10. The below step-by-step guides also work for images, which means that you can burn photos to DVD on windows 10.
Using File Explorer
Step 1. Insert a blank disc into your CD/DVD drive.
Step 2. A notification popup window will appear on the bottom right part of the screen. Tap on it and choose Burn files to disc.
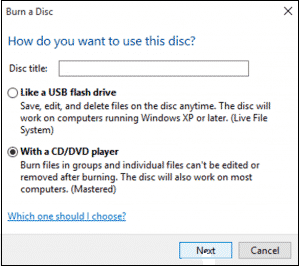
Step 3. In the Burn a Disc window, type the title in the Disc Title field. Choose the option With a CD/DVD player and click Next.
Step 4. Then the DVD RW Drive window appears. Press “Windows + E” to open a new File Explorer.
Step 5. Find the photo slideshow you just created and drag it to the DVD RW Drive window. Or copy the slideshow video and paste it into the DVD RW drive.
The storage capacity of a single-sided DVD is 4.7 GB and a double-sided DVD is 8.5 GB.
Step 6. Click on Drive Tools in the top menu bar and click Finishing Burning in the Manage tab.
Step 7. In the Burn to Disc window, name your disc and select the desired recording speed. Click Next to start burning your slideshow to DVD.
Step 8. Once done, click Eject to remove your DVD from your PC’s disc drive. Now, you can play your DVD photo slideshow on TV or other devices.
Using Windows Media Player
Windows Media Player also can be used to burn slideshow to DVD.
Step 1. Place a blank DVD in your computer’s drive.
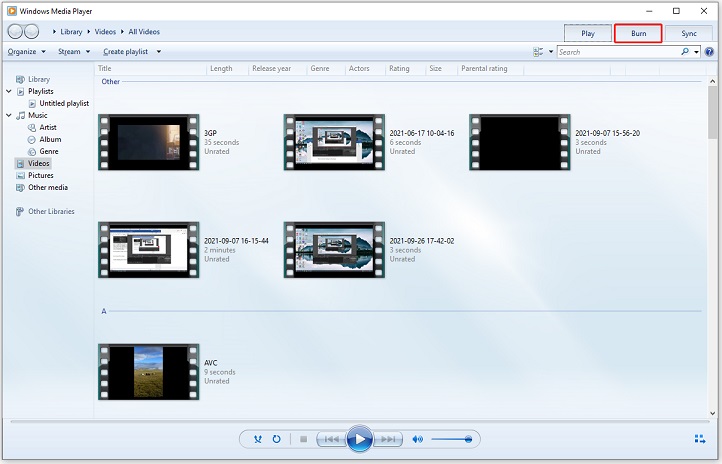
Step 2. Click the search icon on the taskbar and search for Windows Media Player. Then open Windows Media Player.
Step 3. Click on Burn at the top right corner to open the Burn tab.
Step 4. Click the Burn options next to Clear list. Then select Data CD or DVD from the drop-down menu.
Step 5. Open File Explorer and find the photo slideshow you want to burn to DVD. Then drag the video file to the Burn tab in Windows Media Player.
Step 6. Click the Start burn to start making the DVD photo slideshow.
Also read: 2 Ways to Convert MP4 to DVD on Windows/ Mac
Part 2. How to Make a DVD Photo Slideshow on Mac
This part will walk you through the steps on how to make a DVD with pictures and music on Mac.
Make a Photo Slideshow with iMovie
For Mac users, they can create a photo slideshow with the Photos app and iMovie. iMovie is a professional video editor and it comes with more features than Photos. So, I’ll show you how to make a professional-looking slideshow with pictures and music using iMovie.
Step 1. Open iMovie on your Mac.
Step 2. Click the + to create a new project.
Step 3. Go to the My Media tab and import your photos to iMovie.
Step 4. Press Command + A to select all imported photos and drag and drop them into the timeline.
Step 5. Rearrange the order of the photos. If you need to change the duration of a photo, drag the left or right side of the photo to change the photo duration.
Step 6. Then you can enhance your slideshow with transitions, titles, backgrounds, effects, and other features.
Step 7. Now, you can add your favorite music to this slideshow video. Import the music from your Mac and add it to the timeline.
Step 8. When you’re done, click the File button in the top menu bar and select Share > File… to export the photo slideshow.

Burn Slideshow to DVD on Mac
Here are two methods to burn slideshow to DVD on Mac. One is using iTunes and the other is using Finder.
Using iTunes
Step 1. After creating your slideshow, click File and go to Share > iTunes…
Step 2. Adjust the video quality, resolution for the video and click on Share.
Step 3. Open the iTunes app and navigate to Movie > Library > Home Videos.
Step 4. Insert a blank disc into your Mac. Then click on File and select Burn Playlist to Disc.
Step 5. In the Burn Settings window, choose the Disc Format option Data CD or DVD.
Step 6. Press the Burn button.
Using Finder
Step 1. Insert a blank DVD into your Mac. Launch Finder.
Step 2. From the left side of the window, choose Untitled DVD.
Step 3. Open the DVD. Copy the iMovie slideshow and paste it into the DVD folder.
Step 4. Click File in the top menu bar and select Burn to Disc from the drop-down menu.
Step 5. Edit the DVD name and change the burn speed. Then hit the Burn button to burn iMovie slideshow to DVD on Mac.
Conclusion
This post tells you how to make a DVD photo slideshow on Windows and Mac. If you have better suggestions about burning photos and slideshows to DVD, share them with us in the comments section.
If you encounter problems when using MiniTool MovieMaker, please feel free to contact us via [email protected].
User Comments :