This post from MiniTool MovieMaker, a Windows movie maker, will introduce the best free WMV splitters for Windows and other tools to split WMV on your PC.
Sometimes you may need to split WMV into small segments when you want to remove the middle part of a clip, rearrange the order of events, or insert something between them. How to split WMV videos? Here are the 3 best free WMV splitters for you.
MiniTool MovieMaker
MiniTool MovieMaker is one of the best video editing software available for Windows 11, 10, 8, and 7. It provides a set of tools and trending effects to edit and enhance your footage. This application supports importing the most popular video formats, such as MP4, WMV, MKV, AVI, WebM, and more.
MiniTool MovieMaker is easy to use and can export videos up to 1080p for free and without watermarks. If you’re looking for the best free WMV splitter, it won’t let you down. Follow the steps below to split WMV using this handy video editor.
Step 1. Best free WMV splitter download.
Click the download button below to get the installer of MiniTool MovieMaker, and then complete the installation.
MiniTool MovieMakerClick to Download100%Clean & Safe
Step 2. Import WMV video.
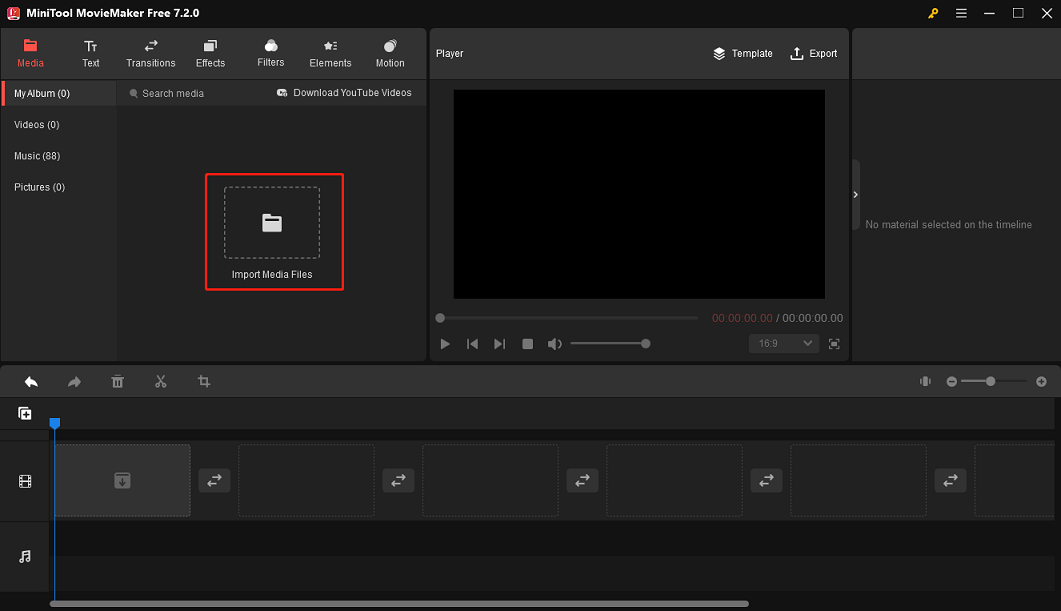
Launch MiniTool MovieMaker and close the promotion window to access to main user interface. Click Import Media Files to open the File Explorer to browse for your WMV video.
Step 3. Split the WMV video.
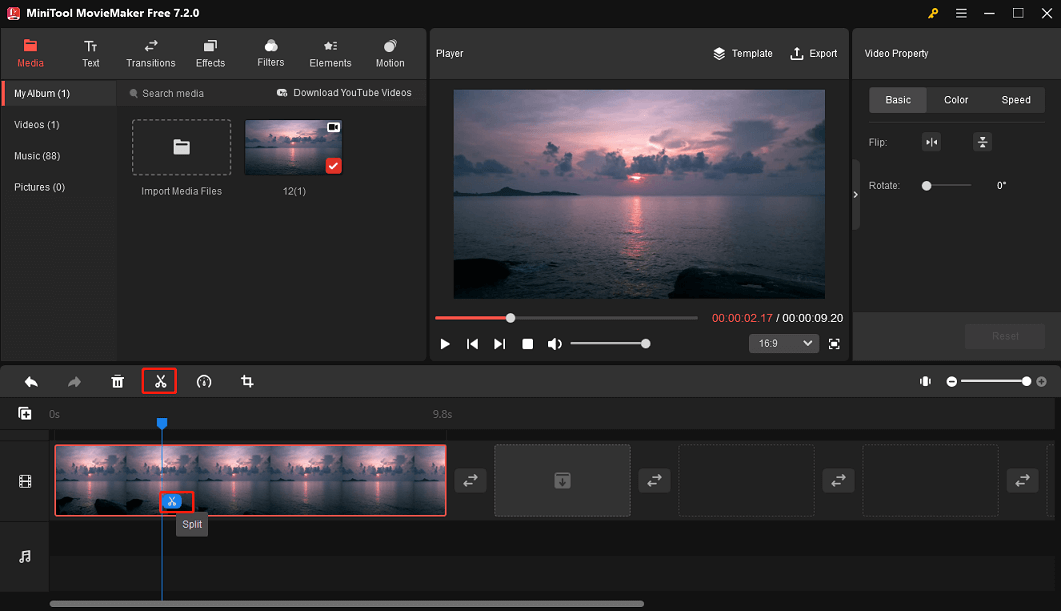
Drag the video to the timeline and select it. Drag the playhead to where you want the split to occur. Click the Split icon on the playhead or the scissors icon on the timeline toolbar. Repeat this step to split the video into several parts.
Step 4. Continue editing.
If you want to delete one of the segments, right-click on it on the timeline, and choose Delete.
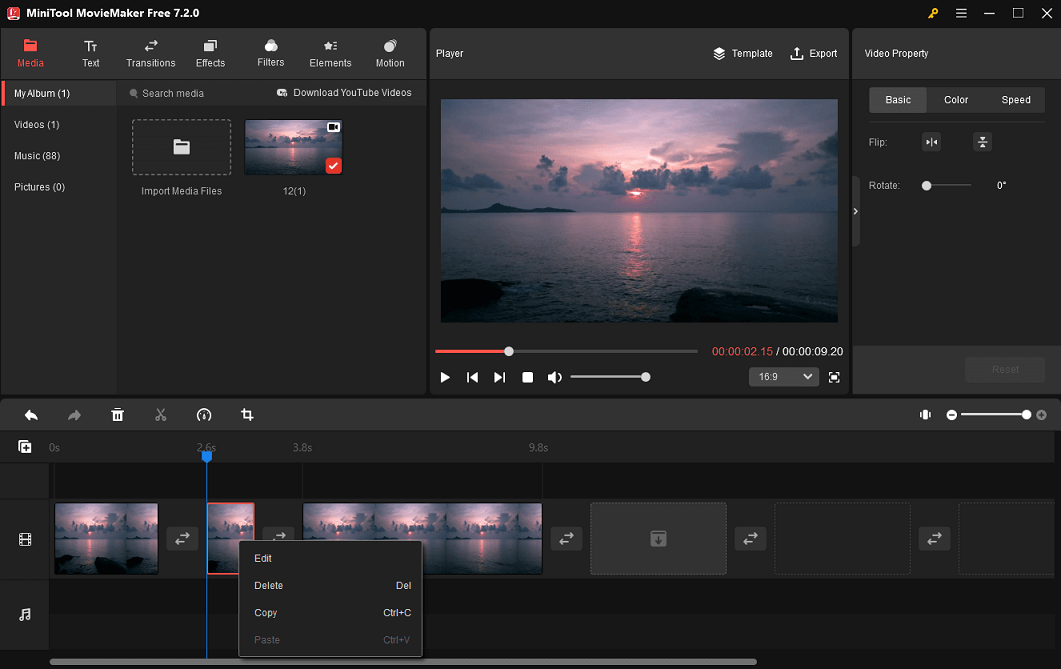
Add a transition between two clips: go to Transitions, find or download the desired effect, then drag and drop it to the location between the target 2 clips.
Insert a video or photo: go to Media > Import Media Files to open your video or image, then drag and drop it to the desired position on the timeline.
Step 5. Export video.
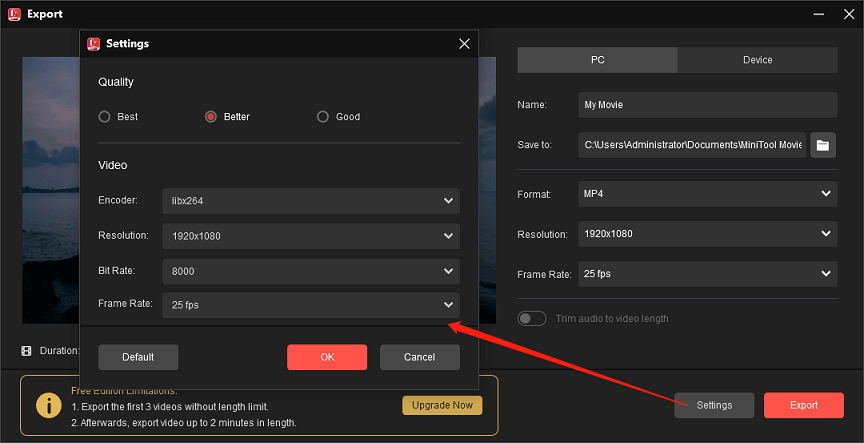
Once you’re happy with the result, click Export to open export settings. You can give the video a name, select the destination folder, format, resolution, and more. By default, MiniTool MovieMaker exports video as an MP4 file, and you can expand the Format menu to select another format, like WMV, MKV, AVI, and more.
Finally, click Export to start processing the video.
Other features of MiniTool MovieMaker:
- Create video from images and music.
- Add a title card, caption overlays, and end credits to the video.
- Offer a variety of transitions to make one shot smoothly move to the next.
- Provide popular special effects to give your video a new look.
- Function as a video trimmer, rotator, cropper, speed changer, etc.
- Apply trending filters to adjust the color and tone of your video.
- A library of animated stickers to help make fun videos.
- Support 16:9, 9:16, 1:1, and 4:3 aspect ratios.
- Use motion effects to make still images more dynamic.
- Select video format, resolution, frame rate, and bitrate when exporting.
- …
Microsoft Clipchamp
Clipchamp is the default video editor in Windows 11 and can also be installed on Windows 10 through the Microsoft Store. This application is equipped with all basic editing tools such as split, trim, and crop. If you need to cut WMV on your PC, it’s also a good choice.
Additionally, Clipchamp enables you to fade in or fade out of videos, apply filters and special effects, etc.
Step 1. Go to the search box on the taskbar, type Clipchamp, and select it from the results to open it.
Step 2. Click Create a new video to access the editing page of Clipchamp. Then, click Import Media in the upper left corner to import the WMV video and drag it onto the timeline.
Step 3. Select the video on the timeline, move the playhead to the timestamp you would like to split, and click on the Split button to cut your WMV.
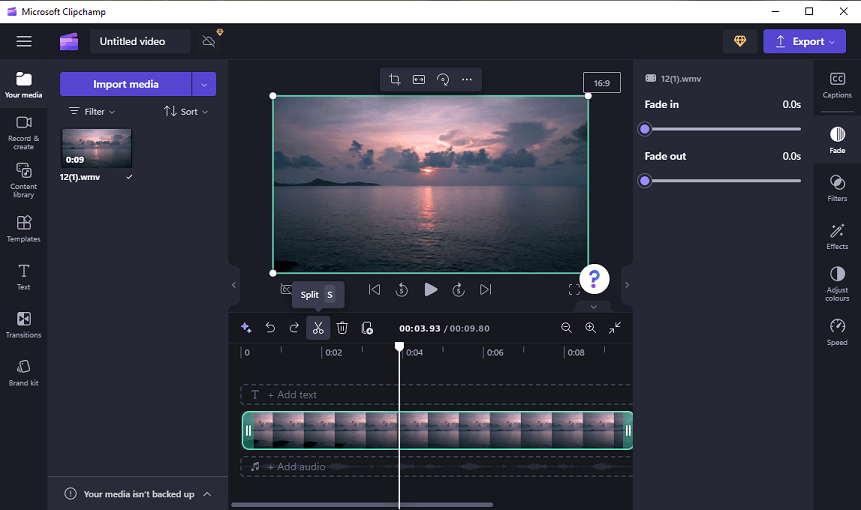
Step 4. Click Export and choose a resolution to start exporting the video as an MP4 file.
Video Editor in Photos or Photos Legacy
Windows 10 has a hidden video editor in the Photos app and it can also be accessed in Photos Legacy on Windows 11. This Windows built-in video editor includes some basic editing features and lets you split a video easily. But if you want something extra like transitions, switch to other video editing apps.
Here’s how to split WMV with the hidden video editor on Windows 10/11.
Step 1. Open the Photos app on Windows 10 or Photos Legacy on Windows 11.
Step 2. Go to Video Editor at the top and click New video project.
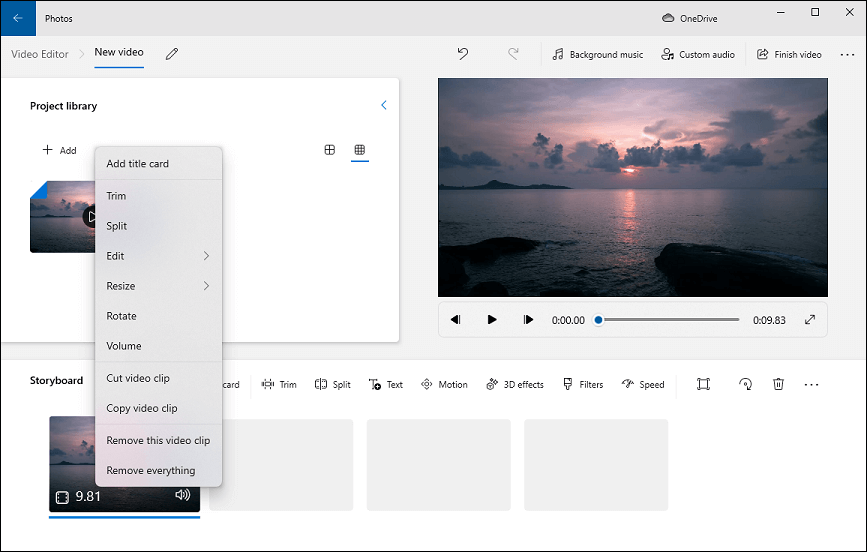
Step 3. Click the + Add button to import your WMV video. Then, drag the video to the Storyboard.
Step 4. Right-click on the clip and select Split or click the Split icon.
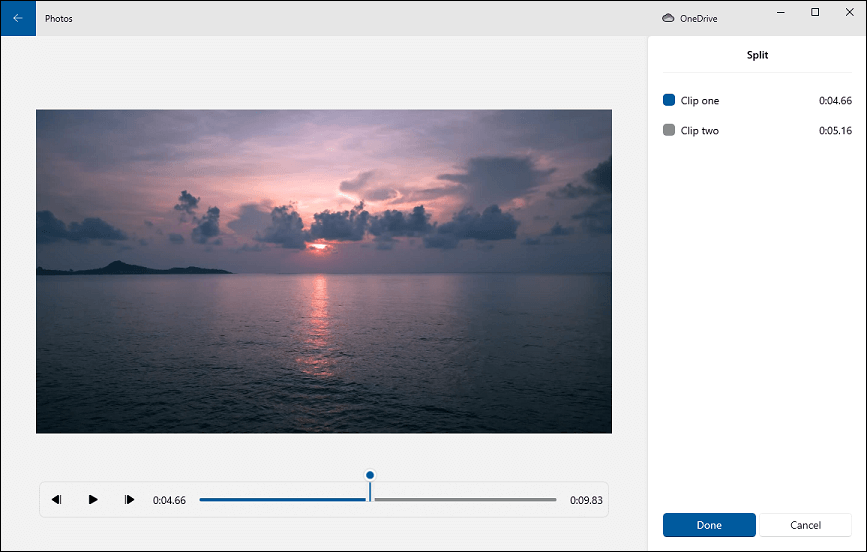
Step 5. Drag the seeker to the desired timestamp you want to split, and click Done to save changes.
Step 6. Click Finish video in the upper right corner, then choose the video quality, click Export, and select the output folder to save the MP4 file.
Conclusion
What’s the best WMV splitter for you? All of these WMV splitters are simple to use. You can choose one of them to split your WMV or other video files. Finally, if you encounter any problems using MiniTool MovieMaker, you can contact us via [email protected].


![How to Upload High Quality Video to Instagram [Ultimate Guide]](https://images.minitool.com/moviemaker.minitool.com/images/uploads/2023/02/how-to-upload-high-quality-video-to-instagram-thumbnail.jpg)

User Comments :